
gas oven safety valve troubleshooting supplier

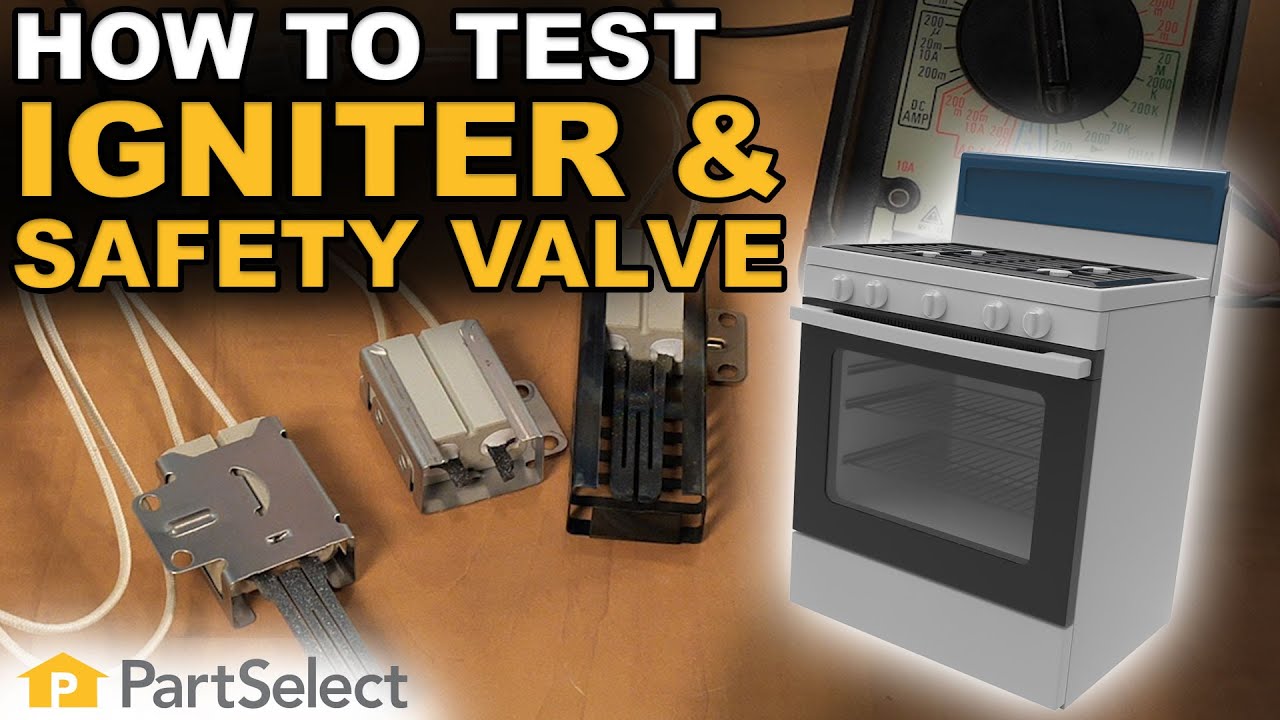
Trouble turning on your gas stove? If your igniter is glowing but there is no flame, then one of two components in your range are at fault. These components are the “safety valve” and the igniter itself.
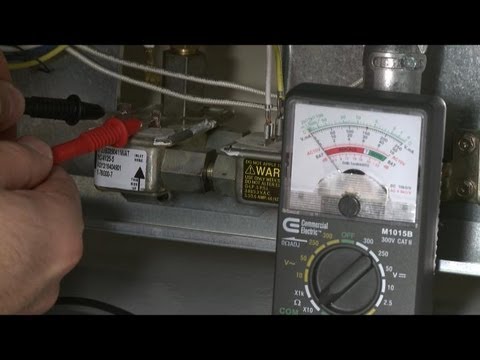
Take a clamp-on type ammeter, and attach it to the circuit to determine whether the igniter is working efficiently enough to open the safety valve. Clamp your meter onto the wire that either goes to the bake burner igniter or the bake burner safety valve. Turn on the bake function, and see what current is drawn. Typically your meter will show 2.8 – 3.0 amps for a normal current draw for a working igniter. If your meter is showing 2.7 or lower then you can assume that the igniter is not drawing enough current to actually ignite the flame, and therefore it won’t open the oven safety valve to allow the gas to enter the burner chamber. If this happens, it’s time to replace the oven burner igniter.
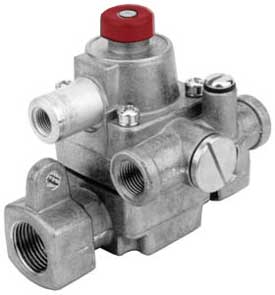
To test the oven safety valve, measure between the two terminals, on the valve and look for continuity. The resistance here is low, but you should be able to detect 1 to 1.5 ohms. If your model uses a dual valve, one for the broil burner and one for the bake burner, then you will have two bi-metals and again you can test them for continuity using a multimeter. They also should be very low resistance and those would indicate that they"re normal working oven safety valves.
If after performing these tests, you"ve determined that you need to replace your gas range"s oven safety valves, oven igniter, burn igniter, or safety valves? Take a look at our large selection of oven parts.

Pilot ignition systems use a flame sensing element to sense whether the pilot is lit and the safety valve can open. The sensing element sits right in the pilot flame.
Just exactly where the sensor sits in the pilot flame is important. (See figure 6-A) If the sensing bulb is not in the right part of the flame, or if the pilot is adjusted too low or too high, it will not get hot enough and the safety valve will not open.
When two dissimilar metals (for example, copper and steel) are bonded together electrically, and then heated, they generate a tiny electrical current between them. The voltage is very small, measured in millivolts. This is the basis for a millivolt oven ignitor system. All that"s needed is a safety valve that will sense this tiny voltage and open the valve if it is present. If the pilot is out, there is no millivoltage and the safety valve will not open. See figure 6-B.
If the burner in a millivolt system will not start, typically the problem is the gas valve. Occasionally the problem might be the pilot generator or thermostat. The thermostat in these is just a temperature-sensitive on/off switch. To test, turn it on and test for continuity.
If that doesn"t work, we have a minor dilemma in determining whether the problem is the pilot generator or the safety valve. The dilemma here is that the voltages are too small to be measured with standard equipment. VOM millivolt adaptors cost nearly as much as the pilot generator itself. And the safety valve, which is usually the problem, costs twice as much as the pilot generator. So usually you just replace either or both of them. But don"t forget they are electrical parts, which are non-returnable. What I recommend is just to replace the gas valve first; that usually will solve the problem. If not, replace the pilot generator. You just ate a gas valve, but trust me, you"d have bought one sooner or later anyway.
When installing the pilot generator, screw it into the safety valve finger tight, plus 1/4 turn. Any tighter than that and you can damage the electrical contacts on the valve.
In some systems the sensor is a liquid-filled bulb, with a capillary to the safety valve or flame switch. When the liquid inside heats up, it expands and exerts pressure on a diaphragm, which opens the valve or closes the switch.
It is important to know that these sensor bulbs do not cycle the burner on and off to maintain oven temperature. That is the thermostat"s function. It has a sensor bulb too, but it senses oven temperature, not pilot flame. The only function of these pilot sensing elements is to prevent gas flow to the burner if the bulb does not get hot enough to assure burner ignition.
In flame switch systems, hydraulic pressure from the capillary physically closes the switch, which completes an electrical circuit to the safety valve. The safety valve is electrical and operates on 110 volts. See Figure 6-D. If the pilot is out, the flame switch does not close and the 110 volt heating circuit is not complete, so the safety valve will not open.
Some of these direct-pressure (hydraulic) systems use a two-level pilot. The pilot stays at a very low level; not even high enough to activate the safety valve. This is called the constant pilot, or primary pilot. Gas for the primary pilot may come from either the thermostat or directly from the gas manifold.
When the thermostat valve is turned on, the pilot flame gets bigger, heating the sensor bulb, which activates the safety valve (hydraulically) and the burner ignites. This is called the heater pilot, or secondary pilot. Gas for the secondary pilot comes from the oven thermostat itself.
When the gas oven reaches the correct temperature setting, the thermostat drops the pilot flame back to the lower level, the safety valve closes and the burner shuts off. See figure 6-E.
If you do have a good strong pilot that engulfs the pilot sensing bulb with flame, then odds are that the sensing element and/or whatever it is attached to are defective. If it is a flame switch, replace the flame switch. If it is a safety valve replace that.
In a two-level pilot system, remember that the main oven thermostat supplies the secondary pilot with gas. So if you cannot get a good secondary pilot the problem may be the pilot assembly, or it may be the thermostat. If you do get a good secondary pilot, you"re back to the sensing bulb and safety valve.
Spark ignition systems use a spark module to generate a pulsing, high-voltage spark to ignite the gas. The spark module is an electronic device that produces 2-4 high-voltage electrical pulses per second. These pulses are at very low amperage, measured in milliamps, so the risk of shock is virtually nil. But the voltage is high enough to jump an air gap and ignite gas. The spark ignition module is usually located either under the cooktop or inside the back of the stove. The same module is used for both the surface burner ignition and the oven burner ignition.
However, the spark is not certain enough to light the oven burner, and the gas flow is too high, to rely on the spark alone. Remember, in an oven, before the safety valve opens, you need to be assured of ignition. So the spark ignites a low-gasflow pilot, and then the safety valve opens only when the pilot is lit.
This is the same two-level pilot system described in section 6-2(b), with a few important exceptions. The constant or primary pilot does not stay lit when the oven thermostat is turned off. It does, however, stay lit the whole time the oven thermostat is turned on.
When the gas oven is turned on, a switch mounted to the oven thermostat stem signals the spark module. These are the same switches as shown in section 5-3.
When the thermostat calls for more heat in the oven, the heater or secondary pilot increases the size of the pilot flame, which heats the sensing bulb, which opens the safety valve and kicks on the burner.
Yup, this ol" boy"s got it all. Spark ignition, a pilot, a flame switch and TWO - count "em - TWO safety valves; one for the pilot and one for the burner. (Figure 6-H)
The operation is actually simpler than the diagram looks. When you turn on the oven thermostat, a cam on the thermostat hub closes the pilot valve switch. This opens the 110 volt pilot safety valve and energizes the spark module, igniting the pilot. As in the other spark system, the pilot flame provides a path that drains off the spark current, so the ignitor stops sparking while the pilot is lit. As long as the oven thermostat is turned on, the pilot valve switch stays closed, so the pilot valve stays open and the pilot stays lit.
When the pilot heats the pilot sensing element of the flame switch, the flame switch closes. This completes the 110 volt circuit to the oven safety valve, so the valve opens and the burner ignites.
When the oven temperature reaches the set point of the thermostat, the thermostat switch opens, breaking the circuit and closing the oven safety valve, and shutting off the burner.
Now that you know how the system works, first look to see what is not working. When the oven thermostat is on, and there isn"t a pilot flame, is the electrode sparking? Is there spark, but no primary pilot? Is the primary pilot igniting, but not the secondary? Is there sparking after the thermostat is shut off?
(The pilot may or may not light, but the main burner is not lighting) Remember that the thermostat supplies the pilot with gas in these ovens, and only when the thermostat is on. So if you don"t have a primary and secondary pilot flame, odds are the problem is the pilot orifice or oven thermostat. Try cleaning the pilot assembly and sensor bulb as described in section 6-5. If that doesn"t work, adjust the secondary flame a little higher. If that doesn"t work, replace the pilot assembly.
If you do have a good strong secondary pilot that engulfs the pilot sensing bulb with flame, then odds are that the oven safety valve (or flame switch, whichever is attached to the pilot sensing bulb in your system) is defective. Replace the defective component.
Something is wrong with the high-voltage sparking system. If you are in a hurry to use your oven, you can turn on the oven thermostat, carefully ignite the primary pilot with a match and use the oven for now; but remember that the minute you turn off the thermostat, the pilot goes out.
Are the cooktop ignitors sparking? If so, the spark module is probably OK. What typically goes wrong with the sparking system is that the rotary switch on the valve stops working. Test continuity as described in section 5-3(a). If that isn"t the problem, check the electrode for damage and proper adjustment. The spark target (the nearest metal to the electrode) should be about 1/8″ to 3/16″ away from it, (about the thickness of 2-3 dimes) and directly across the primary pilot orifice. Replace or adjust the electrode as appropriate. When replacing, make sure you get the right kind of electrode (there are several) and do not cut the electrode lead; follow it all the way back to the spark module and plug the new lead into the proper spark module terminal.

So, you’re having trouble with your oven. There are some common oven problems that you can try to troubleshoot yourself when your oven is not working properly. Whether the problem is your oven not heating, oven not turning on, or your oven is not working in general, we’ve got suggestions for you.
The most common cause of an oven not heating is a defective igniter. The igniter draws electrical current through the oven safety valve to ignite it. If the igniter is too weak, it won’t open the valve correctly and will fail to ignite the gas in the oven burner. To see if the igniter is defective, observe the igniter when the oven is on. If the igniter glows for about 2 minutes without igniting the gas flame, the igniter is likely too weak to open the valve and needs to be replaced.
Another common cause for an oven not heating is having one of the wires that supplies power to the oven element burn out; it is common for these wires to burn out near the heat source. Inspect the wires leading to the oven element or igniter. If you determine the wire is fried, replace it. If you don’t see anything visibly burnt, check to make sure the wires are not loose and causing interruption to the flow of power to the oven element.
A common oven problem is the oven not maintaining proper temperature, or not getting to the correct temperature you have set it too. A defective igniter can cause this problem. As the igniter weakens over time, it takes longer to open the gas safety valve. When this happens, there is a longer span before the burner reignites, attempting to heat the oven to maintain accurate temperature.
Consequently, the oven temperature will drop too low before the burner is lit again. The oven temperature should not drop more than 40 degrees F. before the igniter relights the burner. If you are detecting too much temperature fluctuation, you may need to replace the igniter.
The oven sensor is another common culprit to the oven temperature not regulating. On some oven models, you can recalibrate the oven control up to 35 degrees F.- refer to the owner’s manual for instructions on how to recalibrate the oven control. Otherwise, you may need a licensed technician to determine if the oven sensor is failing.
If you discover the self-cleaning feature of your oven not working, the oven control board may be defective. The oven control board has relays that send voltage to the bake/broil circuits based on sensor input. If you have a faulty oven control board, the heating components will not get the voltage they need to activate.
Again, that pesky igniter. The igniter is the most commonly defective component of an oven that won’t turn on. See above “Oven Not Heating” for more details about checking the igniter.
Another common cause of an oven not working is loose or burnt wires. The wires that supply power to the oven element or igniter sometimes burn out near the heat source. Check the wires leading to the element or igniter. The will wire usually be visibly burnt if the wire is indeed burned out. If this is the case, the wires need to be replaced.
One of the most common oven problems is a stove burner that won’t light properly. The spark modules, spark electrodes, and spark wires all work together and are responsible for the burners lighting. First check the spark electrode and spark wire. If both of those are in working order, then check the spark module. If the burner produces a weak spark, or sparks intermittently, the spark module may need to be replaced.

On a newer gas oven, the burners release and set fire to the gas via an igniter called the hot surface igniter. The ignitor is a very fragile thing, whether it’s the round or the flat type. It works like a chain reaction: turning on the oven sends electricity to the igniter, causing it to heat red-hot. This makes the two metals in the oven safety valve contort enough to open the valve and set the gas aflame. This chain reaction takes about 60 seconds in a working oven. And a persistently cold oven could be the result of any break along the chain. A burner that won’t light could be connected to an igniter with no power coming into its circuit. Have a repairperson check the circuit for electricity, since this is a live voltage check. If there is indeed power coming to the igniter, and it is open circuit, a multi-meter can be used to run a continuity check. It may be that, while the igniter is glowing, it’s still insufficiently hot to open the valve: this can be checked by your repairperson with an amp meter. A defective igniter can’t be repaired: replacement is the only option.

Most modern appliances have safety features built in, but your gas oven safety valve is arguably the most important. If an electrical appliance malfunctions, it can cause a fire, but a misfiring gas oven could potentially blow up your house. You don"t really need to know how the safety mechanism works to use your oven, but you may find that it gives you some extra peace of mind.
Broadly speaking, there are two ways a built-in safety mechanism can work. One option is that it remains "open" by default and to shut off if certain conditions are met. That"s how fuses and circuit breakers work in an electrical circuit: Ordinarily, the electricity is free to flow, but if the current grows too large, the fuse or breaker will blow and cut off the circulation of electricity.
The other option is for your safety mechanism to be "closed" by default and allow a device to operate only when the correct conditions are met. That"s how a gas oven safety valve works. Gas ordinarily is prevented from flowing, and if the valve is working correctly, it opens only when you want to light your oven.
Many gas stoves use what"s called a "hot surface igniter," a bar or element (similar to the ones on your stovetop) that gets hot enough to ignite the gas on contact. Gas oven safety valves on stoves with this type of ignition system take a couple of different approaches.
In one approach, a bimetallic strip operates the valve. It harnesses a simple scientific principle: Metals expand and contract at different rates when they"re heated and cooled. If you bond two suitable metals together in one strip, that strip will flex to a predictable degree as the temperature goes up and down. Wall-mount thermostats often use this principle, as do analog oven thermometers and the thermometer in the lid of your gas grill.
As appliance-repair website PartSelect explains, turning on your gas oven causes electricity to flow into the heating element of your hot surface igniter. As the igniter heats up, it warms a bimetallic strip inside your gas oven safety valve. When the igniter reaches its operating temperature, the bimetallic strip opens the valve and allows the gas to flow, igniting as it crosses the heated surface.
According to heating-equipment vendor Anglo Nordic, gas oven safety valves use a variation of that principle to operate. In these stoves, the flow of electrical current through the hot surface igniter becomes the control mechanism. The igniter"s bar is made of a material that offers less and less resistance to electricity as it heats. When it reaches the temperature required to ignite the gas, its resistance becomes low enough to trip the safety valve and open the flow of gas.
More modern ranges use an electrical igniter. When you turn on your oven, the gas begins flowing immediately, and it sends an electrical current to a piezo electric igniter. The current makes the igniter spark (like the manual igniter on your gas grill) and lights the oven"s burner. In this case, the safety valve works in the opposite way: An electronic sensor checks for the heat caused by ignition after a few seconds, and if it"s absent, it will close the valve and shut off the flow of gas.
It"s worth pointing out that not all gas ovens have a safety valve in the conventional sense. Older stoves simply use a pilot light, a small but constant flow of gas, which, in turn, feeds a small, candle-like flame. You essentially are the safety mechanism in this system: It"s up to you to check that the pilot is lit. When you turn on the gas manually, the small pilot flame ignites the main flame. It"s a mechanically simple system, which makes it durable, and for that reason, you"ll still see it used on commercial restaurant ranges, which must stand up to decades of heavy use.
Using a Phillips screwdriver, unthread the screw securing the burner tube to the oven. Take the tube off the gas orifice and carefully set it down on the floor of the oven.
Move to the back of the oven and take out the screws holding the lower, rear access panel to the appliance. Once the panel is off, disconnect the wires from the gas safety valve, and use a 9/16 inch wrench to loosen the nut securing the gas line to the valve. Then, unthread the mounting screws holding the safety valve to the back of the range. Lift the gas safety valve up and off the oven.
To install the new safety valve, insert the orifice tube into the hole in the back of your oven. Align the valve with the gas line and reattach the two mounting screws that secure the safety valve to your appliance. Next, reconnect the wires and tighten the gas line nut with a 9/16 inch wrench. Put the lower, rear access panel back on, and reattach the screws you removed earlier.
Move to the front of your appliance and reinstall the burner tube to the safety valve’s gas orifice. Once the connection is secure, reattach the mounting screw that holds the tube in place. Next, replace the lower access panel in the oven cavity and put the racks back in your appliance.
Plug your appliance back in, and turn on the gas supply. If you smell gas at any time, shut off the gas supply and inspect the safety valve connection.
The kitchen is the heart of the home. It’s where families share dinner, gather together and pass down recipes. One of the worst things that can happen when preparing to cook an amazing meal for your family is to find out that your gas oven won’t light. Do you call a repairman or resort to the microwave?
A handy homeowner can troubleshoot the problem when a gas oven doesn’t light. A handful of common problems can plague gas ovens. Many are as simple as a loose connection, while others involve replacing important components. However, those simple repairs are less likely to cost you an arm and a leg. Before worrying about replacing your oven, see if one of these common issues is the cause of your oven problems.
You can check a handful of issues if your gas oven doesn’t light. From a simple power issue to a faulty gas igniter, here are a few common reasons your gas oven won’t work.
If your oven won’t heat and your gas burners won’t light, the problem might be as simple as a tripped circuit breaker. Even though you have a gas oven, it still needs electricity to run. Electricity powers the control board, igniter and temperature sensor, among other parts.
The oven should connect to a standard 15- or 20-amp switch inside your circuit breaker box. These are the single switches. Your oven may also have its own dedicated breaker switch. If not, you can check the power by testing the secondary outlet. The problem lies elsewhere if the outlet works but your gas oven does not.
While a rare occurrence, your gas oven may not heat because your gas supply is off — usually a result of maintenance repairs or replacements in the system. For example, if your oven or other gas-reliant appliance was recently repaired, the gas line is likely still turned off.
Like a thermostat, the temperature sensor regulates the oven temperature of your gas oven. It connects to the igniter switch. If the temperature sensor breaks, the oven will not light for safety reasons.
Troubleshooting and replacing this sensor is a fairly easy fix for a homeowner who is comfortable working on a gas oven. Unplug the oven from the wall.
The igniter controls the oven safety valve, also known as the gas valve. This oven component ensures only gas enters the oven when the igniter is hot enough to ignite it. This component stops working if there is not enough power to either the valve or the igniter. A handy homeowner can use a multimeter tool to test that the valve is working. Unplug your oven.
Use a multimeter tool on the RX1 setting and test the valve. Some brands use valves with terminals for both the broiler and the baking elements. Test both sets of terminals.
The igniter is the key component of a gas oven. If you have a faulty igniter, many of the other components will not work and the oven will not turn on. Oven igniters glow hot to ignite the natural gas released by the oven safety valve. However, if the heating element is not working, the gas valve will not trigger and the oven will not ignite.
To check the gas igniter: Turn off the circuit to the oven and confirm the power is off by checking that the oven light, clock and control board are all off.
If nothing looks wrong with the part, plug the oven back in and watch to see if the igniter glows after turning on the oven. If it does not glow orange, replace it.
Replacing a faulty gas oven igniter is a moderately easy DIY appliance repair. Estimated costs are between $40 and $80, depending on the cost of a replacement igniter. If you have a newer oven, check any manufacturer warranties before making any repairs.
While a homeowner can do this project, ensure you take every safety precaution before attempting. Turn off the oven’s gas supply and disconnect the appliance from the outlet. Remember to take precautions if you smell gas (even after you have turned off the supply to the oven). Turn off the main gas supply to your home, open windows for ventilation, and call an appliance technician for assistance.
To ensure you have the correct replacement igniter, have your oven model number and serial number. A Kenmore oven might not use the same part as a Whirlpool oven. These numbers are often found inside the oven door or drawer, depending on the brand of oven.
Turn off all power to your oven. Ensure the power is off by checking that the light, control board and clock are off. Then remove the oven racks. Next, unscrew the base plate and remove it from the oven. You will find the igniter underneath.
Take a reference photo before removing the old gas igniter. Install the new igniter in the same way. Be very careful with the new igniter because it is very fragile. Unplug the two wires or the wire harness from the igniter.
While your gas stove and gas oven are part of the same appliance, they do not use the same parts and components. This is why your gas burners can work while your gas oven won’t light. Your gas range has its own set of igniters, gas valves and safety features. If everything is in working order, your range can work independently of your gas oven.
Appliance repairs are always a big inconvenience and can sometimes cost an arm and a leg. Don’t get stuck without your most important appliances. Check out the Cinch Home Services warranty plan that cover appliances, including both gas and electric ovens. With three different options to choose from, you can find the right plan for your home.

These valves do not fail very often. Normally the problem is with the ignitor not drawing enough amperage to open the valve. Even if the ignitor is glowing orange it is likely still the cause of the burner not igniting. Technicians refer to this as a "weak" igniter.
Dual gas safety valve assembly. The gas oven safety valve works with the oven igniter to provide gas to the burner. If the safety valve fails, the oven won’t heat. Since safety valves rarely fail, be sure to check more commonly defective parts before replacing the safety valve.
These valves do not fail very often. Normally the problem is with the ignitor not drawing enough amperage to open the valve. Even if the ignitor is glowing orange it is likely still the cause of the burner not igniting. Technicians refer to this as a "weak" igniter.
These valves do not fail very often. Normally the problem is with the ignitor not drawing enough amperage to open the valve. Even if the ignitor is glowing orange it is likely still the cause of the burner not igniting. Technicians refer to this as a "weak" igniter.
These valves do not fail very often. Normally the problem is with the ignitor not drawing enough amperage to open the valve. Even if the ignitor is glowing orange it is likely still the cause of the burner not igniting. Technicians refer to this as a "weak" igniter.
These valves do not fail very often. Normally the problem is with the ignitor not drawing enough amperage to open the valve. Even if the ignitor is glowing orange it is likely still the cause of the burner not igniting. Technicians refer to this as a "weak" igniter.
These valves do not fail very often. Normally the problem is with the ignitor not drawing enough amperage to open the valve. Even if the ignitor is glowing orange it is likely still the cause of the burner not igniting. Technicians refer to this as a "weak" igniter.

These valves do not fail very often. Normally the problem is with the ignitor not drawing enough amperage to open the valve. Even if the ignitor is glowing orange it is likely still the cause of the burner not igniting. Technicians refer to this as a "weak" igniter.
These valves do not fail very often. Normally the problem is with the ignitor not drawing enough amperage to open the valve. Even if the ignitor is glowing orange it is likely still the cause of the burner not igniting. Technicians refer to this as a "weak" igniter.
These valves do not fail very often. Normally the problem is with the ignitor not drawing enough amperage to open the valve. Even if the ignitor is glowing orange it is likely still the cause of the burner not igniting. Technicians refer to this as a "weak" igniter.

Sometimes your electric appliances will fail to work when you least expect it. One of these machines is the oven, and its repair could cost you between $100 and $200. If you’re the DIY type of person, the first thing to do is to find out where the problem lies.
If the igniter can’t draw a current to the safety valve, it won’t heat the gas burner. To troubleshoot the igniter, remove the gas covers and check if it glows. If it does, it could mean that it has become weak and cannot draw enough current.
The safety valve is the section that controls the passage of gas to the burners. It works by responding to heat generated by the igniter. Upon sensing the amps, the valve opens up to allow gas to pass through.
If your gas range fails to heat, you might be able to identify the problem on your own. For a long-lasting solution, consider engaging a professional in fixing the problem. At Appliance Repair Specialist, we’ll give you repair solutions tailored to the model of your oven. Just contact us to schedule a service or ask any question.

These valves do not fail very often. Normally the problem is with the ignitor not drawing enough amperage to open the valve. Even if the ignitor is glowing orange it is likely still the cause of the burner not igniting. Technicians refer to this as a "weak" igniter.
These valves do not fail very often. Normally the problem is with the ignitor not drawing enough amperage to open the valve. Even if the ignitor is glowing orange it is likely still the cause of the burner not igniting. Technicians refer to this as a "weak" igniter.
These valves do not fail very often. Normally the problem is with the ignitor not drawing enough amperage to open the valve. Even if the ignitor is glowing orange it is likely still the cause of the burner not igniting. Technicians refer to this as a "weak" igniter.
These valves do not fail very often. Normally the problem is with the ignitor not drawing enough amperage to open the valve. Even if the ignitor is glowing orange it is likely still the cause of the burner not igniting. Technicians refer to this as a "weak" igniter.
These valves do not fail very often. Normally the problem is with the ignitor not drawing enough amperage to open the valve. Even if the ignitor is glowing orange it is likely still the cause of the burner not igniting. Technicians refer to this as a "weak" igniter.
These valves do not fail very often. Normally the problem is with the ignitor not drawing enough amperage to open the valve. Even if the ignitor is glowing orange it is likely still the cause of the burner not igniting. Technicians refer to this as a "weak" igniter.
These valves do not fail very often. Normally the problem is with the ignitor not drawing enough amperage to open the valve. Even if the ignitor is glowing orange it is likely still the cause of the burner not igniting. Technicians refer to this as a "weak" igniter.
These valves do not fail very often. Normally the problem is with the ignitor not drawing enough amperage to open the valve. Even if the ignitor is glowing orange it is likely still the cause of the burner not igniting. Technicians refer to this as a "weak" igniter.
These valves do not fail very often. Normally the problem is with the ignitor not drawing enough amperage to open the valve. Even if the ignitor is glowing orange it is likely still the cause of the burner not igniting. Technicians refer to this as a "weak" igniter.

You’ve been waiting for an hour for your gas oven to come up to heat. It should have been ready 45 minutes ago. And still you wait. “What’s the problem?” you curse under your breath. We’ve been here and we know exactly how you feel. (Although we hope it’s not the night before a bake sale when you encounter this.) Appliances don’t always work. Sometimes you run into a problem with your gas oven and you’ve got no idea what it is or why it’s happened.
When you were purchasingyour brand new gas oven, it might have seemed like a fantastic idea at the time. When you compare the pros and cons, a gas oven comes out ahead for many people. You save money because gas ovens cost less to run than electric ovens, they heat up and cool down quicker, and they are more energy efficient. Or you might have chosen it because while an electric oven typically only lasts for 13 years, a gas oven can last up to 15 according to American Home Shield. These are all reasons we looked into when it came to justifying our gas oven against the initial cost of purchasing one and installing the gas line.
Something to look for with all of these issues is whether your oven is getting gas or not. Start by turning on the range burners if you have any. If the gas is flowing normally to the range burners, you know that the issues are within the oven itself. If they aren’t, you need to take a step back and make sure that you’re getting gas from your intake line, and your gas provider. (Sadly, we don’t have an in with any of them. We advise calling them once you’ve confirmed that an issue is with the gas supply rather than the oven itself.)
Sometimes the burners in your oven just won’t light completely. Even though you’ve got the dial cranked to high, you’re not getting a sufficient flame. This not only is going to affect your cooking, but also the efficiency of your oven. The most likely reasoning for this is that you have a cross-over port that’s restricted due to some type of blockage. Grab your old toothbrush and a wire brush and scrub carefully at all of the ports. With a bit of time you should be able to clear anything blocking the ports.
What about if the pilot light doesn’t light up after you’ve turned the oven on? You’ll know it hasn’t if you can open up the oven and don’t see a light at the back of the oven. If it’s not on, you might need to clean the electrode for the pilot. After you’ve taken your trust tools to it, you can relight the pilot with this article from Bob Villa.
One of the benefits of a gas oven, and the reason many people choose them, is the rapid on-off time, the opposite of using electric ovens. However you can have times where even after you ignite the oven, it takes a long time before it operates. This can be caused by the ignition ports being blocked. Please note, this is different from having the cross-over ports blocked. A trained technician is your best choice in this case, rather than doing it yourself. They will be able to tell if it is the ignition port that is clogged and get it fixed. The reason we advise caution here is because a delayed ignition has the potential to cause a fire or explosion, causing damage to you, your oven or your home.
If your oven won’t heat at all, it’s possible that the ignition is a problem. If you’ve made sure that both the gas supply is active and open, pop open the panel at the bottom of your oven. Here you’ll see your burner tube. Turn on your oven to 350 and see if the igniter burns hot. If it does but the gas doesn’t ignite, there’s most likely a problem with the igniter, and it’ll need to be replaced. If the igniter doesn’t glow, the next step is checking it with a multimeter, which you can do on your own, or you can call us in. For more information on how this process works, check out this video.
If you’re facing off against an oven that doesn’t have any flame, your first spot to look is the igniter. (Hm, that thing seems to be the potential spot for several problems doesn’t it?) So, pull out the shields and check to see if it’s glowing. If there’s not flame and your igniter has been glowing for a long period of time, you need a new igniter. They can get old and worn out so that they can’t open the safety valve and bring gas into the burner tube.
If you’ve got your oven lit and you can smell the gas, you’ve got a problem. Start by turning off the oven. If left unchecked a gas leak can cause a fire, explosion or poisoning of anyone in the home.
Now that we’ve got you safe, there are two possible causes for you smelling gas. The first is that the gas valves are opening up too soon before the ignition is reaching the right temperature. The second could be a hole or slit in the gas valves. Both of these need to be addressed by a professional as soon as possible after you notice it.
Oven problems can happen to any homeowner. It’s not something you’ve done or not done, it’s just wear and tear on the parts. The good news is that half of these you can fix on your own. For the other half, Appliance Rescue Service is always here to help. If you’ve got questions about ovens (gas or electric) that we didn’t cover today, or just in general, let us know in the comments below or over on our Facebookpage. If on the other hand you found us because you’re dealing with one of these problems, you can reach out to us on our webpage. So long as you live in Addison or the surrounding area, we’re here to help.

If it wasn’t for your Whirlpool oven model WFG320M0BW, your family wouldn’t enjoy all those delicious meals you make for them. Unfortunately, the more use your oven gets the more wear and tear its components withstand. One of the most common malfunctions an oven experience is the no heat syndrome. While this issue is beyond frustrating, especially if you’re in the middle of cooking dinner, it doesn’t mean your oven is headed to the nearest junkyard. Diagnosing and fixing an oven that is producing little to no heat is actually a repair you can probably handle on your own. To help you troubleshoot a non-heating oven, we’ve created a list of components known for hindering an oven’s ability to heat up.
Safety Reminder:Always unplug an appliance before starting a repair, and if you are working with a gas oven, turn off the gas supply valve. Work gloves and safety goggles should be worn when fixing a malfunctioning appliance.
Before inspecting any other components in your oven, test the appliance’s gas supply. If your oven isn’t receiving gas it won’t be able to heat up. To check the gas supply, simply turn on a cooktop burner. If the burner ignites, gas is entering your appliance. On the other hand, if the burner stays unlit, you’ll need to pull your range away from the wall to ensure the gas cutoff valve is open. Once you confirm the valve is in the open position, you’ll need to contact your gas supplier to find out why there is no gas coming out of the supply valve.
Your oven igniter should produce enough heat to open the gas valve and ignite the gas entering your appliance. Over time, the igniter can weaken, meaning it will take a longer period of time to heat up. If your igniter glows for over a minute without a flame igniting, the component is no longer functioning properly.
Start your repair by removing the lower access panel from the back of your range. Once the panel is off, pull apart the igniter and gas safety valve’s wire harnesses.
Head to the front of your range, and open the oven door. Take out the oven racks. Remove the oven’s lower access panel by lifting the back up first, and then sliding the panel towards the front of the oven.
The oven igniter is located on the side of the burner tube, which runs through the middle of the oven cavity. To remove the faulty oven igniter, you’ll need to detach the burner tube and take it out of your appliance. To do so, simply unthread the mounting screws securing it to the inside of the oven. Once the burner tube is free, pull it and the oven igniter out of the oven cavity.
Go back to your range and reinstall the burner tube. Push the igniter wires through the opening on the oven’s rear wall. Reinsert the oven’s lower access panel, and put the oven racks back in your appliance.
Head to the back of your appliance and reconnect the igniter’s wire harness with the gas safety valve’s harness. Replace the lower access panel and secure it with the four screws you removed earlier.
Plug your appliance back in, and turn on the gas supply valve. Set your oven to preheat and wait for it to warm up to determine if the new oven igniter solved your appliance’s heating problem.
The oven sensor and the oven control board work as a team to measure and regulate the temperature of the oven. As its name implies, the sensor detects the temperature inside the oven cavity. If the sensor is defective the oven will not heat at all or the accuracy of the sensor will be off by 50 degrees or more.
Move to the back of your appliance and disconnect the sensor’s wire harness. Unthread the two screws securing the oven sensor to the range’s rear panel.
Grab your new oven sensor, and insert it into the hole in the rear panel. Replace the mounting screws to hold the sensor in place. Finally, reconnect the wire harness.
Plug-in your range, and turn the gas back on. Test the new sensor by turning your oven on and measuring the temperature inside the oven cavity with an oven thermometer.
The Oven Control Board,as mentioned above, works in conjunction with the oven sensor. While the sensor is more likely to malfunction, the control board can also end up failing. If this happens, the component may read the temperature sent from the oven sensor wrong, which can lead to the oven not heating at all or the temperature in the oven cavity being significantly inaccurate. Replacing the defective control board is your best option.
The Gas Safety Valveregulates when gas is and isn’t released into your oven. If the component is working properly, the safety valve will open when the oven igniter begins to glow white-hot. A malfunctioning gas safety valve won’t allow gas into the oven, even after the igniter is hot enough to ignite the gas. While a defective safety valve can happen, it is a rare occurrence, meaning you should rule out more common malfunctions first. However, if you do discover the gas safety valve is behind you non-heating oven, replacing the component is the only way to fix the problem.
An oven that won’t heat can turn your dinner plans into a complete disaster, especially when the malfunction hits right before a dinner party. If you’re dealing with a non-heating oven and you can’t figure out which component is causing the issue, please contact us today to schedule an appointment with one of our appliance repair technicians.


 8613371530291