
double weave overshot manufacturer
I had the privilege of teaching in Washington state for 8 days in March this year. I found out how to pronounce names like Skagitt and Whatcom. I enjoyed meeting some fascinating weavers. I also experienced the wonderful community of weavers in the Puget Sound area, and of course I saw some lovely scenery.
My first teaching assignment was a lecture to the Whidbey Weavers Guild. During this time of emerging corona virus activity, the guild was well attended. My lecture on Overshot: Past and Present was a warm-up for the three-day workshop I would begin the following day.
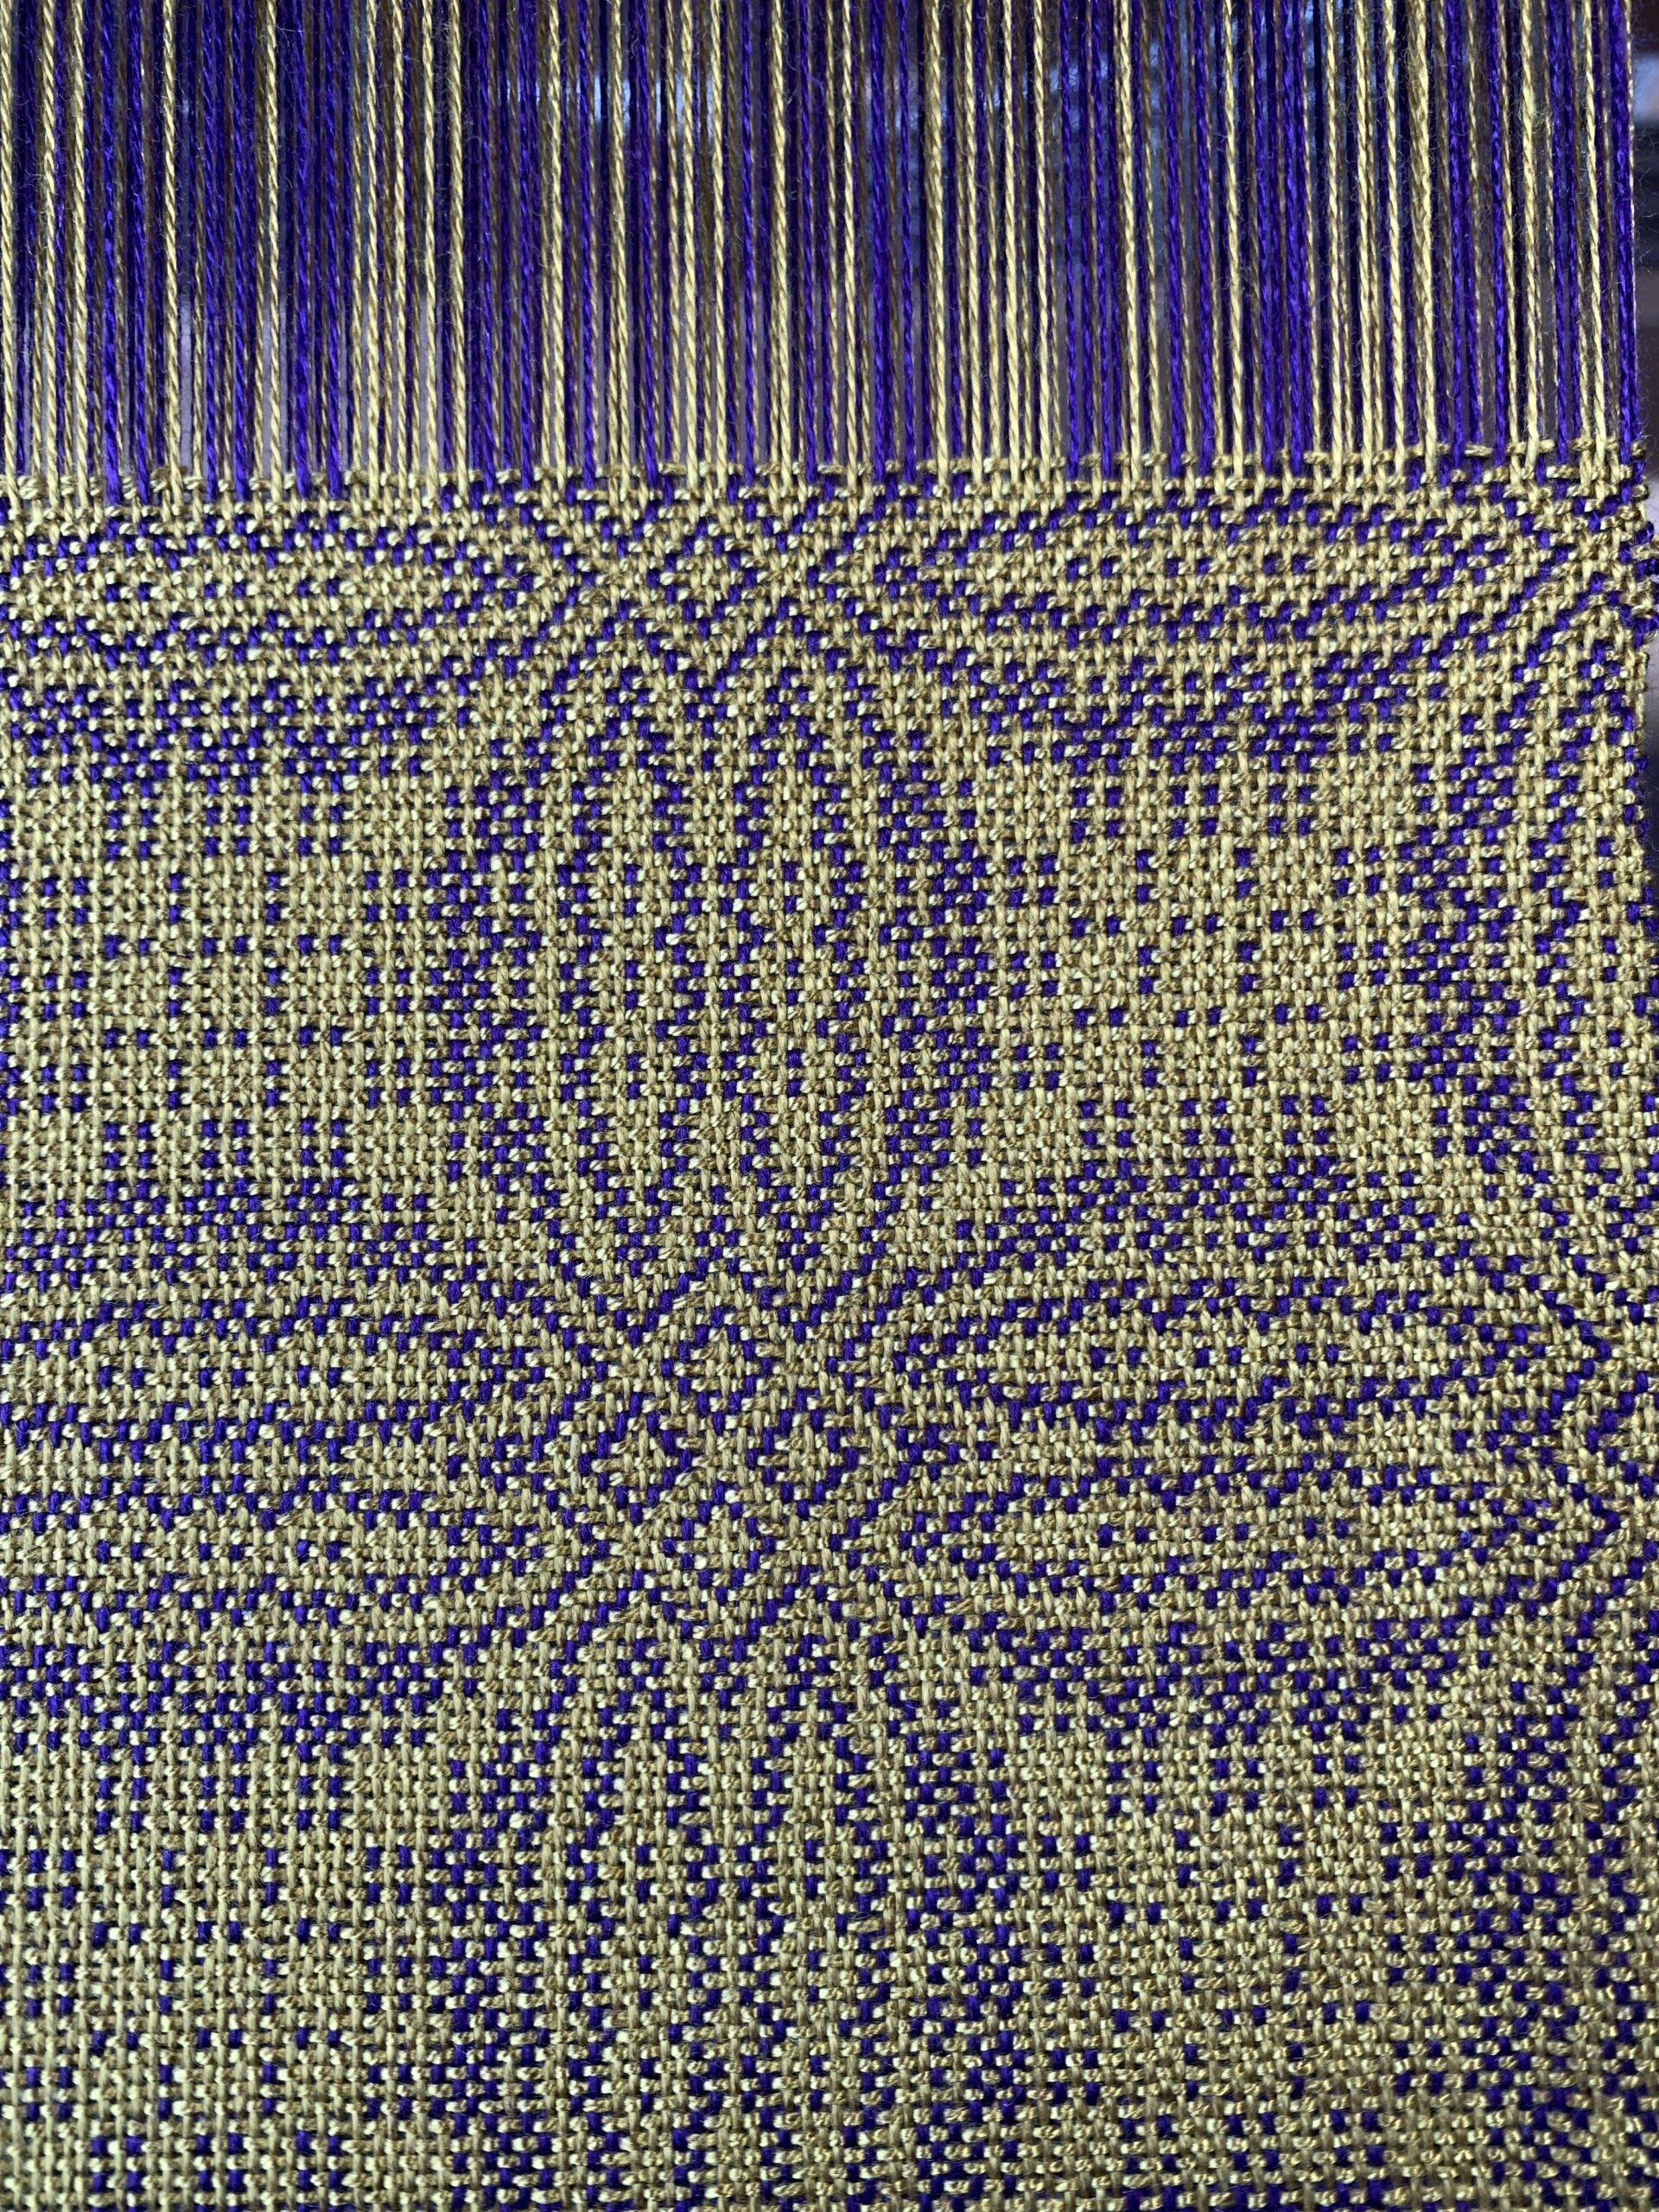
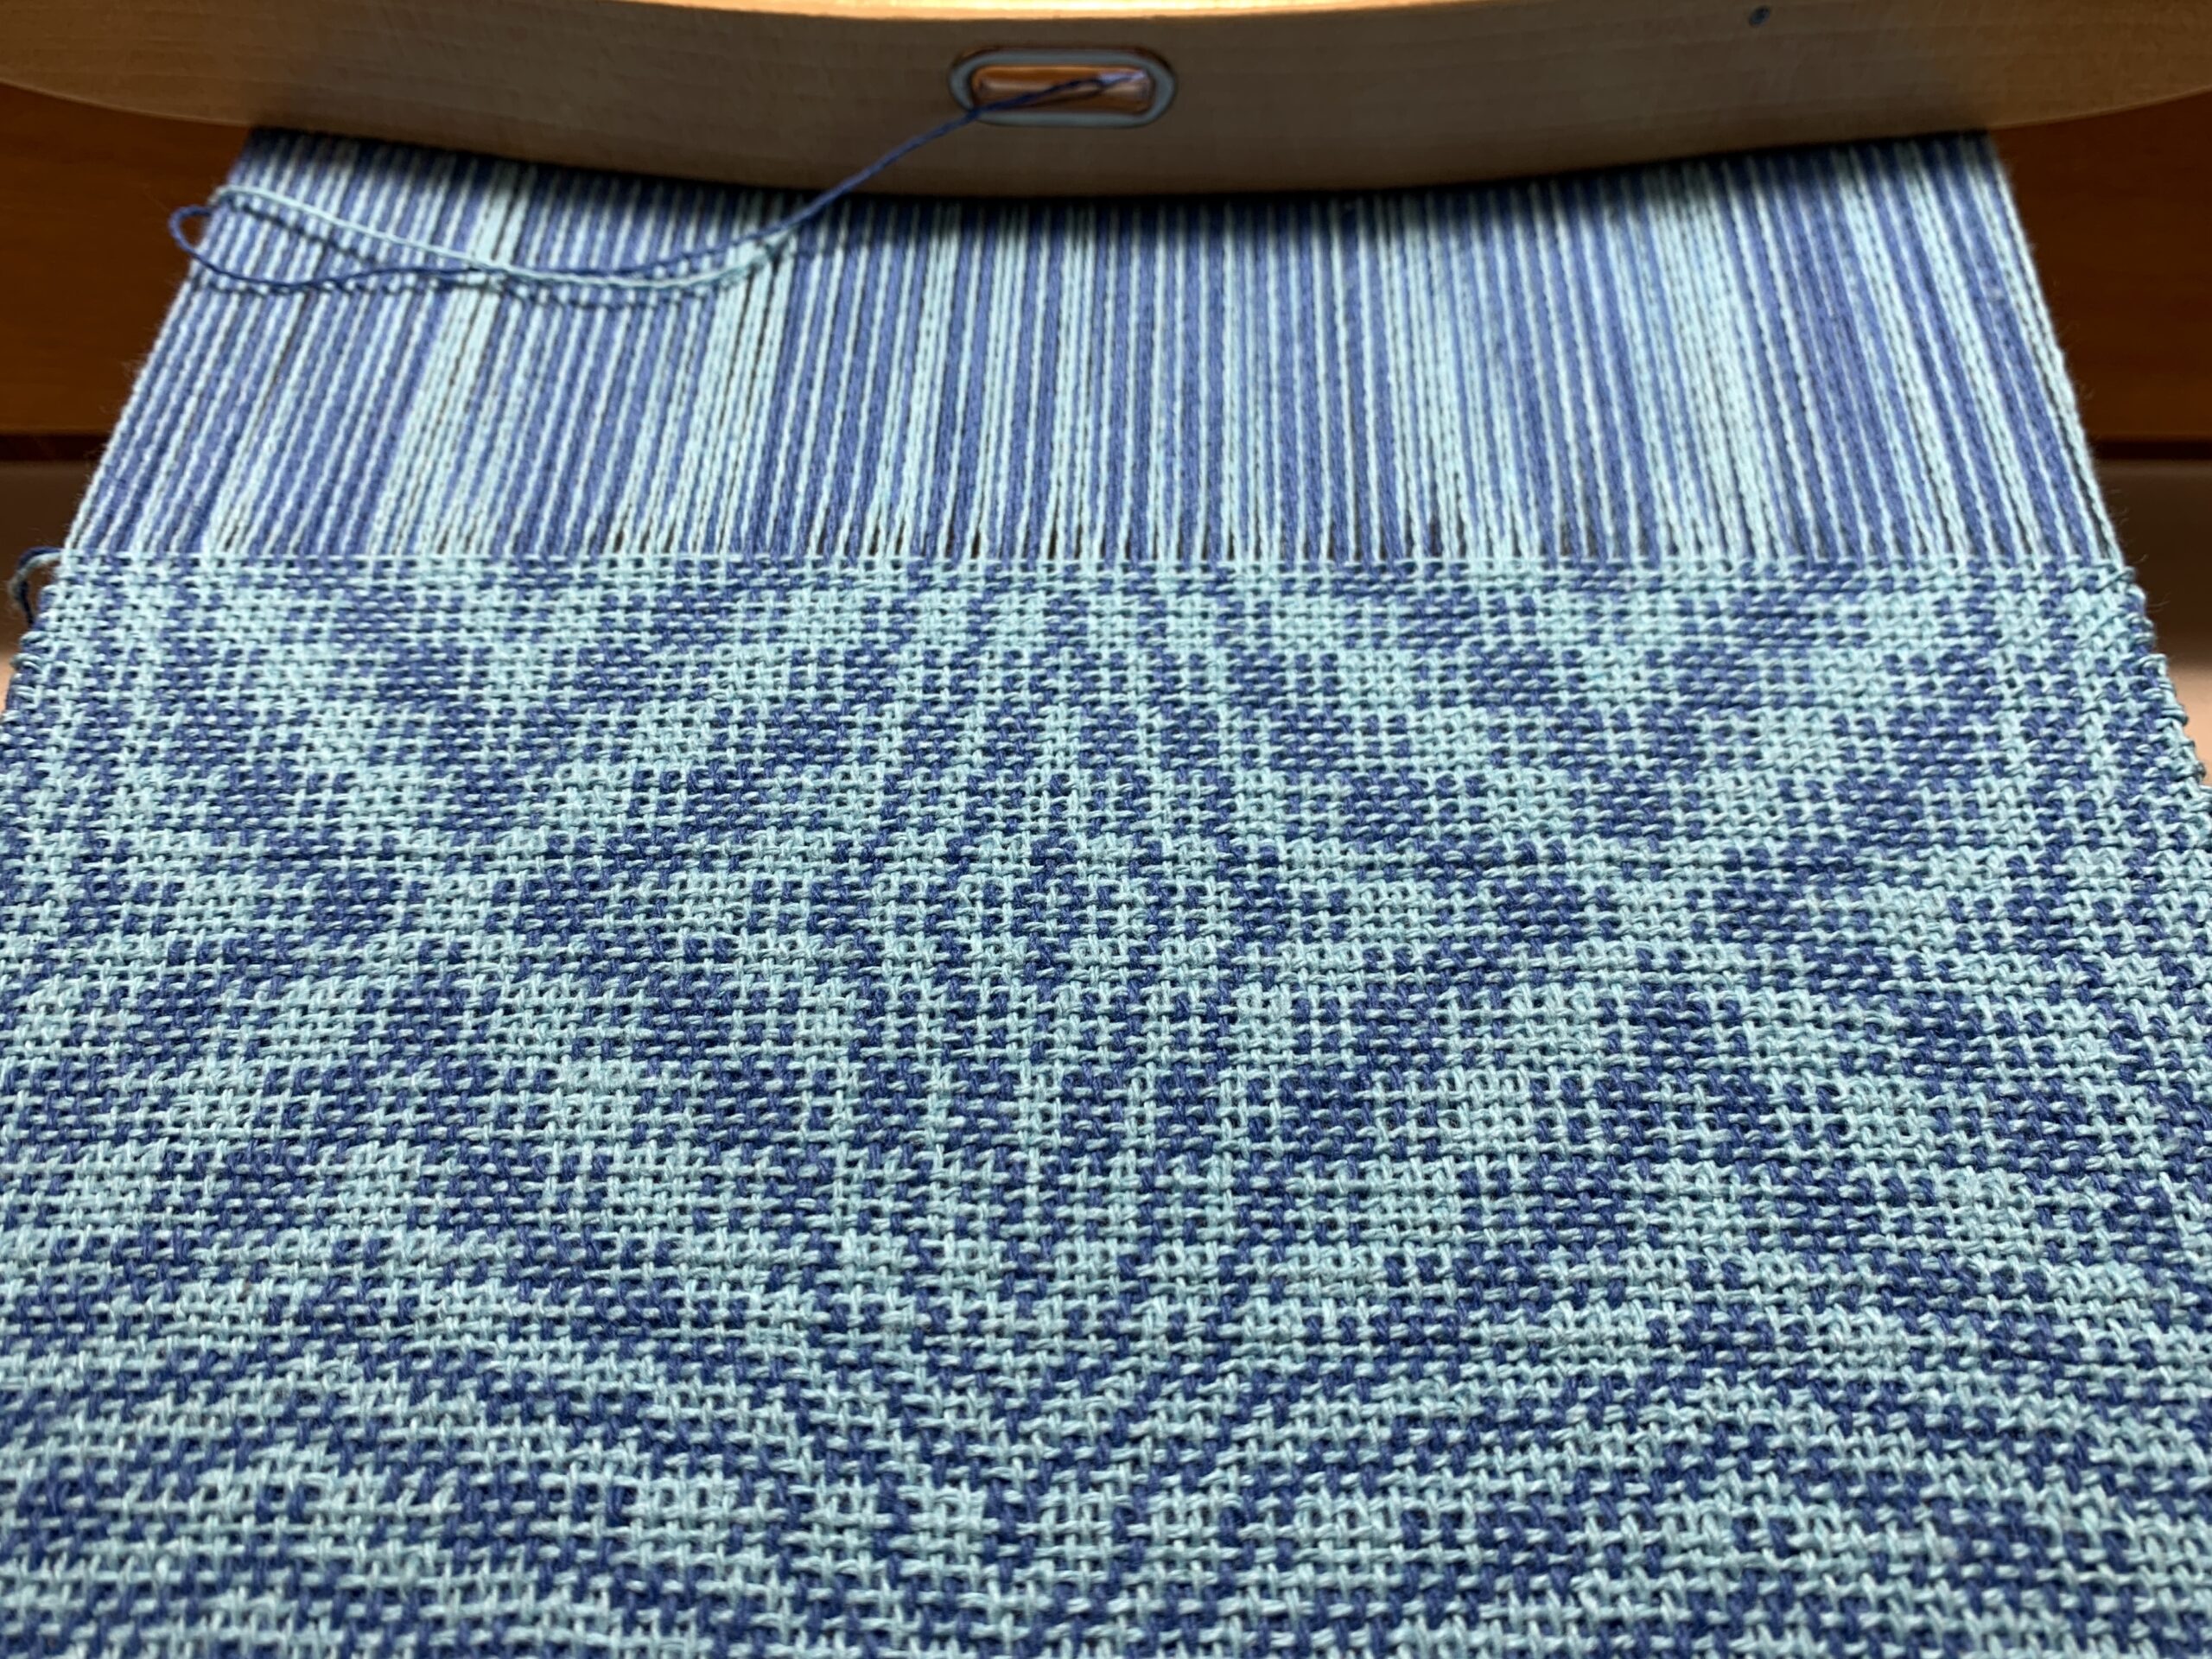
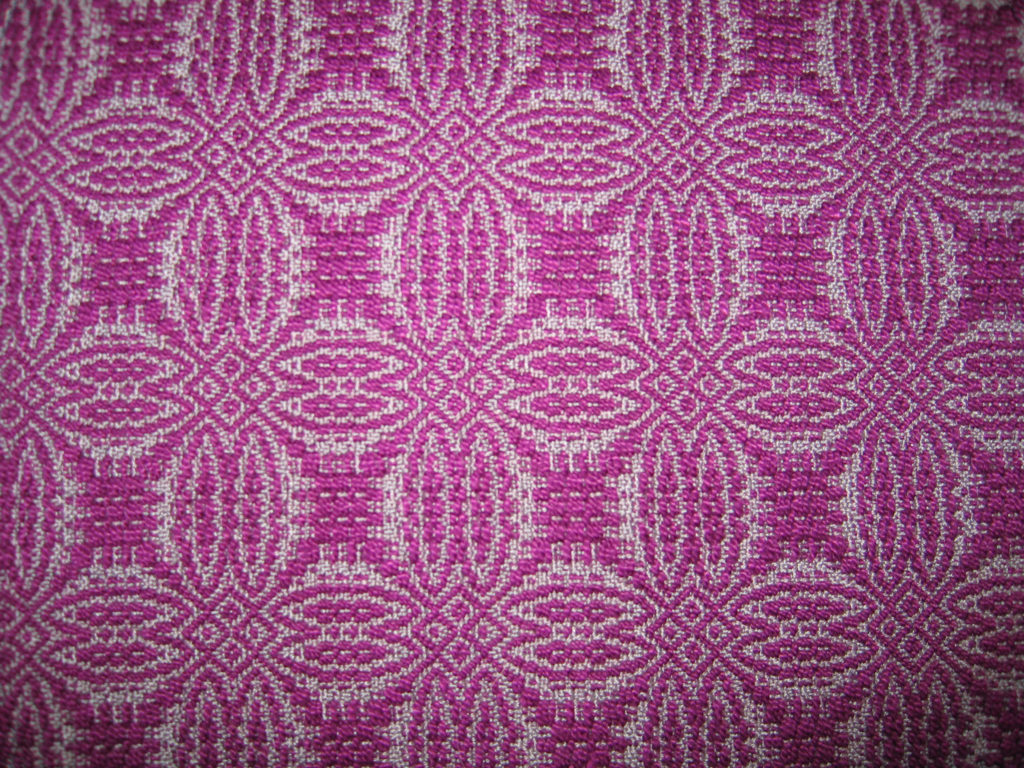
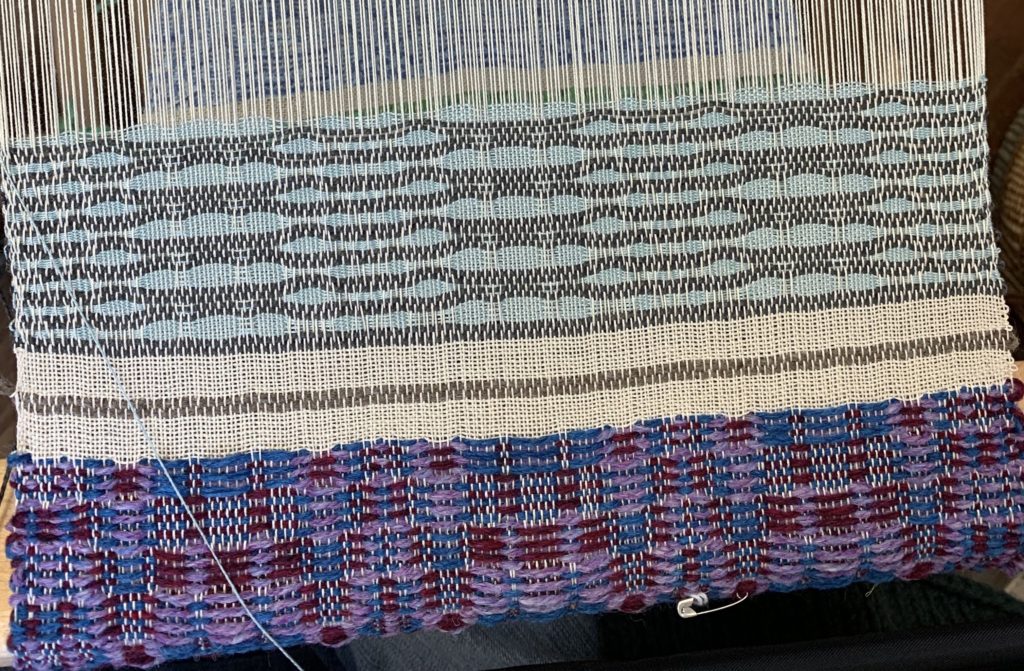
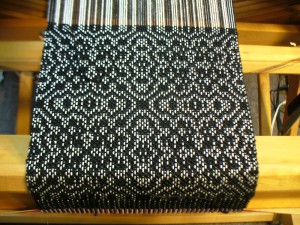
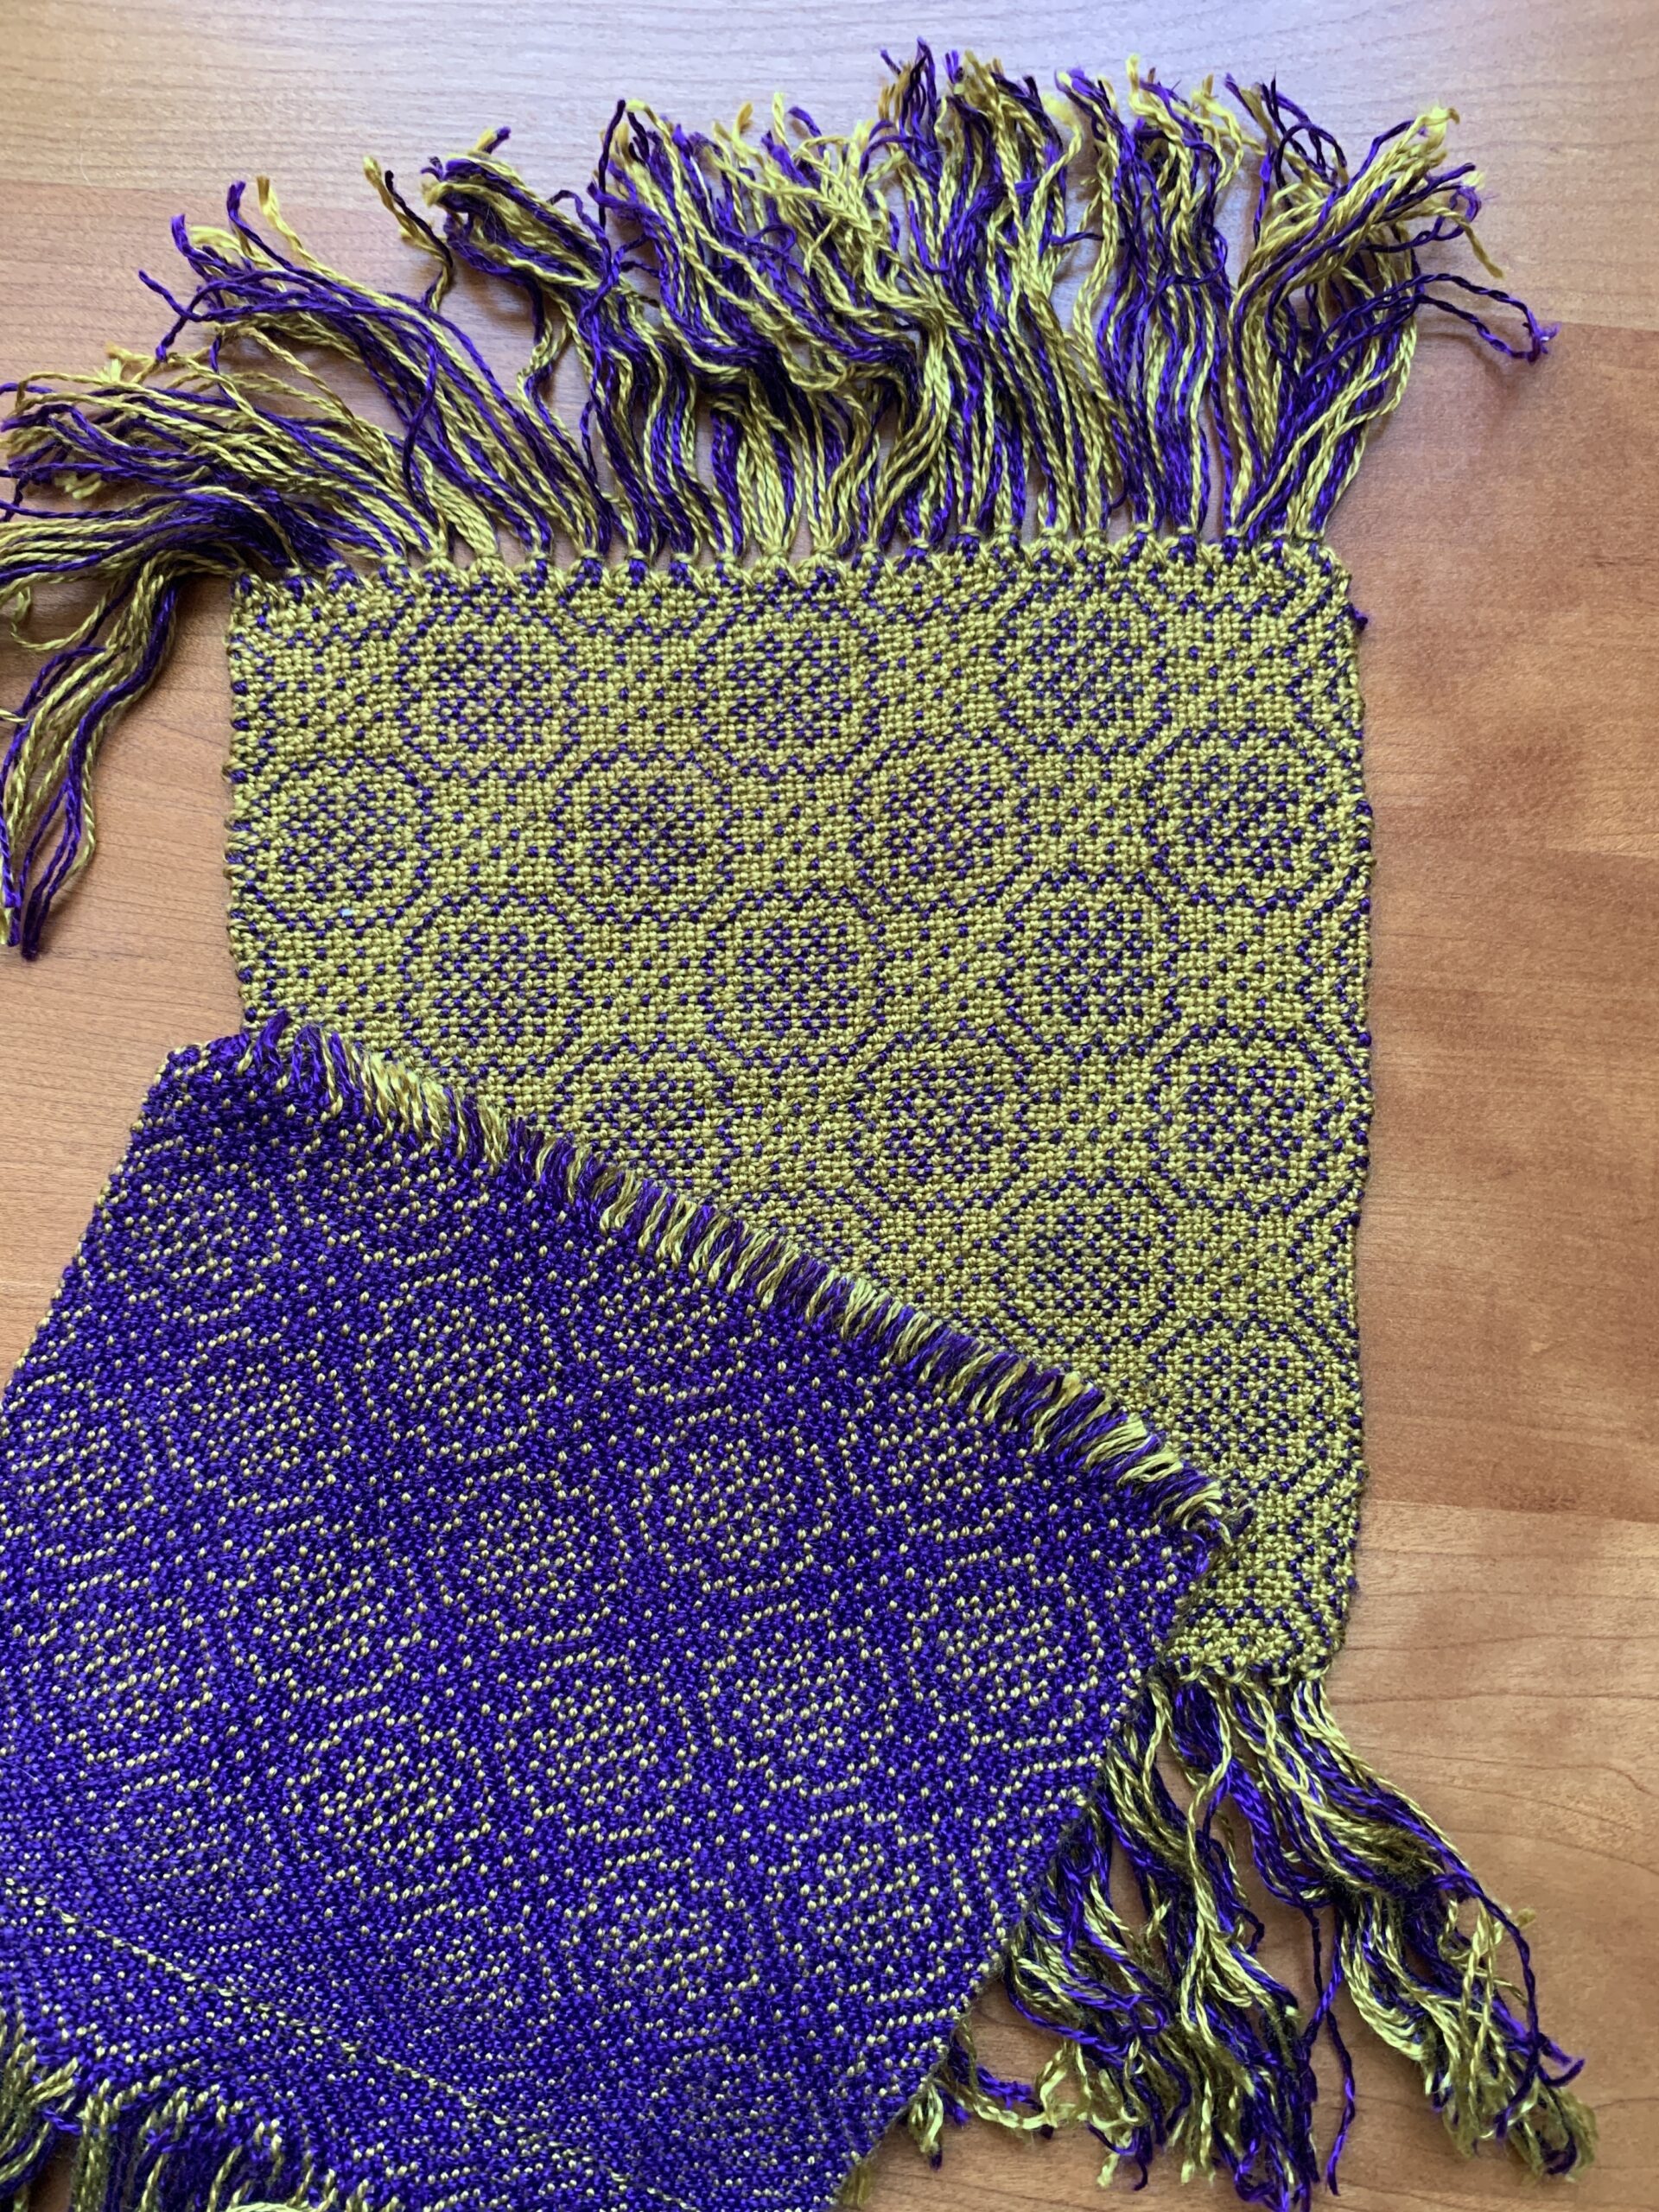
We had an eager 15 attendees in the overshot workshop. The work was very creative. I send out instructions for preparing the looms ahead of time. In the workshop, everyone follows the same treadling order, but each weaver chooses their own colors to bring. Sometimes the thickness varies from one weaver to the next, also. The result is that everyone’s artistic decisions and sense of design are apparent. No two set of samples are identical. The students work through a certain set of treadling patterns and go home with a variety of samples. Some of their work is pictured below.
The day after my overshot workshop, two wonderful ladies took me up to my next assignment: a lecture on Summer and Winter to the Skagit Valley Weavers Guild. Many of the guild members were also members of Whidbey Weavers Guild and of the Whatcom Weavers Guild, who would host me for my next workshop. A couple of my overshot workshop students brought in their samples. They had cut them from the loom and washed them the day before, after the overshot workshop was finished. It was fun to see their completed work and talk about what their next steps would be.
The three-day Early American Textiles workshop was presented at the Jansen Art Center and hosted by the Whatcom Weavers Guild. Nine students wove round robin style on ten different looms. Each loom had been warped by one of the students in a traditional weaving pattern using thread similar to what early American weavers would have used. Throughout the workshop we stopped to talk about production practices within the US and Europe during the 17th, 18th and 19th centuries. One of the students brought in a lovely coverlet she had found in a thrift store. Another shared stories of her aunt and uncle who were weavers. My students were very knowledgeable and, as usual, I learned as much from them as they did from me.
The Whatcom group was a tight-knit community of weavers, too. Many have known each other for years and they constantly share ideas and encouragement. The Jansen Art Center provides studio space for their collection of looms as well as library and meeting space. The staff at the Jansen Center was very welcoming and the cafe served some dynamite lunches–plus afternoon lattes to keep us all going.
I had the privilege of teaching in Washington state for 8 days in March this year. I found out how to pronounce names like Skagitt and Whatcom. I enjoyed meeting some fascinating weavers. I also experienced the wonderful community of weavers in the Puget Sound area, and of course I saw some lovely scenery.
My first teaching assignment was a lecture to the Whidbey Weavers Guild. During this time of emerging corona virus activity, the guild was well attended. My lecture on Overshot: Past and Present was a warm-up for the three-day workshop I would begin the following day.
We had an eager 15 attendees in the overshot workshop. The work was very creative. I send out instructions for preparing the looms ahead of time. In the workshop, everyone follows the same treadling order, but each weaver chooses their own colors to bring. Sometimes the thickness varies from one weaver to the next, also. The result is that everyone’s artistic decisions and sense of design are apparent. No two set of samples are identical. The students work through a certain set of treadling patterns and go home with a variety of samples. Some of their work is pictured below.
The day after my overshot workshop, two wonderful ladies took me up to my next assignment: a lecture on Summer and Winter to the Skagit Valley Weavers Guild. Many of the guild members were also members of Whidbey Weavers Guild and of the Whatcom Weavers Guild, who would host me for my next workshop. A couple of my overshot workshop students brought in their samples. They had cut them from the loom and washed them the day before, after the overshot workshop was finished. It was fun to see their completed work and talk about what their next steps would be.
The three-day Early American Textiles workshop was presented at the Jansen Art Center and hosted by the Whatcom Weavers Guild. Nine students wove round robin style on ten different looms. Each loom had been warped by one of the students in a traditional weaving pattern using thread similar to what early American weavers would have used. Throughout the workshop we stopped to talk about production practices within the US and Europe during the 17th, 18th and 19th centuries. One of the students brought in a lovely coverlet she had found in a thrift store. Another shared stories of her aunt and uncle who were weavers. My students were very knowledgeable and, as usual, I learned as much from them as they did from me.
The Whatcom group was a tight-knit community of weavers, too. Many have known each other for years and they constantly share ideas and encouragement. The Jansen Art Center provides studio space for their collection of looms as well as library and meeting space. The staff at the Jansen Center was very welcoming and the cafe served some dynamite lunches–plus afternoon lattes to keep us all going.

By Jennifer Moore. This book is the whole package. It covers the concepts and techniques of doubleweave and then offers you twelve beautiful projects so you can apply them. Jennifer covers warp preparation and loom set-up, tubular weaving, weaving double-width (and more!), quilted fabric, pick-up, stitched double cloth, block designs, doubleweave derived from overshot designs, and using color in doubleweave. Projects include four harness samplers, pillows, blanket, and runner. Eight harness projects include a drawstring pouch, triple-width tablecloth, runner, placemats, and sampler, including the sampler Jennifer uses in her Double Rainbow class. There is also discussion and photos of these techniques woven with more than eight harnesses. Throughout, she provides tips for getting the best results. Whether you"ve been itching to try weaving at twice the width of your loom or to tackle a complex block design, this book can help you do it.
So, one of the things I did for myself this past year is I signed up for a class to learn doubleweave from Jennifer Moore. She is the author of Doubleweave, and last year I found out that she also teaches a workshop as an online Zoom class. I wanted to see what it would be like to learn directly from Jennifer and … spoiler alert … it was amazing.

I am new to doubleweave and have been told that any overshot pattern can be used to weave a doublewide fabric. How do I figure out the treadling, especially when you weave the top layer first with the shuttle, then the bottom twice, and back to the top to finish. Can you please help me understand this?
I’m assuming you have threaded every other thread on the first four shafts following the overshot pattern for the top layer, and you have threaded the alternate threads on shafts 5 to 8 for the bottom layer the same order but in the opposite direction from the first four shafts.
To weave Block A in the top layer, for example, shafts 1 and 2 must be down plus all of the shafts in the bottom layer. To weave Block A in the bottom layer, you’ll raise the Block A shafts for the bottom layer so the pattern weft will be placed correctly when the piece is unfolded. You will therefore raise all of the top-layer shafts plus shaft 5 and 6. (Whenever you weave in the top layer you leave down the shafts where you want the weft to show on the face; whenever you weave in the bottom layer, you raise the shafts where you want the weft to show on the back plus the top-layer shafts.)
For specific information about planning and weaving projects in doublewidth overshot and other structures, you need the Best of Handwoven ebook, Doubleweave, Doublewidth! It is a great resource!

After returning from a fabulous time at the New England Weavers Seminar in July, I found myself rewriting the beginning of this article. I was so lucky to spend two days in a round-robin style class taught by Marjie Thompson entitled 18th & 19th Century High Fashion for the Middle Class. To say that Marjie knows an extraordinary amount about historic textiles seems to be an understatement. Oh, to have an hour swimming about in her brain!
One interesting piece of information I learned is that overshot is a fairly modern term. Originally this type of weaving would have been referred to as floats or floatwork. It seems that many people are returning to this original terminology, though the weaving world has thus far shown little interest in making the change back. Personally, I like it. Floatwork sounds a bit less frenetic than overshot – as though I’m peacefully hitting my mark rather than missing it in a wild fashion.
Until recently, my floatwork experience was limited to one project. This was created using Cascade 220 back in April 2008. The pattern is Leaves on p. 118 of The Handweaver’s Pattern Directory by Anne Dixon. I was criticized for having floats that were too long and would easily snag, but I loved my fabric. I turned it into a little tote that fit perfectly into my bike basket and never experienced a snag. Thankfully I took a photo back then, as the bag is currently in storage and missing the bike paths of Boulder.
Floatwork, formerly known as overshot which was originally known as floatwork, is a block design traditionally woven on four shafts where a heavier pattern yarn floats above a plain weave ground cloth and creates a raised pattern. Your plain weave background cloth is woven using a finer yarn in your warp and in every other weft pick (these weft picks being the ‘use tabby’ part of your pattern.)
This finer yarn is hidden in places by the thicker yarn floats, blended in places with the thicker yarn (as plain weave) creating areas that are shaded (referred to as halftone), and woven across itself to create delicate areas of plain weave. Most of us think of antique coverlets when we hear ‘overshot.’
Back to business. Tabby is a plain weave pick that anchors your pattern pick in place. When weaving floatwork, every other weft pick is tabby. Your pattern pick needs the tabby pick to stabilize the cloth and keep the pattern picks from becoming distorted. This also means that you are working with two shuttles, one holding your tabby yarn and one holding your pattern yarn. This two-shuttle thing can be a bit awward at first, but you’ll get the hang of it with a little practice.
Here is the thing about floatwork that really helped it to make sense for me. It is basically a twill weave. As Mary Black puts it, “An examination of an overshot draft shows it to be made up of a repetitive sequence of the 1 and 2, 2 and 3, 3 and 4, and 4 and 1 twill blocks”.
Choosing yarns to weave floatwork can be challenging. Generally speaking you want your pattern yarn to be about twice the diameter, or grist, of your tabby/warp yarn. Your tabby yarn and your warp yarn are generally the same yarn. I say generally because I can see so many non-traditional ways to weave floatwork that involve breaking the rules. Imagine, for example, taking a small part of a given pattern and blowing it up to a massive scale to do a wall hanging or using three different yarns to create a completely different visual experience!
When choosing your yarns, you can always search online to see what other folks have used successfully. Ravelry.com, Weavolution.com and Weavezine.com are all good places to start. You could also double your tabby yarn to create a pattern yarn. I did this with my bike basket, using a different colorway to create the contrast. And of course there is our friend the sample. Pick a warp and experiment with your weft.
You can find it listed in the chapter or sub-chapter entitled ‘Notes on the Overshot Drafts.’ As someone who generally cheers on the underdog, I was drawn to this pattern without a name.
No. 18 Name Unknown is woven tromp as writ, as I mentioned earlier. Weave it in the order it’s threaded, alternating each pattern pick with a tabby pick. Your pattern shuttle will hold the thicker yarn and your tabby shuttle will hold the finer yarn that was also used in your warp.
Here is a list of books and magazines that might be of interest if you’d like to learn more about floatwork/overshot. Many of these references include patterns in addition to thorough instructions.
If you have a particular interest in old coverlets, Eliza Calvert Hall’s A Book of Hand-Woven Coverlets and The Coverlet Book by Helene Bress are both interesting resources, the later being particularly thorough. I can only imagine the time and research that went into this pair of tomes. And if you are simply looking for patterns, The Handweaver’s Pattern Book by Marguerite Porter Davison and The Handweaver’s Pattern Directory by Anne Dixon are just for you.
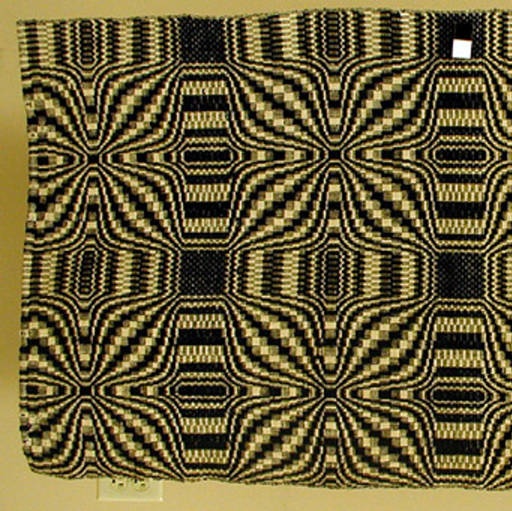
Overshot: The earliest coverlets were woven using an overshot weave. There is a ground cloth of plain weave linen or cotton with a supplementary pattern weft, usually of dyed wool, added to create a geometric pattern based on simple combinations of blocks. The weaver creates the pattern by raising and lowering the pattern weft with treadles to create vibrant, reversible geometric patterns. Overshot coverlets could be woven domestically by men or women on simple four-shaft looms, and the craft persists to this day.
Summer-and-Winter: This structure is a type of overshot with strict rules about supplementary pattern weft float distances. The weft yarns float over no more than two warp yarns. This creates a denser fabric with a tighter weave. Summer-and-Winter is so named because one side of the coverlet features more wool than the other, thus giving the coverlet a summer side and a winter side. This structure may be an American invention. Its origins are somewhat mysterious, but it seems to have evolved out of a British weaving tradition.
Twill:Twill along with plain and satin weave is one of the three simple weave structures. Twill is created by repetition of a regular ratio of warp and weft floats, usually 1:2, 1:3, or 2:4. Twill weave is identifiable by the diagonal orientation of the weave structure. This diagonal can be reversed and combined to create herringbone and diamond effects in the weave.
Double Cloth: Usually associated with professional weavers, double cloth is formed from two plain weave fabrics that swap places with one another, interlocking the textile and creating the pattern. Coverlet weavers initially used German, geometric, block-weaving patterns to create decorative coverlets and ingrain carpeting. These coverlets contain twice the yarn and are twice as heavy as other coverlets.
Beiderwand: Weavers in Northern Germany and Southern Denmark first used this structure in the seventeenth century to weave bed curtains and textiles for clothing. Beiderwand is an integrated structure, and the design alternates sections of warp-faced and weft-faced plain weave. Beiderwand coverlets can be either true Beiderwand or the more common tied-Beiderwand. This structure is identifiable by the ribbed appearance of the textile created by the addition of a supplementary binding warp.
Figured and Fancy: Although not a structure in its own right, Figured and Fancy coverlets can be identified by the appearance of curvilinear designs and woven inscriptions. Weavers could use a variety of technologies and structures to create them including, the cylinder loom, Jacquard mechanism, or weft-loop patterning. Figured and Fancy coverlets were the preferred style throughout much of the nineteenth century. Their manufacture was an important economic and industrial engine in rural America.
Multi-harness/Star and Diamond: This group of coverlets is characterized not by the structure but by the intricacy of patterning. Usually executed in overshot, Beiderwand, or geometric double cloth, these coverlets were made almost all made in Eastern Pennsylvania by professional weavers on looms with between twelve and twenty-six shafts.
America’s earliest coverlets were woven in New England, usually in overshot patterns and by women working collectively to produce textiles for their own homes and for sale locally. Laurel Thatcher Ulrich’s book, Age of Homespun examines this pre-Revolutionary economy in which women shared labor, raw materials, and textile equipment to supplement family incomes. As the nineteenth century approached and textile mills emerged first in New England, new groups of European immigrant weavers would arrive in New England before moving westward to cheaper available land and spread industrialization to America’s rural interior.
The coverlets from New York and New Jersey are among the earliest Figured and Fancy coverlets. NMAH possesses the earliest Figured and Fancy coverlet (dated 1817), made on Long Island by an unknown weaver. These coverlets are associated primarily with Scottish and Scots-Irish immigrant weavers who were recruited from Britain to provide a skilled workforce for America’s earliest woolen textile mills, and then established their own businesses. New York and New Jersey coverlets are primarily blue and white, double cloth and feature refined Neoclassical and Victorian motifs. Long Island and the Finger Lakes region of New York as well as Bergen County, New Jersey were major centers of coverlet production.
German immigrant weavers influenced the coverlets of Pennsylvania, Virginia (including West Virginia) and Maryland. Tied-Beiderwand was the structure preferred by most weavers. Horizontal color-banding, German folk motifs like the Distelfinken (thistle finch), and eight-point star and sunbursts are common. Pennsylvania and Mid-Atlantic coverlets tend to favor the inscribed cornerblock complete with weaver’s name, location, date, and customer. There were many regionalized woolen mills and factories throughout Pennsylvania. Most successful of these were Philip Schum and Sons in Lancaster, Pennsylvania, and Chatham’s Run Factory, owned by John Rich and better known today as Woolrich Woolen Mills.
Coverlet weavers were among some of the earliest European settler in the Northwest Territories. After helping to clear the land and establish agriculture, these weavers focused their attentions on establishing mills and weaving operations with local supplies, for local markets. This economic pattern helped introduce the American interior to an industrial economy. It also allowed the weaver to free himself and his family from traditional, less-favorable urban factory life. New land in Ohio and Indiana enticed weavers from the New York and Mid-Atlantic traditions to settle in the Northwest Territories. As a result, coverlets from this region hybridized, blending the fondness for color found in Pennsylvania coverlets with the refinement of design and Scottish influence of the New York coverlets.
Southern coverlets almost always tended to be woven in overshot patterns. Traditional hand-weaving also survived longest in the South. Southern Appalachian women were still weaving overshot coverlets at the turn of the twentieth century. These women and their coverlets helped in inspire a wave of Settlement Schools and mail-order cottage industries throughout the Southern Appalachian region, inspiring and contributing to Colonial Revival design and the Handicraft Revival. Before the Civil War, enslaved labor was often used in the production of Southern coverlets, both to grow and process the raw materials, and to transform those materials into a finished product.
Because so many coverlets have been passed down as family heirlooms, retaining documentation on their maker or users, they provide a visual catalog of America’s path toward and response to industrialization. Coverlet weavers have sometimes been categorized as artisan weavers fighting to keep a traditional craft alive. New research, however, is showing that many of these weavers were on the forefront of industry in rural America. Many coverlet weavers began their American odyssey as immigrants, recruited from European textile factories—along with their families—to help establish industrial mills in America. Families saved their money, bought cheaper land in America’s rural interior and took their mechanical skills and ideas about industrial organization into the American heartland. Once there, these weavers found options. They could operate as weaver-farmers, own a small workshop, partner with a local carding mill, or open their own small, regional factories. They were quick to embrace new weaving technologies, including power looms, and frequently advertised in local newspapers. Coverlet weavers created small pockets of residentiary industry that relied on a steady flow of European-trained immigrants. These small factories remained successful until after the Civil War when the railroads made mass-produced, industrial goods more readily available nationwide.
This week, I’m kicking off a weaving pattern series. And what better place to begin than plain weave? It’s the simplest weaving pattern there is. The original, the work horse, the practical one.
In this series, I’ve chosen 6 of my favorites to highlight. There are many, MANY more weaving patterns than that. But, these will do the trick for now. Please enjoy Episode 14 of A Handwoven Experience, all about plain weave!
Weaving Patterns – Weaving patterns refer to a plan for creating fabric on a loom. They are broken up into various categories based on the characteristics of the process and the fabric. In this series, I’ll be touching on plain weave, twill, rep weave, overshot, double weave, and tapestry.
I looked up a bit about the history of potholder looms and found some fascinating details! Apparently, the potholder cotton loops were waste products from sock manufacturing. The looms were first produced in the 1930’s in an effort to recycle and re-purpose. They were made from metal, wood, or plastic, and came with a long hook to help weave the loops through.
If you"ve always wanted to learn to weave, but didn"t know where to begin, this is the video for you. This course is designed to acquaint you with the basics and help you choose a direction in which to begin. It starts with an overview of what handweaving is, what can be woven, plus a look at several types of looms and how they work. You will become acquainted with a number of small tools used by weavers, as well as the vocabulary of weaving terms needed to understand the process. You"ll learn about warp and weft yarns, and how their size, weight, elasticity and fibre content relates to specific projects and fabrics. The detailed exercise in figuring out how much warp and weft is needed for a project will become a valuable resource as you continue with future weaving projects. You will also learn how to prepare (measure) the warp using a warping board. This course is recommended as a prerequisite to other video weaving courses for those who are new to weaving. An exciting new hobby awaits you!
Many years ago, I finally got to try weaving. I took the Beginning to Weave workshop through the Ottawa guild. At that time, 1989, the OVWSG did not have a studio space to house what guild equipment we had acquired. (The Guild had an old second-hand 100 inch loom and 6 or 7 table looms. There may have been a floor loom too but I was distracted by the 100 inches of loom, so do not remember). All the looms lived in one of our guild members’ very big basements. On weekends, she either taught weaving workshops or hosted weavers working on the 100 inch loom. It sounded like a busy basement! I remember 4 weekends of driving to a little town just east of Ottawa. I took the table loom home each week to do homework. I still remember the sound of the mettle heddles rattling as I drove down the highway, back and forth to the classes. Then I think there were two more weekends of Intermediate weaving and Dona sent me off and I was weaving!
It all starts with yarn, wind it carefully, attach it to the back beam, wind on, thread the heddles, slay the reed, tie on to the front beam, check the tension and then start to weave. It sounds like a lot of work but it is all worth it as you start to pass the shuttle through the shed and the cloth begins to appear. Weaving was like Magic! From a pile of string to POOF, actual cloth!!!
During the workshop, I found pickup seemed strangely familiar as my brain watched my fingers happily lifting and twisting threads for the various lace and decorative weave patterns. The other thing that my brain went “ooh this is cool!” was Overshot. It is a weave structure that requires a ground and a pattern thread, (two shuttles). One is fine like the warp and the pattern thread is thicker and usually wool. I was still reacting to wool so I used cotton for both. My original goal was to draft and weave a Viking textile for myself but I put that aside for a moment, I will get back to that later.
The first thing I wove after my instruction was a present for my Mom. she had requested fabric to make a vest. I looked through A Handweaver’s Pattern Bookby Marguerite Porter Davison and found an overshot pattern that I thought we both would like. I wove it in two shades of blue (Mom’s favourite colour), at a looser thread count than usual. (Originally the overshot weave structure was used to make coverlets, so were tightly woven and a bit stiff, while I liked the pattern I wanted the fabric to be much more drapey.) Even worse, I did not want it to be as hard-edged in the pattern as it was originally intended so I tried a slub cotton as a test and loved it.
So, for any sane weaver, it was all wrong! Wrong set, wrong fibre, wrong colour choices! It was fabulous and perfect. I kept the sample as a basket cover and at either the end of 1989 or the beginning of 1990, I gave Mom the yardage for her vest. “Oh this is too nice to cut” Mom Said, so it lived on the back of her favourite reading chair as a headrest until her most recent move (2015?) it never did get to be a vest but it has been well enjoyed.
In the Exhibition The Inkle band, hanging beside the overshot, I wove much more recently. I used an Inkle loom and a supplemental warp thread. This means weaving with an extra separate thread that was not part of the main warp on the loom. I used a yarn with a fuzzy caterpillar-like slub.
You may be able to see how I wove the weird slubby supplemental warp. The yarn is weighted and left hanging over the back peg of the Inkle loom. It comes over the top peg (usually labelled B in diagrams) and floats above the weaving. In the areas where the Caterpillar (Slub) is not present I catch the yarn with the shuttle and weave it into the band. In the area the caterpillar appears I would leave the yarn above the warp and then start weaving it in again as I reached the end of the caterpillar. I hope that explanation doesn’t sound like mud and makes a bit of sense. Using a supplemental warp on an Inkle loom is not quite normal but it is a lot of fun.
I was going to tell you about my original goal in learning to weave, the mysterious Fragment #10 from a Viking excavation from around the year 1000, but I have likely confused you with weaving enough for one day. So I will save that for another chat. (don’t forget the Inkle loom I would like to tell you a bit more about that in another post too. I promise I will get back to felting in the not-too-distant future)


 8613371530291