
double weave overshot supplier
I am new to doubleweave and have been told that any overshot pattern can be used to weave a doublewide fabric. How do I figure out the treadling, especially when you weave the top layer first with the shuttle, then the bottom twice, and back to the top to finish. Can you please help me understand this?
I’m assuming you have threaded every other thread on the first four shafts following the overshot pattern for the top layer, and you have threaded the alternate threads on shafts 5 to 8 for the bottom layer the same order but in the opposite direction from the first four shafts.
To weave Block A in the top layer, for example, shafts 1 and 2 must be down plus all of the shafts in the bottom layer. To weave Block A in the bottom layer, you’ll raise the Block A shafts for the bottom layer so the pattern weft will be placed correctly when the piece is unfolded. You will therefore raise all of the top-layer shafts plus shaft 5 and 6. (Whenever you weave in the top layer you leave down the shafts where you want the weft to show on the face; whenever you weave in the bottom layer, you raise the shafts where you want the weft to show on the back plus the top-layer shafts.)
For specific information about planning and weaving projects in doublewidth overshot and other structures, you need the Best of Handwoven ebook, Doubleweave, Doublewidth! It is a great resource!
I love coverlets, and I love it even more when the coverlet has a cartouche in the corner giving the name of the weaver, the weaving location, and the person for whom it was woven. I can try to find out more about the weaver based on that little bit of information. A sampler might have a cross-stitched name and date: “Hannah Bailer is my name and Lancaster County is my home, 1823.” There you go. There is at least the beginning of the story. By searching geneology websites, it might even be possible to find out about Hannah’s history, her family before her, and the family she gave to the world.
For unmarked pieces, it’s nearly impossible to know their story. I might be able to estimate the time period by examining the threads used to weave it. Sometimes I’ll recognize a style of fabric and determine it was most likely woven during a certain period because of the style’s popularity at that point in time. For many pieces, it’s a guessing game. I think it is a terrible injustice not to give them a story, so I just make something up. It’s really quite easy when you have an overactive imagination. Let’s pretend you’re an antique dealer trying to make a sale. That carriage blanket is from the 1850s when the winters were brutal. It’s all the family had to keep them warm in the buggy on their way to church. Not bad, not bad, but how about this? That handspun, handwoven linen sheet was destined to be bandages for the wounded during the war, but she just couldn’t tear it up because it was from her hope chest. Sniff, sniff, sniff. There, see how easy it is?
Most woven fabrics are reversible. Take for instance a piece of overshot. On one side of the cloth, there appears to be a defined circle with a patterned rose motif in the center of the circle. On the other side, it reads as the negative image of the top side; that little rose is now a plain-weave block. Summer and winter and block doubleweave are two more examples of positive and negative pattern images. You can use either side of the fabric; the choice is yours.
Now what would you say if I told you that you could have two fabulous sides that look completely different on each side? Impossible you say? Well, let me tell you about other ways to weave double-faced fabrics.
The sample in the photograph above is a hot pad woven with 8/4 carpet warp and rags. Our beloved Madelyn van der Hoogt explained to me one day that the structure is known as stitched double cloth. I have used this technique for many rag rugs when I want a heavier rug. Not only do I get a hefty rug, but it’s reversible! When I heard the term double cloth, I immediately thought of doubleweave, but they are not the same. Block doubleweave has two layers that are separate until you change to the next pattern block. The pattern blocks are joined both vertically and horizontally, much like little pockets of ravioli. With stitched double cloth, however, the warp threads are moving back and forth between the two sides and stitch the weft materials to the surface of the cloth. One side of the piece weaves as a 1/3 twill, and the other side weaves as a 3/1 twill. This can be woven with a simple straight-draw twill threading and a direct tie-up on a four-shaft loom.
For the first pick on the hot pad, I raised shaft 1 and wove a rag strip. I wove the second pick by raising shafts 1, 2, and 4 and placing a different-color rag strip. On that second pick, the warp ends on shaft 3 were down and acted as the stitching thread for the bottom layer just as the ends on shaft 1 did for the top layer. For the next two picks, I raised shaft 3 for the top layer, and shafts 2, 3, and 4 for the bottom layer.The warp ends on shaft 1 moved down to weave the bottom layer and the warp ends on shaft 3 moved to the top. The movement of these warp ends from front to back is what fuses the layers. For the third pick on the top layer, I raised shaft 2, and on third pick for the bottom layer I raised shafts 1, 2, and 3. The fourth pick for the top layer was woven by raising shaft 4, and the fourth pick of the bottom layer was woven with shafts 1, 3, and 4 raised. That’s the total sequence. It’s a broken-twill sequence on both top and bottom layers but looks like plain weave. You could weave it in a proper twill sequence and you would see a typical diagonal line in your fabric.
I have seen and woven this method in two other structures: complementary plain weave (doubleweave overshot) and double-faced overshot. I first saw a reference to double-faced overshot in a Handwoven article by Charles Lermond (November/December, 1989). He wrote about using two pattern yarns to weave different colors on the front and back sides of his placemats and napkins. A conventional tabby thread alternates between the pattern picks. When choosing an overshot pattern, you must be mindful of the length of the pattern floats. You see, you are no longer weaving this structure as a 2/2 twill, but you are changing it so that the top surface is weaving as a 1/3 twill and the bottom of the cloth is weaving as a 3/1 twill. This imbalance makes for a longer float. By losing shafts in the tie-up, a four-thread float may become a seven-thread float. Careful thought must be given as to how this fabric is going to be used.
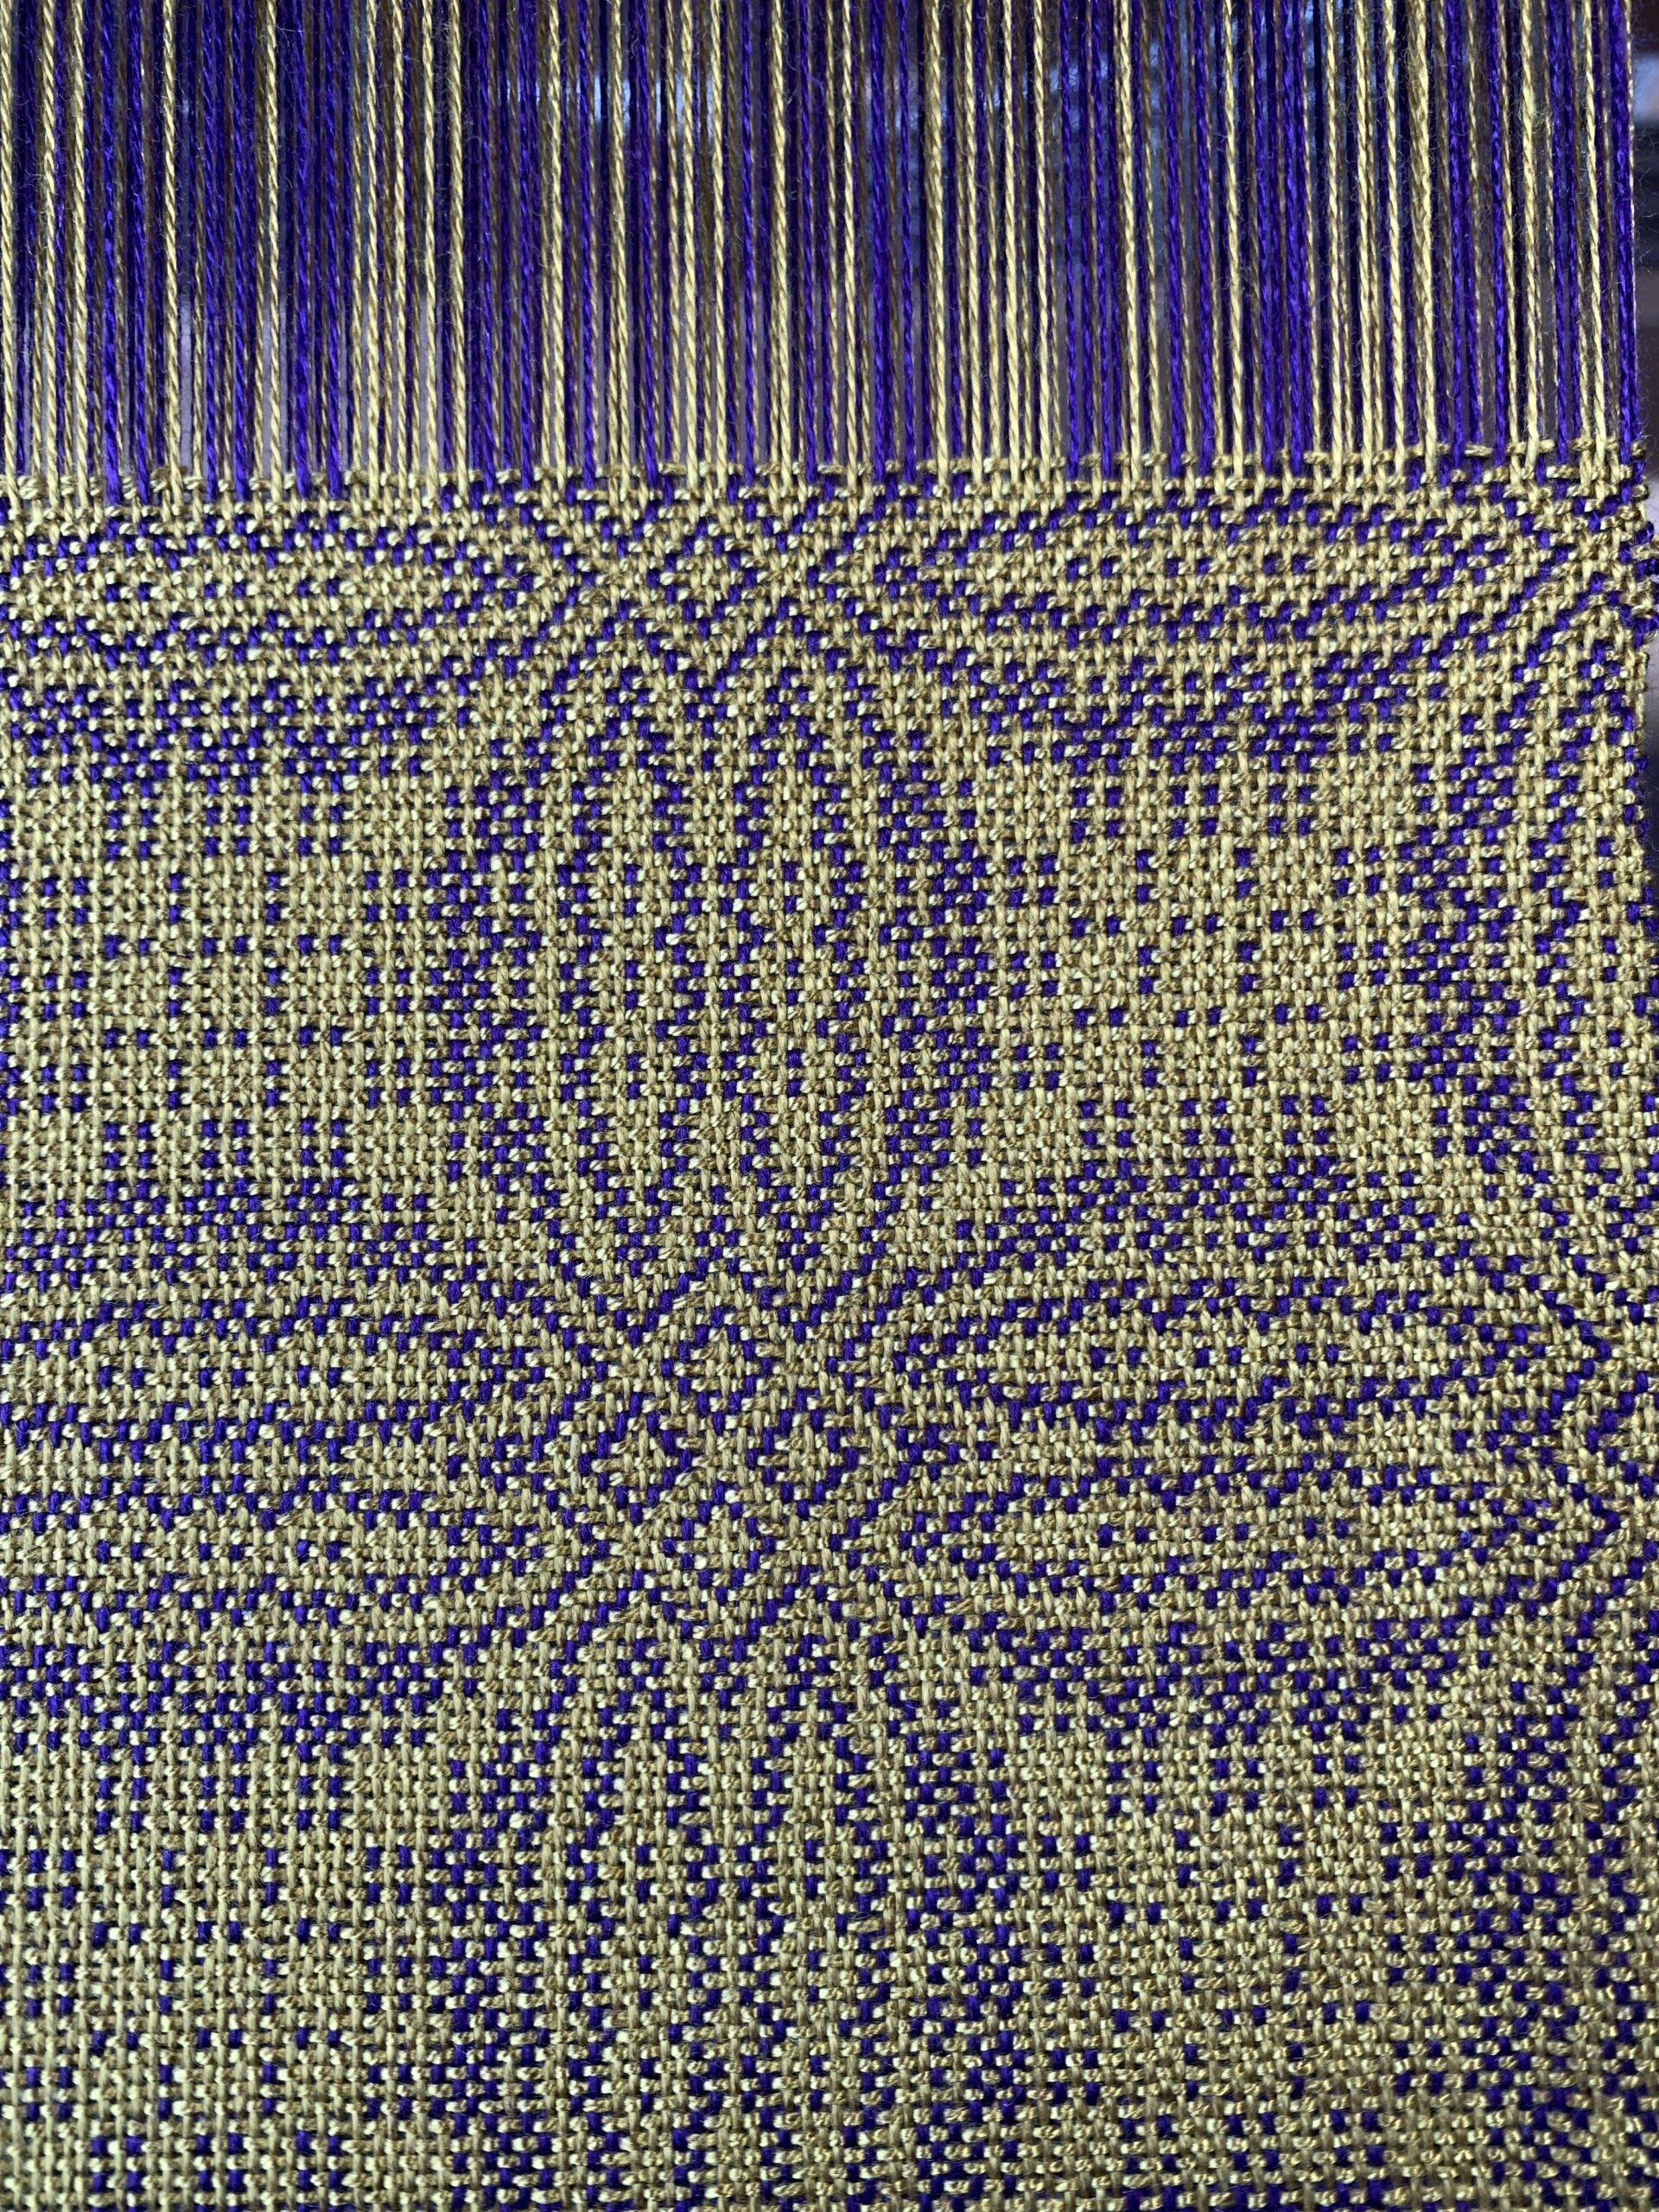
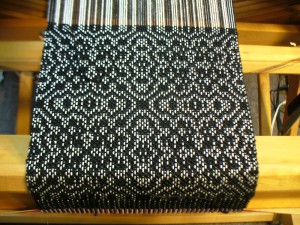
Clockwise from the left: The top sample is Star of Bethlehem woven in double-faced overshot and the bottom sample is traditional overshot. Star of Bethlehem woven in complementary plain weave. Unlike overshot, honeycomb looks very different depending on which side of the cloth you’re viewing.
To illustrate the differences between these examples, I picked one of my favorite patterns, Star of Bethlehem. I first warped my loom and wove a sample in the traditional manner. I then changed my tie-up so that I could weave it as double-faced overshot. You can see the difference between the two sides of the fabric in the top sample in the photograph on the left. Now, how cool is that? Next I wove a placemat in complementary plain weave. All three are easily recognized as the pattern, Star of Bethlehem, but look at how different they are. The warp for the placemat in complementary plain weave consists of two contrasting colors threaded dark/light across the warp. When weaving this piece, I used the dark weft for the upper layer and the light color for the lower layer. I now have a reversible fabric with two color variations of Star of Bethlehem.

This post is the third in a series introducing you to common weaving structures. We’ve already looked at plain weave and twill, and this time we’re going to dive into the magic of overshot weaves—a structure that’s very fun to make and creates exciting graphic patterns.
Overshot is a term commonly used to refer to a twill-based type of weaving structure. Perhaps more correctly termed "floatwork" (more on that later), these textiles have a distinctive construction made up of both a plain weave and pattern layer. Requiring two shuttles and at least four shafts, overshot textiles are built using two passes: one weaves a tabby layer and the other weaves a pattern layer, which overshoots or floats, above.
Readers in the United States and Canada may be familiar with overshot textiles through woven coverlets made by early Scottish and English settlers. Using this relatively simple technique, a local professional weaver with a four-shaft loom could easily make a near-infinite variety of equally beautiful and complex patterns. If you’d like to learn more about overshot coverlets and some of the traditions that settlers brought with them, please see my reading list at the bottom of this article!
As it is twill-based, overshot will be very familiar to 4 shaft weavers. It’s made up of a sequence of 2-thread repeats: 1-2, 2-3, 3-4, and 1-4. These sequences can be repeated any number of times to elongate and create lines, curves, and shapes. These 2-thread repeats are often referred to as blocks or threading repeats, IE: 1-2 = block 1/A, 2-3 = block 2/B.
There are three ways weft appears on the face of an overshot cloth: as a solid, half-tone, or blank. In the draft image I’ve shared here, you can see an example of each—the solid is in circled in blue, the half-tone in red, and the blank yellow. Pressing down the first treadle (shafts 1 and 2), for example, creates solid tones everywhere there are threads on shafts 1 and 2, half-tones where there is a 1 or 2 paired with 3 or 4, and nothing on the opposite block, shafts 3 and 4. Of course, there’s not really nothing—the thread is simply traveling on the back of the cloth, creating a reverse of what’s on the face.
Because overshot sequences are always made up of alternating shafts, plain weave can be woven by tying two treadles to lift or lower shafts 1-3 and 2-4. When I weave two-shuttle weaves like overshot, I generally put my tabby treadles to the right and treadle my pattern picks with my left foot and my tabby with my right. In the draft image I’ve shared above, I’ve omitted the tabby picks to make the overarching pattern clearer and easier to read. Below is a draft image that includes the tabby picks to show the structure of the fabric.
Traditional overshot coverlets used cotton or linen for warp and plain weave wefts, and wool pattern wefts—but there’s no rule saying you have to stick to that! In the two overshot patterns I’ve written for Gist, I used both Mallo and Beam as my pattern wefts.
In the Tidal Towels, a very simple overshot threading creates an undulating wave motif across the project. It’s easy and repetitive to thread, and since the overshot section is relatively short, it’s an easy way to get a feel for the technique.
The Bloom Table Squares are designed to introduce you to a slightly more complex threading—but in a short, easy-to-read motif. When I was a new weaver, one of the most challenging things was reading and keeping track of overshot threading and treadling—but I’ve tried to make it easy to practice through this narrow and quick project.
Overshot works best with a pattern weft that 2-4 times larger than your plain weave ground, but I haven’t always followed that rule, and I encourage you to sample and test your own wefts to see how they look! In the samples I wove for this article, I used 8/2 Un-Mercerized Cotton weaving yarn in Beige for my plain weave, and Duet in Rust, Mallo in Brick, and Beam in Blush for my pattern wefts.
The Bloom Table Squares are an excellent example of what weavers usually mean when they talk about traditional overshot or colonial overshot, but I prefer to use the term "floatwork" when talking about overshot. I learned this from the fantastic weaver and textile historian Deborah Livingston-Lowe of Upper Canada Weaving. Having researched the technique thoroughly for her MA thesis, Deborah found that the term "overshot" originated sometime in the 1930s and that historical records variably called these weaves "single coverlets’ or ‘shotover designs.’ Deborah settled on the term "floatwork" to speak about these textiles since it provides a more accurate description of what’s happening in the cloth, and it’s one that I’ve since adopted.
Long out of print, this fabulous book covers the Burnham’s extensive collection of early settler textiles from across Canada, including basic threading drafts and valuable information about professional weavers, tools, and history.
Amanda Ratajis an artist and weaver living and working in Hamilton, Ontario. She studied at the Ontario College of Art and Design University and has developed her contemporary craft practice through research-based projects, artist residencies, professional exhibitions, and lectures. Subscribe to herstudio newsletteror follow her onInstagramto learn about new weaving patterns, exhibitions, projects, and more.
The purchase of an old fashioned 8-shaft table loom has opened up a whole new world of weaving opportunities for me. I can now discover distorted wefts and warps, double weave, over-shot, shadow weave, blocks and twills..... which were not possible without 4 or more shafts. But all the techniques which I learnt on the rigid heddle loom are applicable on the 8-shaft, but with greater complexity. I will be kept busy for years!

The term overshot recalls coverlets woven on Early American barn frame looms dating back to the 1700’s. It is believed Europeans brought the weave structure to North America and fortunately weaving materials such as wool and cotton were readily available.
Susan invites you to spend two insightful days exploring one of her favorite weave structures. Her workshop creates multiple overshot samples serving as a ‘snapshot’ of overshot treadling sequences. Her goal is for each participant to enjoy learning the process of weaving “per block order” and understanding the benefits of doing so. This teaching method provides the groundwork for wider (on the loom) weaving projects once concepts are mastered.
Utilizing apre-wound8/2 cotton warp and tabby weft along with Borgs Fårö 6/1 for pattern weft, looms will be dressed prior to the workshop with an 8 1/2″ wide warp. Overshot treadlings such as Star and Rose will be explored in addition to Echo, On-Opposites, Petit Point, Lace Weave, Spetsväv, and Honeycomb.
As a bonus, at the end of the workshop, students will receive a 4-Shaft Overshot Pillows Draft which could include up to ten pillow tops. Sampling first, as we will do in the workshop, will enable you to enjoy your new-found knowledge for such a project.

Of the many ways of designing and weaving double weave, my favorite is loom-controlled, patterned double weave. On my 16-shaft treadle loom I can weave up to 4 blocks of plain weave as well as network drafted double weave designs. I have written several posts on this topic and thought it was time for another visit because it really is so much fun!
In this post I share photos, drafts and notes about my recent projects that include a 16-shaft, 4-block double weave table runner and a couple of 8-shaft, 2-block placemats. I also share a photo of a double weave Tencel shawl that I plan on submitting to my guild’s annual exhibit in April.
The first project is a table runner I wove using 5/2 pearl cotton with a sett of 28 e.p.i. that turned out to have a fairly good but not perfectly balanced weave. I happen to like it this way, but a wider sett of 24-26 e.p.i. would have helped make the rectangular areas be more square. After twisting the fringes, I washed it by hand, spin dried in the washer but I could have rolled it in a towel too, laid flat to dry and steam ironed while it was still a bit damp. Here it is:
With the magic of block substitution, my weaving software (Fiberworks PCW) generated the complete drawdown. You can do this manually as well (it’s still magical!) by looking at the profile draft and substituting the following for each block: first block is threaded and treadled 1, 2, 3, 4; second block 5, 6, 7, 8; third block 9, 10 ,11, 12; and fourth block 13, 14, 15, 16. I then experimented with different colors and came up with a color scheme I liked, choosing colors that I had in 5/2 pearl cotton in my stash. Below are different views of the thread-by thread draft. The double weave view shows how each side actually appears, one side appears different than the other side. The close-up interlacement view shows how the warp and weft interlace or cross each other and gives you a hint that there are 2 layers with areas in one layer exchanging places with areas in the other layer:
The second project is a couple of placemats I wove using 20/2 unmercerized cotton, 2 strands used together as one, with a sett of 40 e.p.i. I wove a few inches of basket/plain weave with the 20/2 cotton used singly in between mats to be turned and hand sewn as hems for a neat finish after the wet finishing process which was the same as that for the table runner. Here’s how the placemats turned out:
As before, block substitution generated the complete drawdown, the first block is threaded and treadled 1, 2, 3, 4 and the second block 5, 6, 7, 8. Since this pattern looks so busy I decided to use only 2 colors to make it appear simpler and to highlight the balance between the dark and light areas. Below is the thread-by-thread draft in double weave view of one side. I didn’t show the other side because it looks the same except that the dark and light areas are interchanged. The close-up of one section of the draft in interlacement view also shows the basket/plain weave I mentioned earlier that I used to weave for the hems on the placemats. As you can see in the tie-up you need two extra treadles to do this.
OK, I asked myself, what now? How about challenging myself to weave something interesting in double weave to enter in my guild’s show in March? After experimenting with many drafts, I came up with a 16-shaft networked draft for double weave that looks like mosaic when viewed from a distance and also looks interesting when viewed close-up. I liked the design and wove this Tencel shawl:
UPDATE March 31, 2014: This shawl received “The Kathryn Wellman Memorial Award” for imaginative weaving incorporating design, color and texture at the 2014 Philadelphia Guild of Handweavers “Celebration of Fibers” exhibit.

I find the blurred edges of the patterns in networked double weave subtle and interesting. I also like the clear, sharp edges of the patterns in traditional patterned double weave. In this post I’m delighted to share photos, drafts, and notes of a plain weave, networked double weave pillow that I recently designed and wove as well as photos of other double weave projects I worked on this year.
The pillow project started out with pattern lines that I designed and then networked (initial 4) using Fiberworks weaving software. I then played around with the resulting networked threading and treadling drafts, tried different twill tie-ups in case I decided to weave my yardage as a networked twill, and then tried them with double weave tie-ups in case I decided to weave it as a networked double weave. Eventually I had to make a decision and the winner was a networked double weave draft that I used to weave this fabric from which I made the pillow:
A few years ago I learned how to design double weave tie-ups using Photoshop Elements, thanks to Alice Schlein’s amazing book, The Liftplan Connection (Designing for Dobby Looms with Photoshop and Photoshop Elements). I weave on a 16-shaft, 40 inch wide, Macomber treadle loom, and found things in Alice’s book that I can learn and apply even to my treadle loom. It’s also so much fun! Here’s the double weave tie-up I used for the pillow that I designed with Photoshop Elements:
A more challenging networked double weave project that I designed and wove is this wall hanging that I plan to submit to my weavers guild annual exhibit next year:
Last but not least, I wove a traditional double weave runner as a gift for friends of mine and of my husband’s who are antique dealers of early American folk art. It’s a 12-shaft, 3-block double weave. I generated the draft with block substitution from profile draft No. 169 that I found in Mary Meigs Atwater’s classic book, The Shuttle-Craft Book of American Hand-Weaving, first published in 1928. Below are photos of this runner, notice on the close-up the clear and sharp edges of the pattern as compared to the more subtle, unclear edges in the pillow and wall hanging:
This entry was posted on September 4, 2017 at 6:18 pm and is filed under Double Weave, Networked Drafts. You can subscribe via RSS 2.0 feed to this post"s comments.

Many years ago, I finally got to try weaving. I took the Beginning to Weave workshop through the Ottawa guild. At that time, 1989, the OVWSG did not have a studio space to house what guild equipment we had acquired. (The Guild had an old second-hand 100 inch loom and 6 or 7 table looms. There may have been a floor loom too but I was distracted by the 100 inches of loom, so do not remember). All the looms lived in one of our guild members’ very big basements. On weekends, she either taught weaving workshops or hosted weavers working on the 100 inch loom. It sounded like a busy basement! I remember 4 weekends of driving to a little town just east of Ottawa. I took the table loom home each week to do homework. I still remember the sound of the mettle heddles rattling as I drove down the highway, back and forth to the classes. Then I think there were two more weekends of Intermediate weaving and Dona sent me off and I was weaving!
It all starts with yarn, wind it carefully, attach it to the back beam, wind on, thread the heddles, slay the reed, tie on to the front beam, check the tension and then start to weave. It sounds like a lot of work but it is all worth it as you start to pass the shuttle through the shed and the cloth begins to appear. Weaving was like Magic! From a pile of string to POOF, actual cloth!!!
During the workshop, I found pickup seemed strangely familiar as my brain watched my fingers happily lifting and twisting threads for the various lace and decorative weave patterns. The other thing that my brain went “ooh this is cool!” was Overshot. It is a weave structure that requires a ground and a pattern thread, (two shuttles). One is fine like the warp and the pattern thread is thicker and usually wool. I was still reacting to wool so I used cotton for both. My original goal was to draft and weave a Viking textile for myself but I put that aside for a moment, I will get back to that later.
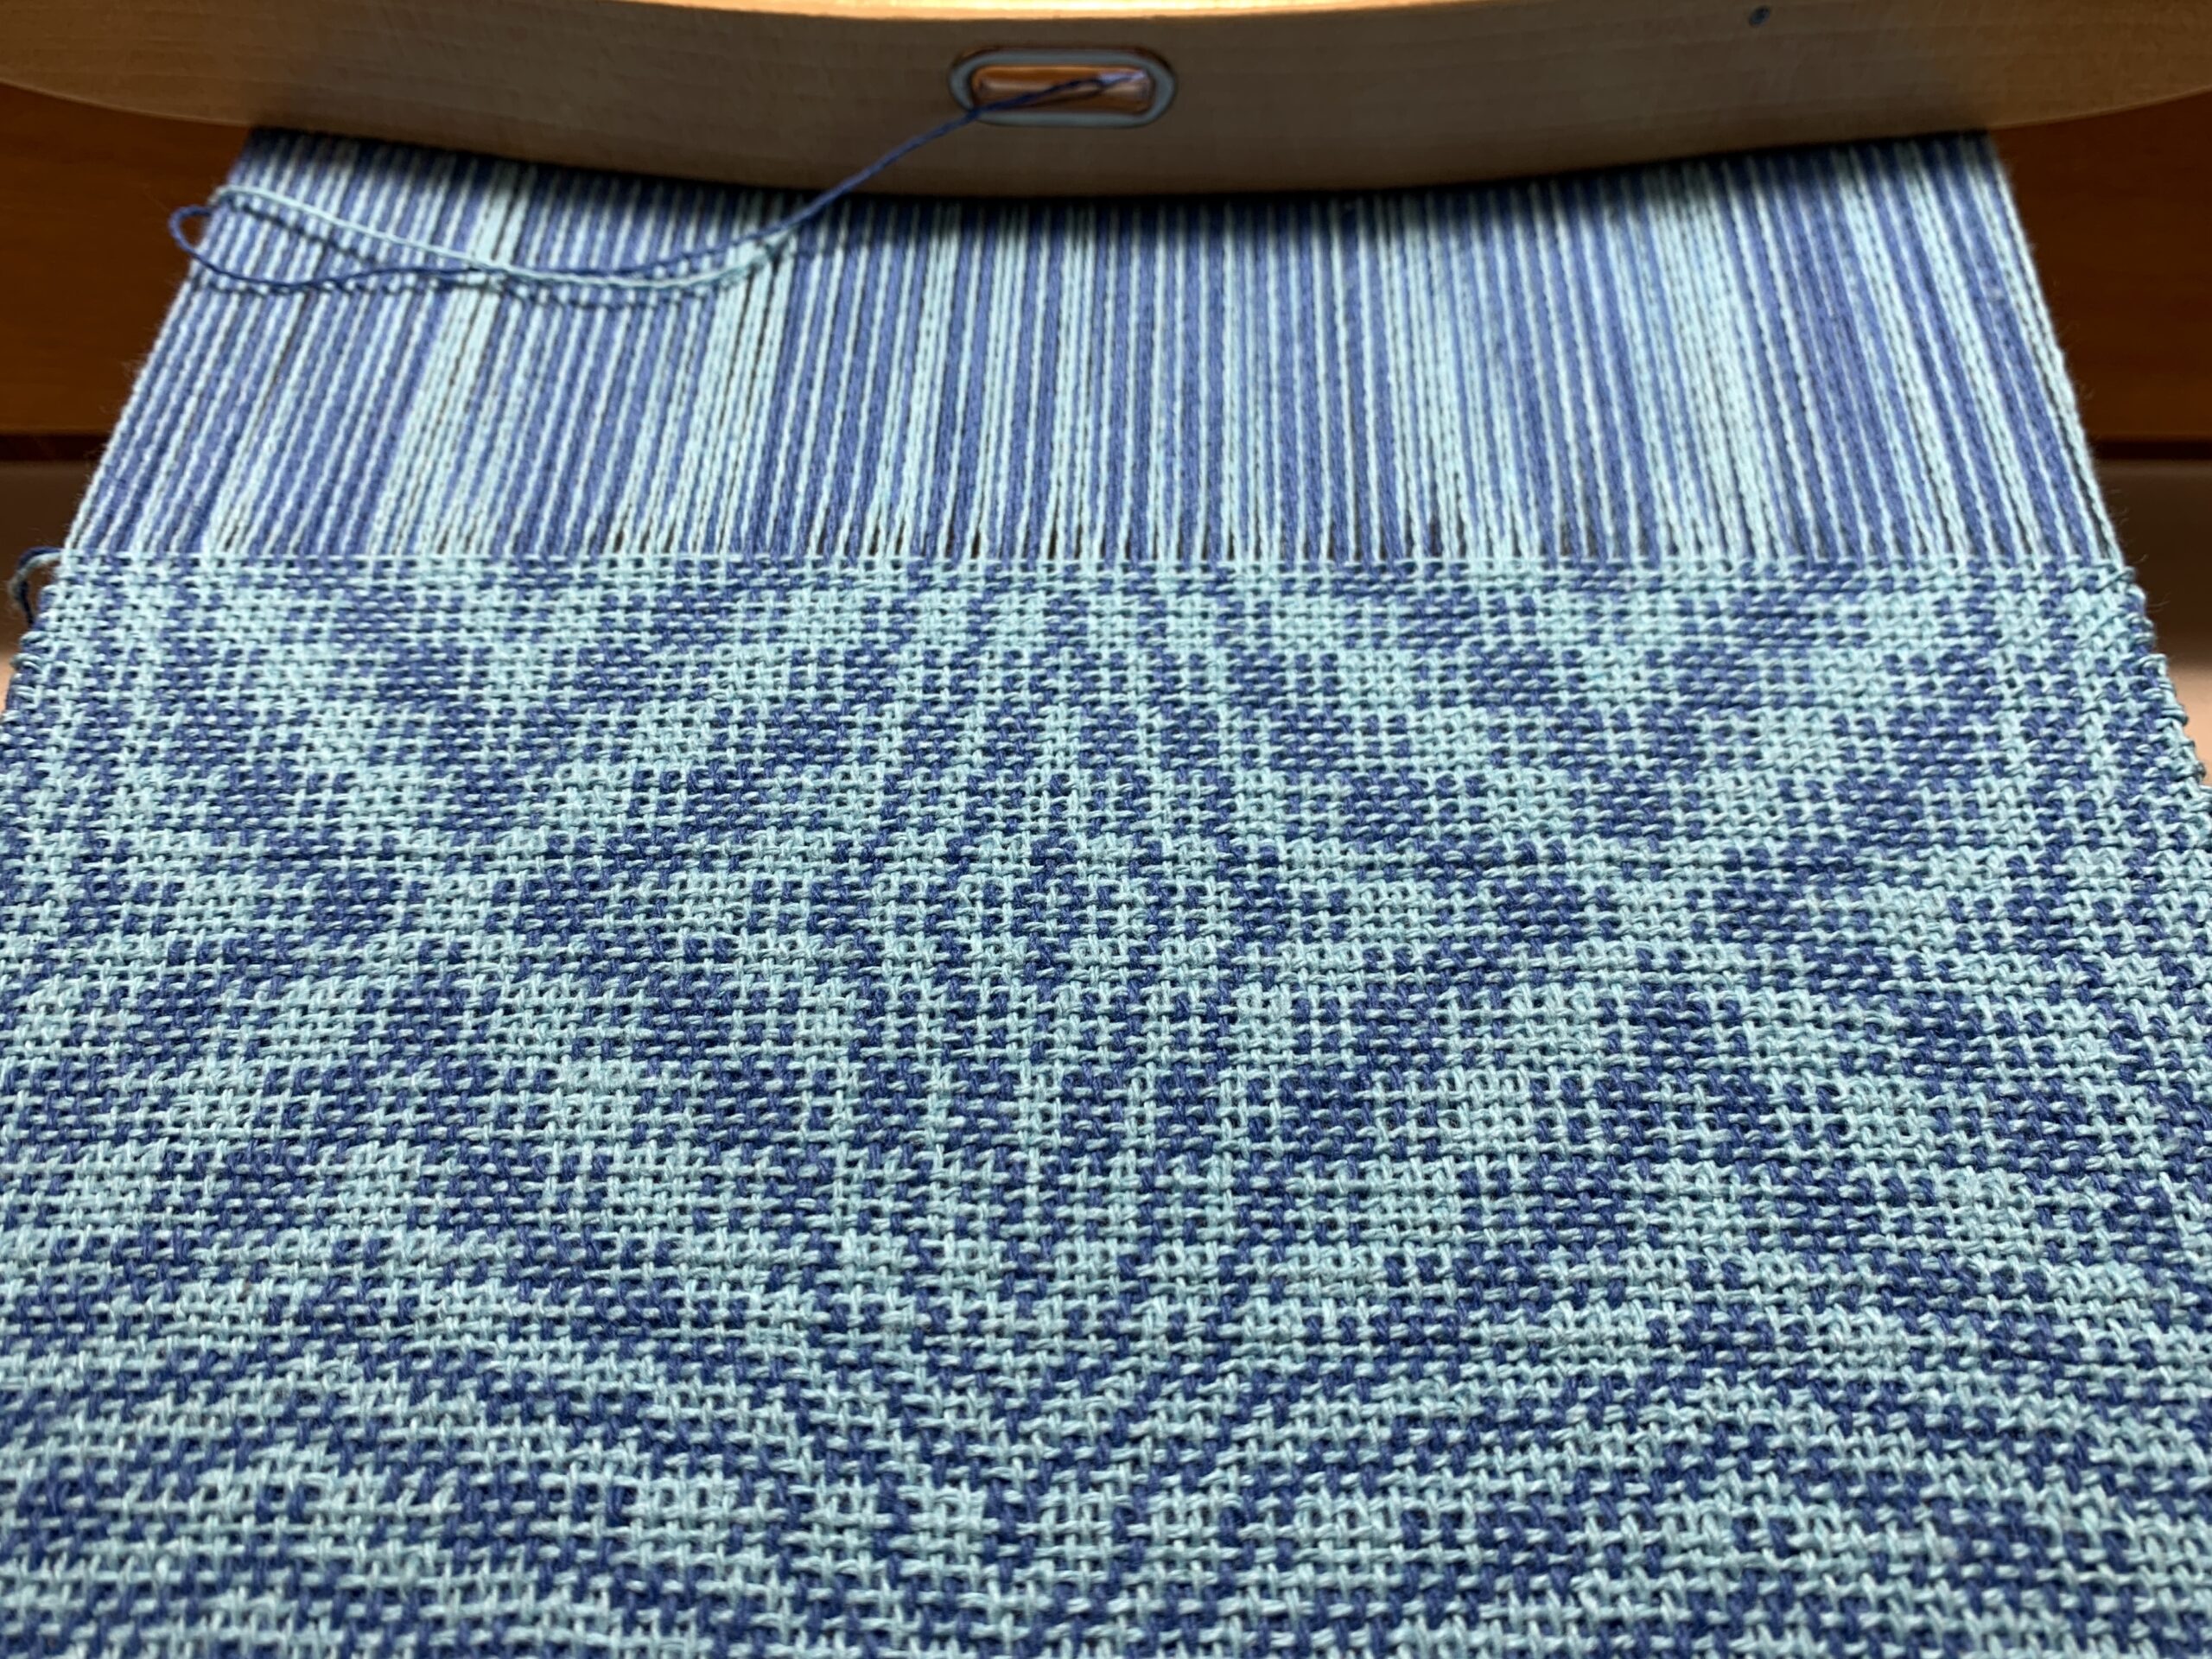
The first thing I wove after my instruction was a present for my Mom. she had requested fabric to make a vest. I looked through A Handweaver’s Pattern Bookby Marguerite Porter Davison and found an overshot pattern that I thought we both would like. I wove it in two shades of blue (Mom’s favourite colour), at a looser thread count than usual. (Originally the overshot weave structure was used to make coverlets, so were tightly woven and a bit stiff, while I liked the pattern I wanted the fabric to be much more drapey.) Even worse, I did not want it to be as hard-edged in the pattern as it was originally intended so I tried a slub cotton as a test and loved it.
So, for any sane weaver, it was all wrong! Wrong set, wrong fibre, wrong colour choices! It was fabulous and perfect. I kept the sample as a basket cover and at either the end of 1989 or the beginning of 1990, I gave Mom the yardage for her vest. “Oh this is too nice to cut” Mom Said, so it lived on the back of her favourite reading chair as a headrest until her most recent move (2015?) it never did get to be a vest but it has been well enjoyed.
In the Exhibition The Inkle band, hanging beside the overshot, I wove much more recently. I used an Inkle loom and a supplemental warp thread. This means weaving with an extra separate thread that was not part of the main warp on the loom. I used a yarn with a fuzzy caterpillar-like slub.
You may be able to see how I wove the weird slubby supplemental warp. The yarn is weighted and left hanging over the back peg of the Inkle loom. It comes over the top peg (usually labelled B in diagrams) and floats above the weaving. In the areas where the Caterpillar (Slub) is not present I catch the yarn with the shuttle and weave it into the band. In the area the caterpillar appears I would leave the yarn above the warp and then start weaving it in again as I reached the end of the caterpillar. I hope that explanation doesn’t sound like mud and makes a bit of sense. Using a supplemental warp on an Inkle loom is not quite normal but it is a lot of fun.
I was going to tell you about my original goal in learning to weave, the mysterious Fragment #10 from a Viking excavation from around the year 1000, but I have likely confused you with weaving enough for one day. So I will save that for another chat. (don’t forget the Inkle loom I would like to tell you a bit more about that in another post too. I promise I will get back to felting in the not-too-distant future)

After returning from a fabulous time at the New England Weavers Seminar in July, I found myself rewriting the beginning of this article. I was so lucky to spend two days in a round-robin style class taught by Marjie Thompson entitled 18th & 19th Century High Fashion for the Middle Class. To say that Marjie knows an extraordinary amount about historic textiles seems to be an understatement. Oh, to have an hour swimming about in her brain!
One interesting piece of information I learned is that overshot is a fairly modern term. Originally this type of weaving would have been referred to as floats or floatwork. It seems that many people are returning to this original terminology, though the weaving world has thus far shown little interest in making the change back. Personally, I like it. Floatwork sounds a bit less frenetic than overshot – as though I’m peacefully hitting my mark rather than missing it in a wild fashion.
Until recently, my floatwork experience was limited to one project. This was created using Cascade 220 back in April 2008. The pattern is Leaves on p. 118 of The Handweaver’s Pattern Directory by Anne Dixon. I was criticized for having floats that were too long and would easily snag, but I loved my fabric. I turned it into a little tote that fit perfectly into my bike basket and never experienced a snag. Thankfully I took a photo back then, as the bag is currently in storage and missing the bike paths of Boulder.
Floatwork, formerly known as overshot which was originally known as floatwork, is a block design traditionally woven on four shafts where a heavier pattern yarn floats above a plain weave ground cloth and creates a raised pattern. Your plain weave background cloth is woven using a finer yarn in your warp and in every other weft pick (these weft picks being the ‘use tabby’ part of your pattern.)
This finer yarn is hidden in places by the thicker yarn floats, blended in places with the thicker yarn (as plain weave) creating areas that are shaded (referred to as halftone), and woven across itself to create delicate areas of plain weave. Most of us think of antique coverlets when we hear ‘overshot.’
Back to business. Tabby is a plain weave pick that anchors your pattern pick in place. When weaving floatwork, every other weft pick is tabby. Your pattern pick needs the tabby pick to stabilize the cloth and keep the pattern picks from becoming distorted. This also means that you are working with two shuttles, one holding your tabby yarn and one holding your pattern yarn. This two-shuttle thing can be a bit awward at first, but you’ll get the hang of it with a little practice.
Here is the thing about floatwork that really helped it to make sense for me. It is basically a twill weave. As Mary Black puts it, “An examination of an overshot draft shows it to be made up of a repetitive sequence of the 1 and 2, 2 and 3, 3 and 4, and 4 and 1 twill blocks”.
Choosing yarns to weave floatwork can be challenging. Generally speaking you want your pattern yarn to be about twice the diameter, or grist, of your tabby/warp yarn. Your tabby yarn and your warp yarn are generally the same yarn. I say generally because I can see so many non-traditional ways to weave floatwork that involve breaking the rules. Imagine, for example, taking a small part of a given pattern and blowing it up to a massive scale to do a wall hanging or using three different yarns to create a completely different visual experience!
When choosing your yarns, you can always search online to see what other folks have used successfully. Ravelry.com, Weavolution.com and Weavezine.com are all good places to start. You could also double your tabby yarn to create a pattern yarn. I did this with my bike basket, using a different colorway to create the contrast. And of course there is our friend the sample. Pick a warp and experiment with your weft.
You can find it listed in the chapter or sub-chapter entitled ‘Notes on the Overshot Drafts.’ As someone who generally cheers on the underdog, I was drawn to this pattern without a name.
No. 18 Name Unknown is woven tromp as writ, as I mentioned earlier. Weave it in the order it’s threaded, alternating each pattern pick with a tabby pick. Your pattern shuttle will hold the thicker yarn and your tabby shuttle will hold the finer yarn that was also used in your warp.
Here is a list of books and magazines that might be of interest if you’d like to learn more about floatwork/overshot. Many of these references include patterns in addition to thorough instructions.
If you have a particular interest in old coverlets, Eliza Calvert Hall’s A Book of Hand-Woven Coverlets and The Coverlet Book by Helene Bress are both interesting resources, the later being particularly thorough. I can only imagine the time and research that went into this pair of tomes. And if you are simply looking for patterns, The Handweaver’s Pattern Book by Marguerite Porter Davison and The Handweaver’s Pattern Directory by Anne Dixon are just for you.

Advanced weavers with 8-, 12- or 16-harness looms will find a lot of useful information here. The purpose of this book is to present a number of weaves from which a wide range of designing is possible. Charts have been developed to assist in tying up, pegging or feeding the information to the computer so that precious time may be saved to apply to the designing aspect. Concepts are given in a terse but clear and to the point format eliminating the need for in-depth study. Once you understand the concepts you"ll understand many different multiple harness weave systems. After a short section explaining the Charts and Terminology used in the book, the author provides chapters that cover: Beiderwand, Crackle, Damask, Diaper Twill, Dimai, Double Two-Tie, Double Weave, Lace Weaves, Overshot, The Profile Draft, Summer & Winter, Tie-ups and Twills. There is a large bibliography for those who wish to do further study and a complete index at the end.


 8613371530291