
overshot weaving tutorial in stock

Overshot weaving is similar to weaving twill except that between each row of pattern, there is a row of plain weave (aka tabby). These rows of plain weave give your weaving structure, and allow your pattern wefts to float over lots of warp strings, creating larger patterns without compromising the structure of your piece.

Overshot weaving is similar to weaving twill except that between each row of pattern, there is a row of plain weave (aka tabby). These rows of plain weave give your weaving stru...

Crazyshot - creative overshot weaving - introduces anyone who uses a rigid heddle loom to a whole world of creative weaving. Using just one heddle and one pick-up stick, you’ll explore color, design, and texture, taking your weaving to the next level.
Complete step-by-step instructions are included for weaving all 14 of the designs in this book. Also provided are how-tos for the single heddle overshot technique, reading charts for the rigid heddle loom, and finishing techniques, along with lots of tips and tricks for successful and
Complex patterning is easier than it looks with this simple charted technique. All you need are basic rigid heddle warping and weaving skills to start your next weaving adventure!

Crazyshot Companion contains over 100 charted designs, along with complete instructions for incorporating them into your Crazyshot projects. You’ll also find ways to combine or modify charts, to add color, or to translate traditional weaving drafts for use with the Crazyshot technique.

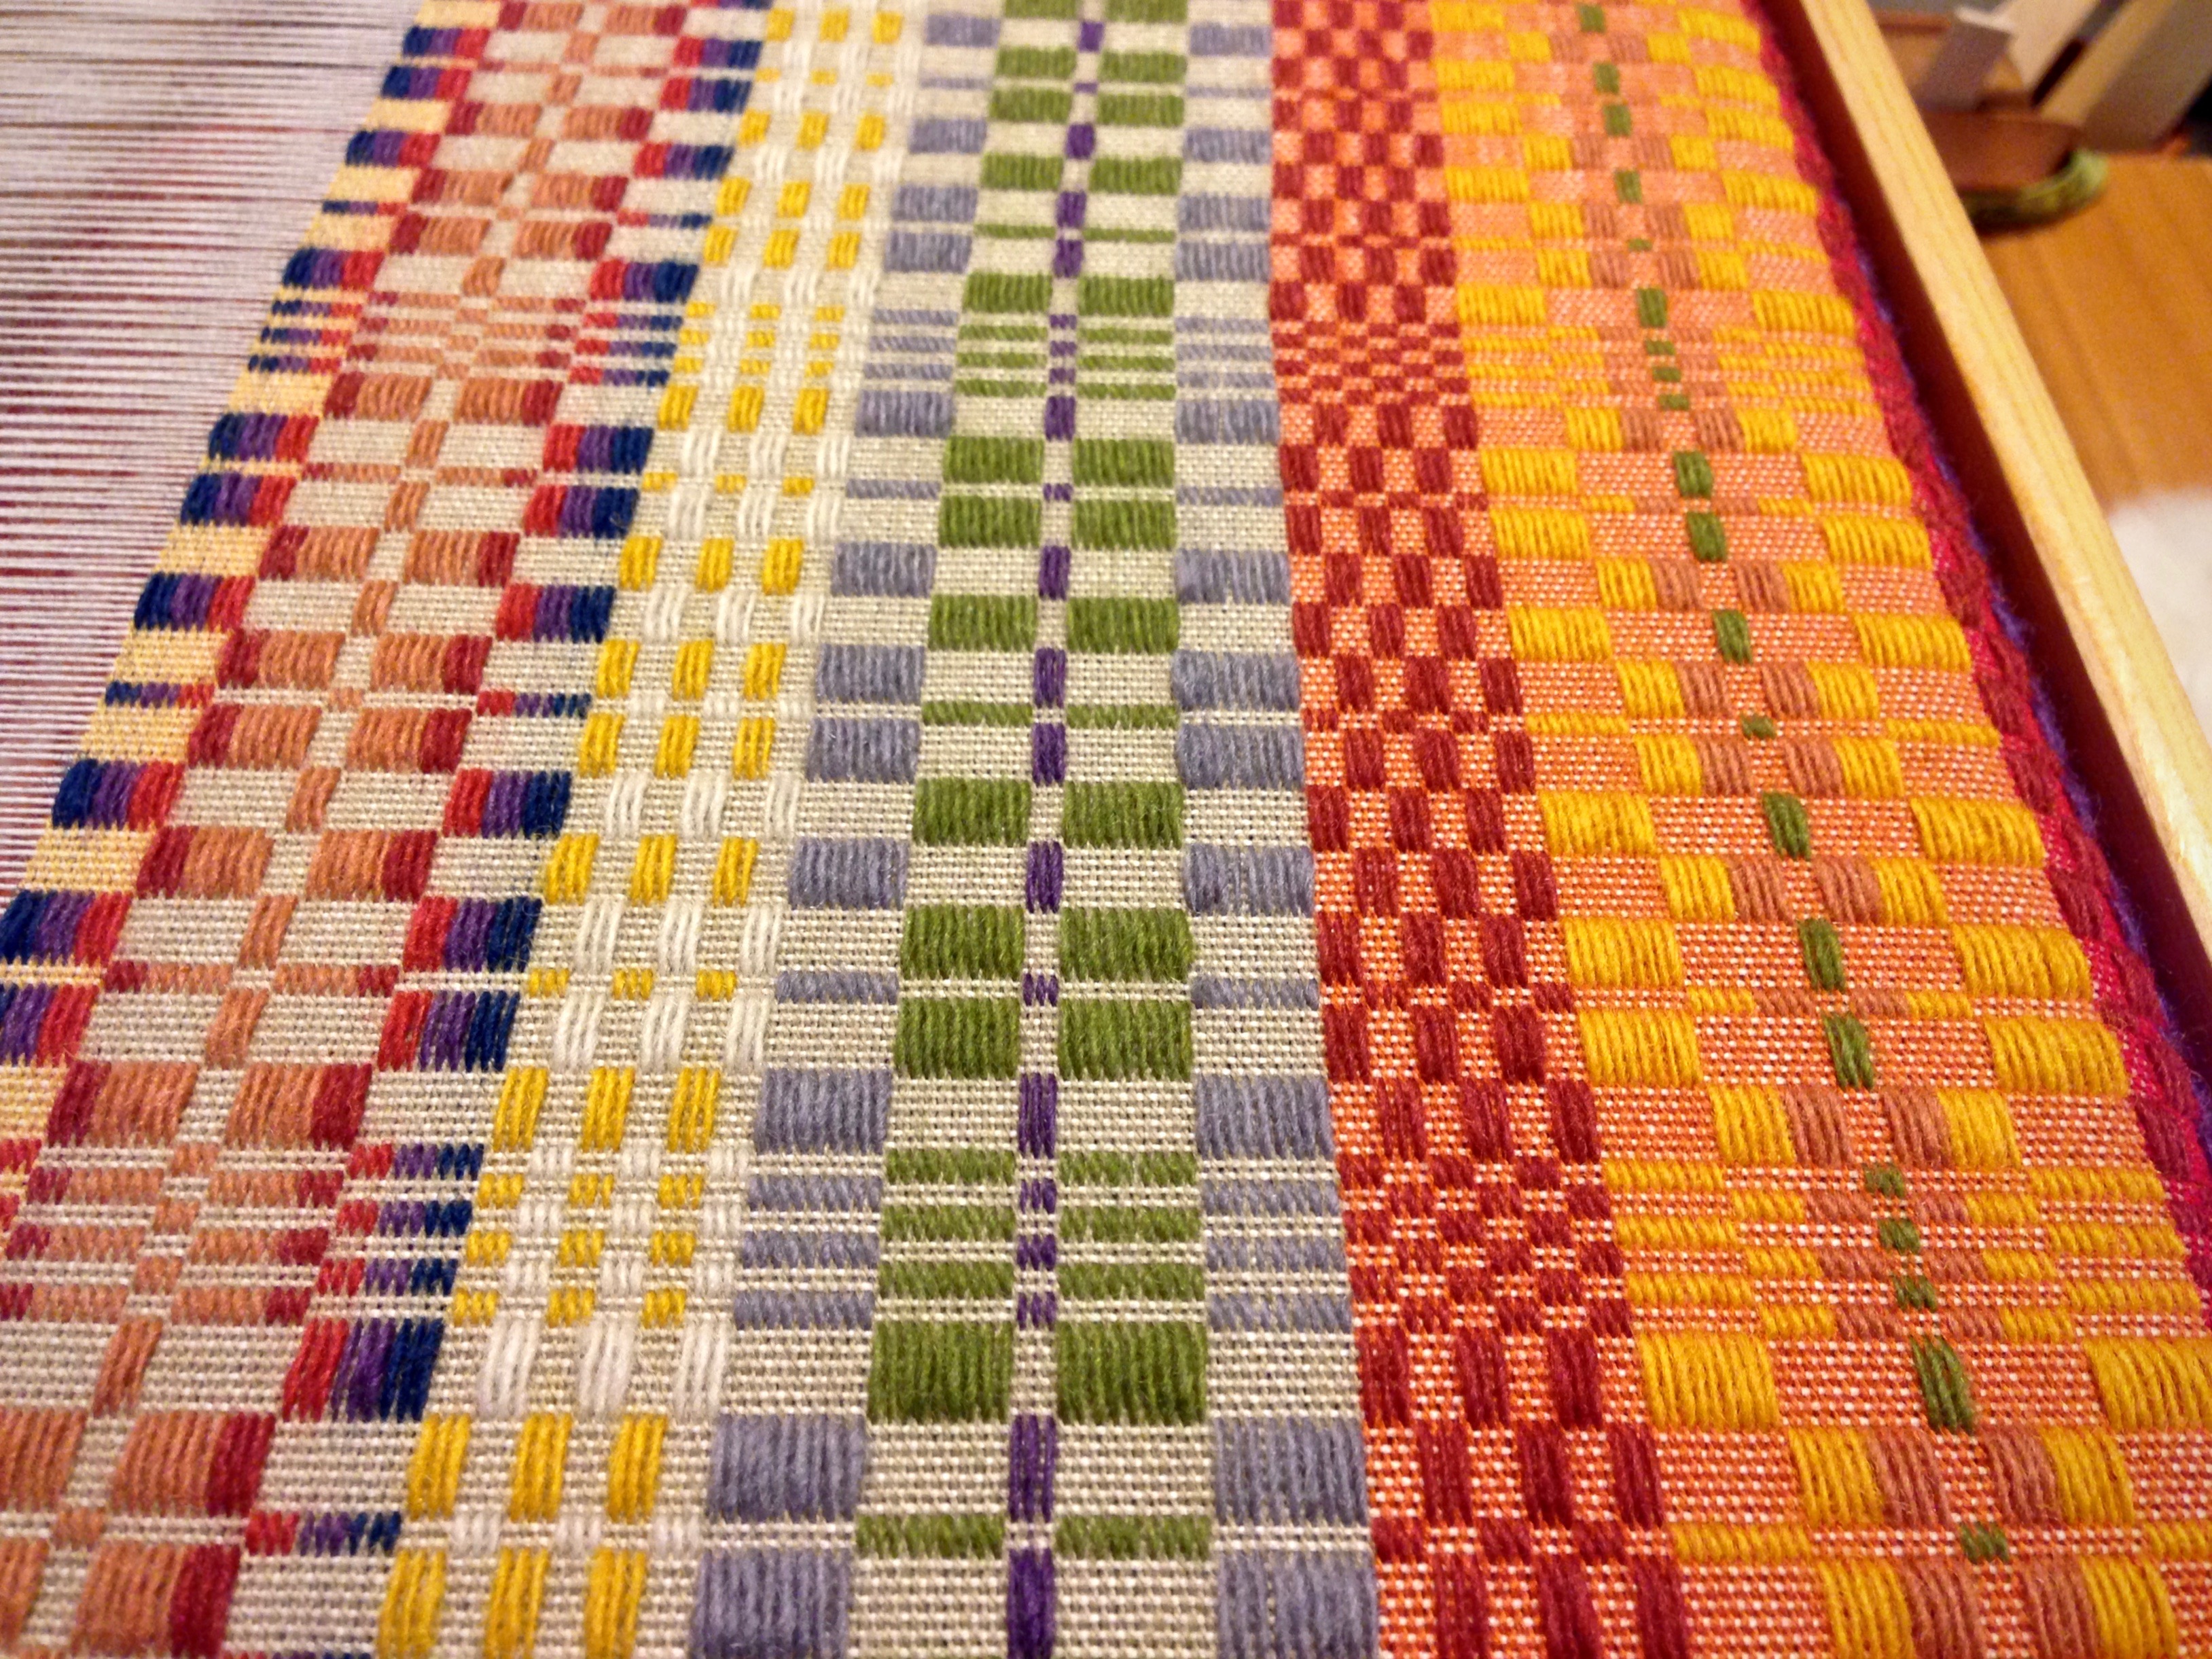
Also related to rigid heddle weaving, the workshop at Harrisville Designs went well. My goal as workshop leader was to help new weavers gain the background and confidence needed to warp and to weave on the rigid heddle loom on their own, at home, and be excited about it! Here are just a couple of photos of the lovely creations woven by class participants:
Using more than one color in the warp (I’ve used 3 here) is an interesting exercise. To my eye, the texture of the weaving structure really seems to shine. Of course, after the cloth is off of the loom and finished, we might be looking at an entirely different kettle of fish. But that’s what makes this whole gig so fun, right?

Over three years ago, when my David Louet floor loom was still somewhat new to me, I wrotethis post on overshot. If you read it, you will discover that my initial relationship with overshot was not a very positive one.
Back then, I was a little harder on myself as a learning weaver. By now, I’ve realised that weaving, just like life, is a journey that has a beginning but no end. Back then, I thought that my ultimate goal was to be a “master weaver”.
The happy ending to the initial overshot sob story is that I can weave overshot now. Quite well, in fact! And I also teach it. And I happen to love it, very, very much. Don’t you love a happy ending?
I don’t think there was any particular moment where I thought to myself “I can weave overshot now!” I didn’t even weave any overshot for quite some time after that initial attempt. But slowly it tempted me back, and we started over. It was just a matter of sticking with it, employing some specific techniques and practice, practice, practice until it feels like an old friend.
My love of overshot has only increased with my more recent discovery of American Coverlets. I loved the look of the coverlets and the history behind them before I realised that so many of them were woven in the wonderfully humble 4 shaft overshot.
I’ve put a lot of research time into coverlets this year and have made it a big weaving goal of mine to weave my first coverlet, which is quite an undertaking, but I relish the thought.
Now that I have quite a lot of experience weaving overshot, I want to share my best overshot tips with you in hope that you too will fall in love with this wonderful weave structure.
To weave overshot you need a warp yarn, a tabby yarn and a pattern weft yarn. Using the same yarn for warp and tabby works perfectly. For the pattern weft, I like to use a yarn that is twice the size of the tabby/warp yarn. I have experimented with using doubled strands of tabby/warp yarn in a contrasting colour, but it just doesn’t look as good. A thicker pattern yarn is the way to go.
What will the size of your item be? A miniature overshot pattern may get lost in a blanket, but may be perfect for a scarf. As a general rule, a good way to estimate the size of one repeat of your pattern just by looking at the draft is to see how many repeats are in one threading repeat. Also consider the thickness of your yarns and the sett you intend to weave.
Just to give you an idea, my current project is woven at 20 ends per inch with 8/2 cotton for warp and tabby and fingering weight wool for the pattern weft. The weaving draft has 50 threads in one threading repeat. My design repeats on the loom are around 2.5″ wide and just under 5″ long, which is a great size for the 30″ x 99″ throw I’m weaving.
This is a non negotiable for overshot if you want neat edges and less headaches! You get used to using floating selvedges very quickly, so don’t stress if you have no experience with them.
There are 6 treadles needed for overshot, even though you weave on 4 shafts. The two extra treadles are for the tabby weave. I always set up my pattern treadles in the centre of the loom – two on the left and two on the right. Then I set up a “left” tabby and a “right” tabby treadle. To do this on my 8 shaft loom I leave a gap between the pattern treadles and the tabby treadles so that my feet can “see” and differentiate between a pattern and tabby treadle.
I like to advance little and often. You will find your own preference or “sweet spot” for weaving, but I find that with overshot I advance a lot more frequently at a much smaller amount than I do usually.
An example of this is that I wove an overshot sampler right before Is started my main project (the throw). It was a narrow warp (around 8″) and a different overshot threading and treadling than I’m using for the project.
I personally do not use a temple. Some weavers will say they won’t weave without one. I’ve tried using a temple on many of my projects, particularly if I’m getting broken edge warp threads (signs of tension problems and too much draw in). But I will avoid using one wherever I can get away with it, and I don’t use one for weaving overshot.
I find that if I’m careful with weft tension and warping evenly, I do not get excessive draw in. It is something I’m constantly aware of while weaving and remind myself of tip 4 so that my weft picks are not pulling in at the edges.

Weave structures often have specific threading and treadling patterns that are unique to that particular weave structure and not shared with others. This book takes you out of the traditional method of weaving overshot patterns by using different treadling techniques. This will include weaving overshot patterns such as Summer/Winter, Italian manner, starburst, crackle, and petit point just to name a few. The basic image is maintained in each example but the design takes on a whole new look!
Each chapter walks you through the setup for each method and includes projects with complete drafts and instructions so it’s easy to start weaving and watch the magic happen! Try the patterns for scarves, table runners, shawls, pillows, and even some upholstered pieces. Once you"ve tried a few projects, you"ll be able to apply what you"ve learned to any piece you desire!
Author of the popular Overshot Simply and Shadow Weave Simply now shares her explorations of overshot weaving structures. Her teaching style is to break down the weave structure into its basic parts so that it is easy to understand, and then teach you how the parts work together to create the weave structure so that you can use any pattern or create your own.
Weave structures often have specific threading and treadling patterns that are unique to that particular weave structure and not shared with others. This book takes you out of the traditional method of weaving overshot patterns by using different treadling techniques. This will include weaving overshot patterns as Summer/Winter, Italian manner, starburst, crackle, and petit point just to name a few. The basic image is maintained in each example but the design takes on a whole new look!
Each chapter walks you through the setup for each method and includes projects with complete drafts and instructions so it’s easy to start weaving and watch the magic happen! Try the patterns for scarves, table runners, shawls, pillows and even some upholstered pieces. Once you"ve tried a few projects, you"ll be able to apply what you"ve learned to any piece you desire!

Overshot is an intricate weave structure in which pattern weft “shoots over” a grounded plain weave cloth to create a huge range of patterns. From undulating waves to dashing circles, the weaver can create complex patterns on only 4 shafts. This weave structure has been used all over the world, but developed most widely in Appalachian coverlets and table linens during early colonial America. In this class, students will learn more about this beloved weave structure and weave their own overshot table runners, placemats, or samples using cotton and wool on 4 shaft floor looms. Explore blending colors, manipulating patterns, and practicing weaving this two shuttle weave structure. No weaving experience is necessary, but some experience is helpful.

Weaving with supplemental warps opens up a whole new world of design possibilities, allowing you to overcome some of the limitations of two-shuttle weaves. Deb Essen is a master of weaving supplemental warps, without the need for a second back beam. Here she is to share some more information about the technique ~Andrea
Two-shuttle weaves create wonderful patterns. Among my favorites are overshot, monk’s belt, summer and winter, and shadow weave. But there are limitations!
Patterns typically run from selvedge to selvedge. And even though you can break up the pattern lengthwise by weaving stripes of plain weave, you may wind up with “humped” pattern sections that are wider than the plainweave sections, depending on the size and density of the pattern weft.
The other bonus is that a traditional two-shuttle pattern weave structure turns into a one-shuttle weave. You weave with ground weft only. No need to worry about juggling two shuttles, wrapping the ground and pattern wefts at the selvedges, or using floating selvedges. Warping may take a little longer with the supplemental warps, but weaving is much, much faster.
This runner uses a section of pattern from an overshot name draft I created called “Tis the Season.” The name draft is a traditional overshot weaving pattern. I then turned the draft and separated the pattern sections with plain weave.
The holidays always call for a little “bling,” and I’ve been playing with using Kreinik metallic threads in weaving. Kreinik threads are well known in the needlepoint/stitching industry, but they are not quite so well known in weaving. I’m delighted to say they are weaving-friendly, and using the metallic thread as a supplementary pattern warp gave me the bling I wanted, saved me money, and kept the soft drape of the Mountain Colors Bearfoot merino-blend knitting yarn.


 8613371530291