
diy rotary table for milling machine quotation

New: A brand-new, unused, unopened, undamaged item in its original packaging (where packaging is applicable). Packaging should be the same as what is found in a retail store, unless the item was packaged by the manufacturer in non-retail packaging, such as an unprinted box or plastic bag. See the seller"s listing for full details.See all condition definitionsopens in a new window or tab

I just purchased a Sherline RT (lists at 270$U) & can vouch for it. Much better than some of the offshore stuff (although quality does vary by brand/origin, so I"m generalizing here).
I already have a larger RT. But many jobs are small setups that I"m hoping to be easier & faster setup with 4". I"m in the process of making a baseplate so the assembly will just drop in my 6" mill vise, saving removing the vise & setting up larger RT (although you can mount it conventionally too). Do a search on the forum & you will see some impressive projects using this RT.
- hold-downs are 10-32 type cap screws & matching T-nuts kind of unique to Sherline. You could make them yourself, but they are reasonable cost. This lends itself to smallish setups & also the slots come closer to center than common. I"m going to also make some gridded pre-threaded tooling plates to clamp on the table so I can orient odd-ball parts easier yet.
For a corner fillet weld such as those, it may help if you grind off half of each corner on the slotted plates giving a 45 deg V. This will help to ensure the weld gets good penetration and strength at the same time as allowing you to retain the original edges for alignment.

Years ago, before I learned CNC, I owned a Phase II 8″ horizontal/vertical rotary table that I purchased from Kap Pullen’s Getmachinetools.com store. He has them at a good price, BTW, and he’s a darned nice fellow to deal with as well as being a frequent HSM contributor. Anyway, its a nice little table, but I hadn’t done a whole lot with it for quite a while after purchasing it. As is so often the case, one day, a project landed on my doorstep and I was glad to have it.
Before I could get started, however, I had to make some accessories for it. Basically, I needed some T-Nuts to fit the table, as well as a little fixture that makes it easy to hold a plate up off the table through a hole in the center so you can machine it. The latter, what I call a “plate machining fixture”, was inspired by something similar I saw the Widgitmaster of CNCZone fame using to make Dremel clamps for his mini-router:
I turned the round spigot using the 4-jaw on the lathe. I’m making the fixture out of MIC-6 aluminum plate, which is pre-ground very flat on the sides. This is a 5 inch by 3 inch piece. I’ve clamped it to the rotab using my T-nuts and the regular mill clamps and step blocks. It is sitting on parallels to make sure I don’t cut into the table. You can also see how I’ve clamped the rotary table to the mill table using a big cast iron V-block I have. You can never have to many blocks with precision faces hanging around!
Having a 4-jaw chuck on your rotary table is mighty handy! Because it’s a 4-jaw, you can dial in the workpiece by adjusting the jaws until it is perfectly concentric with the table’s axis of rotation. The best way is to make an adapter plate that attaches to the back of the chuck in the same way that your lathe does so you can exchange lathe tooling with the rotab. Here is an example:
For the example, the chuck is threaded onto the adaptor plate, and then the holes in the adapter plate’s flange are used to bolt down to T-nuts on the table.
In my case, I bought a 4-jaw from Shars brand new, and simply drilled some through-holes in the chuck to mount to the table directly without an adapter plate:
First, you want to make sure your part is properly centered on the table. To do that, I clamp the table down on the mill table (no special place is needed), put my Indicol indicator holder on the mill spindle, and find some round feature on the part to indicate on. For example, on the plate milling fixture above, indicate on the round boss, or on the center hole. Spin the table and bump the part in until spinning the table doesn’t move the indicator.
Second, locate the center of rotation directly under the mill spindle. You can simply use the X and Y table handwheels to do this. Use that Indicol to indicate off of a circular feature you want centered under the spindle. Turn the indicol around on the spindle and adjust the handwheels until the indicator stays put relative to the spindle position. A Blake Coaxial indicator will make this last even simpler.
When you’re rounding partially by cranking a part around on the rotary table, it’s really easy to go a little too far and screw things up. The answer is to drill the end points to make the exact stopping point on the rotab a lot less sensitive:
Centering with a Blake indicator is really fast, but what if you don’t have a Blake, or worse, what if your mill is too small to accomodate one? Here is a nice solution I found on a German site. This fellow has made an ER collect fixture for his rotary table, and has taken care that when installed on the table, the axis of the collet is aligned with the table’s axis. He can then place a dowel or other straight pin in the collet and line up until it will go into a similarly sized collet on the spindle. Nice trick! It’s similar to how Widgitmaster showed me to align a drill chuck on a QCTP to the lathe centerline with a dowel pin held in the lathe chuck.

Alibaba.com offers 2894 milling rotary tables products. About 44% % of these are wood routers, 12%% are other machine tools accessories, and 5%% are table.
A wide variety of milling rotary tables options are available to you, such as manufacturing plant, machinery repair shops and energy & mining.You can also choose from 1 year, 6 months and 1.5 years milling rotary tables,As well as from not available, {2}, and {3}. and whether milling rotary tables is bearing, gear, or motor.

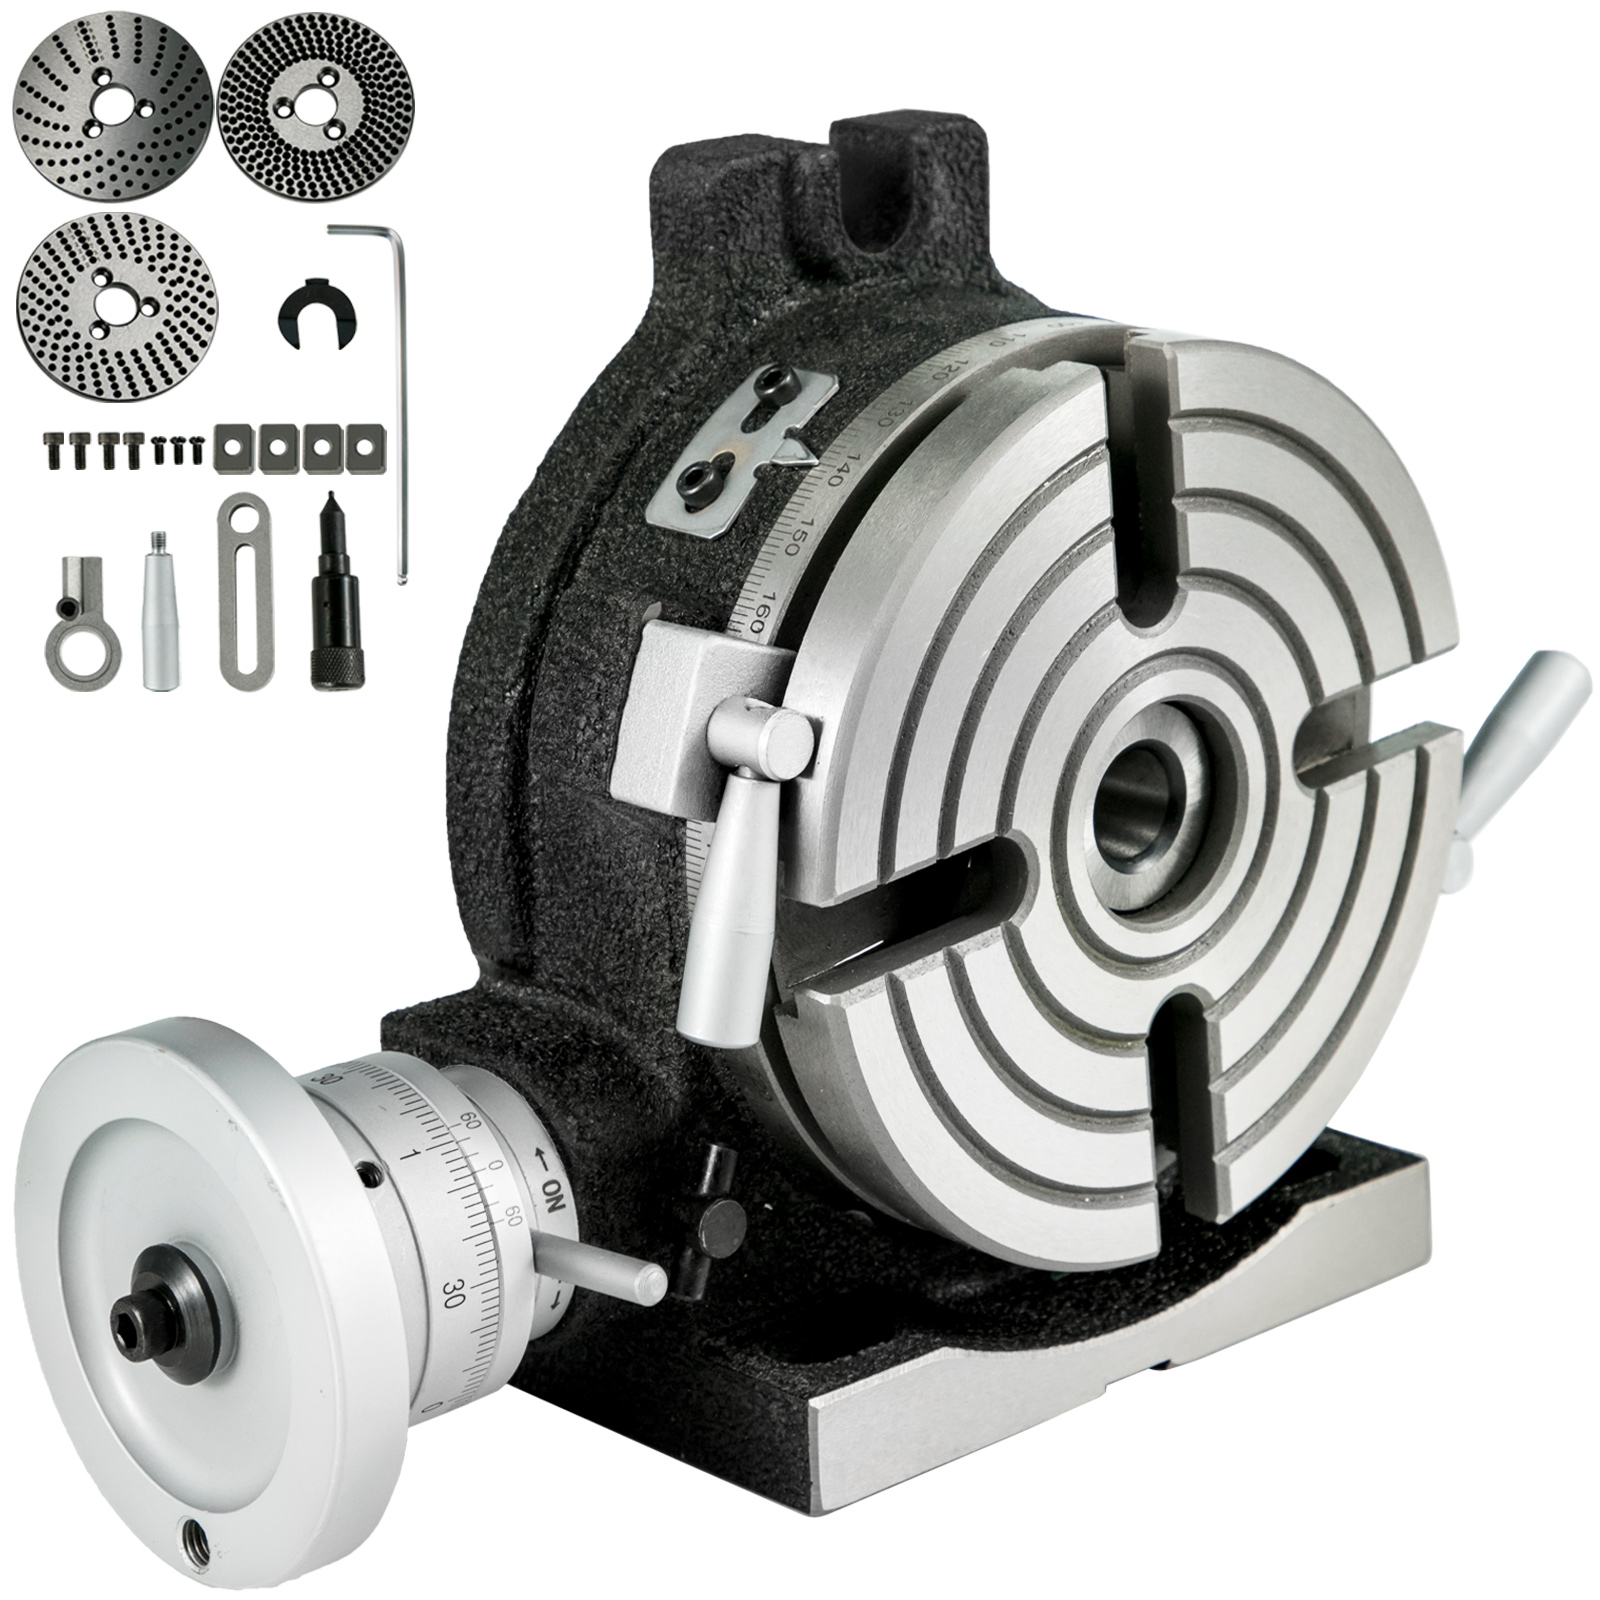
The mill rotary table is one of the main accessories of milling machine. As a precision work positioning device, it is widely used for indexing drilling, milling, circumferential cutting, boring, etc. The rotary turn table for milling machine is made from casting with high quality, can work with a set of dividing plate.
Both vertical and horizontal with two functions. Circle cutting, indexing drilling, milling and more complicated work are possible when the vertical position of the table is used together with the tail part.
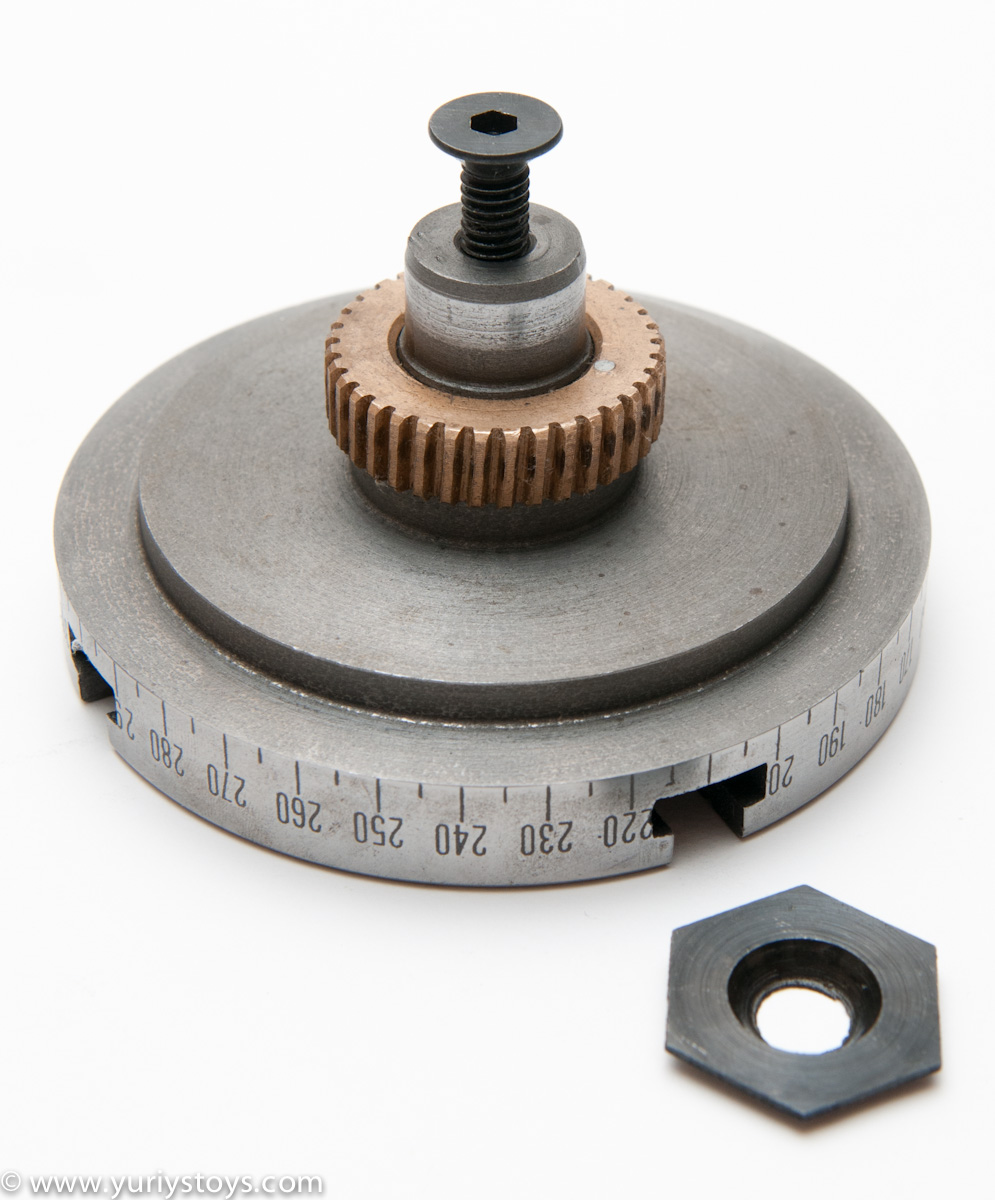
Three dividing plate set(Plate "A" - 15, 16, 17, 18, 19, 20 Plate "B" - 21, 23, 27, 29, 31, 33 Plate "C" - 37, 39, 41, 43, 47, 49). A set of wrench and screws are free for you with your installation.

This website is using a security service to protect itself from online attacks. The action you just performed triggered the security solution. There are several actions that could trigger this block including submitting a certain word or phrase, a SQL command or malformed data.
One thing that is sorta misleading about the CNC tables unless you"re seen one first hand is just how big they are. I"ve got a Tsudakoma THNC-301, which is a 320mm (12"+) table thats rotary powered and manually tiltable from horizontal to a bit past vertical. It weighs somewhere between 400 and 450 lbs, and I guess the new cost now is somewhere north of $16,000. They have positioning accuracy within a few arc seconds, and are capable of holding accuracies like this with a part that weighs a couple hundred pounds and cutting forces that can generate several hundred ft-lbs of torque.
Pricewise, assuming my 16K current estimate is accurate, that would work out to a bit less than $40/lb, because it definitely weighs over 400#. For comparison, a 10" Kitagawa power chuck for a lathe retails now for about $4000, and although I"ve never weighed one, I guess they weigh less than a hundred lbs from picking one up a "few" times. So that puts the chuck at over $40/lb. If you ever have cause to take one of these chucks apart, they are surprisingly simple. They"re accurate and repeatable, and everything is hardened and ground, but they"re still simple, especially when compared to a rotary table. A good sized collet chuck from Royal to fit an A-8 spindle nose on a lathe weighs barely over 40 lbs and costs close to $2500. Once again, its all hardened and ground, but this is the price of a pullback type chuck which is just one single piece of steel with no moving parts whatsoever, yet it sells for over $60/lb. When you compare the rotary tables and their size and complexity to other machine tool parts of similar complexity and quality, the price begins to look not so far out of line, even though its still not cheap by a long shot.


 8613371530291