
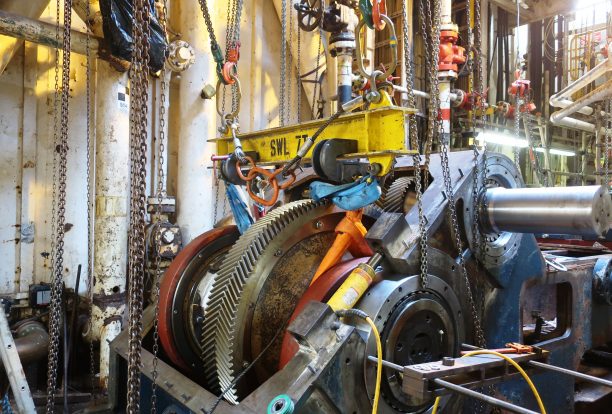
mud pump for textured walls factory

In this article, we will review the types of texture materials and provide guidelines for properly mixing these materials as well as review some initial tips on selecting texture equipment.
The most common drywall mud can be purchased in pre-mix or powder form. Regardless of the type of material you are working with, the bottom line is to mix the material correctly and thin until the desired consistency is reached. Additionally, it’s important to pay close attention to the material consistency throughout the job. These essential steps will go a long way to achieving the best texture finishes.
Pre-mixed joint compound starts out thick with a paste-like consistency. This type of mud will come in a bucket or box with everything in it that you need. However, most pre-mixed joint compound needs to be thinned to meet the pattern criteria. Some benefit of pre-mixed material is convenience, requiring less mixing and less water needed on the job site.
Powdered joint compound, commonly used for wall and ceiling texture, can be broken down further into standard and fast setting. Standard joint compound material is primarily composed of gypsum and used for drywall. On the other hand, fast-setting material contains unique chemical compounds that react and set quickly when exposed to water, hence its name. Typically, most contractors spraying texture do not prefer fast-setting material because of constant and thorough cleanup required and fast setup time.
Powdered material will come in a bag and need to be thinned according to the manufacturer’s directions. Generally speaking, thinner drywall mud creates more output and a finer finish while thicker drywall mud creates less output and a coarser finish. The helpful tips below provide additional information to properly mix and manage texture materials throughout the application.

If you’re currently using manual application texture tools like a hopper gun, hawk and trowel or roller, switching to a Graco texture sprayer will double your productivity and you will deliver the highest quality finish on every job. With a Graco interior texture sprayer, one system can do it all. You’ll have more flexibility to apply everything from skim coats to drywall mud, and orange peel, level 5—all the way up to heavy coatings. There’s a system for the residential and remodel contractor to the large commercial contractor, and every contractor business in between. With long-lasting Graco parts and better build quality, you’ll spend more time “on the wall” and finish jobs faster.

This website is using a security service to protect itself from online attacks. The action you just performed triggered the security solution. There are several actions that could trigger this block including submitting a certain word or phrase, a SQL command or malformed data.
Working from the center of the repair area out toward the original textured area, "feather" the effect by lightening up on the roller pressure as you approach the non-damaged areas.
One of the newest ways to repair textured walls and ceilings is with a gravity-fed, manually powered pressure sprayer. This technique will be most appropriate if you have very large areas of damage or are applying a new orange-peel texture to entire wall surfaces.
This handy tool does not require an air compressor or another power source—just your hand pressure. When you pull back the lever, the chamber sucks in the textured paint, and when you pump the lever, it pushes the paint out through the front plate. By adjusting the front plate and lever, you can control the sprayed textured pattern.
The gun can apply several different wall and ceiling textures, including orange peel, splatter, knockdown, and popcorn. It is not the best tool for texturing very large areas but works well for a few square feet. Each full pressure stroke can cover an area of 6 inches by 3 feet.
Put on eye protection. Cover the floor, as well as any surrounding furniture, with plastic drop cloths. Test the spray pattern by adjusting the front plate and nozzle lever to vary the texture until an acceptable setting is found that matches the look of your walls.
Stand 3 to 4 feet from the wall, and maintain this distance as you spray. Move the gun in a sweeping motion. Pull the handle back as required for the amount of spray, and push the handle completely in to complete the stroke.
Aerosol texture products will be most suitable for fairly small patch areas. Companies such as Homax offer oil-based products, as well as newer water-based aerosol spray texture products in a spray can.
Shake the can to mix the ingredients, as directed by the label. After the can is shaken and warm, test the spray pattern by spraying on a piece of cardboard or plywood. Homax provides different spray straws for various spray patterns and heaviness levels.
Major damage, such as what occurs with large-scale water damage, is really outside the scope of this article, but in the unlikely event that you are trying to recreate an orange-peel texture on an entire wall or several walls, you"ll probably have to use a hopper spray gun and air compressor.
You can typically lease this equipment from a rental store. You put a thinned mixture of drywall joint compound (e.g., 30 pounds of a compound to 5 pints of water) mixed to a consistency like runny batter into the hopper, then run the gun half-open through a small nozzle at about 25-30 psi. This setting usually gives you splatter the right size for an orange-peel texture.
If you used an oil-based product, the best way to remove a small area is by sanding. A handheld block sander will give you a fairly uniform removal. Use 150-grit sandpaper to get the high points then move to 220-grit to get it fairly smooth. Make sure not to apply too much pressure, or you may accidentally sand down into the drywall paper layer. Once the oil-based area texture is removed, prime and spray with a latex orange-peel texture spray.
Not only does orange-peel wall texture add some visual interest to walls, but it also helps to hide dirt and imperfections. And it’s durable when done right. This is why it’s popular in rentals and commercial spaces.

Centerline Manufacturing is committed to the highest level of customer service quality. Every Centerline pump is comprehensively and repeatedly tested at diverse pressure levels to assure that it goes to our customer in perfect operational order. Centerline technicians work to ensure that our customers fully understand the operation of the model being delivered. If a customer"s pump is down, we understand the importance of timely response and parts availability. Centerline technicians will assess the problem and make repairs to bring the pump back into new specification. The Centerline mud pump technicians are well versed and qualified to operate and repair any product that is provided to the customer.

“Mudding,” the process of applying multiple thin coats of drywall compound to the joints and screw indentations in newly hung drywall, sounds messy, and it is. When done correctly, the result is a wall so flat that you cannot spot the seams.
While professional drywall tapers make mudding look easy, do-it-yourselfers find that it takes practice, skill, and—of course—the right gear (in this case, the mud itself and the tape that prevents cracks from appearing in the seams). This guide to how to mud drywall outlines the materials required for the job, and walks DIYers through the process step by step.
There are two main types of drywall mud: premixed and powdered. There are variations on each type, too, which can make it tough to choose the right product for your job. Here’s the lowdown on the types of drywall mud you might find at the home improvement store:
Premixed joint compound is just that: The mud has already been mixed with water to a smooth consistency and is ready to be applied. Within this category, you’ll find all-purpose mud, topping mud, and lightweight all-purpose mud.All-purpose mud goes on smoothly and usually begins to harden in a couple of hours, depending on the temperature and humidity in the room. It’s suitable for all mudding applications, and is the best drywall mud for beginners.
Topping mudis used as a final top coating. It dries to a bright white and is easy to sand, making it a good choice for walls that will be painted a light color. Topping mud has fewer adhesion properties than all-purpose mud, so it’s not suitable for first and second coats.
Lightweight all-purpose mud also dries to a lighter hue, which makes it suitable for walls that will be painted a light color. Some pros use all-purpose mud for the first mudding application and then switch to lightweight all-purpose mud for the second and third applications.
Powdered drywall mud, also called “setting mud” or “hot mud,” contains chemicals that hasten hardening time when water is added to the powder. This type of mud tends to shrink less than all-purpose premixed mud, but it hardens very quickly. Quick-setting mud works well for pre-filling large gaps in walls, or smoothing over crushed drywall corners before starting the actual mudding process.Timed drywall mud: Setting mud is labeled by the maximum amount of time you have to work with it before it hardens. You can choose from 5-minute mud, 20-minute mud, or longer-hardening times, depending on your needs. If you use setting mud, mix only as much as you need, and wash your tools frequently as you work.
Easy-to-sand setting mud: The chemicals in some types of hot mud harden into rock-like ridges on your walls, and you can spend hours trying to sand them smooth. Avoid this by choosing an easy-to-sand variety.
During the mudding process, tape acts as a bond to keep the finished wall from developing cracks along the drywall seams. The different types of tape are paper, mesh, and preformed—and all three have their pros and cons.Paper tapeis used almost exclusively by the pros because it’s very thin, which helps create imperceptibly smooth drywall joints. Paper tape comes with a crease down the center that allows you to bend it along the crease to form sharp wall corners. It takes practice, however, to correctly bed paper tape in the first coating of wet mud without creating bubbles underneath.
Mesh tapeis made from fiberglass threads in an open-weave pattern and comes with adhesive on the backside. While it’s fairly simple to position mesh tape over a dry joint and then apply your first coat of mud on top, mesh tape is thicker than paper tape and can result in more noticeable joints when the wall is painted.
Preformed tape, also known as preformed “corners,” may be made from paper, plastic, thin metal, or a combination of materials. It’s used on outside wall corners to achieve a smooth, uniform look. Some preformed corners require nailing while others attach with adhesive. If you’re not confident that you can successfully tape outside corners with plain paper tape, try preformed tape.
Primed with an understanding of mudding materials, it’s time to familiarize yourself with the process as outlined here. Because paper tape offers the most professional results, we’ll detail how to mud sheetrock using paper tape. If you’re using mesh tape, you’ll find some tips below that will help you use it correctly.
Cover the floor with a canvas drop cloth (plastic drop cloths can become dangerously slick) and don goggles and old clothing. Mudding is a messy process, and splatters can sting if they get in your eyes.
Remove the lid from the bucket of premixed mud. If using powdered setting mud, mix as recommended by the manufacturer, beating until smooth with a heavy duty drill fitted with a paddle bit.
Drywall panels come with slight bevels on both of their long sides. When the bevels are fitted together, they form a small indentation, about 2 inches wide, along the joints. Use the 6-inch taping knife to smooth and work the mud evenly into the joint, filling the entire indentation and wiping away excess mud.
Cut and fit a piece of paper tape over the joint while the mud is still wet for a process called “bedding.” Use the 6-inch taping knife to gently smooth the paper onto the wet mud, working out bubbles as you go. Wipe away excess mud with the knife.
With the 6-inch knife, apply a thin coat of mud to both sides of an inside corner, making sure to work it all the way into the center. Cut, fold, and fit a strip of pre-creased paper tape in the corner over the wet mud. Smooth the paper tape carefully in the wet mud, using either a 6-inch taping knife or an inside-corner taping tool that features a preformed 90-degree shape for easy bedding. Use light stroking movements to bed the tape without dislodging it from the corner. Wipe excess mud from the walls.
If using preformed tape corners, attach them as recommended by the manufacturer, and then smooth mud over the corners, using long vertical strokes on both sides to form a sharp, uniform corner.
You can avoid butt joints, which occur when un-tapered ends of a drywall panel are fitted together, by using sheets of drywall that span the entire room. But if dealing with ends that have no beveled indentations, it’s more challenging to get a smooth finish. Mud them as you did the beveled joints, taking care to use only as much mud as necessary to fill the joint and bed the tape.
Let all the mud dry before applying the next coat. Apply a second coat of mud to the screw indentations, beveled joints, and inside and outside corners in the same order as the first coat—only this time, use only mud. No need to add more tape! Just apply a thin layer of mud and wipe off all excess.
To do a second coat for butt joints, take the 10-inch taping knife, apply two swaths of mud, approximately 8 inches wide, along both sides of the first joint coat, but not on top of the original joint. This imperceptibly builds up the wall depth over a wider area to reduce the appearance of a bulky butt-joint seam. Feather out the edges of the swaths well with the knife for a smooth look.
Apply a third very thin coat of mud after the second coat dries. Use the 10-inch knife for all screw indentations, seams, and corners. The wider knife allows you to feather out the edges of the mud to a razor-thin application. Follow the same procedure for beveled joints and corners as before. On butt joints, apply a thin coat of mud over the previous swaths and the original mud joint. It’s not unusual for the mud swath on butt joints to be 2 feet wide or wider.
When the mud dries, apply one last thin coat only over the butt joints. Feather out the edges very well and let the mud dry. Before moving onto the final step, an important question to ask is, “How long does drywall mud take to dry?” Approximately 24 hours is the answer for most types of drywall mud, but refer to your product’s label for specifics on drying time.
Unlike paper tape that requires bedding in wet mud, self-adhesive mesh tape is applied over seams and then, when mud is applied, an adequate amount seeps through the mesh into the seam beneath. The order of taping is the same: Do screw indentations and beveled joints first, inside and outside corners next, and butt joints last. If you use mesh tape on flat joints, note that it’s not suitable for corners. Use pre-creased paper tape for inside corners and preformed tape for outside corners.

We’re definitely seeing a huge trend towards textured wall finishes right now. These wall treatments exude a natural, earthy warmth that celebrate imperfection, and pair beautifully with other textural materials, such as raw timber and slubby linen. For this look, we want the walls to have a warmth about them, looking a little more like the baked earth of the Mediterranean, rather than the cold concrete of an industrial warehouse.
There are many ways to achieve a textural look on internal walls, from bagged brick, to cement render… but the trends were seeing most prominently right now all involve one key component – lime, aka crushed limestone.
LimewashLimewash is essentially a painted surface that incorporates tiny particles of crushed limestone, creating surfaces that are mottled and matte, with a chalky texture –something like suede. Available in a wide array of different colours, limewash lends luminosity to flat walls, and brings real depth to a space.
Look to the warmer colours in a lime wash paint or suede effect that lean to brown or yellow, like beige, cream and cashmere. Steer clear of textured walls in bright colours such as turquoise and purple that were applied using sponges in the 90s or the bright orange ‘Tuscan’ look. This time around it’s about a more natural, earthy look.
When pigment is added to aged slaked lime plaster, the finish is known as Venetian plaster. The application in thin translucent layers creates a uniquely textured, soft yet polished finish, giving the appearance of depth and movement due to the marble dust combined with lime. Seen internationally in projects by designers-to-the-stars Axel Vervoordt and Vincent Van Duysen, we’re seeing a lot of this polished plaster finish in Australian interiors right now – and there’s no better example than in the award-winning ‘Budge Over Dover’ project by YSG Studio in Sydney, which features pigmented Venetian Plaster in a range of incredible colours, on both walls and ceilings!
TadelaktTadelakt has a similar soft, textural appearance to a limewash effect, but is perfect for wet areas. It’s a waterproof lime plaster surface used in Moroccan architecture. As it’s applied to the surface with a trowel, it gives a beautiful seamless appearance. Unlike tiles in the bathroom, there are no grout lines and it applies to curves effortlessly. When applied by a professional installer it can be used on all surfaces in a bathroom; walls, floor; vanity bench, and even the vanity basin.

Textured, even excavated interior walls—the sort with charmingly exposed plaster or peeled-back wallpaper—are trending. (Read: Trend Alert: The Excavated Look, 15 Ways.) Not so much the other sort of textured walls: the “orange peel,” popcorn, or faux-stucco walls that might plague your house or rental.
Textured interior walls (think: “orange peel,” popcorn, or swirled patterns) have a practical function, since the texture hides the signs of drywall installation—that is, the taped seams where the sheets of drywall meet—and other imperfections. “It’s cost-saving,” says Barton. “Maybe people actually liked it back in the seventies, but the reason it’s done now is to save money. It’s cheap and fast.”
To many of us, the best wall is the smoothest wall you can get. Here are four ways to turn a stippled surface into a smooth one. These methods will also work with walls that are distressed in other ways (should you tire of the exposed plaster or old-wallpaper look someday).
When drywall is installed, the fasteners and taped seams are skim coated—covered with a thin coat of joint compound, or “mud,” to level the surface in preparation for painting or papering. The same technique gets rid of textured walls. A thin coat of mud is applied over the entire wall surface, allowed to dry, and then sanded smooth. Especially bumpy walls may need more than one coat.
The contractor-proven pump technology and cordless power capability found on Graco automatic drywall mud pumps helps reduce fatigue while maximize efficiencies on interior drywall or texture jobs. Finish every drywall job faster and never hand pump again with Graco PowerFill 3.5 Cordless Loading Drywall Pumps.

Builders have been widely applying knockdown texture to drywall since the early 1990s. It’s known for providing a casual elegance to interior walls and lends itself to a wide variety of décor types.
There are basically three different knockdown texture techniques: splatter, stomp, and mud trowel (also known as skip trowel). We’ll discuss the tools and materials you’ll need, the steps you should take to prepare yourself and the walls, and how to execute each type of knockdown finish.
Like any fine recipe, you need to make sure you have all the right ingredients and tools before you begin. Here’s a list of tools and materials you’ll need to gather before starting the job.
Drywall hopper gun kit.A drywall hopper gun kit is key to facilitating the knockdown textured finishes for drywall. The gun uses an air compressor to push mud through the nozzle of the gun and spray it on the wall or ceiling.
Air compressor.An air compressor forces the drywall compound from the hopper into a tube, eliminating hand pumping. When the trigger on the tool is pressed, the air pressure sends the compound through the head of the tool evenly. We recommend using one with a minimum capacity of 30 to 40 psi.
1.5-gallon joint compound powder (not rapid dry).Joint compound in the dry form is a powder that usually comes in large paper bags. This product is usually not labeled as being dry. It will be called joint compound with the qualifiers ready-mixed or pre-mixed omitted.
Additional items you’ll need: shop cloths or rags, two or three 2- or 5-gallon buckets, water, a scrap of drywall (for testing), and a tarp or drop cloth.
Before you start mixing powder, make sure that you prep the area or room where you are applying the drywall. You should wipe away dust and dirt using a damp rag. Make sure you allow any moisture to dry before moving forward.
Add Mud or Compound.Pour the proper amount of water in a second bucket. Standard, all-purpose joint compound will work best for this project. You can use either dry compound or ready-mix compound. Avoid compounds that contain sand or grit (unless you want a unique look). Plain mud works best for this type of texture. You should also avoid lightweight compounds. These formulas scratch more easily and may not accept the texturing as well as all-purpose compounds do.
Mix to the Consistency You Want.For knockdown texture, never use mix that contains aggregate. Continue to add water and powder until you have a bit more mix than you think you’ll need. Better to waste some mud than to run out before you’re done. Set the mixture aside for about 15 minutes to allow for complete water absorption. You don’t want the mix thickening in the hopper. You must be able to spray the mixture with the hopper gun, so it should be about the consistency of pancake batter or thick paint.
You can choose between 3 different sized tips for the hopper: small, medium and large. You can spray the mixture lightly to create a fine texture or heavily to create a more rugged look. Usually a medium texture works great with an air control valve so that you can turn your pressure up and down. When applying knockdown, we recommend using a setting of around 40 psi, because you don’t want it to spray too fast.
PRO TIP #2:It takes practice and experience to know exactly how long to wait before knocking down the texture. If you do it too soon, the texture will be runny and simply smear. If you wait too long, small dried out pieces of mud will drag across the surface creating unsightly lines.
Depending on the temperature and humidity levels in your house, it can take anywhere from five to ten minutes for the compound to set to the desired rigidity. This can cause problems because the longer it takes the material to dry, the more vulnerable it is to failure, mold growth, cracking, and more.
The stomp method creates a much rougher surface than the splatter or mud trowel techniques, but with higher ridges and deeper valleys, stomp textures always turn out interesting and unique.
Using a stiff-bristled, crows-foot stomp brush, dab or stomp the brush into the mud. The bristles of a stomp brush are usually arranged in an oval or square pattern and allow you to create an irregular and distinctive texture.
Because the stomp method requires a paint roller to apply the compound to the drywall surface and the additional step of stomping the mixture with a stomping brush before knocking it down, don’t be surprised if this takes longer than you thought. It can take up to twice as long to achieve this look than the splatter method, but the results are worth the extra time.
The curved trowel causes the mud to literally skip across the wall, leaving a sparse texture of round, quarter-sized globules on 50 percent of the surface.
Well, there you have it! Our best tips for how to apply knockdown drywall. Good luck with your project and be sure to leave a comment to let us know how it went and what tips you found most helpful.
Hold pump/texture bottle firmly and cut off bottle tip at groove with a utility knife. Now puncture a small hole in the red bottle cap where indicated.
Wall Texture Repair: Select pattern by rotating applicator to desired position. Test spray pattern on cardboard or scrap drywall. Stand 1-2 feet from surface, pump to apply texture using short rapid strokes. Rotate applicator to OFF position when not spraying to prevent dripping.
After applying Orange Peel Heavy, allow material to begin to set up (5-10 min.), then use the plastic mud knife, flatten or lightly “knockdown” the texture to match the surrounding area.
Popcorn Ceiling Texture Repair: Point nozzle upright to ceiling and rotate pump to HEAVY setting. Hold pump at a 40° angle, and approx. 6-12" from ceiling. Pump using short rapid strokes. Rotate applicator to OFF position when not spraying to prevent dripping.
FIRST AID: If inhaled, move to fresh air and get medical attention. In case of eye contact, immediately flush eyes with water for 15 minutes. Seek medical attention if irritation persists. If on skin, wash thoroughly with soap and water.
WARNING: If you scrap, sand or remove old paint, you may release lead dust. LEAD IS TOXIC. Contact the National Lead Information Hotline or 1-800-424-LEAD or log onto www.epa.gov/lead.


 8613371530291