
mud pump for textured walls free sample

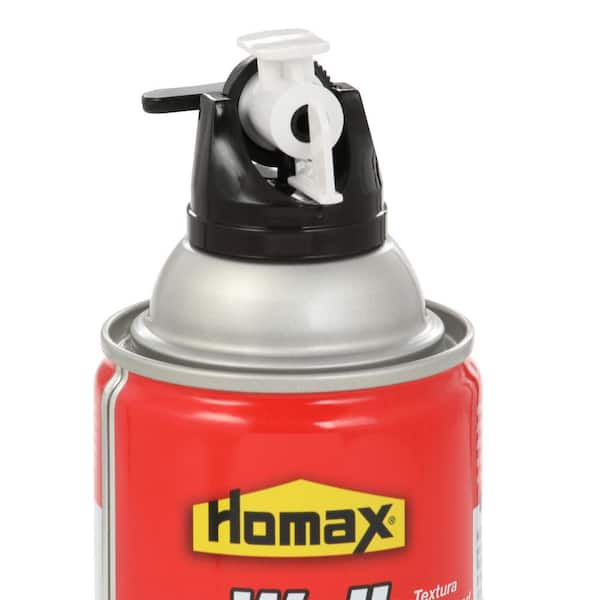
Hold pump/texture bottle firmly and cut off bottle tip at groove with a utility knife. Now puncture a small hole in the red bottle cap where indicated.
Wall Texture Repair: Select pattern by rotating applicator to desired position. Test spray pattern on cardboard or scrap drywall. Stand 1-2 feet from surface, pump to apply texture using short rapid strokes. Rotate applicator to OFF position when not spraying to prevent dripping.
After applying Orange Peel Heavy, allow material to begin to set up (5-10 min.), then use the plastic mud knife, flatten or lightly “knockdown” the texture to match the surrounding area.
Popcorn Ceiling Texture Repair: Point nozzle upright to ceiling and rotate pump to HEAVY setting. Hold pump at a 40° angle, and approx. 6-12" from ceiling. Pump using short rapid strokes. Rotate applicator to OFF position when not spraying to prevent dripping.
FIRST AID: If inhaled, move to fresh air and get medical attention. In case of eye contact, immediately flush eyes with water for 15 minutes. Seek medical attention if irritation persists. If on skin, wash thoroughly with soap and water.
WARNING: If you scrap, sand or remove old paint, you may release lead dust. LEAD IS TOXIC. Contact the National Lead Information Hotline or 1-800-424-LEAD or log onto www.epa.gov/lead.

If simple, painted walls don"t fit into your sense of style and your vision for your indoor space, there are a number of ways to add texture and nuance to enliven your rooms. Whether it"s using wallpaper, textured paint, joint compound or a faux finish, the end result of textured walls is well worth the effort.
Wallpaper might be the most common and simple way to add texture to walls. Textured wallpaper has its own built-in feel and design. With so many different styles and colors available, it can be tailored to match existing décor in a room or used to create a new design you have in mind. It can also be painted, if even more customization is desired. An advantage of wallpaper is that it hides wall imperfections, which means you don’t have to repaint regularly to hide scrapes, marks and dings. For full details about how to install wallpaper, see the project How to Hang Wallpaper.
You can add texture to your walls using textured paint. Using paint in this way can give you more options than the basic eggshell, satin or flat sheens. Instead, you may choose from stone, sand, faux finish or original textures. Textured paint is good for hiding blemishes that a flat or satin sheen might show. You can buy textured paint pre-mixed or you can buy packages of powdered texture additive or sand (formulated for mixing with paint) to add to standard paint, such as True Value EasyCare Ultra Premium Interior Paint. Note: Texture additives can be added to both latex and oil paints.
Buying powdered additive is convenient because you can mix the right amount of texturing agent you need for the particular job and effect you’re going for.
Some pre-mixed textured paints are designed for use on both walls and ceilings, but some are designed specifically for one or the other. Check the package to make sure you’re buying the product you need.
Pour paint into a large paint mixing container about ½ full. Slowly pour in the additive while mixing together with a mixing stick. Try to add a half cup of the additive at a time until you reach the consistency you’re looking for.
For best results, apply True Value EasyCare Ultra Premium Interior Primer/Sealer with a brush or roller, starting at the top and painting in a “W”, “X” or “N” pattern and then fill in the spaces. Continue this until you are at the bottom of the wall. Once you reach the bottom load your roller with primer and starting at the top roll all the way to the bottom then go back next to where you just rolled and roll to the bottom again. This should be done until all of the area you had just primed has been rolled in the same direction. Let it dry thoroughly.
Next, apply your texture/paint mixture with the same technique you used with the primer. As you’re painting, look closely at the results and ensure that your desired texture effect is successful. If the texture isn’t coarse enough for your tastes, add more texture additive to your paint and start over. If it’s too much, you may need to start a new mixture of paint and texture to get the effect you want.
Clean the walls with a sponge, water and mild detergent. Let them dry. Move furniture out of the room or cover it with drop cloths. Also cover the floor to protect it from any joint compound that might spill on it and secure the cloths to the floor using painter’s tape (you’ll be laying the compound on fairly thick and it can easily drop off the drywall knife).
Start applying the compound to the wall using a 10” drywall knife, beginning in corners, along baseboards or at the top of the wall and work inwards in small sections. Coat the wall with a layer of compound at about a 1/8” to a ¼” in depth. If you want a rougher effect you can go thicker, you just want to try and be as consistent as possible in the depth. It doesn’t have to be perfect as you’re going for a textured appearance, but you don’t want large hills or valleys on the surface. Working in small sections (3’ x 3’) allows you to take your time adding the desired texture effect. Keep a smaller drywall knife (4” to 5”) handy for applying mud to tighter spaces.
There are any number of ways to create the texture you want. You can use combs and brushes to create striations, sponges to create swirls or mottling, stencils, or even your fingers to make your design. Practice on a scrap piece of drywall to test your design and so you don’t end up with undesired results. Finish texturing your 3’ x 3’ section of wall and then apply compound to the adjacent wall surface in the same dimensions. Add texture and then repeat the process until you’ve covered the entire wall. Let the compound dry for the length of time recommended by the manufacturer.
Apply True Value EasyCare Ultra Premium Interior Paint with a brush or roller, starting at the top and painting in a “W”, “X” or “N” pattern and then fill in the spaces. Continue this until you are at the bottom of the wall. Once you reach the bottom load your roller with paint and starting at the top roll all the way to the bottom then go back next to where you just rolled and roll to the bottom again. This should be done until all of the area you had just painted has been rolled in the same direction. This ensures good hide and durability from your paint job. Let it dry thoroughly. Add a second coat if any of the wall underneath is still showing. For best results use a roller cover with a thick nap so that paint effectively makes it into all nooks and crannies on the textured surface.
You can use a sponge painting or rag rolling to create texture on plain walls. Rag rolling is done by using a twisted or bunched up rag to roll paint on or pull it off irregularly, creating a mottled effect for a custom look that is all your own. Using a sponge to dab paint on a surface provides a similar but unique effect. Follow the steps below to do it right.
Using a paintbrush or roller, apply a coat of True Value EasyCare Ultra Premium Interior Paint in eggshell finish in a color of your choice. Allow the wall to dry completely for at least 24 hours before painting a new coat. Let the second coat dry for at least 24 hours as well before the next step.
You will need a few clean linen or lint-free cotton cloths or rags, or a sea sponge (they provide a more irregular, natural appearance than synthetic sponges). For rag rolling, decide which method you want to use: rolling on or rolling off. Each of them provides different variations of the same texture. Rolling off usually means less of the base coat will show through, compared to rolling on the paint. Rolling off also usually requires more rags because they eventually become saturated with paint and cease to provide the desired effect. Choose a small portion of the wall to use as a test area to see which method works best for you. You can always paint over what you"ve done.
For the next coat, use a slightly darker shade of the same color paint you used as your base coat or vice versa, if you want the base coat to be darker than the top coat.
For better results, try diluting the paint for the next coat by mixing it with water in a paint tray. Aim for getting the mixture at a ratio of 2:1 (paint to water).
If you"re rolling on the paint, dip your rag into a paint tray to cover it with paint. Be careful not to over-saturate the cloth. Twist it or bunch it up into a ball to distribute paint evenly throughout and then roll the cloth down the wall with steady pressure, starting at the top. Try not to use the same downward stroke each time or the results may be too uniform; you want to use slightly angled, different strokes, re-adjusting as you move along the wall. Keep extra rags handy, as once one becomes too saturated with paint, you"ll need a new one because it won"t work in the same way. Do this across the entire surface of the wall until you"ve covered it completely.
When rolling off the paint, apply the next coat of paint over the base coat with a roller or paintbrush. Then, immediately begin rolling a clean twisted or bunched up rag down the wall. The clean rag will pick up paint from where you just painted, creating the textured appearance.
If you’re using sponges, soak a sponge with paint and then dab it on the surface to create random textures on top of the basecoat. For a consistent appearance, make sure your dabs overlap each other. To get maximum texture, periodically re-wet the sponge.
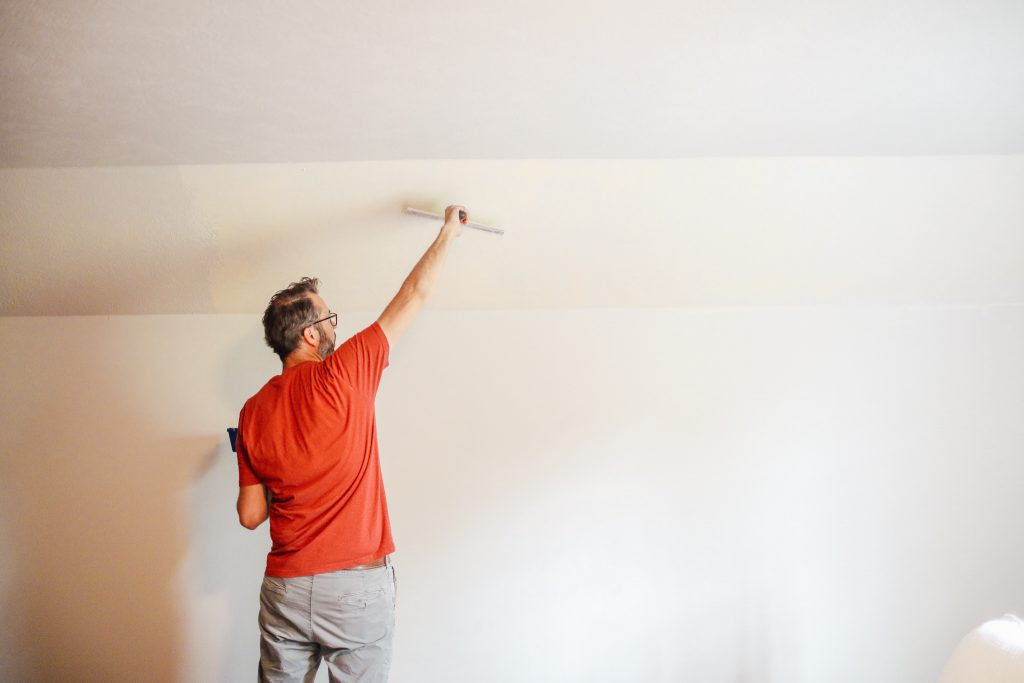
Some textures on walls and ceiling are pretty aggressive. This can especially be a problem if you want to put wallpaper over the texture, like we’re planning in Greta’s room. We have wallpapered over a slight orange peel texture in our last house with no issue but anything more than that, you’ll want to smooth it out before wallpapering. The ceiling in here isn’t the craziest texture we’ve ever seen, but it’s definitely enough to clearly show through any wallpaper we apply, and ruin the look and adhesion. So if you have a similar situation, all you need is a few simple tools and a bit of time to smooth that texture out before you put your wallpaper on.
Some textured surfaces will be too aggressive for this and may require sanding. If this is your case, goggles, a respirator, and an orbital sander will make this go a lot quicker.
Using a small taping knife, scoop your joint compound out of the box and put it in the mud pan. Use the long taping knife to apply an even layer across the entire textured surface, working in areas about 2ftx2ft. Scrape any excess off to get the surface as smooth as you can. Do this across the entire area and allow to dry for 4-8 hours.
Once the joint compound has dried, use a medium grit sanding block to sand the surface. Run your hand along it to ensure uniform texture. If needed, add some joint compound to any areas that may not have been covered the first time.
Before you apply wallpaper, you’ll want to paint a coat of primer onto your newly smooth area. This will help the wallpaper adhere better to the surface.
With that little task out of the way, we’re ready to get this wallpaper up! Hopefully in the next week or two, so stay tuned for that! And in case you wanted a little more detail on the de-texturing, we recorded a little video you can watch below. Can’t wait to show you more as we work on this great space!

Modern trends have tended toward flat, blank walls and a focus on color to bring a room together, but adding a unique wall texture to a room, or even to a single accent wall, can bring a personality to your home that a color choice simply cannot. Texturing can even help hide architectural errors, saving you costly repairs by allowing an uneven wall or ceiling to simply fade into an attractive textured pattern.
If you’re thinking that texturing is too difficult to do yourself, think again! While texturing should involve some degree of practice before deciding to texture a room in your house, the techniques used to make the following wall finishes are not as hard as you may think. Take a look below at seven popular wall texture types and the techniques behind them.
The comb texture is produced using techniques that create lines of various widths and shapes in drywall compound. This technique is often used to produce a repeated series of rainbow patterns on the drywall and is one of the more simplistic texturing techniques. This method requires drywall compound, a roller, and a drywall trowel that has evenly spaced teeth (or uneven teeth if you are going for a less organized pattern). Apply the drywall compound to the wall using the roller, then use the teeth of the trowel to gently apply lines in the wet compound. If you are aiming for perfect concentric circles, practice your artistic skills on a spare piece of drywall before attempting them on your wall. Let the texture dry for 24 hours before priming and painting.
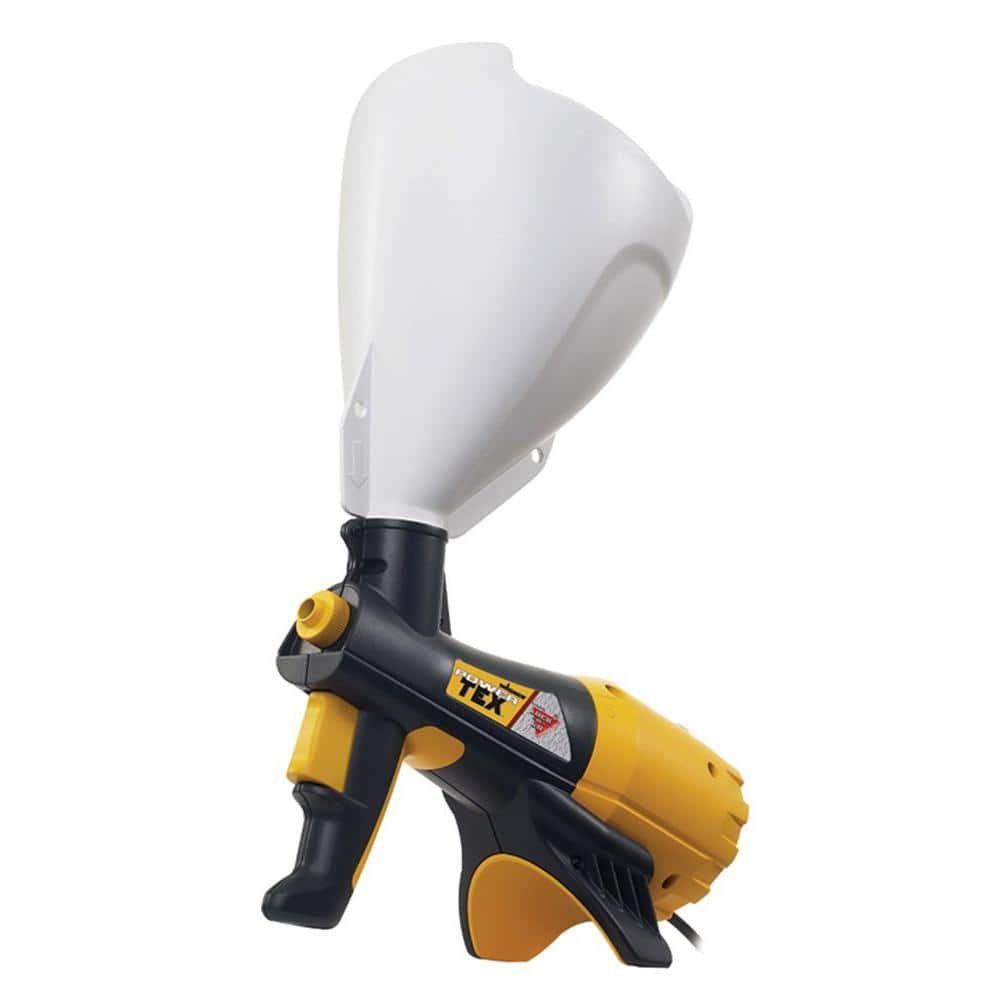
Popcorn ceilings were a classic look in the 70s and can still be seen in countless homes today. The reason for this type of wall texture’s popularity is that it’s great at hiding imperfections and it can even help absorb sound between floors and walls. But the best part about this style of texturing? It’s easy and affordable to do yourself. All you need is the popcorn texture, an air compressor, and a hopper gun, which you can rent from your local home building center on Amazon. The popcorn texture is a dry mix of drywall mud and polystyrene, and it comes in a standard white color, so it’s best to prime the wall or ceiling before use. Mix the popcorn texture with water, following the instructions on the package. Make sure to securely cover all surfaces and items that are not to be sprayed. Once the rest of the room is properly covered, spray away. The texture can be painted any color you want after it has dried.
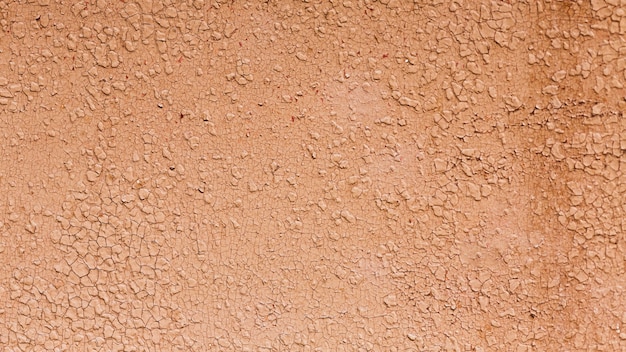
An orange peel texture looks exactly as it sounds—it resembles the peel of an orange. You will need to prime the walls ahead of time so that the texture has a smooth, dirt-free surface to stick to. Pick up a hopper gun with an air-adjustable valve, an air compressor, and drywall compound. Mix the drywall compound with water until it becomes the consistency of thick paint or a soupy pancake batter, then pour it into your hopper. Spray a small amount from the hopper onto a test piece and adjust the air valve to suit the spray pattern that you want. You should be shooting small splatters of compound onto the wall to create the desired texture but not fully covering the primed drywall underneath. Try both heavy splatters and light splatters, and when you are confident in the spray pattern, begin to apply it to the walls. After drying, prime and paint the textured walls.
The knockdown technique creates a unique, rustic pattern, akin to stucco. Knockdown can be achieved by adding a step to the orange peel technique: After applying an orange peel texture to the walls, flatten the peaks and bumps that form in the drywall compound using an 18-inch or wider knockdown knife. Smaller rooms will likely require a wait period of about 10 to 15 minutes after spraying before the peaks can begin to be flattened, while a larger room can probably be started as soon as you are finished spraying. Just be sure to begin flattening in the same area that you began spraying. Be careful with timing! If you begin flattening the drywall compound too early, the knockdown knife will leave lines from the edges of the knife. If you see this happening, stop and wait another five or 10 minutes, then begin again. After flattening all the peaks in the orange peel texture, the wall can then be left to dry overnight before priming and painting.
Sand swirl adds a feel of individuality to a room without stealing the show. This style of texturing is easy to do using a compound known as perlite (primer with sand mixed into it) and a 7-inch-wide paint brush. Hold the paintbrush by the base, as this will give you more control than holding the handle. Dip the brush a few inches into the perlite, giving it a wipe on either side of the bucket to remove loose drips. Practice making a swirl pattern on a spare piece of drywall before moving onto your wall. Using the brush, start at the very top of the wall, making a big loop with an open bottom. Each row of this swirl pattern will cover up the bottom of the previous row. Apply swirls to a 5-foot section, dipping the brush into the paint after every swirl, then return to your starting point and drop down one row. Continue working your way around the room until you are complete, then let it dry. After a 24-hour drying period, you can prime and paint the walls.
The slap brush texture creates a random pattern of thin lines on your walls that add an eccentric flair to any room. This type of wall texture is a great choice if you aren’t confident with a spray gun. All that is needed for this technique is a roller, a double crows foot drywall texture brush (also known as a slap brush, available on Amazon), and drywall compound. Mix your compound with water until it reaches a thick paint consistency, then apply it evenly to the wall using your roller. Complete two 5-foot-wide sections before picking up the slap brush. Apply drywall compound to each side of the slap brush in a thin coating, and then begin slapping the first section of the wall with the brush. There shouldn’t be any specific pattern to the texture, so have fun with it and mix it up by twisting the angle of the slap brush in the air between slaps. Once the first section is complete, roll the next 5-foot area of the wall, then apply the slap brushing to that section. Repeat this process until you have completed the room. After 24 hours of drying, you can prime and paint the room.
A slap brush knockdown texture combines the slap brush technique with the flattening step of the knockdown texture to create a random pattern of flatter, wider lines, instead of peaked, thin lines. To apply this texture, you will need a roller, slap brush, knockdown knife, and drywall compound. Using the slap brush technique, work your way around the room until each wall is evenly covered in a slap brush texture. For smaller rooms, wait 10 to 15 minutes before beginning to knock down the peaks using the knockdown knife. As with the knockdown technique, if you begin too early a line caused by the edge of the knife will appear in the wall texture. Stop if this happens, and wait another five to 10 minutes before proceeding. For larger rooms, you can begin knocking down the peaks in the slap brush texture immediately. Once the peaks on every wall have been flattened, the walls can be left to dry for 24 hours before painting.
Texturing walls is a time-honored method of adding character to a wall or covering such imperfections as drywall taping inconsistencies—but not everyone loves the ridges and swirls of knock-down or the soft ripples of orange peel. Luckily, if you prefer flat surfaces, it is possible to get rid of an old textured finish, though this tends to be a messy, time-consuming project. Before you even put on your work clothes and pick up a scraper, you should get to know the two methods for how to remove texture from walls depending on whether or not your walls are painted.
If you’re ready to roll up your sleeves, we’ve got the guidance to take your walls from textured to totally smooth. Keep reading to find the method for removing wall texture that works for you.
You may have to spray the wall two or three times in order to saturate it sufficiently. Give the wall about 15 minutes of dwell time, then test the texture with a fingertip. When the texture is soft enough for you to rub it off all the way down to the drywall beneath, it’s time to scrape.
Stand on a sturdy step ladder to reach the top and work your way down with a 10-inch drywall taping knife. To remove texture without gouging the drywall, hold the blade approximately 30-degrees to the wall, and scrape in whatever motion feels most comfortable to you, using long slow strokes. If the knife meets resistance, stop; spray that area again and wait until the texture softens sufficiently.
It’s okay if thin smears remain on the wall; you’ll sand them off in the next step. Let the wall dry completely, which could take up to 24 hours, before proceeding.
Excess compound will build up on your knife as you go, so it’s a good idea to hold a taping pan in your other hand and scrape the excess into the pan. Skimming is a learned technique, and you’ll develop the hand movement that works best for you as you go.
Just as in painting, you’ll get better results by not letting one swath of compound dry before you roll the next swath. Drywall compound has a tendency to harden and set if dry bits of compound come into contact with wet compound, so work quickly, in no more than two-foot swaths, to keep from skimming wet compound over already dry areas.Note: Do not dump the excess compound you scrape from the wall back into your bucket of fresh compound. Dispose of it in another bucket and use only fresh compound as you skim.
Dry time will vary depending on the humidity in the room. The second coat is rarely necessary on most textured walls, but if your wall has deep texture, such as valleys and peaks of slap-brush texture, it might take a second coat to cover completely. If applying a second coat, do not sand between coats.

The cost to texture walls and ceiling is $0.80 to $2.00 per square foot, which is $450 to $1,000 per bedroom and $600 to $1,400 for a living room. Retexturing walls cost $1.80 to $3.80 per square foot, including old texture removal. The cost to smooth textured walls is $1 to $3 per square foot.
The average cost to texture a ceiling is $1 to $2 per square foot. Texturing a drywall ceiling costs $130 to $440 on average for a bedroom or living room, depending on the texture type, application method, and ceiling height.
A knockdown texture ceiling costs $1.00 to $2.50 per square footor $500 to $1,250 for 500 square feet. Knockdown is the most common drywall texture style and is also called California knockdown or splatter drag.
The cost to texture walls is $0.80 to $1.80 per square foot or $280 to $800 for an average bedroom. Texturing one bedroom wall costs $70 to $200. Wall texture rates depend on the height, texture type, coating thickness, and application method.
Smoothing textured walls costs $1 to $3 per square foot on average. The cost to smooth textured walls depends on whether the old texture is removed or covered by a skim coat.
Drywall installation costs $1.50 to $3.50 per square foot, including materials and labor to hang, tape, finish, and texture the drywall. The average cost to tape and mud drywall is $0.35 to $1.10 per square foot, not including sanding or finishing.
Sprayed textures are applied with a pump that uses compressed air to feed drywall mud through a nozzle. The pattern is determined by the nozzle and sprayer type.
Hand textures are more customizable and are applied with a trowel, knife, or brush. Some hand textures require a sprayer to apply a layer of drywall mud before other tools are used to create a pattern.
Textured drywall finishes are created by applying joint compound with a sprayer, trowel, or brush to create a raised pattern on the surface. Texture adds dimension, looks like traditional plaster, and hides the seams and flaws in drywall.
Drywall does not have to be textured. However, a textured surface hides flaws and doesn"t require repairs or repainting as often as a smooth surface. You can paint drywall with or without texture as long as the joints are mudded and the surface is primed first.
A knockdown texture hides flaws, seams, uneven areas, and minor stains on walls or ceilings. Light shining across a smooth surface accentuates the flaws, while a knockdown texture conceals them instead. A heavier layer of knockdown texture hides the most flaws.
Texturing drywall with a sprayed coating takes less than one day for an average home. Hand-applied textures take 1 to 3 days, depending on the texture style and the number of drywall laborers.
DIY drywall texturing is feasible but time-consuming and messy. Achieving a good finish requires skill, experience, precise timing, and specialized tools. Hire a professional drywall contractor for the best results.
Sprayed textures are the easiest to DIY and provide the most forgiving results for inexperienced users. Renting a texture sprayer costs $75 to $95 per day.
One gallon of premixed joint compound—also called drywall mud—covers 50 to 100 square feet of wall or ceiling surface, depending on the texture"s thickness. One pound of powdered joint compound covers 30 to 40 square feet after thinning with water.
Wall texture is often applied out of necessity. Given a choice, many homeowners would choose a smooth, glass-like texture for their walls and ceilings. Besides being the preferred style of today, smooth surfaces help paint color stand out better. Because there are no bumps to create a shadow effect, the surface appears brighter.
But wall texture does have the distinct advantage of being a quick method of finishing walls without the seemingly endless cycles of mudding, curing, and sanding drywall compounds. Wall texture can cover up imperfect drywall or mudding work, and it dries rapidly enough that you can begin painting just hours later. And many homeowners do enjoy the rustic look of textured walls.
Wall texture is a substance that is thicker than paint but thinner than a straight drywall compound. Texture applied to walls and ceilings creates small shadows due to the bumps and depressions.
Application is far slower than with the electric sprayer but it"s easier to control, and can be a good option for smaller areas or repairs. Knock-down and orange peel effects can be achieved with the paint roller method, just like with the electric texturizer.
Wall texture effects can vary depending on how the material is applied and rolled. Practice the technique on scraps of drywall or even sheets of cardboard before moving to your walls and ceilings. Practice with both thin coats and heavy coats. Try different drying times between coats.

Air compressor owners often forget that an ounce of prevention is worth a pound of cure. Maintaining your air compressor can save you both time and money down the road. By performing the following checks each time you operate your air compressor, you are saving yourself a world of pain in the future.

One of the basic tenets of interior design—if you ever plan to sell your home—is to avoid overly personal choices of the more permanent variety. Yet, as anyone who has ever house- or apartment-hunted before can attest, many people think that textured walls are a universally appealing design choice. Fact:
If you find yourself with a textured wall that you’d like to be, well, not textured, don’t despair: There are ways of removing that texture. It just takes some time and elbow grease.
If your textured wall has been painted, you’re going to have to employ a more complicated fix (see below). That’s because paint acts as a sealant, protecting the texture from its enemy (that would be water, and you). These approaches apply to textured ceilings, as well. If the wall in question isn’t painted, you can use the “Soak and Scrape” procedure to get that texture off the wall. Like so:Protect your floors and furniture with drop cloths, because this could get messy.
If your textured wall has been painted, you’re facing a more difficult task. In fact, for painted textured walls, you might consider the nuclear option of just tearing them out and having fresh drywall installed. If that’s not an option, you’re going to have to apply a skim coat—a thin layer of drywall mud over the existing wall. This is not nearly as easy as it sounds—yes, anyone can smear compound all over the wall, but getting it to look good and have an even, smooth finish requires a lot of skill. You will be much better off hiring professionals to do this. But if you’re an enthusiastic DIYer and want to do it yourself, here’s how:Remove the baseboards and trim.
Mix your compound. You can use powder drywall compound or pre-mixed—the latter is much easier, the former is more affordable. Either way, mix your compound with water—you’re looking for a
Pour some of your thinned compound into a rolling tray, and start “painting” the walls with it. This will make an enormous mess and be more of a workout than you might imagine. Roll your way through the pain and suffering. Work in small sections unless you’ve got a team working to smooth the walls behind you; otherwise, the compound will dry out as a lumpy mess before you get to the next step.
Smooth the coat you’ve just applied from the bottom up. You can use a standard drywall knife for this if you have some experience, but a “magic trowel” (aka an
Let your skim coat dry for 1-2 days. If your wall still shows some texture, apply a second skim coat, smooth, and let dry again. Don’t sand between skim coats.
Yep, it’s a lot of work no matter which procedure you have to use. Is it worth it? That depends. It’s a lot cheaper and less disruptive than having new drywall installed, but your chances of ending up with wonky walls that don’t look great are...well, pretty high, actually. You have to put a lot of time and effort into this project to get it to look right—be patient and don’t rush.
Textured, even excavated interior walls—the sort with charmingly exposed plaster or peeled-back wallpaper—are trending. (Read: Trend Alert: The Excavated Look, 15 Ways.) Not so much the other sort of textured walls: the “orange peel,” popcorn, or faux-stucco walls that might plague your house or rental.
Textured interior walls (think: “orange peel,” popcorn, or swirled patterns) have a practical function, since the texture hides the signs of drywall installation—that is, the taped seams where the sheets of drywall meet—and other imperfections. “It’s cost-saving,” says Barton. “Maybe people actually liked it back in the seventies, but the reason it’s done now is to save money. It’s cheap and fast.”
To many of us, the best wall is the smoothest wall you can get. Here are four ways to turn a stippled surface into a smooth one. These methods will also work with walls that are distressed in other ways (should you tire of the exposed plaster or old-wallpaper look someday).
When drywall is installed, the fasteners and taped seams are skim coated—covered with a thin coat of joint compound, or “mud,” to level the surface in preparation for painting or papering. The same technique gets rid of textured walls. A thin coat of mud is applied over the entire wall surface, allowed to dry, and then sanded smooth. Especially bumpy walls may need more than one coat.
Builders have been widely applying knockdown texture to drywall since the early 1990s. It’s known for providing a casual elegance to interior walls and lends itself to a wide variety of décor types.
There are basically three different knockdown texture techniques: splatter, stomp, and mud trowel (also known as skip trowel). We’ll discuss the tools and materials you’ll need, the steps you should take to prepare yourself and the walls, and how to execute each type of knockdown finish.
Like any fine recipe, you need to make sure you have all the right ingredients and tools before you begin. Here’s a list of tools and materials you’ll need to gather before starting the job.
Drywall hopper gun kit.A drywall hopper gun kit is key to facilitating the knockdown textured finishes for drywall. The gun uses an air compressor to push mud through the nozzle of the gun and spray it on the wall or ceiling.
Air compressor.An air compressor forces the drywall compound from the hopper into a tube, eliminating hand pumping. When the trigger on the tool is pressed, the air pressure sends the compound through the head of the tool evenly. We recommend using one with a minimum capacity of 30 to 40 psi.
1.5-gallon joint compound powder (not rapid dry).Joint compound in the dry form is a powder that usually comes in large paper bags. This product is usually not labeled as being dry. It will be called joint compound with the qualifiers ready-mixed or pre-mixed omitted.
Additional items you’ll need: shop cloths or rags, two or three 2- or 5-gallon buckets, water, a scrap of drywall (for testing), and a tarp or drop cloth.
Before you start mixing powder, make sure that you prep the area or room where you are applying the drywall. You should wipe away dust and dirt using a damp rag. Make sure you allow any moisture to dry before moving forward.
Add Mud or Compound.Pour the proper amount of water in a second bucket. Standard, all-purpose joint compound will work best for this project. You can use either dry compound or ready-mix compound. Avoid compounds that contain sand or grit (unless you want a unique look). Plain mud works best for this type of texture. You should also avoid lightweight compounds. These formulas scratch more easily and may not accept the texturing as well as all-purpose compounds do.
Mix to the Consistency You Want.For knockdown texture, never use mix that contains aggregate. Continue to add water and powder until you have a bit more mix than you think you’ll need. Better to waste some mud than to run out before you’re done. Set the mixture aside for about 15 minutes to allow for complete water absorption. You don’t want the mix thickening in the hopper. You must be able to spray the mixture with the hopper gun, so it should be about the consistency of pancake batter or thick paint.
You can choose between 3 different sized tips for the hopper: small, medium and large. You can spray the mixture lightly to create a fine texture or heavily to create a more rugged look. Usually a medium texture works great with an air control valve so that you can turn your pressure up and down. When applying knockdown, we recommend using a setting of around 40 psi, because you don’t want it to spray too fast.
PRO TIP #2:It takes practice and experience to know exactly how long to wait before knocking down the texture. If you do it too soon, the texture will be runny and simply smear. If you wait too long, small dried out pieces of mud will drag across the surface creating unsightly lines.
Depending on the temperature and humidity levels in your house, it can take anywhere from five to ten minutes for the compound to set to the desired rigidity. This can cause problems because the longer it takes the material to dry, the more vulnerable it is to failure, mold growth, cracking, and more.
The stomp method creates a much rougher surface than the splatter or mud trowel techniques, but with higher ridges and deeper valleys, stomp textures always turn out interesting and unique.
Using a stiff-bristled, crows-foot stomp brush, dab or stomp the brush into the mud. The bristles of a stomp brush are usually arranged in an oval or square pattern and allow you to create an irregular and distinctive texture.
Because the stomp method requires a paint roller to apply the compound to the drywall surface and the additional step of stomping the mixture with a stomping brush before knocking it down, don’t be surprised if this takes longer than you thought. It can take up to twice as long to achieve this look than the splatter method, but the results are worth the extra time.
The curved trowel causes the mud to literally skip across the wall, leaving a sparse texture of round, quarter-sized globules on 50 percent of the surface.
Well, there you have it! Our best tips for how to apply knockdown drywall. Good luck with your project and be sure to leave a comment to let us know how it went and what tips you found most helpful.

If your wall has an irregular finish or mild surface texture this is the only wallpaper we recommend to use. Wallpapers have their limitations and we do not guarantee adhesion of the Long Term Peel and Stick over heavily textured walls. If you are not sure about the degree of texture on your walls please get a sample and test it in location.
Textured walls are modern inventions to finish walls in less time while hiding drywall seams and other building imperfections. Wallpapers ( all of them from traditional to peel and stick types) are not compatible with texture on the walls.
Over textured surface peel and stick wallpapers cannot bond optimally, for that reason peel and stick wallpapers with soft adhesive will fall off. Because the adhesive in the Long Term Peel and Stick is stronger and more durable it will hold over mild textured surfaces.
Over textured walls the Long term Peel and Stick cannot bond optimally so as more surface deformation is present less adhesion will be experienced. When a surface is too heavily textured not even the Long Term Peel and Stick will hold.
Yes you can perfectly do it, read the instructions, watch the video a couple times and be patient. If your area is complex, inside a bath, or have elements on the wall as doors or windows, we advise you to look for the help of a pro.
Textured walls are by definition imperfect, they all have deformations. The texture on the wall creates a difficult surface to install a perfect matching wallpaper. When installing over texture always expect minor misalignments as surface deformation might make impossible a perfect match. If you are very detail oriented we recommend smoothen the wall prior wallpapering.
Always ask for experience with peel and stick wallpapers. If your walls have some degree of texture or deformation you need to let your installer know before head. Look for a pro that"s willing to asses your wall prior installation.
It is important to point out when you have a textured wall and hire a professional wallpaper installer he/she will tell you you need to smooth out the wall prior wallpapering. This is the right thing to do.
A professional installation means high quality results, that can only be achieved by smoothing out the wall prior wallpapering. It is completely your personal choice but consider a wallpaper install over a textured wall will never have professional results. Walls are textured to avoid finishing them ( layers of joint compound and sanding prior painting ), they are very prone to have deformations and decorative textures themselves have different rates of deformation, this will make virtually impossible a perfect match between panels.
The removal process is possible without causing much damage to the wall. Expect (even on textured walls) to lift some paint chips while removing it, and if you soften the material with a blow dryer in Hot setting it will be even easier to remove.
Avoid using Long Term Peel and Stick over a recently painted wall, the fumes for a recently painted wall ruin the adhesive of this wallpaper. Wait at least 4 weeks after painting to install a wallpaper


 8613371530291