
building a rotary table in stock

For a corner fillet weld such as those, it may help if you grind off half of each corner on the slotted plates giving a 45 deg V. This will help to ensure the weld gets good penetration and strength at the same time as allowing you to retain the original edges for alignment.
Looks to me like you are using a 240V single phase welder. In Oz I would use a Satin craft 13 electrode as these have a slower flux than a Satin craft 12. This helps stop the flux from running into the weld pool and stopping the arc. My welder has only 2 settings 2.5 and 3.2 mm so I try and use the shortest possible cable between the power point and the welder. If I have to go longer a heavier duty cable helps keep up the volts and amps.

when I started the welding I was going fast and was distracted a bit by helping my son change his winter tires - totally gapped that I had a roll of stainless in the machine - Argh!! Was absolutely sh...tie to start and things did not look nice. Had to grind off the tacks carefully and then change out wire.
to help keep things straight I cut a 1/16” deep pocket that the side fit into so they maintained proper alignment and spacing. I did have some shrinkage as things cooled so I skimmed the centre holder for a better fit. It is snug but moves about reasonably well.

This website or its third-party tools process personal data (e.g. browsing data or IP addresses) and use cookies or other identifiers, which are necessary for its functioning and required to achieve the purposes illustrated in the cookie policy. To learn more, please refer to the cookie policy. In case of sale of your personal information, you may opt out by sending us an email via our Contact Us page. To find out more about the categories of personal information collected and the purposes for which such information will be used, please refer to our privacy policy. You accept the use of cookies or other identifiers by closing or dismissing this notice, by scrolling this page, by clicking a link or button or by continuing to browse otherwise.
This website or its third-party tools process personal data (e.g. browsing data or IP addresses) and use cookies or other identifiers, which are necessary for its functioning and required to achieve the purposes illustrated in the cookie policy. To learn more, please refer to the cookie policy. In case of sale of your personal information, you may opt out by sending us an email via our Contact Us page. To find out more about the categories of personal information collected and the purposes for which such information will be used, please refer to our privacy policy. You accept the use of cookies or other identifiers by closing or dismissing this notice, by scrolling this page, by clicking a link or button or by continuing to browse otherwise.
This website is using a security service to protect itself from online attacks. The action you just performed triggered the security solution. There are several actions that could trigger this block including submitting a certain word or phrase, a SQL command or malformed data.
To the OP and Dr. Clyde- My last post was poking a bit of fun at myself and all other Luddite-Wannbees. I do fully understand re-purposing an otherwise useless paperweight. I also agree that most ROTABS are next to useless, I haven"t dragged any of mine out in years either. I applaud finding a practical use and nod at the enjoyment the OP must have felt in creating a useful fixture from this.
The small part of me that cringes is when something exceptional is facing some degree of destruction. Some things are limited in existing numbers and every one of them that gets altered/destroyed reduces that available quantity regardless of the purpose. I"ve got a 100 year old vise that is still in good condition (now) and several art pieces that are centuries old because someone took care of them. A Troyke ROTAB isn"t an art piece but it"s not too far a stretch to consider it within that realm for a toolmaker.
I also do NOT consider welders to be hacks. A nicely welded joint by any fusing process draws an admiring inspection from me, especially when it"s better than my own. Contracting at Miller Industries (tow truck people) as a tooling engineer I chose to confer with the welders on every fixture design I created for several reasons. Welders earned my respect a long time ago.
To Dr. Clyde- My "cringe" is nothing more than the small sadness of watching the past being left in the dust of the future, right where it belongs. I really was poking fun at myself and my comments were with my tongue firmly planted in cheek.

Years ago, before I learned CNC, I owned a Phase II 8″ horizontal/vertical rotary table that I purchased from Kap Pullen’s Getmachinetools.com store. He has them at a good price, BTW, and he’s a darned nice fellow to deal with as well as being a frequent HSM contributor. Anyway, its a nice little table, but I hadn’t done a whole lot with it for quite a while after purchasing it. As is so often the case, one day, a project landed on my doorstep and I was glad to have it.
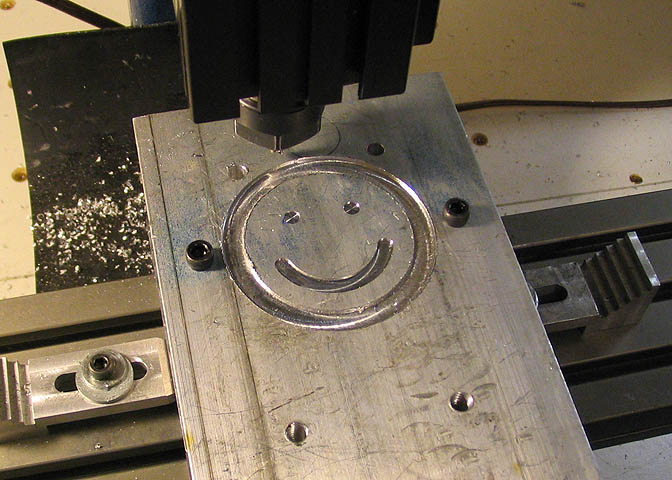
Before I could get started, however, I had to make some accessories for it. Basically, I needed some T-Nuts to fit the table, as well as a little fixture that makes it easy to hold a plate up off the table through a hole in the center so you can machine it. The latter, what I call a “plate machining fixture”, was inspired by something similar I saw the Widgitmaster of CNCZone fame using to make Dremel clamps for his mini-router:
The Plate Maching Fixture and 3 Homemade T-Nuts. T-Nuts are easy to make: square a block to the proper dimensions, mill the side reliefs, drill, and tap. These are much smaller than the mill’s Bridgeport standard T-slots, so I made them myself and I’m using 1/4-20 bolts with them. They’re made of mild steel.
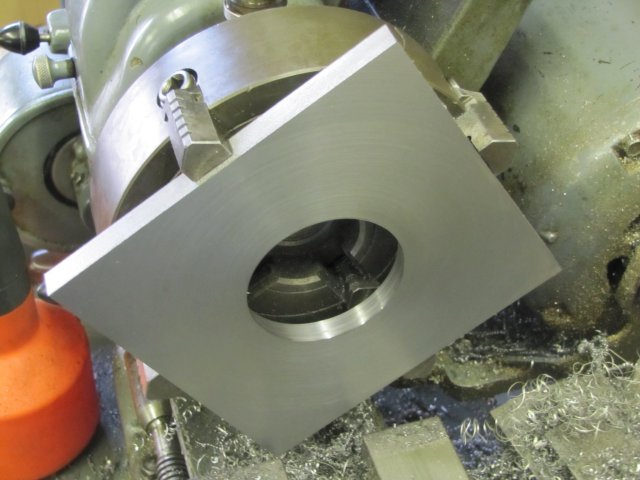
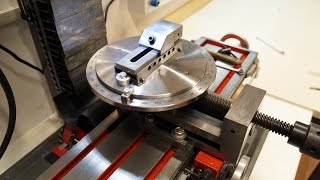
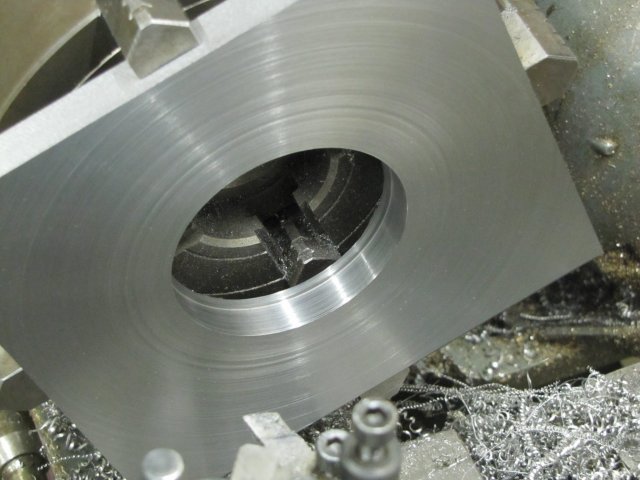
I turned the round spigot using the 4-jaw on the lathe. I’m making the fixture out of MIC-6 aluminum plate, which is pre-ground very flat on the sides. This is a 5 inch by 3 inch piece. I’ve clamped it to the rotab using my T-nuts and the regular mill clamps and step blocks. It is sitting on parallels to make sure I don’t cut into the table. You can also see how I’ve clamped the rotary table to the mill table using a big cast iron V-block I have. You can never have to many blocks with precision faces hanging around!
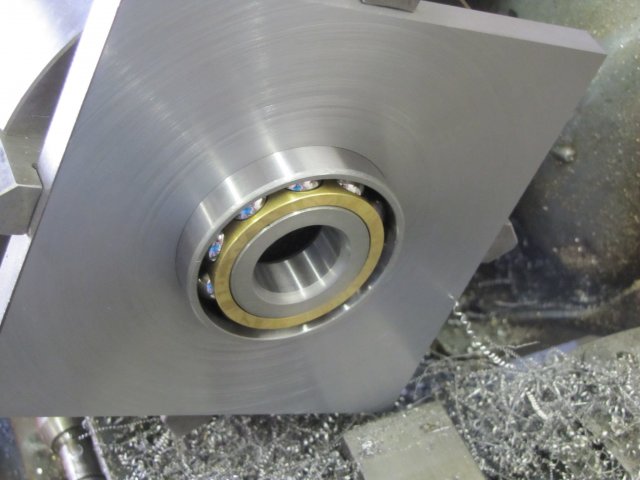
Having a 4-jaw chuck on your rotary table is mighty handy! Because it’s a 4-jaw, you can dial in the workpiece by adjusting the jaws until it is perfectly concentric with the table’s axis of rotation. The best way is to make an adapter plate that attaches to the back of the chuck in the same way that your lathe does so you can exchange lathe tooling with the rotab. Here is an example:
For the example, the chuck is threaded onto the adaptor plate, and then the holes in the adapter plate’s flange are used to bolt down to T-nuts on the table.
In my case, I bought a 4-jaw from Shars brand new, and simply drilled some through-holes in the chuck to mount to the table directly without an adapter plate:
First, you want to make sure your part is properly centered on the table. To do that, I clamp the table down on the mill table (no special place is needed), put my Indicol indicator holder on the mill spindle, and find some round feature on the part to indicate on. For example, on the plate milling fixture above, indicate on the round boss, or on the center hole. Spin the table and bump the part in until spinning the table doesn’t move the indicator.
Second, locate the center of rotation directly under the mill spindle. You can simply use the X and Y table handwheels to do this. Use that Indicol to indicate off of a circular feature you want centered under the spindle. Turn the indicol around on the spindle and adjust the handwheels until the indicator stays put relative to the spindle position. A Blake Coaxial indicator will make this last even simpler.
When you’re rounding partially by cranking a part around on the rotary table, it’s really easy to go a little too far and screw things up. The answer is to drill the end points to make the exact stopping point on the rotab a lot less sensitive:
Centering with a Blake indicator is really fast, but what if you don’t have a Blake, or worse, what if your mill is too small to accomodate one? Here is a nice solution I found on a German site. This fellow has made an ER collect fixture for his rotary table, and has taken care that when installed on the table, the axis of the collet is aligned with the table’s axis. He can then place a dowel or other straight pin in the collet and line up until it will go into a similarly sized collet on the spindle. Nice trick! It’s similar to how Widgitmaster showed me to align a drill chuck on a QCTP to the lathe centerline with a dowel pin held in the lathe chuck.
Rotary Tables└ Workholding Supplies└ Workholding & Toolholding└ CNC, Metalworking & Manufacturing└ Business & IndustrialAll CategoriesAntiquesArtBabyBooks & MagazinesBusiness & IndustrialCameras & PhotoCell Phones & AccessoriesClothing, Shoes & AccessoriesCoins & Paper MoneyCollectiblesComputers/Tablets & NetworkingConsumer ElectronicsCraftsDolls & BearsMovies & TVEntertainment MemorabiliaGift Cards & CouponsHealth & BeautyHome & GardenJewelry & WatchesMusicMusical Instruments & GearPet SuppliesPottery & GlassReal EstateSpecialty ServicesSporting GoodsSports Mem, Cards & Fan ShopStampsTickets & ExperiencesToys & HobbiesTravelVideo Games & ConsolesEverything Else
${{result.values.onspecial === "true" && parseFloat(result.values.catalogprice) > parseFloat(result.values.price) ? result.values.catalogprice.slice(0, result.values.catalogprice.indexOf(".")).replace( /\d{1,3}(?=(\d{3})+(?!\d))/g , "$&,") : result.values.msrp.slice(0, result.values.msrp.indexOf(".")).replace( /\d{1,3}(?=(\d{3})+(?!\d))/g , "$&,")}}{{ result.values.onspecial === "true" && parseFloat(result.values.catalogprice) > parseFloat(result.values.price) ? result.values.catalogprice.slice(result.values.catalogprice.indexOf(".")+1) : result.values.msrp.slice(result.values.msrp.indexOf(".")+1)}}
${{result.values.price.slice(0, result.values.price.indexOf(".")).replace( /\d{1,3}(?=(\d{3})+(?!\d))/g , "$&,")}}{{result.values.price.slice(result.values.price.indexOf(".")+1)}}
One revolution of the worm advances the gear one tooth. 21 teeth so 21:1. That would be an odd number for an RT. Also an RT usually has a mechanism for taking up any slack to reduce backlash. This would be hard to accomplish with your gear set. However, if you are willing to do the math and only turn the table in one direction for its final setting, it could work.


 8613371530291