
mounting chuck to rotary table supplier

6" base adapter plate is ideal to use on 6" rotary tables of either 3 or 4 slots to mount either 4" , 5" 3-jaw ,6-jaw or 4-jaw self-centering lathe chucks.

6" PRECISION 3 slot ROTARY TABLE /HORIZONTAL&VERTICALwith 6" 3-jaw self-centering chuck top&bottom reversible jaws, front mounting. All bolts and T-nuts to mount the chuck included.

I have a 5" 4 jaw that I use on the 9x20. I also have a nice Phase II 6" rotary table. I was going to buy another 6" 4 jaw for the rotary table and just drill it between the jaws and run socket head screws through it to T-nuts. I may still do that, just because the plain back 4 jaw 6" chucks are cheap.
Then I thought, why not just use the 5". I haven"t done it yet, but the idea I had was to use a 6" chuck adapter threaded for the 9x20 (have it already) and turn the register to catch the back of the 5" chuck - basically, make a regular lathe chuck mount. With the check mounted and checked out, turn the diameter of the adapter to match the rotary table as required. Then remove the chuck, mount the adapter on a faceplate backwards and face off the back of the plate to make it flat all the way across. Alternately, I could just mill the threaded mounting boss off the back side. Take what"s now a chuck mounting "puck" and punch 4 holes in the outer diameter clear of where the chuck mounts to catch some t-nuts on the rotary. Mount chuck to puck, puck to table and done. If the chuck is needed on the lathe, it"s just put back on its old 5" adapter and mounted on the lathe. One chuck doing double duty. More engineering, but hey - I need practice.

New: A brand-new, unused, unopened, undamaged item in its original packaging (where packaging is applicable). Packaging should be the same as what is found in a retail store, unless the item was packaged by the manufacturer in non-retail packaging, such as an unprinted box or plastic bag. See the seller"s listing for full details.See all condition definitionsopens in a new window or tab

TOOLMEX is a diversified industrial supplier, designer and producer of highly engineered products for the metalworking, machinery and electric motor industries. Toolmex drives innovation with the expertise and ingenuity of its people, and is dedicated to delivering results our customers and partners can depend upon. Toolmex has headquarters in Boston and Chicago with sales offices throughout the United States, Canada and Latin America.

Is there any relatively easy way I can fit a 3-jaw chuck concentrically to a rotary table when the chuck only has mounting holes from the rear. Or do I have to go out and buy one with mounting holes from the front?
If your chuck has a Myford backplate you can buy an adaptor which fits your rotary table and has a Myford threaded nose to accept the chuck. Alternatively you can do what I have done and make an adaptor which fits the MT in the table and has a threaded nose to suit whatever is on the chuck backplate. If you do this you must use a drawbar to secure the adaptor in the table taper - it is a very short taper.
I have got a three-slot table so could make a backplate to fit the table, mounting with T nuts and bolts and bolting the chuck to this backplate first.
To make it more versatile (because I want to use other tooling as well) I am making an arbour threaded with the spindle nose uppermost and an MT taper to fit the table (mine"s MT2) so that I can screw any of my chucks to the arbour.
If its not a threaded chuck then turn a circular plate about 25mm larger dia than the chuck, counterbore or countersink for the chuck mounting screws and then mill 3 or 4 slots into the edge depending on the number of slots in your table and use these with tee nuts, studs etc to hold it to your table just like the Chronos ones
I have a 3/8 thick 5" dia. "sub plate" that has a short male register turned on one side to locate in the RT and a female register on the top side that accepts a plug to register the chuck concentrically. The chuck was drilled for 6mm capheads that hold it to the sub plate (from beneath), the sub plate is then held to RT with 6mm capheads into tee nuts in the RT slots
I should add that the 3 jaw is the Myford type with internal thread and register which makes the above relatively straight forward. This will of course be more of a problem if the chuck has a conventional backplate.
In the near future I"m intending to make a low profile indexing table and intend to drill right through the chuck for the hold down bolts. This will eliminate the sub plate.
I made a threaded nose with a 100mm dia flange with slots to take bolts that go into T nuts in my 6" rotary table, I,v tryed to keep things as low as possible, but with 8" chucks I have minimal room with the jacobs chuck in the mill, so I find use for short drills ect.Ian S C
Use this to line your the chuck’s own back plate and your new adaptor and spot through the retaining screws to hold the chuck to the adaptor. Use counter sunk screws.
On my home made table I made a small table the same diameter as the mini-lathe chuck (80mm) with a deep groove all round so you can get at the mounting screws. It means its a bit higher than usual by about 1", but I can also put my 7" faceplate on it.
I suppose you could make a short locating plug, MT one end, and some sort of boss to fit the chuck at the other end. Then hold the chuck down using Tee nuts and long bolts/ clamps on the outside of the chuck. This would give you maximum vertical headroom. Drill/ bore a hole thro the plug in case you need to mount a longer workpiece in the chuck. Bit crude, but it would work !
I go away for a couple of days and there are a myriad of really helpful replies. Thank you so much! I will be able to make a suitable chuck fitting for my RT this weekend.
For what its worth my chuck is a Chinese one with a shallow recess for fitting to a backplate. Unfortunately, no Myford or Boxford here. So I"ll be using the ideas based on the thick plate twixt RT and Chuck.
It is indeed interesting that none of the usual tool suppliers has filled the requirement for an RT with an integral, concentric, low-height chuck over a wide range of sizes....
I have the adaptor from Chronos for the Boxford lathe and mount it to my rotary table Only issue I have is that it often unwinds itself so I need to come up with some idea to fix it when trying to machine a large flywheel as the lathe will not take the size of flywheel. Any body have any ideas?? Newbie Mike
Could make some brake shoe devices to bolt into the rotary table slots and come into firm contact with the body of the chuck. Need one in each slot to ensure force is symmetrical so no tendency for the chuck to be pushed out of true. I"d use softwood shoes on an L shaped bracket with a projection on the base of the L so that tightening the bolt pushes the shoe into contact. Use a scrap of alloy sheet under the projection so it doesn"t mark the table.
Simpler way would be to get one of the long jubilee clips used to hold smoke deflectors on chimneys, central heating pressure vessels (and probably lots of other things) to clamp simple L brackets to the chuck which could similarly be bolder to the table. 3 mm alloy would probably work, bends easily and will take up the chuck diameter when the clip is done up. Maybe two clips for extra security.
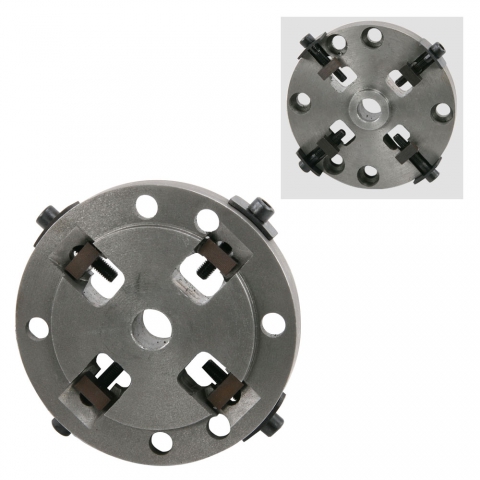
a week or so ago I posted a bit on my rotary table fitted with a chuck. I made a base-plate (photo below, right) between chuck and table- The base plate bolts to the table and is larger in diameter than the table and chuck. I drilled the chuck through so that it bolts onto the base plate from the front of the chuck.
Surrounding the chuck is a larger ring that also bolts to the base plate ( below left) and has four screws through the side that impinge on the chuck. Backing off slightly on the three chuck bolts allows the work piece to be nicely centred using the 4 side screws, and then tighten up the chuck bolts.
Forgive the repeat of the photos of the previous post - I have not managed to work out how to give a link to just a specific section post in the forum...
I have drilled 4 M10 holes in my RT allowing me to bolt down a 4 jaw chuck. They were carefully located to make the chuck body as near concentric as possible. But the way I look at it is that I would never put something round in the 3 jaw in the lathe and expect it to run true - I always try to plan to get all the concentric things turned at one setting. If something has to run true it goes in the 4 jaw on the lathe. So why is it different on a rotary table?
Thought proceess might be best started with the RT purchase - four T-slots, not three. I mistakenly bought a 4 jaw self centering chuck for mine and regretted it. I will change it for an independent four jaw next time I need to remove it. The independent chuck does not even need to be mounted that central - how many rotary tables are spun at high speed!
A baseplate fitted to a three slotted RT, followed by the 4 jaw chuck is better than a self centering chuck. I cringed, every time I have wanted to remove that current chuck, to mount something direct on the RT. It will not be fitted centrally again!

At Sherline, we manufacture the world"s most complete line of precision milling machines, lathes, and chucker lathes (also known as Mini or Micro Mills and Lathes). We manufacture both manual and CNC machines for benchtop or tabletop-size workspaces, along with a full line of accessories to support these machines.
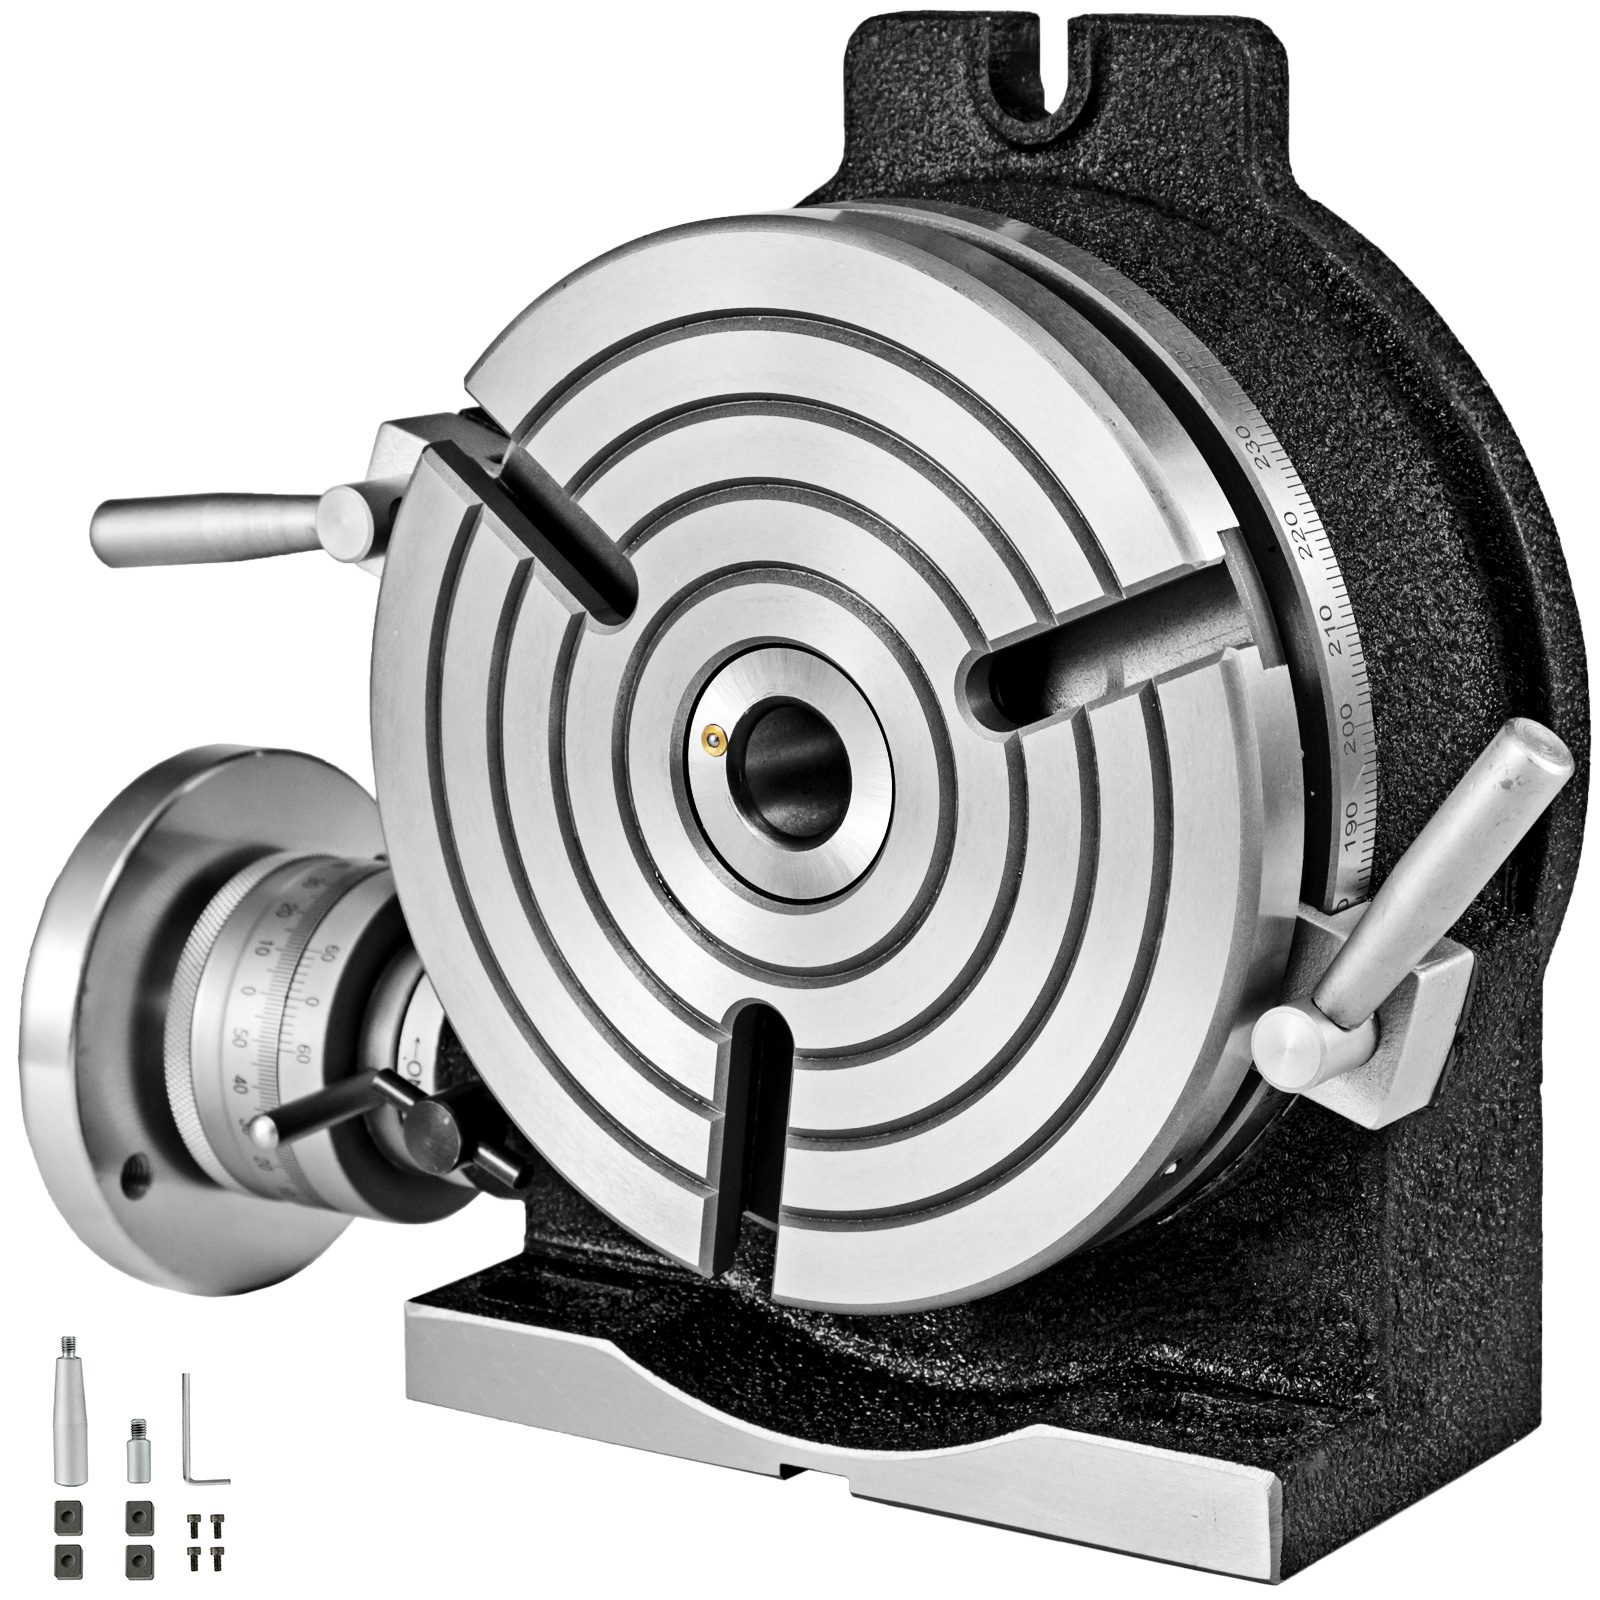
3-Jaw Front Mount Scroll Chuck - Flatback Top Reversible JawFor use with rotary tables and applications where back mounting chucks cannot be usedFor use on 3 slot rotary tables or on base plate for 4 and 8 slot rotary tables
Rotary mounted three-jaw manual chuck with high concentricity. For internal and external clamping of rotationally symmetrical parts. With Ø2 x 7 mm deep holes and 2 sets of pins of different lengths for elevating parts for access from all sides. Available with an SWA 39 quick-change adapter or base plate.


 8613371530291