
gas furnace safety valve free sample

As a design engineer responsible for developing and specifying boilers, dryers, furnaces, heaters, ovens and other industrial heating equipment, you face a daunting labyrinth of standards and industry regulations. Regulatory bodies sound a bit like alphabet soup, with acronyms like UL, FM, CSA, UR, AGA, ASME, ANSI, IRI, CE and NFPA tossed about. This article will help explain a common task for many thermal processing equipment specifiers: meeting the requirements of key codes — including Underwriters Laboratories (UL), Factory Mutual Insurers (FM) and the National Fire Protection Association (NFPA) — for safety valve equipment used in process heating applications.
Key to designing safety into your fuel train configurations are familiar technologies such as safety shutoff valves and vent valves as well as visual-indication mechanisms and proof-of-closure switches.
Your design skills come into play with how you take advantage of the wide range of products available. You can mix and match solenoid and safety shutoff valves — within designs from catalytic reactors to multi-zone furnaces — to create easily installed, cost-effective solutions that comply with all necessary standards. (See table.)
Make sure, however, that you start with a good grasp of valve element fundamentals. For example, examining a proof-of-closure (POC) switch underlines how reliably modern valves can ensure combustion safety. The POC unit provides an electrical contact interlocked with the controller safety circuit. In a typical design, the switch is located at the bottom of the valve, positioned to trace the stroke of the valve disc. When the disc seal reaches the fully closed position, it triggers the mechanism to push down on the contact, closing it and triggering the unit’s visual indicator to show open or closed status. As a result, the operator can act with full confidence in situations where it is critical that a safety valve be safely closed.
To provide ease of installation, many users prefer valves with modular capabilities. For example, to reduce mounting complexity, you can choose modular gas safety shut-off valves — combining a solenoid valve with an electrohydraulic motorized valve for a compact double-valve footprint, a slow-open feature and high flow rates. An accompanying actuator can provide on/off or high/low/off firing rates as well as visual indication and proof of closure for compliance with most industry standards.
Also, you may want to look for valves that include useful features such as pipe taps, which can facilitate accurate pressure readings and leakage testing.
Knowing your valve choices — and how they meet given codes and standards — can reduce the time required for design and production while facilitating compliance. This results in safer, more efficient and cost-effective heating process installations.

If it is determined that there is an unsafe condition, the inspector should shut off the furnace at the electric service switch and advise the occupant and/or owner of the unsafe condition. The local utility company may be contacted for further immediate evaluation.
If the furnace is not operating properly, report the heating system as in need of correction. The inspector may look through the sight glass to check for a blinking light signaling an error code and document the code, if applicable. The error codes or diagnostic indicator table or chart may be attached to the furnace.
The furnace must be accessible for inspection, servicing, and replacement with an unobstructed passageway and solid continuous flooring at least 24 inches (609.9 mm) wide. If the furnace is located in the attic or underfloor crawlspace, the unobstructed passageway or opening should be at least 30 inches high by 22 inches wide, and the solid continuous flooring should be at least 24 inches wide and not more than 20 feet long. An opening for the furnace (such as an opening in an attic floor) should be at least 20x30 inches. There should be a 30x30-inch level workspace in front of a furnace.
The location of the furnace must not be in a sleeping room, bathroom, storage closet, or in a space that opens only into such rooms or spaces. There are exceptions: if the furnace is a direct-vent furnace, or is a furnace installed in a room that meets certain volume criteria outlined in the local building code. The furnace may be installed in a space that opens directly to a bedroom if there is a solid weatherstripped door that has a self-closing device and the combustion air is taken directly from outside.
Category I furnaces operate with a negative vent pressure. They do not produce condensate, and their vent connector pipes are metal Type B (negative, no condensate, metal).
Category IV furnaces operate with a positive vent pressure. They produce condensing flue gases, and their vent connector pipes are plastic (positive, condensate, plastic). The plastic vent pipes for Category IV furnaces may be specified or furnished by the manufacturer. Common plastic combustion air and venting pipes are made of Schedule 40 PVC or CPVC, but the manufacturer"s installation instructions will identify the required plastic pipe material.
Type B vent connector pipes are made of metal and are designed for venting non-condensing gas appliances equipped with a draft hood or fan-assisted furnaces with a non-positive vent pressure (Category I).
To learn about furnace categories and vent connectors, take InterNACHI"s free, online How to Inspect HVAC Systems Course and go to the "Identify and Describe Systems" section.
Vent connector pipes connect the furnace to the vertical chimney or vent. The common connector pipe for Category I gas furnaces is Type B Double Wall, and the metal pipe should be installed from the furnace to termination.Vent pipes must not pass through any air duct or furnace plenum.
Look at the vent connector pipes for proper support, slope, and termination. Plastic vent connector pipes must slope at least 1/4" per foot (0.25:12) of run so that condensate drains back to the furnace.
There should be a minimum 1-inch (25.4 mm) clearance (air space) between the Type B vent connector pipe and combustible materials. A single-wall vent connector pipe requires at least 6 inches (152.4 mm) of clearance.The building code and the manufacturer"s installation instructions will indicate the minimum clearances required between the furnace vent connector pipes and unprotected combustible materials. If a vent pipe passes through insulation, a metal shield should be installed to provide clearance between the vent pipe and the insulation.
Requirements for metal gas vent pipe terminations are described in the local building code. Gas vents of 12 inches (304.8 mm) or less in size and at least 8 feet (2438.4 mm) away from a wall must terminate at least 1 foot (304.8 mm) above the roof surface having a slope of between flat and 6:12.
For more information about fuel gas termination, take InterNACHI"s free online "How to Inspect Fireplaces, Stoves, and Chimneys Course" and go to Chapter 3, Fuel-Gas Termination section for more information.
Look at the switch, its electrical box, plate cover, and wire.An emergency shut-off switch may be installed at a distance far away enough from an unsafe condition at the furnace.
Look at the required clearance (combustion and service) around the cabinet.The manufacturer"s installation instructions will indicate the minimum clearances required between the furnace and unprotected combustible materials. In most cases, in general, there should be a clearance of at least 3 inches (76.2 mm) of working space around the furnace cabinet.
Look at the gas shut-off valve, which should be outside of the cabinet and near the furnace.The valve should be accessible, located within the same room as the furnace, installed within 6 feet of the furnace, and installed upstream of the union, connector or disconnect device.
Look at the union.A union must be installed on the rigid metal pipe, accessible, downstream of the gas shut-off valve, and within six feet of the furnace.
It should be installed downstream from the furnace"s gas shut-off valve as close to the inlet of the furnace as possible. It can be of any length.View illustration of a sediment trap.
There should not be flexible gas connector pipe installed inside the furnace cabinet. The gas piping must be solid pipe.Only hard metal gas pipe can passthrough the furnace cabinet to connect with the gas valve assembly.The gas flexible connector (if installed) can not pass through the furnace cabinet.The gas flex connector must be completely visible in the same room with the furnace.
Black-Jacketed CSST has an arc-resistant jacket or coating system. The Black-Jacketed CSST must be electrically continuous and bonded to an effective ground-fault current path. Black-Jacketed CSST is considered to be bonded where it is connected to an furnace that is connected to an appliance grounding conductor of the circuit that supplies that furnace.
Check the inlet gas operation using the thermostat (normal operating control).A label must be present if the furnace was converted from natural gas to Liquefied Propane (LP).
Look at the inducer fan motor and blower assembly while it is operating.Natural draft furnaces are old and no longer manufactured, energy-inefficient, and beyond their service life expectancies.
Look at the condensate drainpipe and traps.Category IV appliances produce condensate.Condensing furnaces should be provided with an auxiliary drain panwhere damage may occur if the condensate drainage system fails. A pan is not necessary if the appliance has an automatic shut-down device installed.
Look at the condensate pump, if one is installed.If a condensate pump is connected to a furnace located in an uninhabitable space (such as an attic or crawlspace), the furnace should be installed to turn off automatically if its condensate pump fails. The condensate pump should have an overflow shutoff capability.
Air for combustion, ventilation and dilution of flue gases for gas-fueled central furnaces and heating systems must be provided by certain provisions listed in the manufacturer"s installation instructions and the local building code. Outdoor air may be introduced in accordance with one of the methods described in the building code. Makeup air must be provided where clothes dryers and exhaust fans may interfere with the furnace"s safe operation. The minimum amount of indoor combustion air for the furnace is 50 cubic feet per 1,000 BTU/h of the furnace"s input rating. The minimum amount of outdoor combustion air for the furnace may be provided by one permanent opening that is 12 inches (304.8 mm) from the top of the enclosure, or by two permanent openings, with one opening 12 inches from the top and the other opening 12 inches from the bottom of the enclosure.
Delta T is the temperature difference between the supply air and return air. Delta T can be used to help diagnose system performance. Calculating Delta T is complex and is beyond the scope of a home inspection. Calculating Delta T at a forced-air ducted furnace involves an HVAC technician subtracting the return air temperature from the supply air temperature, and the difference is the Delta T or the difference in the temperature.
Delta T for a heating system may be indicated by the data plate on the furnace as the temperature rise minimum and maximum. It may be a 30-degree difference in temperature. If the Delta T is high, poor airflow may be the problem. If Delta T is low, the furnace capacity may be inadequate or there may be too much air flow.
A boiler valve kit is a must-have for any homeowner with a boiler system. This brass valve kit features a vent safety valve that helps to protect your home from dangerous gas build-up. The included instructions make installation easy, and the durable brass construction ensures lasting performance. Keep your family safe with this essential boiler valve kit.
9. When the calibrated pressure is reached, the valve opens automatically and discharges the atmosphere to protect the whole system from safe caused by overpressure
10. This brass boiler valve kit is perfect for any steam-powered project. The kit includes a pressure gauge, safety valve, and two shut-off valves. The pressure gauge helps you monitor the pressure in your boiler, the safety valve keeps your boiler from exploding, and the shut-off valves let you turn off the steam supply without having to drain the boiler.
This brass boiler valve kit is perfect for any steam-related projects you may have. It includes a durable boiler and vent safety valve to keep your project safe and functional. The included instructions make it easy to install this kit in no time. This boiler valve kit is the perfect addition to your tool collection with its high-quality construction and affordable price. This brass boiler valve kit is ideal for any steam-based appliance. The kit includes a boiler valve, vent safety valve, and all the necessary fittings for a quick and easy installation. The included vent safety valve helps to ensure safe operation by releasing excess pressure in the event of a malfunction. This kit is ideal for use with any boiler, including cast iron, steel, or copper boilers.
Vent safety valves are required for all direct-fired appliances; this kit includes everything you need to install one. The boiler valve is brass and has a 1/2-inch pipe thread fitting that can be connected to the vent pipe. It also features an adjustable pressure relief valve with a gauge, protecting your home from high-pressure steam or air from the system. This kit comes with two elbows (1 in., two in.), four nipples (3/4 in., 1/8 in., 3/8 in.), three straight fittings (5/16 inches), and five pipe connectors (3 ways).
This boiler kit includes a brass pressure relief valve with an air vent, which is required by law. It also has a 1/2″ discharge elbow and two unions connecting the pipe inlet to your water heater. The safety valves are designed to prevent excess pressure from building up inside the tank, which can cause dangerous boil-overs or even potential explosions. This kit is excellent for homeowners with existing water heaters without this equipment installed.

Air conditioning heat pump pressure bypass valves are important in any air conditioning system. These valves help regulate the amount of refrigerant sent through an AC system and help keep it running smoothly and efficiently. Without these valves, the system would be unable to operate properly, causing a wide range of problems from decreased efficiency to total system failure. Here we will provide a brief overview of how AC heat pump pressure bypass valves work, their advantages, and why they are so important for your AC system.
The most common type of pressure bypass valve is a fixed-orifice design. This type consists of two ports – one port allows the refrigerant to pass through while the other directs high-pressure liquid away from the compressor.
A pressure bypass valve is an important component of an air conditioning heat pump system. It helps to prevent excessive high-pressure buildup, thus ensuring that your system operates efficiently and safely. Pressure bypass valves are most commonly found in split systems, as they control the refrigerant flow.
The main purpose of a pressure bypass valve is to protect the air conditioning compressor from being damaged due to excessive pressure build-up. Allowing excess liquid refrigerant to bypass the compressor helps reduce the risk of damage caused by overpressurization. It also prevents the liquid refrigerant from entering other components within the system and causing further damage. The valve is typically installed at either end of a heat pump’s evaporator coil, with both ends connected via pipes or hoses.
A pressure bypass valve is a critical component of an air conditioning heat pump system. It is designed to control refrigerant flow in the system, allowing it to be safely regulated and maintained. The valve helps to maintain a safe level of pressure within the system and prevents damage from occurring due to excessively high-pressure levels.
The operation of a pressure bypass valve is relatively simple. When the system’s temperature increases, causing the refrigerant pressure to rise, it triggers the valve to open and allows some of that pressure to escape. This reduces the overall pressure to maintain a safe operating level, allowing optimal performance and efficiency. When temperatures drop again, and lower pressures are reached, the valve will close back up automatically until needed.
As homeowners look for ways to lower their energy bills and maintain their air conditioning systems, they should consider the advantages of an air conditioning heat pump pressure bypass valve. This device helps keep the system running smoothly and can reduce costly repairs due to its ability to regulate high-pressure conditions.
The pressure bypass valve is designed to open when system pressures become too high. This prevents damage by allowing refrigerant gas or liquid to flow into another location in a controlled manner. As the refrigerant flows through the valve, it equalizes temperatures between indoor and outdoor units, increasing efficiency while lowering operating costs.
Pressure bypass valves are essential to the air conditioning and heat pump system. They help regulate the pressure within the system, ensuring it works correctly and safely. However, like all mechanical components, pressure bypass valves can experience common issues that may require attention from a qualified HVAC technician.
The most common problem with pressure bypass valves is clogging or sticking due to debris buildup in the valve itself. This can cause airflow restriction, reducing efficiency and increasing energy costs for homeowners. In addition, if dirt or other contaminants enter the valve housing, it can cause an imbalance in pressure levels leading to potential leaks within the system. Other less frequent issues include malfunctioning solenoids or damaged O-rings, which will require replacement parts for repair.
Are you looking for an easy way to install a pressure bypass valve? Installing an air conditioning heat pump pressure bypass valve can be tricky, but understanding the process and having the right tools can make it easier. Keep reading to learn more about installation tips for pressure bypass valves that will help make your project successful.
When installing a pressure bypass valve, it is important to ensure you have all the necessary components before beginning. This includes any mounting hardware, such as screws or brackets, tubing and clamps, and the correct size O-rings. Additionally, you’ll need a wrench set, screwdriver set, wire cutters, adjustable pipe wrench, and tubing bender. Once you’ve gathered all of these items together, check your manufacturer’s instructions for specific installation and setup procedures details.
The air conditioning heat pump pressure bypass valve is an important part of any air conditioning system. As such, it is important to understand the benefits and considerations of having one installed in a residential or commercial space.
One of the major advantages of having a pressure bypass valve installed is that it helps keep the system running efficiently. By preventing over-pressurization, the valve ensures proper operation and prevents costly repairs or downtime due to malfunction. Additionally, it helps protect against water damage should there be a sudden change in pressure levels in the system, which can help reduce overall maintenance costs.
However, like any other system component, some considerations are associated with installing a pressure bypass valve. These include ensuring proper installation by qualified personnel to ensure safe operation and regularly inspecting and maintaining the device for optimal performance.

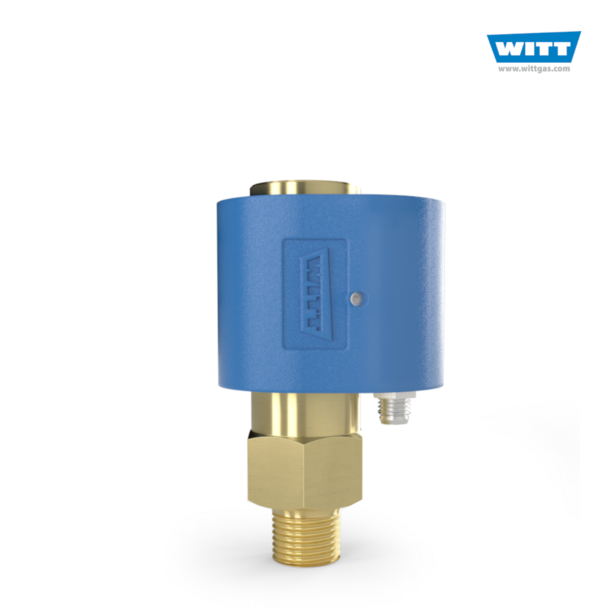
The primary purpose of a safety valve is to protect life, property and the environment. Safety valves are designed to open and release excess pressure from vessels or equipment and then close again.
The function of safety valves differs depending on the load or main type of the valve. The main types of safety valves are spring-loaded, weight-loaded and controlled safety valves.
Regardless of the type or load, safety valves are set to a specific set pressure at which the medium is discharged in a controlled manner, thus preventing overpressure of the equipment. In dependence of several parameters such as the contained medium, the set pressure is individual for each safety application.

This overview presents the ins and outs of a national combustion safety standard for ovens and furnaces, which lays the groundwork for safe operation.
A furnace can be defined in a broad sense as an enclosure for the combustion of fuel, or more specifically, an enclosure where the heat of combustion is transferred by radiation or by convection to a product within the enclosure. The importance of combustion safety in industrial ovens and furnaces cannot be overstated. Therefore, combustion safeguards are required in most national combustion safety standards, such as the National Fire Protection Association (NFPA) Standard 86: Standard for Ovens and Furnaces. Standard 86 is a comprehensive document covering the safe operation of ovens and furnaces, with sections on explosion relief, ventilation, equipment locations and many other helpful sections.
Standard 86 applies to a wide range of furnaces-from electric-arc melting furnaces to low-oxygen types. However, this article concentrates on combustion safety, therefore, a direct natural gas-fired furnace will be considered to simplify the discussion, which also applies to oil- and propane- fired furnaces. Standard 86 also applies to new installations and alterations or extensions to existing equipment.
The basic cause of furnace explosions is the ignition of an accumulated combustible mixture within the confined space of the furnace chamber and/or the associated ducts that exhaust combustion products to the stack. This entire volume can conveniently be referred to as the furnace enclosure or setting. A dangerous combustible mixture within the furnace enclosure consists of the accumulation of a quantity of combustibles mixed with air in proportions that will result in rapid or uncontrolled combustion when an ignition source is supplied. A furnace explosion can result from ignition of this accumulation. The magnitude and intensity of the explosion depends on both the relative quantity of combustibles and the air-to-fuel ratio at the moment of ignition.
The basic requirements established in Standard 86 for a gas-fired furnace and an explanation of the major components of the furnace"s combustion safety system are discussed. Major items include the burner management system controller, the purge cycle, flame monitoring, positive fuel shut-off, training of operating and maintenance personnel and the periodic testing of safeguard devices.
Table 1 summarizes NFPA Standard 86 requirements for furnaces. This table provides only an overview of the information contained in the standard, and the standard should be referred to directly for greater detail in specific areas. Alarms are not included in the table because they are not combustion safeguards. However, many devices listed are alarmed or prealarmed on many systems.
Modern burner management system (BMS) controllers typically are digital electronic control devices that use preprogrammed logic to monitor and control the safety functions of a burner. In simple terms, a BMS controller operates as an automated brain to monitor and control the safety functions of a burner. Such a controller proves airflow and purge time prior to trial for ignition, enforces minimum firing valve setting at light-off and monitors the presence of a flame and fuel conditions during operation. In the event that the BMS controller determines a condition is out of a preset limit, a master fuel trip is enforced, which closes the main fuel safety shut-off valves, thereby stopping burner operation.
Standard 86 requires that a BMS controller "?hall be listed for use in the service intended," the status of which can be checked by an insurance underwriter for the equipment covered. It further includes the minimum requirements a BMS controller must meet, such as limited access to unauthorized changes in its control logic, safe shut down of the controller under seven different failure modes, safety logic stored in nonvolatile memory and many others. Also, Standard 86 specifies that a trip of the burner system by any safety device requires manual intervention of a trained operator to correct a fault situation prior to restarting the burner for normal operation.
Purge is the flow of clean air through the furnace, which effectively removes gaseous combustibles and replaces them with air. The purge airflow and time must be sufficient enough to allow "?t least four standard cubic feet of fresh air or inert gas per cubic foot of heating chamber" (paragraph 5-4.1.2). The furnace volume to be purged should include all equipment from the burner up to, but excluding, the stack. Standard 86 requires that, "?rior to each furnace heating system start-up, provision shall be made for the removal of all flammable vapors and gases that might have entered the chambers during the shutdown period" (paragraph 5-4.1.1).
Flame monitoring is performed to ensure there is a flame in the burner at all times when the fuel safety shut-off valves are open, with the exception of the timed trial for ignition. Common flame monitors are thermocouples, flame rods, ultraviolet (UV) scanners and infrared (IR) scanners (Table 2). Each type of monitor is used in a manner where it can sense the measured variable it is designed to detect and convert the measurement into an electrical output signal, which is input into the BMS controller.
Different type scanners are used in different applications because combustion characteristics vary with different types of fuels. A thermocouple is a heat-activated flame monitor, and, as such, has a relatively long response time to flame loss. Therefore, thermocouples are seldom used in this industrial application. A flame rod is a monitoring device used to sense flame conductivity, and is faster than a thermocouple. Flame rods require more maintenance than UV and IR monitors, but are less expensive. Ultraviolet monitors are used to scan clean flames, such as gas- and light oil-fired burners. These fuels have ultraviolet properties and are easy to detect. Infrared scanners often are used to scan dirty flames, such as coal and heavy-oil firing, which can block the ultraviolet properties of the flame. Both UV and IR monitors are optical scanners that look for flame radiation, and, as such, have very fast response times.
Standard 86 requires that each pilot and main flame have independent flame monitoring, but does allow for one flame sensor for both if the pilot is an interrupted pilot or if it is a self-piloted burner. The flame monitoring device should have a maximum flame failure response time of 4 seconds or less and should be interlocked into the burner"s safeguard control logic. The loss of a flame signal should cause a master fuel trip, which closes the main fuel safety shut-off valves, thereby stopping burner operation.
It is possible for gas to leak by a closed valve, which, in the case of a furnace, could allow a significant amount of gas to accumulate in the furnace. Such an accumulation of gas prior to start-up could result in an explosive mixture, only needing an ignition source to result in an explosion. Causes of leaking shut-off valves range from a worn valve seat to dirt or scale in the valve.
To prevent gas leaking into a furnace when the furnace is not operating, two automatic shut-off valves are piped in series in the main gas pipe. The main shut-off valves are energized to open and fail closed on loss of a control signal. Typically, the BMS sends the same signal to both valves, which results in these main valves opening together. These valves are powered by motorized and solenoid operators, which typically fully open in 1 to 7 seconds, but close on loss of a control signal in 1 second or less. (Note: some insurance underwriters require an additional feature, that a vent valve is piped between these main block valves and operate in reverse action to the main valves-refer to insurance requirements.)
Two shut-off valves are required for burners (or pilots) having greater than 400,000 Btu/h of heat input, and the valves should not be subjected to pressures greater than the manufacturer"s rating. The valves also must be leak tested regularly (at least annually)Operating and maintenance personnel training
Standard 86 requires that all operating, maintenance and appropriate supervisory personnel be thoroughly instructed and trained to ensure knowledge of and practice of safe operating procedures. The standard also requires regular retraining along with recommended initial training to maintain the thorough understanding. Training for gas-fired furnaces should include combustion principles, explosion hazards, ignition sources, confined space entry and functioning of safety and control devices. Operating instructions including piping and wiring diagrams, start-up and shut-down procedures and maintenance instructions also should be included for the furnace.
The author has been involved in the testing of combustion safety interlocks on both boilers and furnaces of many types and can attest that safety devices that go "unexercised" for long periods of time might not work when needed. In a recent survey of the combustion safeguard systems on 21 burners (all on boilers), 15 safety devices were found inoperative. These devices ranged from a flame scanner to high and low gas-pressure switches, which are the basic components of any gas-fired burner management system.
NFPA Standard 86, Appendix B provides a list of operation checks of such items as ignition sparks (ignitor gas pressure also can be added), operating temperatures, and proper ventilation. Appendix B further suggests checks that should be conducted each operating shift, each week, each month and "periodically." These lists of operating and maintenance checks are not Standard 86 requirements, but are provided only for reference and informational purposes. For example, a monthly checklist includes:
The reader is encouraged to review the entire Standard 86 for in-depth, detailed information regarding all oven and furnace questions. Standard 86: Standard for Ovens and Furnaces, 1999 Ed. is published by NFPA, 1 Batterymarch Park, PO Box 9101, Quincy, MA 02269-9101; tel: 617-770-3000; Internet: www.nfpa.org

This article explains "piped-in" or "municipal" Natural Gas Pressure Regulators & Gas Burner Ignition Controls used on building appliances such as gas fired furnaces, boilers, water heaters, and stoves:
How to Inspect & Test LP or Natural Gas Valves Regulators, or Gas Controls at Appliances. Page top photo: gas burner flame or ignition control & pressure regulator for a gas fueled furnace.
We provide descriptions and photographs of unsafe gas piping, regulators, or controls on heating systems, indications of unsafe or improperly operating gas appliances, gas meters, and other gas installation defects.
In understanding LP or natural gas regulators used on heaters and other appliances, it"s useful to understand how they work, why they are needed, how to inspect regulators on appliances like cookstoves and barbecues, furnaces, space heaters, and water heaters.
For heaters using a standing pilot, the control provides means to ignite the pilot flame; some gas fueled heating equipment use a spark igniter or a hot surface igniter instead of a standing pilot.
If you smell gas you should leave the building immediately and should do so without doing anything that could create a spark such as operating a light switch or telephone.
The gas pressure delivered to a heating appliance (gas range, clothes dryer, gas heating furnace, gas fired water heater, etc) needs to be both constant and at the proper pressure for that appliance.
Because of varying outdoor temperatures, the LP gas pressure inside the storage tank may be as low as 10 psi in freezing weather or as high as 200 psi with the tank exposed to sunlight in hot weather.
And in natural gas fuel systems the gas pressure delivered from the gas main in the street can also vary widely by area, season, time of day and for other reasons and may range from 60 psi down to as low as 0.25 psi of natural gas pressure in the piping system.
In addition to those external sources of variation in the pressure of the fuel gas supplied to the heater or appliance, the actual gas pressure right at the heating appliance also varies because of gas type (LPG, propane vs natural gas), source pressure variations, gas piping distance,
In sum, a gas appliance regulator must deliver gas at the proper gas pressure and flow rate specified by the manufacturer for the particular appliance.
In addition, at some appliances such as gas fired boilers and furnaces, the job of the gas regulator includes automagically "turning on" the gas when the thermostat calls for heat and turning the gas supply off when the call for heat is satisfied (at the thermostat) OR when a flame sensing safety device or flue gas spillage device detects that the heater is not operating safely.
The LP, propane, or natural gas regulator(s) have to keep gas flowing to the appliance(s) at that pressure even as pressure in the storage tank or gas piping system changes and even when the number of appliances consuming gas changes (as devices turn on and off in the building).
On automatically-operating heaters such as heating boilers, furnaces and water heaters, the heater"s gas regulator incorporates a gas valve that is instructed to open to permit gas to flow into the appliance"s burners when the thermostat calls for heat.
If a flame-sensing thermocouple senses that there is no flame the valve will shut in order to prevent sending explosive unburned gas into the building. A thermocouple sensor is placed in the flame path at the burner, and its other end is connected to a safety switch on the valve.
The thermocouple and safety shutoff do double duty, since on burners that use a pilot flame the thermocouple senses the pilot flame and won"t permit the
(A bad thermocouple itself can prevent a gas furnace or boiler from working - if you can light the flame at the pilot manually but then the flame goes out when you release the manual gas
Watch out: just about every gas heater or appliance that can be converted between types of gas supply will have several changes that must be made at or in the appliance.
Without following the manufacturer"s instructions for these changes and adjustments the appliance will not work properly and may be quite unsafe if you connect it to the wrong gas fuel type.
Gas regulators used on water heaters include a thermostatic control that permits adjusting the hot water temperature within an allowed range set by the manufacturer of the control.
The regulator above is shown removed from the appliance where it will be used. The photo of the gas regulator shown at above left and some of the content in this article are thanks to Charles or Mike Trumbature.
Really? Well yes, as we cite PGS below, but in our OPINION practically nobody and certainly very few residential property owners ever replace a gas regulator until it shows signs of malfunction. Is it really necessary or is gas regulator replacement a recommendation from the gas supplier"s attorneys?
Bottom line: it"s best practice(safest) to follow all of the gas piping and regulator safety recommendations from your gas supplier as well as to comply with local plumbing and gas piping codes.
CAUTION DO NOT OVER-TIGHTEN. Secure regulator to cooktop gas inlet using pipe-joint compound (resistant to LP and natural gas). Turn to hand tight plus 1/4 turn, not exceeding 1 turn for alignment. Check inlet fittings & regulator for leaks. - Maxitrol gas regulator package instructions for Maxitrol RV47CL US 1/2 psig Nat 6.0" LP 10.0"
Otherwise when the underlying cause for low gas pressure is corrected elsewhere, the flame will be too big and pressure too high at the burner - an unsafe condition.
Do not do anything that is likely to cause a gas explosion, such as lighting a match, operating an electrical switch, or even using a telephone in the building
Gas regulator noises: while many gas grill and some other appliance manufacturers say a bit of humming at the gas regulator for appliances is normal and harmless, not everyone agrees.
Certainly if there is a gas odor or gas leak, the gas supply should be shut off immediately and you need to call a professional for diagnosis and repair of the trouble.
Some experts explain that over time a humming gas regulator may become unsafe; and there are other noises that have other meanings at gas regulators, pipes, and LP gas tanks.
THE TRUTH ABOUT GAS LEAKAGE COMPLAINTS and GAS VALVES [PDF] - original source: Honeywell Corporation (1994), www.graycoolingman.com/uploads/1/0/6/6/10667336/honeywell_gas_valve_leakage.pdf
Watch Out: If you lack the training and equipment, do not attempt to disassemble or mess with a gas regulator as you could create a very dangerous or even fatal problem.
Under the "cap screw" on the gas regulator there a plugged NPT tap (usually 1/8") used to install a hose barb and manometer (a very low pressure gage)
Gas Cylinder or Tank Regulators: Readers concerned with installing, inspecting, or testing LP Gas regulators which are found on outdoor above ground or buried gas cylinders used for storage of LP Gas on site should also
Details about the different pressures found or set for LP gas, propane, and natural gas including before and after different gas pressure regulators are given separately at
International Fuel Gas Code (2003), Chapter 4 GAS PIPING INSTALLATION CODE [PDF], retrieved 2017/11/12, original source: https://www2.iccsafe.org/states/seattle/seattle_fuelgas/PDFs_fuelgas/Chaper%204.pdf
NFPA 54, ANSI Z223.1 NATIONAL FUEL GAS CODE [PDF] contents & sections (2012), American Gas Association and NFPA, 1 Batterymarch Park, Quincy, MA 02169-7471
NFPA 54, ANSI Z223.1 NATIONAL FUEL GAS CODE [PDF] (2006) Complete Text, retrieved 2018/01/18, original source: http://bcpad.net/Code%20Books/NFPA%202006.pdf
700 models with convertible regulators may be converted from Natural gas operation to L.P. gas operation or L.P. gas operation to Natural gas operation.
2. Rotate pointer 90° to convert regulator from Natural to L.P. gas operation or L.P. to natural gas operation. The pointer indicates the type gas and 90°pressure at which the converter is set.
Many but not all gas regulators can be converted between LPG and natural gas. Often there is a part that is flipped over to change a metering orifice. The regulator is usually stamped or marked if it is convertible, and when you have the manufacturer"s brand and model you can in fact find the conversion instructions.
The fire place calls for 8" to 12", the regulator states on it that it provides NAT 4", LP 10". When I turn on the gas the regulator makes a soft pop, and the regulator immediately shuts itself off
If I leave an open butt on the delivery side of the regulator, and slowly crack the valve it stays on until the valve is 2/3 open and then shuts off. (No worries, out side and uphill and only open for a couple seconds.)
The cooktop was installed by the appliance provider, not by the gas contractor that did the rest of the gas system work. Is this regulator OK or is it dangerous?
And that"s the typical in-house gas line pressure for a 1-family residence; Sometimes a taller or larger building with many appliances will need to run a higher pressure gas line through the building but then the pressure must be stepped down to the inlet pressure wanted by the individual appliances being fueled.
2 PSI in your gas piping system delivered to the regulator is, I think, high and improper, though it"s below the regulator"s "emergency" limit as I"ll describe below.
The RV47CL should not rupture and leak when temporarily exposed to gas pressures up to 2.5 psi but it also may fail to regulate the gas pressure properly whenever its intended input of 1/2 psi is exceeded.
Any of those conditions can be UNSAFE risking improper and unsafe appliance operation, a gas leak, fire or worse, explosion. (OK so I may err on the side of caution, constrained by the limits of guessing and trying to keep you safe based on just a brief e-text, there we are).
At the emergency exposure limits, there may be no regulation, but all models will contain gas. They will suffer no internal damage and will resume regulation when normal pressure is restored.
GAS REGULATORS & APPLIANCE / HEATER CONTROLS at InspectApedia.com - online encyclopedia of building & environmental inspection, testing, diagnosis, repair, & problem prevention advice.
Questions & answers or comments about inspecting, diagnosing, repairing, or replacing LP gas regulators and Natural Gas regulators found on heating appliances
TECHNICAL REFERENCE GUIDE to manufacturer"s model and serial number information for heating and cooling equipment, useful for determining the age of heating boilers, furnaces, water heaters is provided by Carson Dunlop Weldon & Associates

Although older fossil fuel furnace and boiler systems have efficiencies in the range of 56% to 70%, modern conventional heating systems can achieve efficiencies as high as 98.5%, converting nearly all the fuel to useful heat for your home. Energy efficiency upgrades and a new high-efficiency heating system can often cut your fuel bills and your furnace"s pollution output in half. Upgrading your furnace or boiler from 56% to 90% efficiency in an average cold-climate house will save 1.5 tons of carbon dioxide emissions each year if you heat with natural gas, or 2.5 tons if you heat with oil.
If your furnace or boiler is old, worn out, inefficient, or significantly oversized, the simplest solution is to replace it with a modern high-efficiency model. Old coal burners that were switched over to oil or gas are prime candidates for replacement, as well as natural gas furnaces with pilot lights rather than electronic ignitions. Newer systems may be more efficient but are still likely to be oversized, and can often be modified to reduce their operating capacity.
Before buying a new furnace or boiler or modifying your existing unit, it is suggested that you first improve the energy efficiency of your home by adding insulation and/or new energy-efficient windows, then have a heating contractor size your furnace. Energy-efficiency improvements will save money on a new furnace or boiler, because you can purchase a smaller unit. A properly sized furnace or boiler will operate most efficiently, and you"ll want to choose a dependable unit and compare the warranties of each furnace or boiler you’re considering.
When shopping for high-efficiency furnaces and boilers, look for the ENERGY STAR® label. If you live in a cold climate, it usually makes sense to invest in the highest-efficiency system. In milder climates with lower annual heating costs, the extra investment required to go from 80% to 90% to 95% efficiency may be hard to justify. However, keep in mind that higher efficiency units will have lower emissions than units in the 80% range.
Specify a sealed combustion furnace or boiler, which will bring outside air directly into the burner and exhaust flue gases (combustion products) directly to the outside, without the need for a draft hood or damper. Furnaces and boilers that are not sealed-combustion units draw heated air into the unit for combustion and then send that air up the chimney, wasting the energy that was used to heat the air. Sealed-combustion units avoid that problem and also pose no risk of introducing dangerous combustion gases into your house. In furnaces that are not sealed-combustion units, back drafting of combustion gases can be a big problem.
High-efficiency sealed-combustion units generally produce an acidic exhaust gas that is not suitable for old, unlined chimneys, so the exhaust gas should either be vented through a new duct or the chimney should be lined to accommodate the acidic gas (see the section on maintaining proper ventilation below).

Hey guys, today we’re going to talk about troubleshooting a furnace gas valve. I wanted to expand on our recent gas furnace troubleshooting series by going into each part of a furnace sequence of operation. I’ll describe what the gas valve does and why it’s important. And towards the end, I’ll give you ten things to check when you’re troubleshooting a furnace gas valve. That’s coming up here on Fox Family Heating & Air.
First, as a technician, you have to know the sequence of events that occurs for a gas furnace to start up properly. It’s straightforward, and you should have this memorized before you can even consider being qualified for troubleshooting a furnace gas valve.
When a furnace begins a new cycle, the inducer motor is the first thing you should see kick on. One hundred twenty volts are applied through the wires coming from the control board. This starts the inducer motor for up to 60 seconds before anything else even happens.
When the “all clear” signal arrives at the control board, high voltage is sent to the ignitor – be it a hot surface ignitor or a spark ignitor. The hot or sparking ignitor stands in the way of the gas that is getting ready to pour over it.
Modern gas valves typically have a printed circuit board in them that receive a 24-volt signal to activate the valve inside of it. Remember the video I did on printed circuit boards? If not, I’ll attach it below so you can brush up on what they are and the things that can go wrong with them.
Next, the gas valve opens. The gas coming from the utility company or the propane tank in the back yard is free to flow on to the ignitor. That gas valve is what’s regulating the flow of the gas.
Only a certain amount of gas can be allowed to pass through the manifold and on to the burners. The manufacturer of the furnace determines what that will be. It is pretty standard, though—about 3.5″ water columns (wc). The natural gas pressure coming from the street is somewhere around 7″-10″ wc, but the gas valve itself specifically allows that 3.5″ wc onto the burners.
There are some situations and equipment where I’ve been told to bring the outlet pressure down to 3.25″ wc. But I only did it on the advice from the technical support rep from that equipment. Specifically, it was Ruud equipment. The rollouts were getting too hot because the hood covering the flame would trap the heat and make the safety open. Modifying the hood and adjusting the gas pressures were recommended to us, which seemed to fix it.
Furnaces differ, so please check your furnace installation and service guide for your system’s specifics. This is something you don’t want to get wrong.
The gas valve is adjustable. And usually, the installer of the equipment will dial in the outlet pressures on start-up. Because the gas valve manufacturer – Emerson, White-Rodgers, Honeywell, and other valves makers will usually have it pre-set to that 3.5″ wc, some installers forget to do this. We can’t assume the valve is correctly adjusted each time. That’s why you can have issues with your furnace related to your gas valve – because it wasn’t set up right by the installer during its first use.
If 24 volts is coming from the board to the gas valve terminals and you don’t hear that little clicking noise the internal valve makes, you could have a bad gas valve. To double-check, take the leads off to the gas valve and check there. Got 24 volts? Then something downstream of that 24 volts is not working.
What’s the next thing that’s supposed to be working? The printed circuit board or electric solenoid attached to the gas valve isn’t telling the valve to open, OR that gas valve board IS telling it to open, but the valve is stuck somehow.
If something is wrong with the internal components of the gas valve, it should be replaced. The gas valve cannot be repaired in the field. Only the gas valve manufacturer or someone certified by the gas valve manufacturer can make these repairs.
Some people will literally take a wrench and bang on the gas valve to get it to open up. This is extremely dangerous. Gas is nothing to toy with. If you decide to try this and it kicks on, please replace the gas valve now rather than later.
If we try to fix these ourselves and something goes wrong with the gas valve, and it somehow caught the house on fire, the investigation could come back to the furnace. If they wanted to know who last worked on it and what was done to it, the gas valve manufacturer could claim innocence, and the homeowner’s insurance could deny the customer’s claim. I know that sounds a little drastic, but it could happen. Why put yourself in that situation?
Check the wires to the gas valve. Are they cracked or frayed? That could mean a couple of things. You have a REALY old furnace, or something could have scorched the wires—things like that. Replace the wire and continue your diagnostic.
Check the coil at the gas valve. If you check the coil’s resistance by putting your two-meter leads on each terminal and you get a reading of OL, you have a bad coil. There are more complicated things here but let’s keep this straightforward.
The gas coming into the valve should be at utility line standards. It’s around 7″-10″ wc for natural gas in my neck of the world. There’s a port on the inlet side to check it.
You may have plugged burner orifices. A furnace that’s been off all summer can be the victim of a spider spinning a web inside the burner orifices. Now, that’s a tiny spider, I know, but I promise, it happens! Take a small piece of thermostat wire and gently poke inside the holes of the orifices attached to the manifold and try to fire up the system again.
The flame might be coming on for a few seconds but then shutting off. Is there a dropout of voltage or gas pressure to the gas valve? That’s something to check for sure. And you can do that by putting a “T” fitting in line with the hose to connect to your manometer. Check the inlet and the outlet side to see if the pressure is dropping on either side of the valve.
Another reason the flame could drop out after only a few seconds of burning is the flame sensor. If the sensor doesn’t detect the flame, the control board will signal the gas valve to shut down.
If the flame does anything but shoot directly into the hollow metal heat exchanger, a safety can trip. One safety trip is the rollout switch. Sometimes you’ll get a little part of the flame that drifts off to the left or right, sending the switch off. That doesn’t mean you should remove the switch. It means you need to fix the problem. Clean the end of the burner assembly nearest the heat exchanger. Rust will sometimes build up on the crossover channels. Use a wire brush to clean and see if that solves it. Then place the burner correctly into the channel.
The other safety trip that can cause the system to cut the gas off to the valve is the high limit switch. If the furnace runs for a few minutes, then shuts off, something could be causing the inside of the furnace to get too hot. The first thing I would check is to see is if the evaporator coil is dirty. I have agreat video that shows what a dirty evaporator coil looks like and what it takes to clean it.
Check the ductwork too. These last three have all dealt with airflow. If the return duct is crushed, then we’ll have low airflow again. Visually check the return duct and feel around it if it looks questionable. If the duct is not perfectly round, then this could be the problem. The furnace is suffocating.
When you’re installing the new gas valve, there are few things to keep in mind. It’s a like-for-like change out, but gas leaks are a serious issue, so make sure to use some pipe dope or pipe tape to seal the fitting.
Also, don’t bend the manifold when you’re trying to remove the gas valve or put the new one back on. Use two wrenches to get a proper hold on the manifold and the gas valve.
I strongly recommend not over-tightening the gas valve to the manifold. You could bend the manifold, but also remember, someone might have to get that thing off someday, and you’d be creating a challenging situation for a tech that has to come out and service it in a few months. Some guys get a little over the top and really crank down on it. Not necessary.
Check for gas leaks with an electronic gas sniffer or soap bubbles. This will assure you the fittings are snug and leak-free. And don’t forget to check the outlet side when the gas valve is on. It doesn’t help when the valve is off because no gas is flowing through it.
If it’s a natural gas set-up, the spring that comes inside the valve will already be the right one. If you’re using LP gas, you’ll need to make sure you put the right spring in it. It’ll come in the box. Check the manifold orifices to ensure they are the right ones for LP too. And put the sticker on the gas valve that says LP. This will help future HVAC technicians when they service the furnace.
And lastly, check the gas pressure on the new valve after you’ve replaced it. I can’t say it enough. It’s simple to do with the right tools, don’t just change the valve and not check the pressures.
If the gas pressure is too low, your furnace’s efficiency will go down. More condensation than usual will build up because the air in the air-fuel mixture will be too high. The condensation can cause corrosion, possibly creating the need for a heat exchanger replacement in the future.
High gas pressure can be just as bad for your furnace because it dramatically increases the furnace’s overheating risk. When this happens, high limit switches will start opening, causing intermittent operation. It can also crack your heat exchanger since it’s only rated to handle a certain amount of heat. And cracked heat exchangers can introduce the spent gasses inside the heat exchanger to be carried along with the heat blowing into the house.
So, to recap. When a furnace begins a new cycle, the inducer motor is the first thing you should see kick on. A safety device called a pressure switch activates when the diaphragm inside it recognizes the suction or purging action of the inducer motor. Next, the three parts of the ignition sequence begin. The ignitor kicks on, the gas valve opens, and the flame sensor senses that the flame exists. If this all goes well, you have heat blowing into the house about a minute later when the blower kicks on.
What else should folks check when troubleshooting a furnace gas valve? Leave me a comment down below to share your expertise. Thanks so much for stopping by, and we’ll see you at the next blog post.

The first thing I will talk about is the pilot safety circuit. We need three things for combustion, air + fuel + heat. The air is supplied from the venting section, and the fuel from the gas piping section. The heat comes in the form of a pilot light, intermittent ignition device, direct spark ignition, or hot surface igniter. As I said before, in this article we will discuss standing pilot lights only.
Let’s go back and take a look at how we used to light pilots; then we’ll talk about the progression of safety devices and the state of technology today.
Development of the Standing PilotOn the old stoves, people used to turn on the gas and light the main burner with a match. As time went on, someone invented the pilot light. The pilot always stayed lit, and when the main burner was turned on, this component ignited it — nice and simple. But what happened if the pilot went out?
A small amount of gas was released to the atmosphere from the pilot burner, and when you went to light the stove, you realized the pilot was out because the stove wouldn’t light. You relit the pilot and you were set.
Now let’s apply this to a boiler. The original gas boilers had what we called wild pilots. There were two gas cocks on the old boilers, an “A” cock and a “B” cock. The “A” cock ran full size to the main gas valve and the “B” cock ran off a 1/8-in. tapping on the “A” cock. The outlet side was a 1/4-in. compression fitting.
From this fitting, 1/4-in. aluminum tubing ran to a pilot assembly. The pilot assembly sat above the main burner, and when the gas valve opened, the pilot lit the main burner. This was known as a “Wild Pilot.” There was no pilot safety control, and if the pilot went out, the main gas would still turn on when there was a call for heat.
The Safety SwitchOnce this problem was recognized, the next step was the development of the electric pilot safety switch. With this device, a thermocouple was put in the pilot flame. The flame should cover 3/8 to 1/2-in. of the thermocouple tip.
The output of a single thermocouple is 20 to 30 millivolts dc (1,000 millivolts = 1 V). The voltage at the cold junction energizes an electromagnet, which closes a circuit on the electric pilot safety switch. The way it works is, you open the “B” cock and light the pilot. There is a button, usually red, on the pilot safety switch. You hold it down for 30 sec, which gives the thermocouple a chance to heat up and send the necessary voltage to the electromagnet to close the circuit. If the pilot goes out, the circuit opens.
This switch would get wired in series with the other safety and limit controls on the gas valve; nice and simple, no pilot, no main gas. Don’t forget, back in the old days all the gas valve was, was an electric solenoid valve.
Most valves you run into now are combination gas valves. The solenoid valve, regulator, and pilot safety are all built into one valve. On a standing pilot model we still use a thermocouple, but in a different way. The pilot valve is also built into the combination gas valve, so there’s no more “B” cock.
To light the pilot, you hold down the button on the gas valve to start the flow of gas to the pilot burner. By holding the button down, you are allowing gas into the valve and, at the same time, blocking the flow of gas to the main burner outlet port while allowing it to flow to the pilot burner through a pilot tube coming from the gas valve body. You light the pilot and hold the button down for 30 sec, and when the thermocouple sends the voltage to the gas valve, an electromagnet holds the main safety shutoff in the open position. In this position, pilot gas will always flow and main gas will flow on a call for heat. If the pilot goes out, no gas will flow into the valve.
The only difference between the pilot safety switch and the combination gas valve is that the pilot safety switch is shutting the gas off electrically, and the thermocouple in the gas valve is shutting the gas off mechanically.
Lock Out TestA properly operating safety system should lock out within 3 min of pilot outage. This test should be performed after gas pressure has been adjusted to manufacturer specifications.
Shut the gas to the appliance using the gas cock. After 3 min, turn up the thermostat to call for heat and turn on the gas; no gas should flow to the main burners or pilot burners. If gas is flowing, you must replace the gas valve. If you replace the pilot assembly, you should also do a turndown test.
It is an ANSI requirement that the pilot flame lights the main burner within 4 sec of gas reaching the main burner. This is done with the pilot gas at the minimum necessary to hold the pilot valve open.
2.Locate the pilot adjusting screw and start turning it clockwise until you notice the pilot flame start to decrease. Turn the screw one-quarter turn clockwise. Wait 1 min and turn clockwise. Keep doing this until the pilot safety circuit drops out, shutting the pilot.
4.Now turn up the thermostat to call for heat and turn the gas cock back to the “on” position. The main burners should ignite smoothly without any rollout within 4 sec. If not, relocate the pilot burner and repeat steps 1 through 4.
Let’s Go On a Service CallYou get a call from Mrs. Jones, who has no heat. You look at the boiler and find that the pilot light is out. The heating unit (boiler or furnace) has a standing pilot with a thermocouple.
The first step is to make sure there is gas. Shut the gas cock at the appliance and open a union or drip cap. Turn on the gas cock. If there is gas, shut the gas cock and retighten the gas union or drip cap.
The pilot will not light. Remove the pilot tube at the gas valve and depress the button. If gas is present at the gas valve and not at the pilot, check the pilot tube and pilot assembly orifice for blockages; clean or replace as necessary.
The pilot stays lit.Check the thermocouple for lint or pet hair; clean if necessary. Check the gas pressure at the inlet and outlet of the gas valve with a manometer. It should be within the parameters set by the manufacturer (which can be found on the rating plate or in the installation and operating manual). If the gas pressure is good, turn on other appliances; does pressure drop? If yes, check line sizing. If no, check the pilot flame; is it covering 3/8 to 1/2 in. of the thermocouple tip? If not, adjust. Check the condition of the draft diverter. If damaged, replace it.
If all the above items are within spec, check the thermocouple with a thermocouple tester or a millivolt meter. If the readings are not within the manufacturer’s specified range, replace the thermocouple. If it’s within the manufacturer’s specified range, replace the pilot safety unit or combination gas valve.
Note:When replacing a pilot safety unit or a combination gas valve, always replace the thermocouple. If you do not have a thermocouple tester or millivolt meter, replace the thermocouple; if the pilot still will not stay lit, replace the pilot safety unit or combination gas valve.
This article was excerpted from “The Complete Guide to Residential Gas Heating” by Richard Bruno, an instructor in Nassau County BOCES, Nassau County, NY, and at


 8613371530291