
how to reset safety valve on propane tank manufacturer
The owner of this website (www.doityourself.com) has banned the autonomous system number (ASN) your IP address is in (20473) from accessing this website.
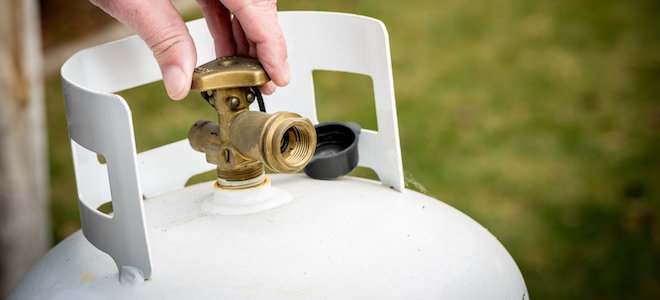
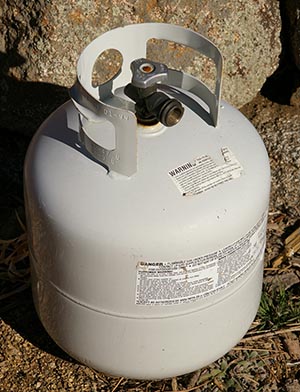
The safety relief valve is one of the most important and vital valves on any LP Gas container. All propane tanks and cylinders are required by law to be fitted with pressure relief devices designed to relieve excess pressure. The function of a safety relief valve is to keep a propane tank from rupturing in the unlikely event of excessive pressure buildup. Propane tank relief valves are also known as pop off valves, pressure venting valves or relief valves.
Relief valves are held in the closed position by the force of a powerful spring. As long as the pressure inside the tank is less than that of the spring, the valve will remain closed. If tank pressure rises to that of the spring, the valve will open resulting in a hissing sound outside the tank. If the pressure in the tank rises significantly higher than that of the spring, the valve will fully open. When the valve fully opens, it initially makes a loud pop followed by a blast of released propane gas. Once the pressure is released and the tank pressure falls below that of the spring, the valve closes.
Most propane tanks in residential and commercial service have internal safety relief valves. The reason for an internal valve as opposed to an external pressure relief valve is it presents less of an obstruction when moving the tank. Internal relief valves are generally placed near the end of the propane tank on above ground containers.
Found primarily on older tanks, external relief valves operate in the same manner as an internal relief valve with the spring mechanism being outside the propane tank itself. Relief valves on multvalves are always fitted with external safety relief valves. Older tanks with an external relief valve installed on the container are generally replaced with internal pressure relief valves, provided they are connected to a dedicated tank opening specifically designed for the placement of the relief valve.
Because the safety relief valve performs such a vital role in the protection of the propane tank, it should be maintained and repaired by licensed propane professionals only. Do not ever look into a relief valve or stand over it.
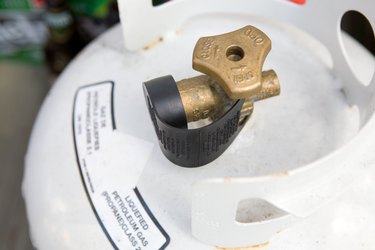
A protective cover should be placed over the relief valve to ensure proper operation. If the valve has debris in the upper mechanism of the relief valve and it opens, the debris may cause the valve to remain open resulting in a potentially dangerous situation and/or excessive loss of propane. A simple protective relief valve cover can be made from a plastic bag fastened around the external portion of the valve with a rubber band.
If a you encounter a relief valve that seems to be "hissing" (opened to relieve pressure) do not tap it or mess with it. If the tank has been recently filled in hot weather and the face gauge reads over 80 or 85%, spray some water from a hose on the tank. This may cool it down and reduce the expansion of the liquid in the tank. Call your propane company immediately and inform them of the situation.
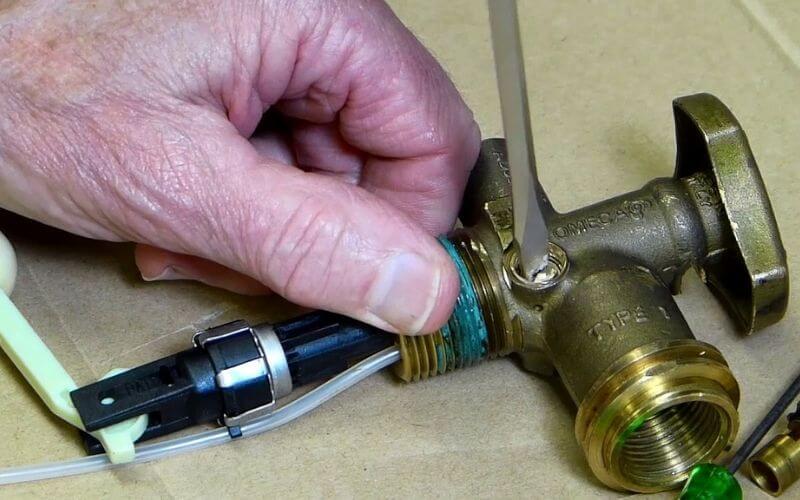
Pictured here is a relief valve that was apparently leaking. Instead of calling the propane company to replace the valve, the customer decided to fix the problem himself. Using a soldering iron, he soldered the leak until it stopped leaking. In the process of "repairing" the leak, the customer completely sealed the relief valve in a closed position placing himself and his family in a very dangerous situation.
In this type of situation, a relief valve that is sealed shut will not allow the tank to vent excess pressure if it is overfilled or the pressure inside the tank exceeds the working pressure of the container. In a case where the tank is unable to vent to the outside, the tank is subject to rupturing causing more harm and damage than money saved by trying to fix it yourself. Let the propane company or LPG professional handle any problems with thesafety relief valve.

Has your propane tank valve gotten stuck yet again? This can put a serious damper if you’ve planned a BBQ, or literally anything that requires your propane tank. But here’s some good news: this article will tell you exactly how to unstick a propane tank valve.
Before we move onto the meat of the matter, you need to understand how your propane tank works. This applies to anything that runs on propane: fireplaces, water heaters, stoves, gas grills, and even RVs. Knowing how your tank operates will make it easier to troubleshoot minor issues.
A basic tank is filled with propane liquid and uses a special machine that forces the propane gas into the tank under pressure, turning it into its liquid form. It remains pressurized in the tank until the valve is released. When the valve is turned, the pressure decreases and the gas converts to vapor and escapes through the opening.
The propane gas is allowed to escape the canister under a certain pressure determined by the size of the valve. Large commercial propane tanks have multiple valves and gauges.
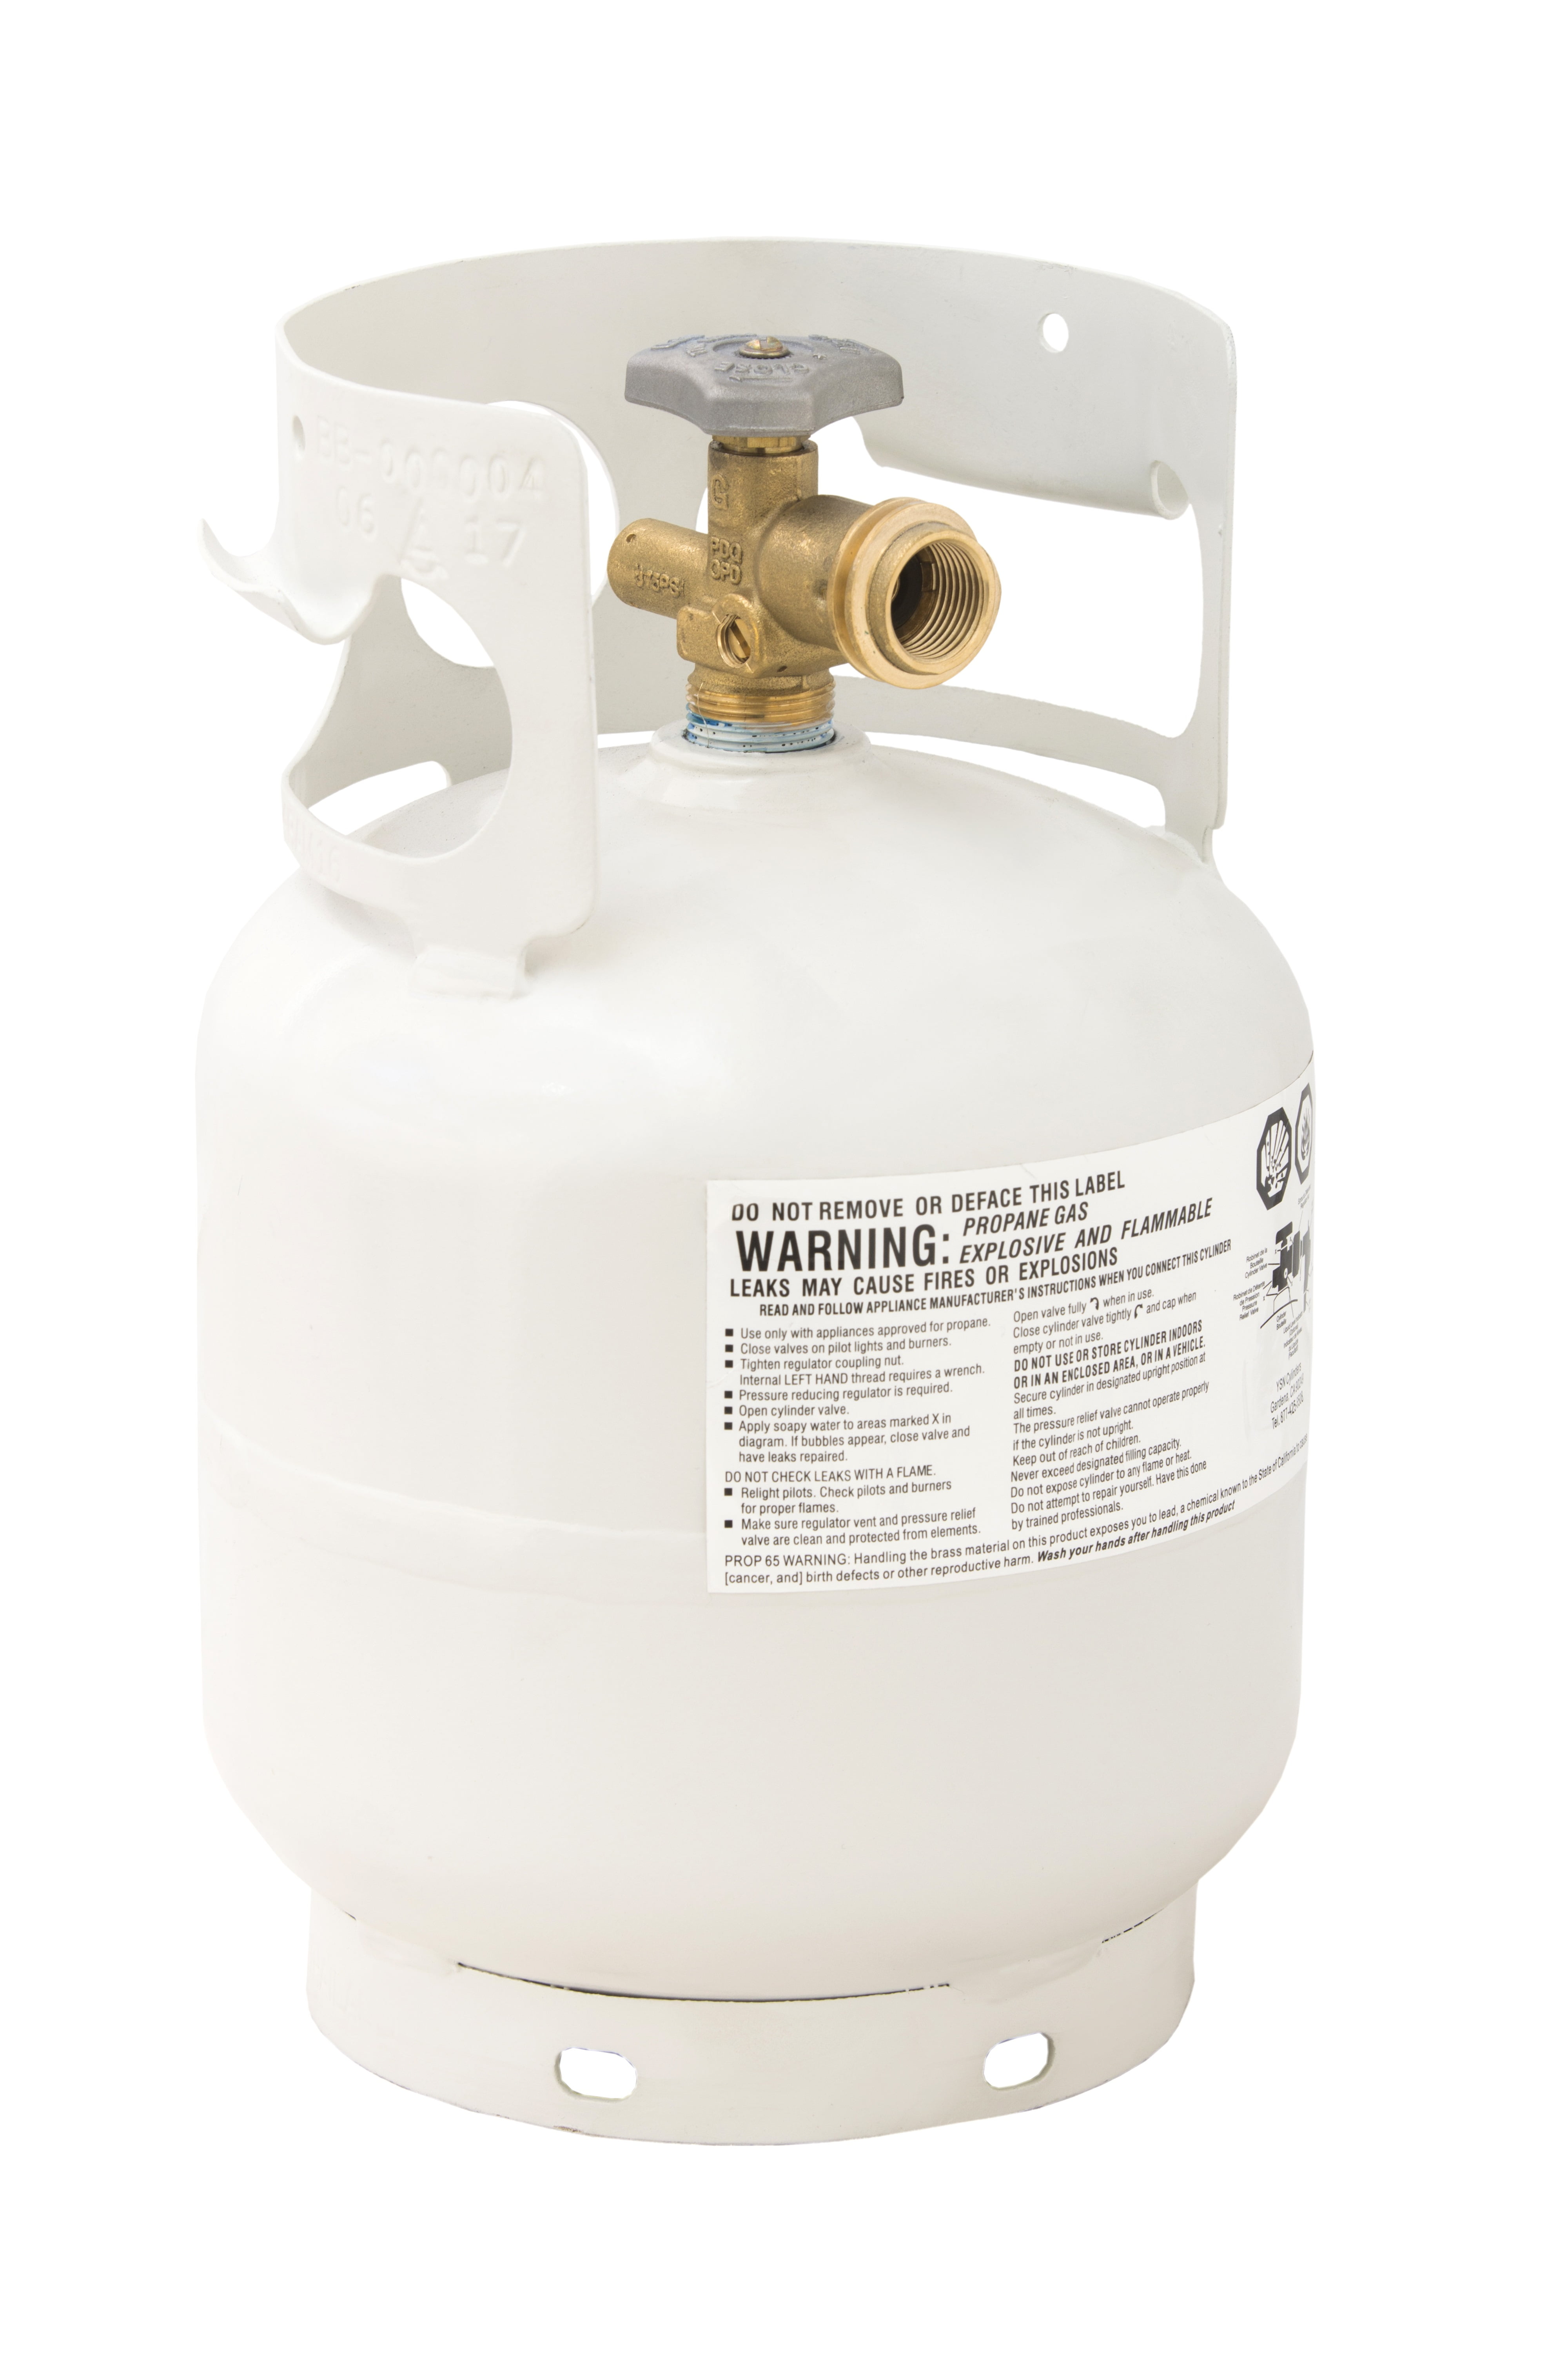
The main valves are the fill valves to refill the tank, a service valve to release the propane, and a relief valve. The relief valve prevents too much pressure from building up in the tank and exploding.
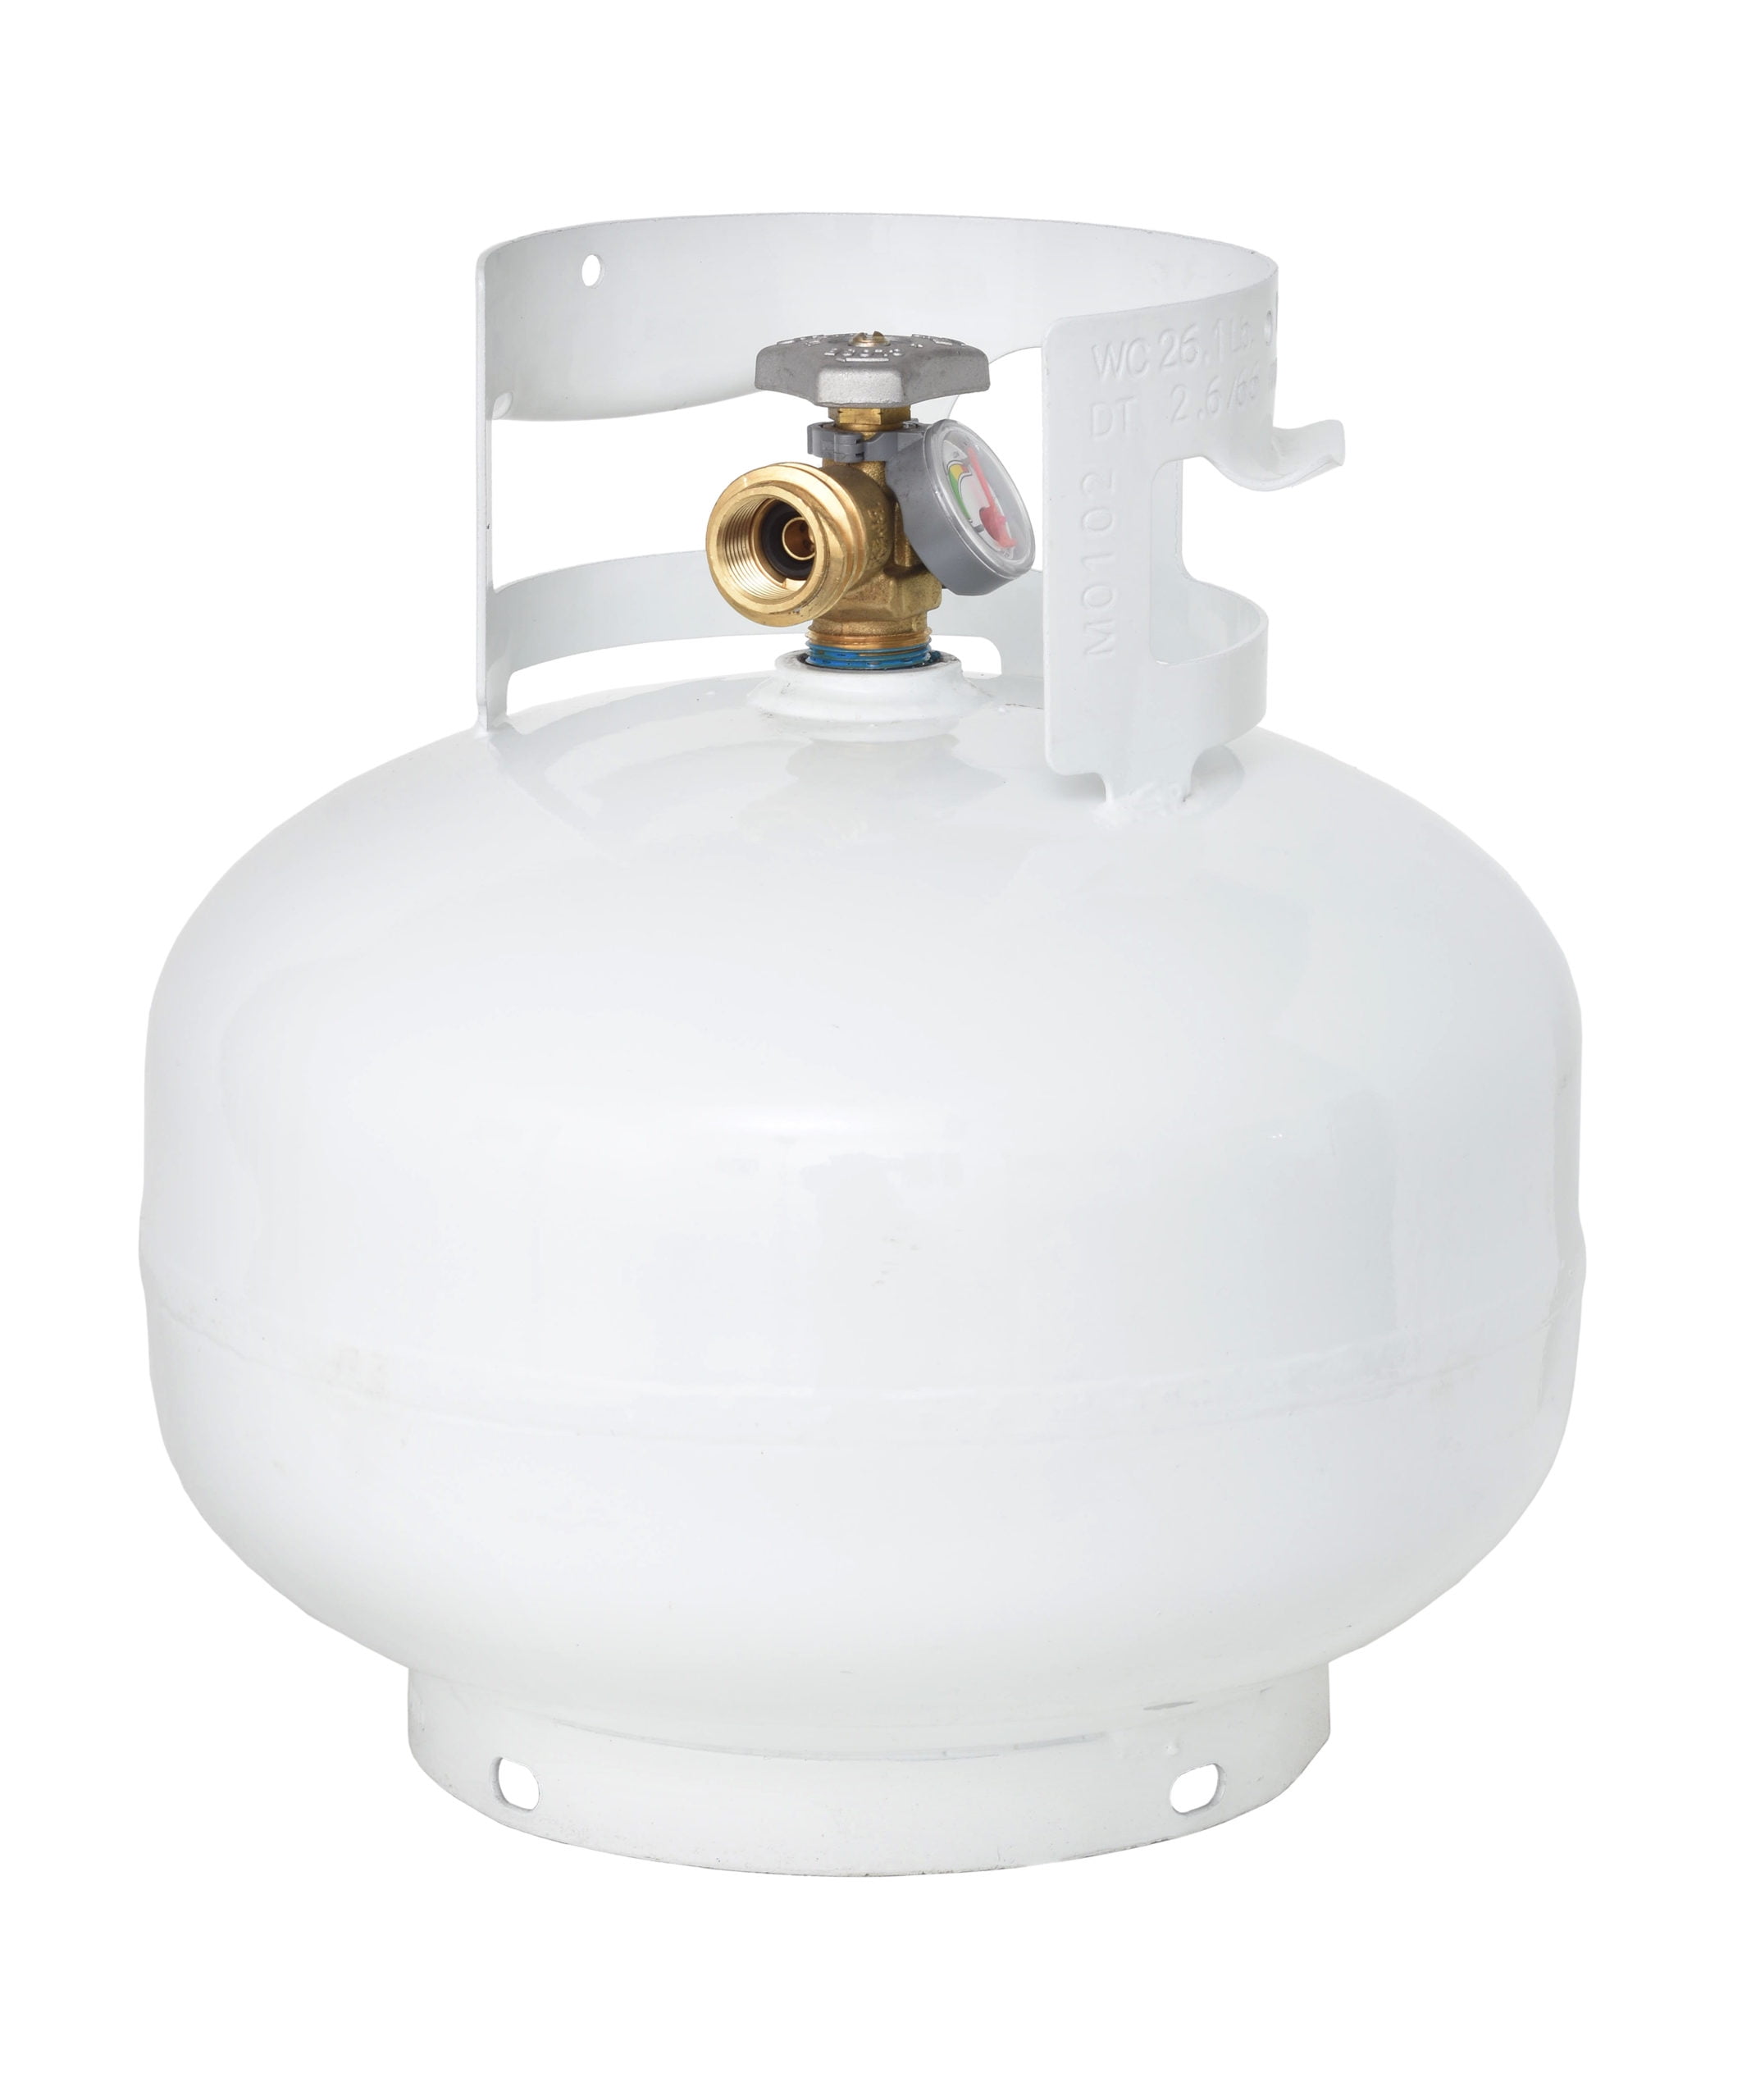
Tanks also have gauges that measure the level of liquid in the tanks called a float gauge, as well as a vapor recovery valve that can be used to release excess vapor in the tanks when getting it serviced.
The tanks are often closed very tightly to prevent leaks. If your propane tank won’t open after you bring it home the first time, try using a wrench or a pair of pliers. You can also unhook the tank from your stove and apply a bit of oil to the valve, before trying to yank it open with pliers.
Before you try to fix a propane safety valve (or any other tank valve), you need to identify the cause of the blockage. This will determine what you need to do to correct the issue.
The most important thing to bear in mind is that propane is highly combustible. When correcting a faulty tank valve, make sure you don’t puncture the tank and cause more damage. Safety is always a priority, so work in a ventilated area and do not light matches or lighters near your tank.
Set the propane tank on a steady, level surface. Make sure you are in a dry and cool area. Carefully check the tank for any signs of obvious damage and try to find the source of any possible leaks.
Wrap the rubber band around the outer edges of the valve to get a better grip on the blocked valve. Once you get a firm grip, twist firmly to loosen and dislodge the valve with your hand.
If this doesn’t work, spray a bit of oil or lubricant on the valve. Shake the valve back and forth to loosen it up, and then try to twist it open once again.
If the valve is still stuck, use a pair of pliers or a wrench to force it open. Grasp the edge of the valve with your pliers firmly and twist counterclockwise to open the valve. Try not to use too much pressure or as this can break the valve instead.
If your valves have rust or water damage, assess the situation. If it is still in the early stages, you can use baking soda and vinegar to get rid of the rust. However, if it is too far gone, you will need to replace the valve.
To avoid the fuss of a propane tank valve that needs to be dislodged, you can follow a few simple steps to prevent it from happening in the first place.
Don’t twist the valve closed too tightly. This might sound obvious, but people tend to close the valve really tightly, especially after a refill. Shut it tight, but don’t overdo it.
After buying a new tank or refilling your old one, smack the bottom of the tank on the ground once or twice. This will loosen the valve so you can open it more easily.
Don’t open the valve of a new cylinder rapidly as this can make it get jammed the next time. Instead, test the water and work it slowly and carefully.
If your propane tank leaks when connected, you most likely need a new valve. Check for the site of the leak by spraying soapy water at the valve, connection point, and pipes. If you see bubbles at the valve or connection, the gasket is broken and the valve requires replacing.
Soak the hose for a few minutes in warm soapy water to clean it. Use grease-cutting dish soap or something similar to break down accumulated oil and debris. Rinse the hose thoroughly under running water and allow it to dry.
The propane tank shut-off valve is your best bet during leaks if the hose or valve isn’t the one behind the leaks. The service or shut-off valve is the metallic spigot-like dial located under the tank cover and hooked to the top of the tank.
You need to use this valve to turn the gas off at the tank in the event of an emergency or leak. Always turn this valve to the right (clockwise), completely to shut off the gas.
This kind of valve is required on all large 4-to-40-pound commercial cylinders in vapor service. The OPD valve is a protective device and is exactly what it sounds like. It prevents the tank from overfilling.
Place the open jaws of the crescent wrench over the large bolt of the tank’s gas regulator. This is located at the meeting point of the propane tank and the gas regulator. Use the thumbscrew to grip the jaws around the large nut.
Then, loosen the nut with the wrench. Continue to remove the nut by hand until you can pull the neck of the regulator from the propane tank connection. You may catch a small whiff of gas as the regulator’s neck is pulled from the propane tank, but this is nothing to be worried about.
Remove the tank from the grill’s cart. In some models, you might have to loosen a safety strap. Store the empty tank in a safe and dry location, outdoors and well away from any flames.
It is perfectly normal to smell a little propane as tiny amounts can leak when the tank is in use. You can also smell the gas when the tank is nearly empty.
It is common for a propane tank to hiss. Hearing this sound is an indication that your tank is leaking so shut off all the valves and check for the location of the leak.
It is always a little scary when dealing with gas tanks, as we are well aware of the risks. However, knowing how to handle any kind of malfunctioning will make it much easier to deal with.
Once you know how to unstick a propane tank valve, you can loosen the valve or spigot without any trouble. And this will make the process of grilling much easier. Happy cooking!

The time has come and the epic barbecue dinner you had planned is in play as friends and family arrive. It’s time to fire up your barbecue grill and preheat it so you can begin cooking. Then you notice the flame is low, and that the grill is only heating up to 250 or 300 degrees Fahrenheit – or maybe it’s not even igniting!!! Don’t panic! There’s no need yet to call your local grill store to come out and fix it yet. This post may just save the day and some of your hard-earned money! …
* Side note about the shut down procedure. The following ignition sequences are written assuming you are turning the burners off 1st, then the Propane Tank. Therefore, each sequence starts from the “all off” positions. You can turn the burners off and leave the Propane Tank on; however, we strongly recommend you to go ahead and turn the Tank off also.
To put it simply, the key is to be sure you have your burners off before you turn on the Propane. If you turn the burners on first the gas will not be pressurized in the gas line causing the Bypass to trigger. You see, in this case the system detects there is a gas leak; hence, the bypass triggers.
* When using the improper sequence, the regulator will trip because by turning the burners on 1st, you empty the lines of any propane which causes the low line pressure.
If after having deployed this fix the issue persists, it’s time to call your local BBQ Grill Repair Company. There are numerous other more advanced issues that can occur. For instance, you may have a blockage in the Venturis Tubes. A blockage like this is caused by char/grease build-up. You can decrease the likely hood of this ever happening by being sure to have a BBQ Grill Cleaning done regularly.
An OPD Cylinder Valve is indeed a part of your propane tanks’ inherent safety design. However, it does not have a “Bypass” as your regulator does, nor is it designed as a safety mechanism during usage. This device is required on all 4 to 40 pound DOT cylinders.
OPD stands for Overfilling Prevention Device and its first function is to do just that, prevent the user from overfilling the device. In addition, the device disallows Propane from flowing out of the cylinder if the triangular handwheel is opened and there is no gas line connected. It does this because there is no connected regulator to push open the valve’s orifice. Moreover, Propane OPD valves operate inside the bottle and are activated as the cylinders liquid propane rises in level pushing the float upward, therefore, stopping the flow of gas into the tank. This action is similar to that of a toilets float valve; once the water in the bowl rises to a certain level, the flow of water stops.
The OPD Valve is one of the main focuses regarding the fact that tanks are to be recertified 12 years after original manufacturer dates and every 5 years thereafter. Inside, there are what you can call “O-Rings” that need to be changed out at those predefined intervals. Also, the mechanism itself can be swapped out for a new one. Tampering with this device is NOT RECOMMENDED. If you suspect there’s an issue call your local propane delivery supplier and they will deal with it properly.

Check that the hose attachment is properly connected to the propane tank, and double-check that the screw-on valve is tightened. Some propane tanks have safety features that won’t allow gas to escape from the canister unless the hose connection is tightly secured with the gas release mechanism.
Take a look at your connector. If it’s less than an inch long, it won’t be long enough to depress the check valve inside the valve. In this case, you’ll need a new connector that’s over an inch long.
If your valve is turned all the way on, the tank may not release propane. This is a safety feature. Start over, turning the valve only once, then igniting the grill.
If none of these actions work, it’s possible that you have a faulty regulator, which stops the flow of propane. In this case, it’s best to get a new hose with a regulator, and try again.
One thing you should pay attention to is the propane tank’s safety relief valve. All propane tanks, including the cylinders you use for your BBQ grill, are required by law to have pressure relief devices to allow for the release of excess pressure in the tank.
A spring keeps the safety relief valve closed as long as the pressure inside the tank is at a safe level. If the pressure in the tank reaches the same amount of pressure of the spring, the safety relief valve is opened. If that happens, you’ll hear a hissing sound coming from the tank. In instances where the pressure in the tank is much higher than that of the spring, the valve will fully open. You’ll hear pop if that occurs.
Your propane tank needs to have room for the propane inside it to expand. That is why your propane tank is filled to 80% of its capacity. The 20% of the tank that is empty space allows the propane to safely expand.
That expansion is why propane tanks are white or beige. Light colors reflect heat to minimize expansion. Dark colors retain heat and can cause the propane inside your tank to expand to dangerous levels. So, even if your propane tank doesn’t go with the color of your siding, leave it alone.
At Smart Touch Energy, we prioritize propane tank safety. Let"s take a closer look at some of the key questions surrounding propane tank safety and how you can minimize propane tank dangers.
Propane, also referred to as liquefied gas, is a popular fuel choice for individuals and businesses. It is delivered as a liquid and pumped into a storage tank, and it will not ignite with air until the ignition source reaches at least 920°F.
Furthermore, propane is 270 times more compact as a liquid than as a gas. As such, propane is easier to transport and store as a liquid than as a gas.
According to the National Propane Gas Association (NPGA), roughly 90 percent of the U.S. propane supply is produced domestically. The NPGA points out that propane serves many purposes, including:
The U.S. Energy Information Administration reported U.S. propane and propylene inventories hit 97.7 million barrels in September 2015 — their highest level in 22 years. This indicates the demand for propane is on the rise in the United States, a trend that may continue in the foreseeable future.
On its own, propane gas is non-toxic. It produces minimal emissions and is not harmful to soil or groundwater. It also is colorless and odorless, but many propane suppliers will add a chemical compound to give propane an unpleasant smell. By doing so, propane suppliers help alert customers if a propane tank leaks — which can be a major safety hazard.
A residential propane tank that leaks may emit gas quickly. Fortunately, the following steps will ensure you are fully prepared to handle this scenario:
When it comes to propane tank safety, it is always better to err on the side of caution. Thus, if you smell gas, you"ll want to act fast to minimize this danger. Otherwise, you may put yourself and others at risk.
In addition, it is important to note that some smell sensitivities or medical conditions could make it difficult to detect propane. In these cases, a gas detector for propane may prove to be valuable, as it will provide an additional layer of security.
Another element to keep in mind when it comes to propane tank safety is odor fade, or the unintentional reduction of propane odor concentration. One reason odor fade may occur is due to water, rust or air inside a propane tank. Additionally, odor fade may happen because the odor can stick to areas such as distribution and piping systems, as well as simply to the inside of the tank. Although this problem is rare, it may affect propane tanks that have been sitting too long before being filled.
Apply a layer of soapy water or a leak detector solution to the connection between the residential propane tank"s cylinder valve and regulator outlet.
If you discover bubbles, close the cylinder valve, tighten the connection and repeat the testing process. If bubbles continue to appear, it means there is a leak in the propane tank.
Avoid Space Heating Propane Grills or Ovens: Although space heating propane grills and ovens may seem like viable options at first, they can be dangerous.
Work With a Qualified Propane Service Technician: A qualified propane service technician can connect an appliance to a propane tank and perform the necessary assessments to ensure you can maximize the value of your appliance.
If you are ever uncertain about how to take care of a propane gas appliance, you can contact the appliance provider for extra assistance. This company will be able to address any of your concerns and questions and help you use your appliance safely.
Inspect Old Appliance Connectors:If an appliance is more than 20 years old, have a qualified service technician assess the appliance connector. If you try to do this on your own, you risk damaging the connector and causing a propane gas leak. If you work with a service technician, however, you may be able to avoid risk and bolster your appliance"s performance for years to come.
Check the Appliance Vents: Let the vents on your appliance breathe and ensure flue gases can flow easily to the outdoors. Remove any insects, bird nests or other debris from the vents. Clear the area around the appliance to ensure plenty of air can reach the burner for proper combustion.
Don"t Repair or Modify the Appliance on Your Own: If you attempt to modify, repair or replace an appliance connector, control, regulator or valve on your own, you risk causing a gas leak.
Propane tank safety extends beyond the tank itself, and those who focus on finding ways to take care of their propane gas appliances can manage risk like never before.
Of course, working with a qualified propane appliance service technician can help you keep your appliance in working order. This technician possesses the training and know-how needed to fix or upgrade an appliance safely.
A propane tank is complex, and you should never modify a propane tank on your own. If you believe your propane tank is defective, don"t try to modify or repair regulators, valves or other propane tank parts if you lack the proper training and expertise.
On the other hand, you may believe your outdoor appliance is problematic. Like propane tanks, outdoor appliances are intricate, so you may want to get expert help with appliance repairs.
Sometimes, the pilot light on an outdoor appliance may go out. If the pilot light goes out periodically, you should follow the appliance manufacturer"s instructions to reignite it correctly. Follow the instructions closely and review any safety warnings before you attempt to reignite the pilot light.
If an outdoor appliance"s pilot light goes out frequently, it likely indicates there is an issue with the appliance, and you should avoid the temptation to reignite the pilot light on your own. In this case, you should get expert help to reignite the pilot light.
If you try to reignite the pilot light on your own, you risk fire or explosion. Comparatively, a qualified propane service technician will do everything possible to fix the pilot light on your appliance and ensure the problem does not occur again.
Any time you have concerns or questions about a propane tankand/or outdoor appliance, reach out to your propane supplier and/or a qualified gas service technician for support. This will allow you to get the expert assistance you need and avoid putting yourself or others in danger.
If you find a propane tank leaks, you should never refill it. You’ll need to get the tank inspected by a qualified propane gas technician before it can be refilled.
It is against the law to refill a tank if it’s out of date. The most recent inspection date of a propane tank is printed on the side of the tank, and you should review this information before you try to have your tank refilled.
The law requires periodic inspection of propane tanks, and you should evaluate a propane tank at least once a month to identify any leaks. Remember, a diligent approach to propane tank safety can make a world of difference. If you allocate even a few minutes each month to inspect your propane tank, you can manage propane tank safety risks effectively.
You should never throw a propane tank away. Conversely, many municipal programs offer propane tank collection in cities and towns nationwide. Or, your propane supplier should be able to offer additional support so you can dispose of your propane tank properly.
How you store your residential propane tank is paramount. If you store your propane tank correctly, you will be able to reduce the risk of causing a leak.
Avoid Excess Heat: Heat builds up inside of a propane tank, and when this happens, the tank"s pressure relief valve may release propane. Therefore, you"ll want to keep your residential propane tank away from areas where temperatures reach 120°F or higher.
Disconnect the Propane Tank When Not in Use:A common scenario you might see is a propane tank connected to a barbecue. However, when the propane tank is not in use, ensure it’s disconnected from the barbecue or other appliance.
You should always store your propane tank outdoors and keep it in an upright position away from heat and direct sunlight. If you intend to use a propane tank that has been stored for a long time, be sure to look for signs of aging on the rubber tubing that links the propane tank to an appliance. If the rubber tubing is broken or cracked, you can replace it by purchasing new rubber tubing from a hardware store.
You should always move a propane tank in standing position. Ultimately, you"ll want to secure the propane tank with rope — not a metal chain. A metal chain could move around against the metal propane tank, creating sparks that could be disastrous. Meanwhile, rope is strong and sturdy and will help you keep the propane tank in place consistently.
When you travel, keep the windows of your vehicle open for added safety. You also will want to ensure the propane tank valve is locked and covered with a dust cap. And if the propane tank needs to be refilled, visit a filling station before you reach your final destination.
Believe it or not, running out of gas in your propane tank can be dangerous. Some of the most common problems that may arise due to an empty propane tank include:
Leaks:If the appliance valve or gas line of a propane tank remains open after the propane supply runs out, a leak may occur when the tank is refilled.
Rust Build-Up:Air and moisture can accumulate inside of an empty propane tank. This can result in rust build-up inside the propane tank, lowering the concentration of the odor of propane and making the gas more difficult to smell.
If the fuel level on your propane tank falls below 20 percent, you shouldcontact your fuel supplier for a refill. Setting up regular propane deliveries also may provide immediate and long-lasting benefits. The deliveries will ensure you"ll always have a full supply of propane on hand, so you"ll be able to use propane any time you choose.
An OPD prevents a propane tank from being overfilled. If a propane tank is overfilled, the tank won"t have sufficient space if liquefied gas expands in warm temperatures. As a result, a propane tank"s cylinder pressure will increase, which can create dangerous conditions.
Smart Touch Energy empowers customers with propane tank safety knowledge and insights. We also take the hassle out of ordering propane and help customers purchase energy products in an easy, convenient and cost-effective way.

This website is using a security service to protect itself from online attacks. The action you just performed triggered the security solution. There are several actions that could trigger this block including submitting a certain word or phrase, a SQL command or malformed data.
Do you want to know how to reset the gas grill regulator? It can be because you turned the grill on to warm it up, hoping that the grill will be ready to cook by the time everyone arrives. Then you realized that the flame is weak, and the grill temperature only goes up to 250 or 300 degrees Fahrenheit. Started to panic? Read this to know the proper way to rest the gas grill regulator before calling your BBQ Grill Repair Company.
Why here? You’re right to think about why we have added a summary at the beginning of the article. The reason is, a glance will help you know that you’re at the right place to learn about regretting the propane regulators.
A gas grill regulator is a small device that is screwed onto an LPG or propane tank. It regulates the gas flow from the gas tank. It also includes a safety mechanism known as a bypass. The gas regulator consists of a ball and spring and automatically cuts off the gas supply when the hose is devoid of the back pressure.
Generally, it happens when there’s a leak. It can also be activated if the gas tank and one of the burners are turned on. You should turn off the gas tank and wait for a while before turning on the burners.
The grill regulators (or propane gas regulators) are a component of the gas grills that controls the gas flow from the fuel canister to the heating element. It also acts as a safety barrier between the high-pressure propane tank and the heating appliance.
In short, it brings the pressure of the propane down to a safe level. If the pressure is too low, the grill may not heat up. If it is too high, it may cause a flameout (or worse).
The regulator is bound to a propane tank to manage the gas flow to the burner of your grill. The higher the gas flow, the larger the flame, and thus the more heat. If the gas flow is low, the flame will be small, and the amount of heat will be low.
In addition, the regulator has what is called a bypass, which is a plastic mechanism that cuts off the gas supply when there is no pressure in the hose extending from the grill. This can be caused by a gas leak or by leaving the burners on for a long time.
All BBQ gas grills have a regulator, which, as the name implies, regulates the flow of propane gas. The regulator has a built-in safety mechanism called a bypass valve. This bypass valve system sits between the regulator and the propane tank.
Usually the system is in a locked state. This is the activated or tripped state of the safety mechanism. In some cases, this is caused by gas leakage, but in most cases, it is due to the user using an improper ignition method.
The safety device of gas regulators consists of a ball and a spring. The pressure from the propane tank pushes the ball against the spring. When it happens, a gas flow is established. If there’s a leakage or burners are left open, the reverse flow of the air pressure doesn’t let the ball displace from its position inside the regulator. As a result, propane from the LPG canister can’t pass through the safety device.
If you don’t light the grill in a certain way, the safety device will mistake it for a leak and reduce gas flow from the canister to less than 10% of normal. This condition is called “bypass.” When the gas supply is reduced, the grill cannot be brought up to its normal temperature, and in some cases, the grill will not light.
Wait a few seconds for the hose to build up pressure before doing anything else. This pressure will push the equipment in and give you the “all clear” to operate normally. It should be noted that allowing the pressure to build-up is the most significant part of the entire process.
After a short wait, turn the appropriate burner to start/high and press the igniter button to ignite, just as you would with a normal grill. The actual ignition method will vary depending on your particular model. Please refer to your owner’s manual for details.
Light all main burners, turn the temperature to high, and close the lid. After about 10-15 minutes, if the temperature reaches 500-550℃, the liquid propane grill is working properly.
Basically, the key is to always turn off the burner before you turn on the liquid propane tank valve. If you turn on the burner first, the gas won’t be pressurized in the gas line, and the bypass will be activated.
To the system, it looks like there is a leak, so the bypass is activated or triggered. (Even if there is no gas leak, the system will think there is a leak because of the low back pressure.)
Side note:If used in the wrong order, the regulator will trip. Turning the burner on first will empty the propane line, resulting in low line pressure.
In most cases, performing a propane regulator reset will get the job done for you. However, sometimes, especially if there’s a severe issue with the propane regulator, resetting the regulator isn’t the option, and you’ll have to replace it.
It’s not necessary the failure to ignition can indicate that you need to reset the regulator. In fact, low temperature can also be the reason for propane regulators in need of a reset.
Also, please note that the flame should always be blue. If it’s not and you’re constantly getting the yellow flame, it’s problematic, and you can go ahead either clean your burner tubes or reset the gas regulator.
If the gas regulators continuously trip, there may be a leak in the hose. Close the valve on the gas tank and disconnect the regulator and gas line from the propane tank. Immerse the regulator in a solution of soap and water, then attach the regulator and hose back to the gas container.
Make sure the burners on the grill are “off,” and the valve on the tank is turned on. Soap bubbles will indicate the location of any leakage in the regulator or hoses. Replace the regulator or hose as necessary.
Now that we know what the problem is with the propane regulator, let’s try to come up with a solution. Of course, this assumes that you have checked your gas container to see if it simply needs to be replaced with a new propane tank.
Slowly turn on the supply from the fuel container by rotating the valve counterclockwise.Make sure you do it veryslowlyto avoid tripping the regulator. It should take 20-30 seconds.
When it’s about cooking on your grill, a tip-top gas regulator can guarantee the constant flow of heat for your BBQ and save you from distress. The regulator reset call, however, needs the right identification of the problem first. It might be your grill regulator demands to be replaced, and working on the valves can be of no help. You can take the right steps by following this quick guide. Hence, if your grills fail to serve your outdoor cooking with sufficient temperature, follow this expert guide on how to reset the gas grill regulator.

Some LPG bulk tank systems are fitted with low and/or high pressure lockout devices usually as an integral part of one of the regulators (typically domestic central heating systems and small domestric/industrial systems). These devices are also called UPSO or OPSO devices. These typically lock out if the tank is allowed to go empty or if they detect a fault on the system (the gas pressure in the pipework going above or below a preset limit). This section describes the different types in use by Flogas and how to reset them. Note they will NOT reset if there is still a problem, and NEVER try to disable them as you will undoubtedly be leaving your installation in a dangerous condition.
While some are yellow, as shown in this picture, most are blue. They are usually located on the LPG tank. The smaller top unit in the picture is the high-pressure cut-out, the larger lower one is the low-pressure cut-out. The transparent plastic caps (on the right of the regulators, see see next photo also) should only black inside the caps. If you see a red indicator inside the caps, then that unit has tripped out.
To reset the unit, unscrew the transparent plastic cap, and pull the shaft outwards - you will hear the gas flowing through, and hold it out for a couple of seconds until the gas re-pressurises the downstream pipework. Replace the transparent cap. If it has reset properly, you won"t see the red marker anymore.
This is grey or silver, and typically located at the LPG tank or, less frequently, on the outside of the building where the gas supply enters the house.
To reset it, first unscrew the plug at the bottom of the regulator. This may be stiff, and a pliers or vice-grips may be needed. Note the the shaft protruding from the bottom of the plug - this is threaded at the end. Apart from being a sealing plug, this is the tool used to reset the device.
Now turn the plug upside-down and screw it onto the shaft in the regulator (it does not have to be tight) as shown. Gently pull it down, you should hear the gas going through the regulator as it fills up the pipework with gas. When the flow stops, let it go, unscrew the plug, and put it back on the way it was originally.
This design was made by Jeavons, Cavagna, and some others. It is invariably either grey or green. It is typically located at the LPG tank or, less frequently, on the outside of the building where the gas supply enters the house. It has two separate reset mechanisms, (a) one for locking out due to too low a pressure, highlighted in the left red circle, and (b) one for too high a pressure, in the right-hand red circle. It is very unlikely that the high-pressure lockout will have tripped.
For the low pressure lockout, unscrew the cap (in the left-hand circle on the previous picture) revealing the plunger shown on the left. Gently pull the plunger out, you should hear the gas going through the regulator as it fills up the pipework with gas. When the flow stops, let it go, and replace the cap.
For the high pressure lockout (again it is very unlikely that this will have tripped and it usually indicates a more serious problem), unscrew the cap (in the right-hand circle on the picture at the beginning of this section).
the cap unscrews but stays affixed to the plunger. In either case, gently pull the plunger or cap out, you should hear the gas going through the regulator as it fills up the pipework with gas. When the flow stops, let it go, and replace the cap.
This is a golden colour, and typically located at the LPG tank or on the outside of the building where the gas supply enters the house. To reset it, simply turn the knob in the direction of the arrow, hold it in that position until you hear the flow of gas stopping, then gently release it.
This shut off is usually fiited indoors beside a cooker or hob that is on a bulk tank supply. It does not incorporate a regulator. The picture shows it in the ON position. To reset it, turn the large knob a quarter-turn to the off position and then slowly turn it back on again. It can also be used as an on/off valve.
This is grey or silver, and typically located at the LPG tank or, less frequently, on the outside of the building where the gas supply enters the house. To reset it, push the white lever down until gas can be heard passing through. Be sure not to push the lever the whole way down or it will cut out the system. Hold down the lever until the system has been repressurised and release.
For the low pressure lockout, push the lever, you should hear the gas going through the regulator as it fills up the pipework with gas. When the flow stops, let it go. Lever should remain in the down position.
To reset the high pressure lock out (again it is very unlikely that this will have tripped and it usually indicates a more serious problem) unscrew the red cap and pull the plunger out until gas can be heard passing through downstream. Once the system has repressurised release the plunger and replace the cap.
I meant to post that but was at work and didn"t have time. Glad you got the answer. The check valve that caused your problem drastically reduces propane flow in case a vehicle is in a accident and the lines are ruptured. It is triggered by excessive gas flow. In the case of a system that has no pressure in it (ie: a gas appliance was replaced or serviced), when you open the valve the gas rushes out triggering the safety valve. So, aloways open the tank valve slowly when system is not pressurized. You can simply tiurn the valve off, wait one minute then turn it back on slowly to reset it.
You are probably turning on your propane tank and torch kit too quickly. There is a safety valve located in the P.O.L. fitting that connects your hose to your propane tank. This feature is there to restrict propane in the event of an accident such as the hose being cut or damaged. If the kit is turned on too quickly the safety valve is activated and will restrict the flow of propane resulting in a very small, flickering, unusable flame. Note:(You do not want any added fittings, regulators, gauges, etc between your POL fitting and tank. The POL fitting will screw directly into the propane tank, left hand thread.)
Starting with everything off and closed (Propane tank and needle valve) SLOWLYcrack the knob of your propane tank about ¼ to ½ of a turn. This will provide plenty of propane flow, depending on the level of propane in your tank, to provide a large useable flame. Next, you need to WAITabout 5-10 seconds for the propane to fill the hose. You will then slowly crack your adjusting needle valve about ½ a turn, and then proceed to light the torch. Following this procedure (also listed in your torch kit"s instruction booklet) will prevent the safety valve from engaging and prohibiting your use. If you find that you have turned your kit on too quickly, shut everything off and give the P.O.L. safety feature time to reset (about 1 minute). See also instructions for clearing your Torch Kit"s orifice. HINT: Neither the tank valve nor the needle valve on the torch needs to be opened all the way to get a useable flame.You do not want any added fittings, regulators, gauges, etc between your POL fitting and tank. The POL fitting will screw directly into the propane tank, left hand thread. See Torch Manual here.View P.O.L. video here.
There is an orifice located inside your torch that may be plugged. In the Mini Dragon™ torch, there is an orifice at the bottom of the torch were the flame comes out, as well as in the fitting that screws into your handle. In other torch kits, the orifice is located at the bottom of the torch only. The orifice is the pin sized hole in the middle of the fitting. If this hole is restricted, the propane cannot properly flow through the torch. With the torch kit turned off and the hose disconnected from the propane tank, locate the orifice and clear the area of debris such as cob webs, rust and dirt. You may use a small piece of wire, or compressed air to clear the orifice. NEVER use water as this may disrupt the performance of your torch kit. See also instructions for properly starting your torch kit. Instructional Manual here.
If your flame goes out when you try to flame your weeds, you may be holding the torch to close to the ground and/or weeds. Fire needs oxygen to burn so it is easy to snuff out the flame if you get too close, especially for smaller flame weeding models. Try holding your torch kit farther away.
The Weed Dragon® and Mini Dragon™ have no assembly required! See PDF downloads for instruction manuals for any of our Red Dragon® products. Instructional Manual here.
This is your pipe thread sealant to be applied to all connections of your propane torch kit, except the P.O.L. Excess Flow valve to your propane tank. See your instruction manual for instructions on properly testing your torch kit for leaks. The Weed Dragon® and Mini Dragon™ do not require application of pipe thread sealant as these units arrive assembled. Instructional Manual here.
The fitting that screws into the propane tank (P.O.L. Excess Flow Valve) has a left hand thread therefore will screw into the tank to the left, instead of most threads that screw to the right. It will screw into the inside of the propane tank valve. This P.O.L. fitting will fit any standard propane tank, however may not screw all the way into the tank depending on the style of tank that you have. Be sure that the P.O.L. fitting fits snug into the propane tank if there are threads exposed. You do not want any added fittings, regulators, gauges, etc between your POL fitting and tank. The POL fitting will screw directly into the propane tank, left hand thread. Instructional Manual here.
There could be exposed threads at every connection of your assembled torch kit. For your protection, all Red Dragon Vapor Torch Kits include a capsule or packet of pipe thread sealant. Always apply this to all connections (except the P.O.L. fitting to the propane tank) when assembling your torch kit. Always leak test you torch before lighting by spraying soapy water on all connections, with the propane valve open (only a ¼ of a turn) but your torch kit NOT lit. If you have a leak, turn off the propane tank, correct the connection and retest before proceeding to light your torch kit. Instructional Manual here.
The squeeze valve feature allows you to set a low pilot setting that when the handle is squeezed you will get a full flame. There is always the option to bypass the squeeze valve for a constant full flame with the adjusting needle valve. The squeeze valve can be added to your torch kit later as the need arises. See the Squeeze Valve here.
The only unit that comes standard with a propane tank is the Backpack unit. The 10# tank that is designed to mount on the backpack frame is Flame Engineering specific and will need to be taken to your local propane dealer for filling. All other hand held torches are recommended to operate with a standard 20# propane tank, commonly used with propane grills. These propane tanks can be found at your local hardware stores, retail chains or gas stations. The Mini Dragon™ Model# VT1-32C is designed for operation with a one pound cylinder commonly found in camping departments and gas stations. The Mini Dragon™ unit can be modified with a hose hookup kit (Model# SL-32C) to operate with a larger propane cylinder. View video here.
The longevity of your propane tank depends on the size of torch and propane tank. Most of our hand held torch kits require a 20# propane cylinder which will last from 45mins - 2 hours depending on a few different factors such as your torch kit size, outside air temperature, etc. The Mini Dragon™ operating on a 1# cylinder will last 1-2hrs. It is not necessary to have your needle valve & propane tank wide open to get a useable flame. This will extend your flaming time.
We recommend flaming your weeds when they are 2-4 inches in height for maximum results. For weeds taller than 4 inches, or weeds with complex and established root systems such as vines and bind weed, it may take multiple applications. Learn more here.
Please remember you are working with a live flame and flammable propane tank. Common sense is key when operating your flame weeding torch kit. We recommend flaming your weeds in the morning when the air and ground is dewy. Never flame conifers (evergreens, etc.) as they are highly flammable. You may also have a garden hose close for comfort. Learn more here.
Yes, however you don"t want to! You only want to heat the leaves of the weed in need of removal. If the weed is "burned to a crisp", the plant will shut down its photosynthesis system (process in which a plant produces its energy to survive and thrive), only to grow back from the unharmed root a few days later. The flaming process is a slow kill. By heating the leaves, you disrupt the structure of the cells therefore killing the plant and the roots from which it grows. It will take only a few days for weeds to dry up. Learn more here.
Yes! Much like chemicals, the heat and flame does not know desirable from undesirable vegetation. If you must get close to plants you do not want to damage, consider using a barrier, such as a shovel, to shield them from harm. Learn more here.
Poisonous weeds are not to be flamed! The vapor caused when flaming poisonous weeds is released into the air and can land on your skin causing irritation, as well as inhaled which may cause serious health issues. Learn more here.
Right here in the heart of the U.S.A! Flame Engineering proudly manufactures the Red Dragon products in Lacrosse, KS. All our products are assembled, manufactured and packaged in Kansas, America with U.S. sourced materials. Check out our Friends of Flame! See our Friends here!

So, tonight’s the big night. Family and friends are on their way to celebrate an occasion. You turn on the grill to preheat it so that by the time everyone arrives the grill will be ready for grilling. Then you notice the flame is low, and that the grill is only heating up to 250 or 300 degrees Fahrenheit – or maybe it’s not even igniting!!! Before you panic and call your local BBQ Grill Repair company, read this …
Lycee professionnel paul le rolland (weight room / cardio training), drancy (93700) – seine-saint-denis buy azab 250 azithromycin with uk shipping inici how to build muscle in 3 weeks, steroid sting musculatio edunexo.
* Side note about the shut down procedure. The following ignition procedures are written assuming you are turning the burners off 1st, then the Propane Tank. Therefore, each sequence starts from the all off positions. While it is acceptable to turn the burners off and leave the Propane Tank on, we strongly recommend you to go ahead and turn the Tank off also.
Basically, the key here is to be sure to have your burners off before you turn on the Propane. This is because if you turn the burners on first the gas will not be pressurized in the hose causing the Bypass to trigger. To the system, it appears there is a gas leak; hence, the bypass triggers. (Even though there is no leak; because the back pressure is low the system will think there is.)
* When using the improper sequence, the regulator will trip because by turning the burners on 1st, you empty the lines of any propane which causes the low line pressure.
So now you know the problem, let’s get to the solution. Of course, we’re assuming you have checked your Propane Tank to see if you simply need a new Propane Tank Exchange.
If this solution availed no result, it’s time to call your local BBQ Grill Repair Company. There are numerous other more advanced issues that can occur. For instance, you may have a blockage in the Venturis Tubes. A blockage like this is caused by char/grease build up. You can decrease the likely hood of this ever happening by being sure to have a BBQ Grill Cleaning done regularly.


 8613371530291