
how to test a gas oven safety valve factory
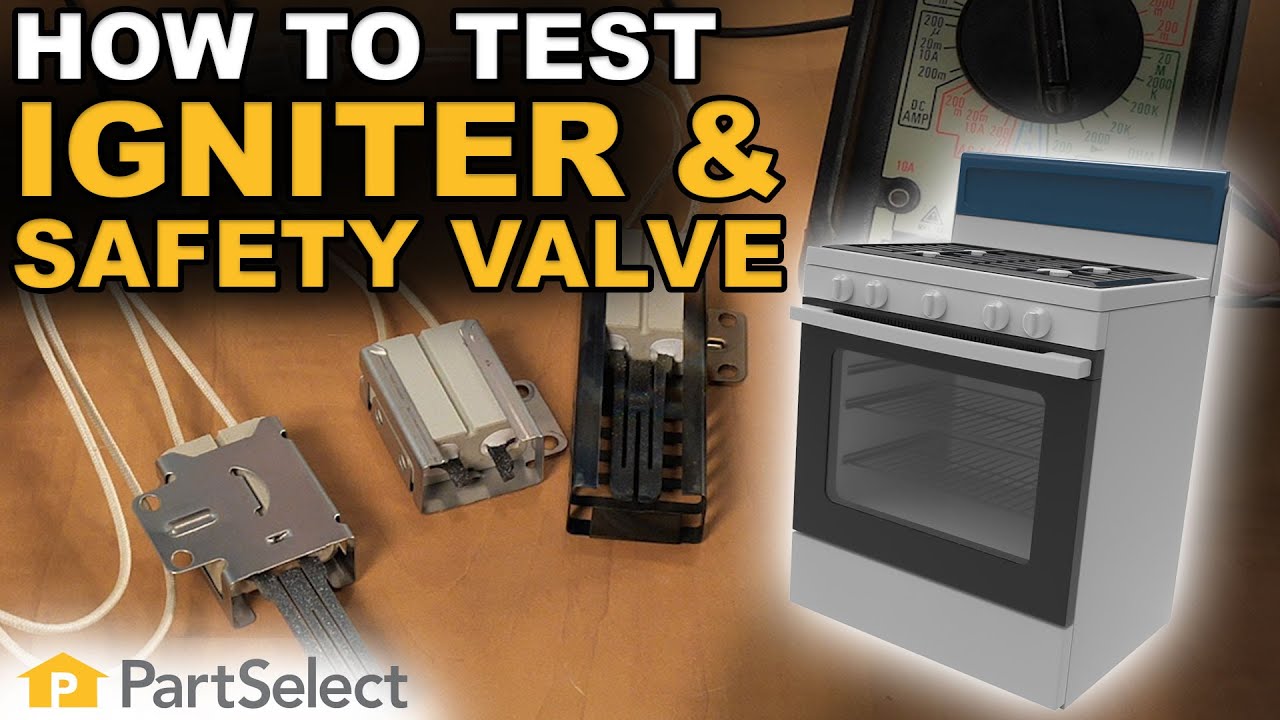
Trouble turning on your gas stove? If your igniter is glowing but there is no flame, then one of two components in your range are at fault. These components are the “safety valve” and the igniter itself.
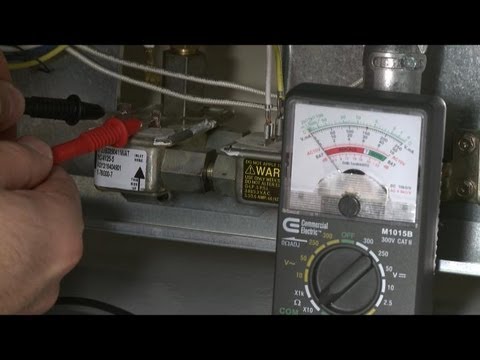
Take a clamp-on type ammeter, and attach it to the circuit to determine whether the igniter is working efficiently enough to open the safety valve. Clamp your meter onto the wire that either goes to the bake burner igniter or the bake burner safety valve. Turn on the bake function, and see what current is drawn. Typically your meter will show 2.8 – 3.0 amps for a normal current draw for a working igniter. If your meter is showing 2.7 or lower then you can assume that the igniter is not drawing enough current to actually ignite the flame, and therefore it won’t open the oven safety valve to allow the gas to enter the burner chamber. If this happens, it’s time to replace the oven burner igniter.
For a “hot surface” or “glow bar igniter” you can test their power continuity using a multimeter. Simply insert both leads onto the terminals for the igniter and measure the resistance. If it shows resistance, it has continuity. No resistance? No continuity. Typically these will be somewhere between 80 and 175 ohms of resistance for a working igniter.
To test the oven safety valve, measure between the two terminals, on the valve and look for continuity. The resistance here is low, but you should be able to detect 1 to 1.5 ohms. If your model uses a dual valve, one for the broil burner and one for the bake burner, then you will have two bi-metals and again you can test them for continuity using a multimeter. They also should be very low resistance and those would indicate that they"re normal working oven safety valves.
If after performing these tests, you"ve determined that you need to replace your gas range"s oven safety valves, oven igniter, burn igniter, or safety valves? Take a look at our large selection of oven parts.

Control valves and igniters on contemporary gas stoves provide convenience, as well as safeguards. Control valves regulate gas pressure to the burners. Turning the burner knob on all the way triggers an electrical spark at an igniter that ignites the gas. Troubleshooting the stove allows you to diagnose common problems. In most cases, you can identity and correct the cause of a burner that won"t ignite or burn as it should without outside assistance.
Basics When you turn a burner control knob all the way on, you should hear a clicking sound that indicates the igniter is generating the electric spark needed to ignite gas at that burner. After the burner ignites, turning the knob down a notch shuts off the electrical current to the igniter. If you hear the clicking, but the burner doesn"t ignite, start by performing a simple gas test.
Gas Test Each burner receives gas through a small metallic tube that connects between the burner and the safety valve that"s located in the front of the burner compartment. If an igniter sparks, but the burner doesn"t ignite, attempt to light the burner with a fireplace match or butane fireplace lighter. If this isn"t successful, there may be food particles or grease buildup in the holes on the burner. Poke a toothpick into each hole, and repeat the test. If this isn"t successful, contact the local gas company, and schedule a service call.
Igniter Wires Each igniter receives electrical current through small wires that connect to a control module near the safety valve. Look for a detached connection at an igniter or the control module, and simply reconnect the wire at the appropriate tab. If the igniter clicks and ignites the gas, you"ve fixed the problem. If an igniter clicks, but the burner doesn"t light, a simple visual test may lead to the problem.
Igniter Spark The color of the spark at an igniter should be almost white with a blue tint. If the spark is yellow or orange, the igniter is not producing ample spark to ignite the gas. Igniters are relatively easy to replace. Using a nut driver, remove two small hex-head screws that secure the base of the igniter to the burner compartment, and pull off the wire connectors. Take the igniter to an appliance accessory store, and get a new one based on the brand and model of the stove. Install it in the reverse order it was removed.
Control Valve Control valves regulate the gas pressure when you turn on a burner. Without one, you wouldn"t be able to turn down the flame at a burner. The control valve is located in front of the burner compartment and has threaded fittings where the tubes from each burner attach. If you smell gas at the valve, tightening the fittings with the appropriate open-end wrench is the first order of business. Alternatively, if a burner flame flickers, and you can"t turn the flame on high, the valve may be faulty. Again, if you don"t have experience with gas appliances, contact the local gas company and schedule a service call.

Most modern appliances have safety features built in, but your gas oven safety valve is arguably the most important. If an electrical appliance malfunctions, it can cause a fire, but a misfiring gas oven could potentially blow up your house. You don"t really need to know how the safety mechanism works to use your oven, but you may find that it gives you some extra peace of mind.
Broadly speaking, there are two ways a built-in safety mechanism can work. One option is that it remains "open" by default and to shut off if certain conditions are met. That"s how fuses and circuit breakers work in an electrical circuit: Ordinarily, the electricity is free to flow, but if the current grows too large, the fuse or breaker will blow and cut off the circulation of electricity.
The other option is for your safety mechanism to be "closed" by default and allow a device to operate only when the correct conditions are met. That"s how a gas oven safety valve works. Gas ordinarily is prevented from flowing, and if the valve is working correctly, it opens only when you want to light your oven.
Many gas stoves use what"s called a "hot surface igniter," a bar or element (similar to the ones on your stovetop) that gets hot enough to ignite the gas on contact. Gas oven safety valves on stoves with this type of ignition system take a couple of different approaches.
In one approach, a bimetallic strip operates the valve. It harnesses a simple scientific principle: Metals expand and contract at different rates when they"re heated and cooled. If you bond two suitable metals together in one strip, that strip will flex to a predictable degree as the temperature goes up and down. Wall-mount thermostats often use this principle, as do analog oven thermometers and the thermometer in the lid of your gas grill.
As appliance-repair website PartSelect explains, turning on your gas oven causes electricity to flow into the heating element of your hot surface igniter. As the igniter heats up, it warms a bimetallic strip inside your gas oven safety valve. When the igniter reaches its operating temperature, the bimetallic strip opens the valve and allows the gas to flow, igniting as it crosses the heated surface.
One intriguing thing about electricity is that a change in temperature can affect how well it passes through certain materials. For example, a lot of research revolves around superconductors – materials that offer very little resistance to an electrical current – but superconductors typically must be heavily chilled to work.
According to heating-equipment vendor Anglo Nordic, gas oven safety valves use a variation of that principle to operate. In these stoves, the flow of electrical current through the hot surface igniter becomes the control mechanism. The igniter"s bar is made of a material that offers less and less resistance to electricity as it heats. When it reaches the temperature required to ignite the gas, its resistance becomes low enough to trip the safety valve and open the flow of gas.
More modern ranges use an electrical igniter. When you turn on your oven, the gas begins flowing immediately, and it sends an electrical current to a piezo electric igniter. The current makes the igniter spark (like the manual igniter on your gas grill) and lights the oven"s burner. In this case, the safety valve works in the opposite way: An electronic sensor checks for the heat caused by ignition after a few seconds, and if it"s absent, it will close the valve and shut off the flow of gas.
It"s worth pointing out that not all gas ovens have a safety valve in the conventional sense. Older stoves simply use a pilot light, a small but constant flow of gas, which, in turn, feeds a small, candle-like flame. You essentially are the safety mechanism in this system: It"s up to you to check that the pilot is lit. When you turn on the gas manually, the small pilot flame ignites the main flame. It"s a mechanically simple system, which makes it durable, and for that reason, you"ll still see it used on commercial restaurant ranges, which must stand up to decades of heavy use.
On a newer gas oven, the burners release and set fire to the gas via an igniter called the hot surface igniter. The ignitor is a very fragile thing, whether it’s the round or the flat type. It works like a chain reaction: turning on the oven sends electricity to the igniter, causing it to heat red-hot. This makes the two metals in the oven safety valve contort enough to open the valve and set the gas aflame. This chain reaction takes about 60 seconds in a working oven. And a persistently cold oven could be the result of any break along the chain. A burner that won’t light could be connected to an igniter with no power coming into its circuit. Have a repairperson check the circuit for electricity, since this is a live voltage check. If there is indeed power coming to the igniter, and it is open circuit, a multi-meter can be used to run a continuity check. It may be that, while the igniter is glowing, it’s still insufficiently hot to open the valve: this can be checked by your repairperson with an amp meter. A defective igniter can’t be repaired: replacement is the only option.

If your gas range is not working correctly, you should check the gas pressure regulator shut-off valve. The factory default setting for the gas pressure regulator is in the "ON" position but may have been turned to the "OFF" position during handling or transportation. When the shut-off valve is on the "OFF" position, gas will flow to the cooktop burners but will not provide a gas supply to the oven.
You can check if the shut-off valve if you can slide the range out from the cabinet. If you are unable to slide the range out, we recommend consultation with a local certified technician.
Verify the pressure regulator shut-off valve is in the open position. The pressure regulator is located at the back of the range. Make sure that the shut-off valve lever is in the "On" position (see illustration below).
NOTE: If the range is hard piped, you will not be able to slide it out from the cabinet if it connected with a flexible supply line, take care not to over-extend the supply line. The main gas valve will usually be at the end of a fixed pipe and connect to the pressure regulator with a flexible supply line. Take care not to kink or pinch this flexible pipe.

The kitchen is the heart of the home. It’s where families share dinner, gather together and pass down recipes. One of the worst things that can happen when preparing to cook an amazing meal for your family is to find out that your gas oven won’t light. Do you call a repairman or resort to the microwave?
A handy homeowner can troubleshoot the problem when a gas oven doesn’t light. A handful of common problems can plague gas ovens. Many are as simple as a loose connection, while others involve replacing important components. However, those simple repairs are less likely to cost you an arm and a leg. Before worrying about replacing your oven, see if one of these common issues is the cause of your oven problems.
You can check a handful of issues if your gas oven doesn’t light. From a simple power issue to a faulty gas igniter, here are a few common reasons your gas oven won’t work.
If your oven won’t heat and your gas burners won’t light, the problem might be as simple as a tripped circuit breaker. Even though you have a gas oven, it still needs electricity to run. Electricity powers the control board, igniter and temperature sensor, among other parts.
The oven should connect to a standard 15- or 20-amp switch inside your circuit breaker box. These are the single switches. Your oven may also have its own dedicated breaker switch. If not, you can check the power by testing the secondary outlet. The problem lies elsewhere if the outlet works but your gas oven does not.
While a rare occurrence, your gas oven may not heat because your gas supply is off — usually a result of maintenance repairs or replacements in the system. For example, if your oven or other gas-reliant appliance was recently repaired, the gas line is likely still turned off.
Like a thermostat, the temperature sensor regulates the oven temperature of your gas oven. It connects to the igniter switch. If the temperature sensor breaks, the oven will not light for safety reasons.
Troubleshooting and replacing this sensor is a fairly easy fix for a homeowner who is comfortable working on a gas oven. Unplug the oven from the wall.
Set the multimeter to the RX1 setting and touch the sensor terminals with the tool to ensure the sensor resistance reading is within the correct parameters.
The igniter controls the oven safety valve, also known as the gas valve. This oven component ensures only gas enters the oven when the igniter is hot enough to ignite it. This component stops working if there is not enough power to either the valve or the igniter. A handy homeowner can use a multimeter tool to test that the valve is working. Unplug your oven.
Use a multimeter tool on the RX1 setting and test the valve. Some brands use valves with terminals for both the broiler and the baking elements. Test both sets of terminals.
The igniter is the key component of a gas oven. If you have a faulty igniter, many of the other components will not work and the oven will not turn on. Oven igniters glow hot to ignite the natural gas released by the oven safety valve. However, if the heating element is not working, the gas valve will not trigger and the oven will not ignite.
To check the gas igniter: Turn off the circuit to the oven and confirm the power is off by checking that the oven light, clock and control board are all off.
If nothing looks wrong with the part, plug the oven back in and watch to see if the igniter glows after turning on the oven. If it does not glow orange, replace it.
Replacing a faulty gas oven igniter is a moderately easy DIY appliance repair. Estimated costs are between $40 and $80, depending on the cost of a replacement igniter. If you have a newer oven, check any manufacturer warranties before making any repairs.
While a homeowner can do this project, ensure you take every safety precaution before attempting. Turn off the oven’s gas supply and disconnect the appliance from the outlet. Remember to take precautions if you smell gas (even after you have turned off the supply to the oven). Turn off the main gas supply to your home, open windows for ventilation, and call an appliance technician for assistance.
To ensure you have the correct replacement igniter, have your oven model number and serial number. A Kenmore oven might not use the same part as a Whirlpool oven. These numbers are often found inside the oven door or drawer, depending on the brand of oven.
Turn off all power to your oven. Ensure the power is off by checking that the light, control board and clock are off. Then remove the oven racks. Next, unscrew the base plate and remove it from the oven. You will find the igniter underneath.
Take a reference photo before removing the old gas igniter. Install the new igniter in the same way. Be very careful with the new igniter because it is very fragile. Unplug the two wires or the wire harness from the igniter.
While your gas stove and gas oven are part of the same appliance, they do not use the same parts and components. This is why your gas burners can work while your gas oven won’t light. Your gas range has its own set of igniters, gas valves and safety features. If everything is in working order, your range can work independently of your gas oven.
Appliance repairs are always a big inconvenience and can sometimes cost an arm and a leg. Don’t get stuck without your most important appliances. Check out the Cinch Home Services warranty plan that cover appliances, including both gas and electric ovens. With three different options to choose from, you can find the right plan for your home.
Cinch serves nearly 1 million customers and includes a 180-day workmanship guarantee on covered repairs. Get a quote on a Cinch home protection plan today.
:max_bytes(150000):strip_icc()/why-your-oven-wont-heat-up-1152246-hero-69771883db274944848e8c265cc484bd.jpg)
These valves do not fail very often. Normally the problem is with the ignitor not drawing enough amperage to open the valve. Even if the ignitor is glowing orange it is likely still the cause of the burner not igniting. Technicians refer to this as a "weak" igniter.
Dual gas safety valve assembly. The gas oven safety valve works with the oven igniter to provide gas to the burner. If the safety valve fails, the oven won’t heat. Since safety valves rarely fail, be sure to check more commonly defective parts before replacing the safety valve.
These valves do not fail very often. Normally the problem is with the ignitor not drawing enough amperage to open the valve. Even if the ignitor is glowing orange it is likely still the cause of the burner not igniting. Technicians refer to this as a "weak" igniter.
These valves do not fail very often. Normally the problem is with the ignitor not drawing enough amperage to open the valve. Even if the ignitor is glowing orange it is likely still the cause of the burner not igniting. Technicians refer to this as a "weak" igniter.
These valves do not fail very often. Normally the problem is with the ignitor not drawing enough amperage to open the valve. Even if the ignitor is glowing orange it is likely still the cause of the burner not igniting. Technicians refer to this as a "weak" igniter.

When you turn the dial on your gas stovetop, it opens a valve that lets gas through. This gas is released and mixes with air. It is ignited by a continuous spark which comes from the spark module, and a blue flame is created.
When the electrode on your gas oven burner continues sparking after the gas has been lit, it usually is a sign of a short in the spark module. This usually happens when liquid (like water from an overflowing pot) gets into the spark module. To fix this, unplug your appliance and let the burner dry out. Turn it on again and test it to see if drying has fixed the problem.
If the module continues to spark, call a service technician to come and replace the module, or call your home warranty company, who can send out a technician to diagnose your appliance.
If your spark module sends out a spark intermittently instead of sparking at a continuous pulse, it has probably worn out and most likely needs to be replaced. You can call a service technician or your home warranty company to get this repaired. This is not something that you should attempt to repair or replace yourself. Although the cost of the spark module really depends on the oven model the part can be found for anywhere between $30 to $250it"s a better deal to replace one spark module rather than replacing an entire oven. This is especially true if you have a home warranty plan, as the repair will generally only cost a small service call fee.
If you turn on your burner and you don’t hear the telltale sign of the electrode sending out a spark, it may be because the electrode is damaged. You can check to see if there is any visible damage by removing the burner and seeing if there are cracks on the top of the electrode.
If you see any damage, call a registered technician or your home warranty company in order to get the electrode replaced. Sometimes, your electrode"s spark is being blocked by the top of the burner being slightly off. Make sure the burner is in the correct place for the electrode to reach the gas and light it before calling a repairman or your home warranty technician.
If you don’t see any cracks on the actual electrode, you can also turn each burner dial to see if there’s one that doesn’t spark. If all of your burners spark but one, there’s probably a problem with the dial. There are times when the dials can become stripped and won’t turn on the electrode. It’s also possible that the dial has shorted out because food or water has spilled into the burner. You can try to dry out the burner, and if that doesn"t work, the igniter wiring harness will need to be replaced. Paying to repair this part is much more cost effective than purchasing a new oven, as the parts range between $30 and $100. With a home warranty, you only pay a small service call fee for parts and labor to repair the igniter wiring harness as long as it"s failed from normal wear and tear.
There’s a chance that food or grease has plugged up the tube that releases gas to be lit by the burner. Turn your oven off and remove the burner from the oven. Clean out thesmall tube inside of the burner with a toothpick or small brush.
When you turn on your oven to bake (or broil) the dial sends electricity to the igniter, which begins to warm up. As the igniter warms, the safety valve releases gas into the oven burner tube. Once the gas reaches the igniter (which can get up to 2,000 degrees Fahrenheit) the gas is lit by the extremely hot metal on the igniter, and warms the oven. When the oven reaches the temperature you selected, the burner and igniter will shut off, but will turn on and off while you’re cooking to keep the correct temperature in the oven.
First, remove the shields so you can see the igniter. If the igniter is glowing, but there’s no flame after the igniter has been glowing for a longer period of time, theigniter has probably grown too old and can’t open the safety valve to bring gas into the burner tube. Call your home warranty company for diagnosis for this problem.
If the igniter isn’t glowing, it probably has outright failed, and needs to be replaced. Call a technician or your home warranty company to repair or replace your igniter.
Oven problems can happen to any homeowner, but with some troubleshooting and a home warranty plan from Landmark Home Warranty, you can usually fix small issues or repair or replace the oven. If you"re interested in covering your oven with a home warranty plan, compare Landmark"s home warranty plans here, or download a brochure with our contract for your state here.
WITT is a manufacturer of Pressure relief valvesor Safety relief valves for technical gases. They are designed to protect against overpressure by discharging pressurized gases and vapors from pipelines, pressure vessels and plant components. Safety relief valves (SRV) are often the last line of defense against explosion – and such an explosion could be fatal. Other common names for safety relief valves are pressure relief valve (PRV), safety valve, pressure safety valve, overpressure valve, relief valve or blow-off valve.
WITT safety valves are very precise. They are individually preset to open at a predetermined pressure within the range 0.07 to 652 Psi. Their small size and orientation-independent installation allow a wide range of connection options. WITT relief valves also stand out due to their high blow-off flow rates of up to 970m³/h. They can be used within a temperature range of -76° F to +518°F and even with very low pressures.
For maximum safety, WITT undertakes 100 % testing of each safety relief valve before it is delivered. In addition, WITT offers individual testing of eachsafety valveby the TÜV, with their certificate as proof of the correct set pressure.
WITTsafety relief valvesare direct-acting, spring-loaded valves. When the preset opening pressure is reached, a spring-loaded element in the valve gives way and opens, and the pressure is relieved. Once the pressures are equalized, the valve closes automatically and can be reactivated any time the pressure rises again. Depending on the application and the nature of the gas, the safety relief valvescan either discharge to atmosphere, or via a connected blow-off line. The opening pressure of the safety valves is preset by WITT at the factory according to the customer’s requirements.
Safety relief valvesare used in numerous industries and industrial applications where, for example, gases pass through pipelines or where special process vessels have to be filled with gas at a certain pressure.
These include, among other things:Pipeline, plant and container constructionIndustrial furnace constructionInsulators and reactors (e.g. “glovebox” systems)hydrogen-powered vehiclesAdditive manufacturing (3D printer)
For most industrial applications using technical gases, brass is usually the standard material of construction of thesafety relief valvebody/housing. For the use of pressure relief valves with aggressive and corrosive gases, the housings are made of high-quality stainless steel (1.4541/AISI 321, 1.4404/AISI 316L, 1.4305/AISI 303 or 1.4571/AISI 316Ti). The use of aluminium as a housing material is also possible.
Depending on the type of gas used and individual customer requirements, various sealing materials and elastomers are available to ensure the safety of your systems under even the most difficult conditions.
WITT pressure relief valves are available with different connections. In addition to the standard versions with the usual internal or external threads, special versions with KF or CF flanges, VCR or UNF threads can also be ordered. Special adapters for connecting the safety relief valve to a blow-off line are also available.


 8613371530291