
how to test a gas oven safety valve brands

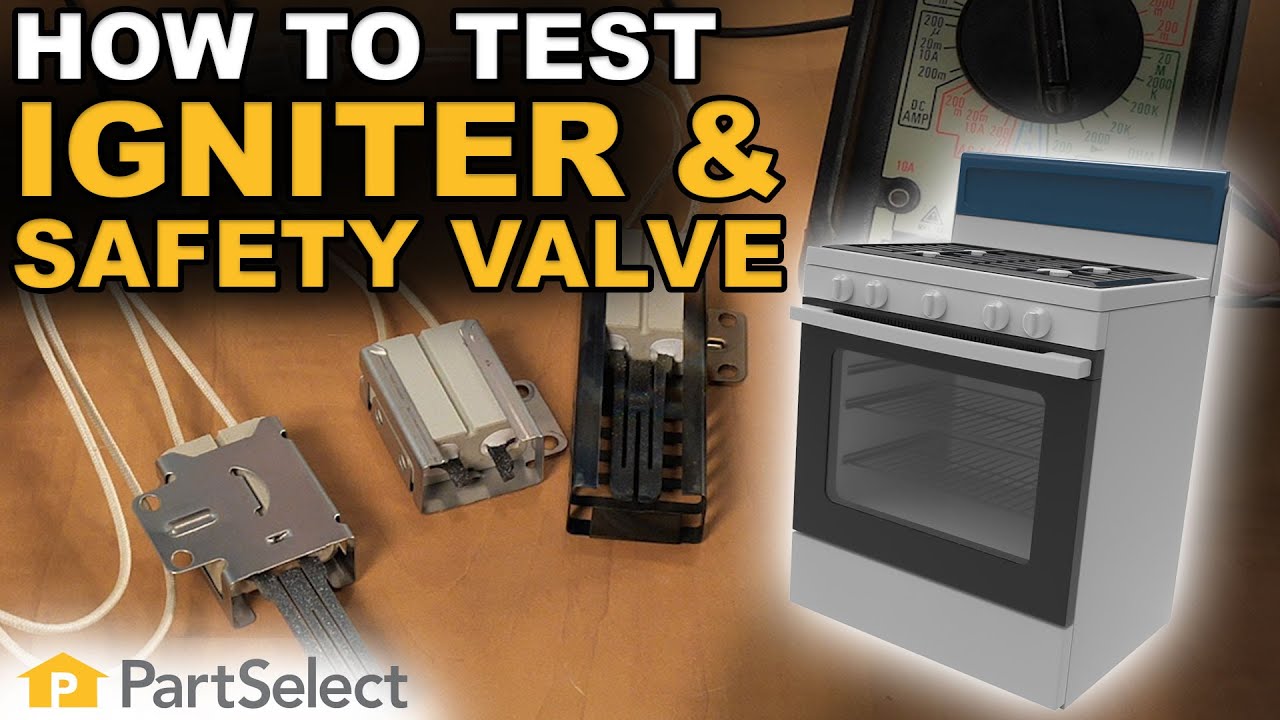
Trouble turning on your gas stove? If your igniter is glowing but there is no flame, then one of two components in your range are at fault. These components are the “safety valve” and the igniter itself.
Take a clamp-on type ammeter, and attach it to the circuit to determine whether the igniter is working efficiently enough to open the safety valve. Clamp your meter onto the wire that either goes to the bake burner igniter or the bake burner safety valve. Turn on the bake function, and see what current is drawn. Typically your meter will show 2.8 – 3.0 amps for a normal current draw for a working igniter. If your meter is showing 2.7 or lower then you can assume that the igniter is not drawing enough current to actually ignite the flame, and therefore it won’t open the oven safety valve to allow the gas to enter the burner chamber. If this happens, it’s time to replace the oven burner igniter.
For a “hot surface” or “glow bar igniter” you can test their power continuity using a multimeter. Simply insert both leads onto the terminals for the igniter and measure the resistance. If it shows resistance, it has continuity. No resistance? No continuity. Typically these will be somewhere between 80 and 175 ohms of resistance for a working igniter.
To test the oven safety valve, measure between the two terminals, on the valve and look for continuity. The resistance here is low, but you should be able to detect 1 to 1.5 ohms. If your model uses a dual valve, one for the broil burner and one for the bake burner, then you will have two bi-metals and again you can test them for continuity using a multimeter. They also should be very low resistance and those would indicate that they"re normal working oven safety valves.
If after performing these tests, you"ve determined that you need to replace your gas range"s oven safety valves, oven igniter, burn igniter, or safety valves? Take a look at our large selection of oven parts.
This website is using a security service to protect itself from online attacks. The action you just performed triggered the security solution. There are several actions that could trigger this block including submitting a certain word or phrase, a SQL command or malformed data.

This week’s Product Pick of the Week is the safety valve in your oven. The reason this product has been picked is because it is very important to understand how your range works to avoid hazardous situations such as open gas valves but no flame to burn said gas. This situation is the biggest concern with ovens, so it is crucial that you know how to test the safety valve so that you can continue using your range!

Control valves and igniters on contemporary gas stoves provide convenience, as well as safeguards. Control valves regulate gas pressure to the burners. Turning the burner knob on all the way triggers an electrical spark at an igniter that ignites the gas. Troubleshooting the stove allows you to diagnose common problems. In most cases, you can identity and correct the cause of a burner that won"t ignite or burn as it should without outside assistance.
Basics When you turn a burner control knob all the way on, you should hear a clicking sound that indicates the igniter is generating the electric spark needed to ignite gas at that burner. After the burner ignites, turning the knob down a notch shuts off the electrical current to the igniter. If you hear the clicking, but the burner doesn"t ignite, start by performing a simple gas test.
Gas Test Each burner receives gas through a small metallic tube that connects between the burner and the safety valve that"s located in the front of the burner compartment. If an igniter sparks, but the burner doesn"t ignite, attempt to light the burner with a fireplace match or butane fireplace lighter. If this isn"t successful, there may be food particles or grease buildup in the holes on the burner. Poke a toothpick into each hole, and repeat the test. If this isn"t successful, contact the local gas company, and schedule a service call.
Igniter Wires Each igniter receives electrical current through small wires that connect to a control module near the safety valve. Look for a detached connection at an igniter or the control module, and simply reconnect the wire at the appropriate tab. If the igniter clicks and ignites the gas, you"ve fixed the problem. If an igniter clicks, but the burner doesn"t light, a simple visual test may lead to the problem.
Igniter Spark The color of the spark at an igniter should be almost white with a blue tint. If the spark is yellow or orange, the igniter is not producing ample spark to ignite the gas. Igniters are relatively easy to replace. Using a nut driver, remove two small hex-head screws that secure the base of the igniter to the burner compartment, and pull off the wire connectors. Take the igniter to an appliance accessory store, and get a new one based on the brand and model of the stove. Install it in the reverse order it was removed.
Control Valve Control valves regulate the gas pressure when you turn on a burner. Without one, you wouldn"t be able to turn down the flame at a burner. The control valve is located in front of the burner compartment and has threaded fittings where the tubes from each burner attach. If you smell gas at the valve, tightening the fittings with the appropriate open-end wrench is the first order of business. Alternatively, if a burner flame flickers, and you can"t turn the flame on high, the valve may be faulty. Again, if you don"t have experience with gas appliances, contact the local gas company and schedule a service call.

So, you’re having trouble with your oven. There are some common oven problems that you can try to troubleshoot yourself when your oven is not working properly. Whether the problem is your oven not heating, oven not turning on, or your oven is not working in general, we’ve got suggestions for you.
The most common cause of an oven not heating is a defective igniter. The igniter draws electrical current through the oven safety valve to ignite it. If the igniter is too weak, it won’t open the valve correctly and will fail to ignite the gas in the oven burner. To see if the igniter is defective, observe the igniter when the oven is on. If the igniter glows for about 2 minutes without igniting the gas flame, the igniter is likely too weak to open the valve and needs to be replaced.
Another common cause for an oven not heating is having one of the wires that supplies power to the oven element burn out; it is common for these wires to burn out near the heat source. Inspect the wires leading to the oven element or igniter. If you determine the wire is fried, replace it. If you don’t see anything visibly burnt, check to make sure the wires are not loose and causing interruption to the flow of power to the oven element.
A common oven problem is the oven not maintaining proper temperature, or not getting to the correct temperature you have set it too. A defective igniter can cause this problem. As the igniter weakens over time, it takes longer to open the gas safety valve. When this happens, there is a longer span before the burner reignites, attempting to heat the oven to maintain accurate temperature.
Consequently, the oven temperature will drop too low before the burner is lit again. The oven temperature should not drop more than 40 degrees F. before the igniter relights the burner. If you are detecting too much temperature fluctuation, you may need to replace the igniter.
The oven sensor is another common culprit to the oven temperature not regulating. On some oven models, you can recalibrate the oven control up to 35 degrees F.- refer to the owner’s manual for instructions on how to recalibrate the oven control. Otherwise, you may need a licensed technician to determine if the oven sensor is failing.
If you discover the self-cleaning feature of your oven not working, the oven control board may be defective. The oven control board has relays that send voltage to the bake/broil circuits based on sensor input. If you have a faulty oven control board, the heating components will not get the voltage they need to activate.
Again, that pesky igniter. The igniter is the most commonly defective component of an oven that won’t turn on. See above “Oven Not Heating” for more details about checking the igniter.
Another common cause of an oven not working is loose or burnt wires. The wires that supply power to the oven element or igniter sometimes burn out near the heat source. Check the wires leading to the element or igniter. The will wire usually be visibly burnt if the wire is indeed burned out. If this is the case, the wires need to be replaced.
One of the most common oven problems is a stove burner that won’t light properly. The spark modules, spark electrodes, and spark wires all work together and are responsible for the burners lighting. First check the spark electrode and spark wire. If both of those are in working order, then check the spark module. If the burner produces a weak spark, or sparks intermittently, the spark module may need to be replaced.
If you have one range burner that isn’t working, but the other burners are working and sparking properly, your failed burner likely has a defective spark ignition switch. Use a multimeter to test the switch for continuity, and if the switch doesn’t have continuity at all settings, replace it.

Pilot ignition systems use a flame sensing element to sense whether the pilot is lit and the safety valve can open. The sensing element sits right in the pilot flame.
Just exactly where the sensor sits in the pilot flame is important. (See figure 6-A) If the sensing bulb is not in the right part of the flame, or if the pilot is adjusted too low or too high, it will not get hot enough and the safety valve will not open.
When two dissimilar metals (for example, copper and steel) are bonded together electrically, and then heated, they generate a tiny electrical current between them. The voltage is very small, measured in millivolts. This is the basis for a millivolt oven ignitor system. All that"s needed is a safety valve that will sense this tiny voltage and open the valve if it is present. If the pilot is out, there is no millivoltage and the safety valve will not open. See figure 6-B.
If the burner in a millivolt system will not start, typically the problem is the gas valve. Occasionally the problem might be the pilot generator or thermostat. The thermostat in these is just a temperature-sensitive on/off switch. To test, turn it on and test for continuity.
If that doesn"t work, we have a minor dilemma in determining whether the problem is the pilot generator or the safety valve. The dilemma here is that the voltages are too small to be measured with standard equipment. VOM millivolt adaptors cost nearly as much as the pilot generator itself. And the safety valve, which is usually the problem, costs twice as much as the pilot generator. So usually you just replace either or both of them. But don"t forget they are electrical parts, which are non-returnable. What I recommend is just to replace the gas valve first; that usually will solve the problem. If not, replace the pilot generator. You just ate a gas valve, but trust me, you"d have bought one sooner or later anyway.
When installing the pilot generator, screw it into the safety valve finger tight, plus 1/4 turn. Any tighter than that and you can damage the electrical contacts on the valve.
In some systems the sensor is a liquid-filled bulb, with a capillary to the safety valve or flame switch. When the liquid inside heats up, it expands and exerts pressure on a diaphragm, which opens the valve or closes the switch.
It is important to know that these sensor bulbs do not cycle the burner on and off to maintain oven temperature. That is the thermostat"s function. It has a sensor bulb too, but it senses oven temperature, not pilot flame. The only function of these pilot sensing elements is to prevent gas flow to the burner if the bulb does not get hot enough to assure burner ignition.
In flame switch systems, hydraulic pressure from the capillary physically closes the switch, which completes an electrical circuit to the safety valve. The safety valve is electrical and operates on 110 volts. See Figure 6-D. If the pilot is out, the flame switch does not close and the 110 volt heating circuit is not complete, so the safety valve will not open.
Some of these direct-pressure (hydraulic) systems use a two-level pilot. The pilot stays at a very low level; not even high enough to activate the safety valve. This is called the constant pilot, or primary pilot. Gas for the primary pilot may come from either the thermostat or directly from the gas manifold.
When the thermostat valve is turned on, the pilot flame gets bigger, heating the sensor bulb, which activates the safety valve (hydraulically) and the burner ignites. This is called the heater pilot, or secondary pilot. Gas for the secondary pilot comes from the oven thermostat itself.
When the gas oven reaches the correct temperature setting, the thermostat drops the pilot flame back to the lower level, the safety valve closes and the burner shuts off. See figure 6-E.
The sensing bulb needs to be sitting right in the hottest part of the flame as described in section 6-2. If you don"t have a good strong pilot (secondary pilot, in two-level systems) that engulfs the pilot sensing bulb with flame, try cleaning the pilot assembly and sensor bulb as described in section 6-5. If that doesn"t work, replace the pilot assembly.
If you do have a good strong pilot that engulfs the pilot sensing bulb with flame, then odds are that the sensing element and/or whatever it is attached to are defective. If it is a flame switch, replace the flame switch. If it is a safety valve replace that.
In a two-level pilot system, remember that the main oven thermostat supplies the secondary pilot with gas. So if you cannot get a good secondary pilot the problem may be the pilot assembly, or it may be the thermostat. If you do get a good secondary pilot, you"re back to the sensing bulb and safety valve.
Spark ignition systems use a spark module to generate a pulsing, high-voltage spark to ignite the gas. The spark module is an electronic device that produces 2-4 high-voltage electrical pulses per second. These pulses are at very low amperage, measured in milliamps, so the risk of shock is virtually nil. But the voltage is high enough to jump an air gap and ignite gas. The spark ignition module is usually located either under the cooktop or inside the back of the stove. The same module is used for both the surface burner ignition and the oven burner ignition.
However, the spark is not certain enough to light the oven burner, and the gas flow is too high, to rely on the spark alone. Remember, in an oven, before the safety valve opens, you need to be assured of ignition. So the spark ignites a low-gasflow pilot, and then the safety valve opens only when the pilot is lit.
This is the same two-level pilot system described in section 6-2(b), with a few important exceptions. The constant or primary pilot does not stay lit when the oven thermostat is turned off. It does, however, stay lit the whole time the oven thermostat is turned on.
When the gas oven is turned on, a switch mounted to the oven thermostat stem signals the spark module. These are the same switches as shown in section 5-3.
The flame is positioned between the spark electrode and its target. The pilot flame actually conducts electricity. So when the pilot flame is burning, electricity from the spark electrode is drained off to ground, and sparking stops. If the pilot quits, sparking resumes.
When the thermostat calls for more heat in the oven, the heater or secondary pilot increases the size of the pilot flame, which heats the sensing bulb, which opens the safety valve and kicks on the burner.
Yup, this ol" boy"s got it all. Spark ignition, a pilot, a flame switch and TWO - count "em - TWO safety valves; one for the pilot and one for the burner. (Figure 6-H)
The operation is actually simpler than the diagram looks. When you turn on the oven thermostat, a cam on the thermostat hub closes the pilot valve switch. This opens the 110 volt pilot safety valve and energizes the spark module, igniting the pilot. As in the other spark system, the pilot flame provides a path that drains off the spark current, so the ignitor stops sparking while the pilot is lit. As long as the oven thermostat is turned on, the pilot valve switch stays closed, so the pilot valve stays open and the pilot stays lit.
When the pilot heats the pilot sensing element of the flame switch, the flame switch closes. This completes the 110 volt circuit to the oven safety valve, so the valve opens and the burner ignites.
When the oven temperature reaches the set point of the thermostat, the thermostat switch opens, breaking the circuit and closing the oven safety valve, and shutting off the burner.
Now that you know how the system works, first look to see what is not working. When the oven thermostat is on, and there isn"t a pilot flame, is the electrode sparking? Is there spark, but no primary pilot? Is the primary pilot igniting, but not the secondary? Is there sparking after the thermostat is shut off?
(The pilot may or may not light, but the main burner is not lighting) Remember that the thermostat supplies the pilot with gas in these ovens, and only when the thermostat is on. So if you don"t have a primary and secondary pilot flame, odds are the problem is the pilot orifice or oven thermostat. Try cleaning the pilot assembly and sensor bulb as described in section 6-5. If that doesn"t work, adjust the secondary flame a little higher. If that doesn"t work, replace the pilot assembly.
If you do have a good strong secondary pilot that engulfs the pilot sensing bulb with flame, then odds are that the oven safety valve (or flame switch, whichever is attached to the pilot sensing bulb in your system) is defective. Replace the defective component.
Something is wrong with the high-voltage sparking system. If you are in a hurry to use your oven, you can turn on the oven thermostat, carefully ignite the primary pilot with a match and use the oven for now; but remember that the minute you turn off the thermostat, the pilot goes out.
Are the cooktop ignitors sparking? If so, the spark module is probably OK. What typically goes wrong with the sparking system is that the rotary switch on the valve stops working. Test continuity as described in section 5-3(a). If that isn"t the problem, check the electrode for damage and proper adjustment. The spark target (the nearest metal to the electrode) should be about 1/8″ to 3/16″ away from it, (about the thickness of 2-3 dimes) and directly across the primary pilot orifice. Replace or adjust the electrode as appropriate. When replacing, make sure you get the right kind of electrode (there are several) and do not cut the electrode lead; follow it all the way back to the spark module and plug the new lead into the proper spark module terminal.
Usually the ignition switch has gotten some moisture in it and it is shorting. To test, pull the lead off the switch and see if the sparking stops. If so, the switch is bad. Replace it.
Remember that these switches are on 110 volt circuits. If you get too fast and loose with pulling these leads off to test them, you might zap yourself.

On a newer gas oven, the burners release and set fire to the gas via an igniter called the hot surface igniter. The ignitor is a very fragile thing, whether it’s the round or the flat type. It works like a chain reaction: turning on the oven sends electricity to the igniter, causing it to heat red-hot. This makes the two metals in the oven safety valve contort enough to open the valve and set the gas aflame. This chain reaction takes about 60 seconds in a working oven. And a persistently cold oven could be the result of any break along the chain. A burner that won’t light could be connected to an igniter with no power coming into its circuit. Have a repairperson check the circuit for electricity, since this is a live voltage check. If there is indeed power coming to the igniter, and it is open circuit, a multi-meter can be used to run a continuity check. It may be that, while the igniter is glowing, it’s still insufficiently hot to open the valve: this can be checked by your repairperson with an amp meter. A defective igniter can’t be repaired: replacement is the only option.

Their are several different gas safety valves. On ovens with ignitors, if the ignitor is weak then the oven will not light off, but what if the igniter is new and the oven will not come on?
NOTE:Never put 120 volts to the safety valve in an attempt to make it come on. All you will do is kill that valve"s bi-metal. It has to be hooked in line with the igniter to work properly. Why? The ignitor takes up most of the power. The power goes through the safety valve as 120 volts but because the amperage is all being hogged by the ignitor, the gas valve opens up and allows gas to flow out into the burner and ignite. Unless it is leaking most of the time the gas safety valve is NOT the problem.
On ovens with pilot lights or standing pilots most of the time it IS the safety valve because the little thermocouple that mounts on the pilot goes bad and won"t open the safety valve.
Some ovens offer a seperate safety feature called a flame switch. What it amounts to is the thermocouple mounted on the pilot light goes to the flame switch which will have continuity as long as it is heated by the pilot light.
NOTE: If you do have to replace the gas valve remember this: It will not come preset. You will have to adjust the flame height with a wrench. It is a good idea to set the 2 valves side by side, adjust the orifice height on the new valve to the same height as the old one and then you need only to tweak it a tad. If the flame is too low it will take 2 hours to bake a pie shell. too high and the bottom will be cooked before the rest. It is best to adjust the flame to about half way up the flame spreader.

You’ve been waiting for an hour for your gas oven to come up to heat. It should have been ready 45 minutes ago. And still you wait. “What’s the problem?” you curse under your breath. We’ve been here and we know exactly how you feel. (Although we hope it’s not the night before a bake sale when you encounter this.) Appliances don’t always work. Sometimes you run into a problem with your gas oven and you’ve got no idea what it is or why it’s happened.
When you were purchasingyour brand new gas oven, it might have seemed like a fantastic idea at the time. When you compare the pros and cons, a gas oven comes out ahead for many people. You save money because gas ovens cost less to run than electric ovens, they heat up and cool down quicker, and they are more energy efficient. Or you might have chosen it because while an electric oven typically only lasts for 13 years, a gas oven can last up to 15 according to American Home Shield. These are all reasons we looked into when it came to justifying our gas oven against the initial cost of purchasing one and installing the gas line.
However, like all appliances, there are times when things just go wrong and you don’t have a say in the matter. That’s when you need to be able to tell the difference between a problem you can fix and a problem we can fix.
Something to look for with all of these issues is whether your oven is getting gas or not. Start by turning on the range burners if you have any. If the gas is flowing normally to the range burners, you know that the issues are within the oven itself. If they aren’t, you need to take a step back and make sure that you’re getting gas from your intake line, and your gas provider. (Sadly, we don’t have an in with any of them. We advise calling them once you’ve confirmed that an issue is with the gas supply rather than the oven itself.)
Food debris can keep the burner from lighting, so your best bet is to clean it out regularly. But we all get busy, or have unintentional cooking mishaps, so here are the steps you need to go through when it’s built up.Start by removing the grate over the burner. Either gently lift it off or loosen the screws that hold it in place.
Check the burner tube(s) and ignition to see if they have any food built up on them, carefully using scrubbing with an old toothbrush or a wire bristle brush.
Sometimes the burners in your oven just won’t light completely. Even though you’ve got the dial cranked to high, you’re not getting a sufficient flame. This not only is going to affect your cooking, but also the efficiency of your oven. The most likely reasoning for this is that you have a cross-over port that’s restricted due to some type of blockage. Grab your old toothbrush and a wire brush and scrub carefully at all of the ports. With a bit of time you should be able to clear anything blocking the ports.
What about if the pilot light doesn’t light up after you’ve turned the oven on? You’ll know it hasn’t if you can open up the oven and don’t see a light at the back of the oven. If it’s not on, you might need to clean the electrode for the pilot. After you’ve taken your trust tools to it, you can relight the pilot with this article from Bob Villa.
One of the benefits of a gas oven, and the reason many people choose them, is the rapid on-off time, the opposite of using electric ovens. However you can have times where even after you ignite the oven, it takes a long time before it operates. This can be caused by the ignition ports being blocked. Please note, this is different from having the cross-over ports blocked. A trained technician is your best choice in this case, rather than doing it yourself. They will be able to tell if it is the ignition port that is clogged and get it fixed. The reason we advise caution here is because a delayed ignition has the potential to cause a fire or explosion, causing damage to you, your oven or your home.
If your oven won’t heat at all, it’s possible that the ignition is a problem. If you’ve made sure that both the gas supply is active and open, pop open the panel at the bottom of your oven. Here you’ll see your burner tube. Turn on your oven to 350 and see if the igniter burns hot. If it does but the gas doesn’t ignite, there’s most likely a problem with the igniter, and it’ll need to be replaced. If the igniter doesn’t glow, the next step is checking it with a multimeter, which you can do on your own, or you can call us in. For more information on how this process works, check out this video.
If you’re facing off against an oven that doesn’t have any flame, your first spot to look is the igniter. (Hm, that thing seems to be the potential spot for several problems doesn’t it?) So, pull out the shields and check to see if it’s glowing. If there’s not flame and your igniter has been glowing for a long period of time, you need a new igniter. They can get old and worn out so that they can’t open the safety valve and bring gas into the burner tube.
If you’ve got your oven lit and you can smell the gas, you’ve got a problem. Start by turning off the oven. If left unchecked a gas leak can cause a fire, explosion or poisoning of anyone in the home.
Now that we’ve got you safe, there are two possible causes for you smelling gas. The first is that the gas valves are opening up too soon before the ignition is reaching the right temperature. The second could be a hole or slit in the gas valves. Both of these need to be addressed by a professional as soon as possible after you notice it.
Oven problems can happen to any homeowner. It’s not something you’ve done or not done, it’s just wear and tear on the parts. The good news is that half of these you can fix on your own. For the other half, Appliance Rescue Service is always here to help. If you’ve got questions about ovens (gas or electric) that we didn’t cover today, or just in general, let us know in the comments below or over on our Facebookpage. If on the other hand you found us because you’re dealing with one of these problems, you can reach out to us on our webpage. So long as you live in Addison or the surrounding area, we’re here to help.

If your gas range is not working correctly, you should check the gas pressure regulator shut-off valve. The factory default setting for the gas pressure regulator is in the "ON" position but may have been turned to the "OFF" position during handling or transportation. When the shut-off valve is on the "OFF" position, gas will flow to the cooktop burners but will not provide a gas supply to the oven.
You can check if the shut-off valve if you can slide the range out from the cabinet. If you are unable to slide the range out, we recommend consultation with a local certified technician.
Verify the pressure regulator shut-off valve is in the open position. The pressure regulator is located at the back of the range. Make sure that the shut-off valve lever is in the "On" position (see illustration below).
NOTE: If the range is hard piped, you will not be able to slide it out from the cabinet if it connected with a flexible supply line, take care not to over-extend the supply line. The main gas valve will usually be at the end of a fixed pipe and connect to the pressure regulator with a flexible supply line. Take care not to kink or pinch this flexible pipe.

From time to time, you may find it necessary to turn off the gas for a stove (or other appliance) that heats with natural gas or LP (liquid propane) gas. Several common repairs for stoves and other appliances may require that you shut off the gas. And should you ever detect a faint odor of gas in your home, shutting off the gas may be required.
Furnaces, water heaters, space heaters, stoves, ovens, and cooktop ranges can all be powered by gas, so it"s a good idea to know where the gas shutoff valves are located on any of these appliances.
It"s a good idea to make a point of knowing where the gas shutoff valves are located for your range and all other gas appliances in your home. In the event that you smell gas, don"t spend a lot of time searching for the appliance shutoff valves if you don"t already know where they are.
Building codes require the gas shutoff valve to be located within 6 feet of the appliance and in the same room. If you find an improper situation that doesn"t meet the code requirements, it"s a good idea to have a service person install a proper shutoff valve. Shutoff valves for standard (freestanding) gas stoves or ranges typically are located behind the appliance.
Any time there is a gas leak in one of your appliances, there is the possible danger of an immediate and catastrophic explosion or fire, so the official recommendation from most utility companies is to leave your house immediately if you smell gas, then call the utility company. Only if the odor is faint should you take the time to find the shutoff valve to an appliance to stop the flow of gas. Shutting off the gas to the stove yourself is safe only if the gas odor is faint and is clearly coming from the stove area.
If a gas smell permeates the entire house, or you detect a strong smell when you walk inside your home, leave the house immediately and call 911from a locationwell away from your house.
If the odor of gas is faint and is contained in a small area, you can shut off the gas yourself before calling the utility or a plumber. In many instances, the location of the gas smell will give you a strong hint about what appliance is malfunctioning or where the bad connection is located. If you smell gas in the kitchen, for example, it"s quite likely that the problem lies with the stove or range. When the smell of gas is localized in this way, it is usually safe to act quickly to turn off the gas supply to the appliance itself, but always use your best judgment, and err on the side of safety.
:max_bytes(150000):strip_icc()/shutting-off-gas-to-the-stove-2718660-hero-033bbdf1503f455e8dcca0f2c668a154.jpg)
You can check if the shut-off valve if you are able to slide the range out from the cabinet. If you are unable to slide the range out, we recommend consultation with a local certified technician.
Verify the main gas shut-off valve is in the open position. Most service valves are single-lever ball valves; the handle parallel to the line means gas is flowing, perpendicular means it"s cut off. (See Illustration below)
NOTE: If the range is hard piped you will not be able to slide it out from the cabinet, if it connected with a flexible supply line take care not to over-extend the supply line. The main gas valve will usually be at the end of a fixed pipe and connect to the pressure regulator with a flexible supply line. Take care not to kink or pinch this flexible pipe.


 8613371530291