
neon wire rope quotation
Flexible Neon Wire (Electroluminescent wire,cool Lighting,EL wire, glow stick rope) made in KPT company . It can be used for Christmas Lighting,DIY Glow toys,Glow flower, Flash…

LED Neon Rope Lights offer the easiest and most economical replacement to standard glass neon accents. Because of their extraordinary ability to mimic the consistent lighting effects of glass neon, LED Neon is the best option available to create signage, perimeter accents, or for any other application where glass neon has traditionally been used. LED Neon can be used for both indoor and outdoor projects and offers an 80% reduction in energy usage when compared to traditional glass neon.
Create custom lighting effects with 2-Wire Rope Light Controllers. Add a dimmer , fader , or flashing controller to your rope lights to create distinctive lighting effects for your next project.
Customize this 151" 1/2" Brilliant Brand LED Rope Light spool in countless ways with the included 63 piece accessory kit and enhance the visual appeal of your home or business. That’s a $53 value, free!

Brilliant Brand SMD LED blue neon rope lights are the perfect replacement for traditional glass neon lights with their flexibility and amazing color. SMD LED neon rope lights don’t have the typical appearance of individual light dots that you see with other LED lights and provide a consistent neon color. Create signs, shapes, or manipulate lights to fit your application with flexible and durable neon rope lights. You will save money with LED neon rope lights as they consume 80% less power than traditional glass neon and have a lifetime of 50,000 hours. SMD LED neon rope lights are perfect for creating signs, lighting your business, or providing accent lighting to your home.
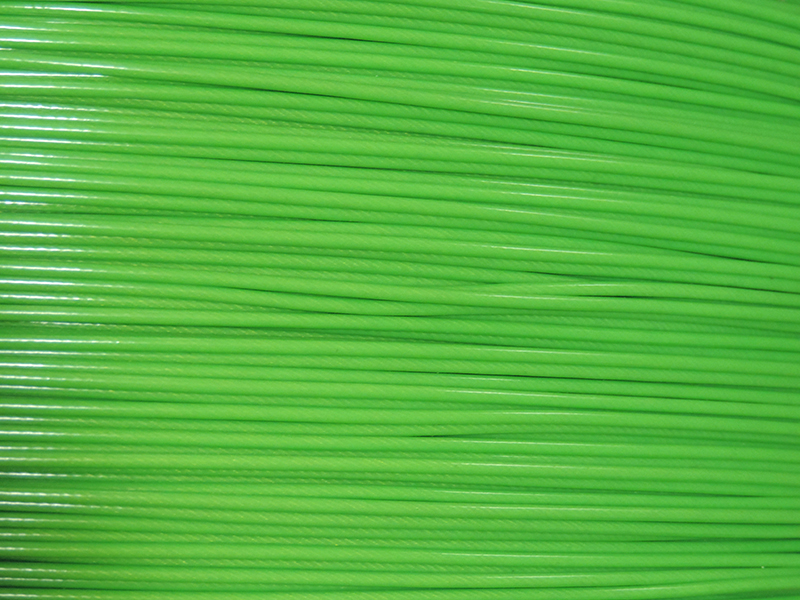
GTO-15 Neon Sign Wire or GTO wire is a form of a wire that can be suitable for decorative purposes in places where electricity is not present. It is very flexible and easy to use. GTO wire can be used in almost all areas of a business or institution. If a business or an institution utilizes GTO wire, it will be easier for them to make their place look attractive and inviting to customers and visitors. These neon signs are well known for their flexible nature and their ability to change their color depending on the occasion. They do not need electrical power to work. The use of the GTO wire will make it possible for any establishment to attract customers and visitors.

The following instructions are here to help you learn how to work with your rope lights and their accessories. Be sure to adapt these instructions as necessary to accommodate the particular type of rope light you are working with, LED vs. incandescent, 2-Wire vs. 3-Wire, etc.
How do rope lights work? A rope light is comprised of bulbs (LED or incandescent) spaced along a set of inner wires. Rope lights are divided into sections and are wired in "series parallel". This means that if a bulb fails, only the section it is in will go dark; the rest of the rope light will stay lit. Due to this wiring method, rope lights can only be cut at the dividing points between sections.
A basic run of rope light consists of four main parts. First is the power cord, which plugs your rope light into an outlet to give it power. Next is the power connector, a small plastic unit with metal pins that connect the power cord to the actual rope light. Then there"s the rope light itself, followed by the final piece, an end cap, which terminates the run.
One of the most important rules of rope light installation is that rope lights can only be cut in specific intervals. Depending on the type of rope light you"re using, this can range anywhere from every 18 inches to every 72 inches. After you have figured out what the ideal amount of rope light is that you are going to need for your project, take a second to make sure this length is divisible by the "cuttable interval" of your particular type of rope light. If it is not, you"ll want to round up or down to the nearest interval. (Make sure this new length will still work with your project.)
When it comes time to cut your rope light, you will find that at every cuttable interval, there will be tiny scissor icons, dashed lines, or other marking imprinted on the plastic outer tubing indicating where it is safe to cut the rope light. These marks are very small and may be hard to locate at first, but rest assured, they are there. If a rope light is cut in any location other than these pre-designated locations, it will damage that section of rope light and cause it to fail. When you are ready to cut your rope light, use a sharp pair of heavy-duty scissors, garden clippers, or a utility knife to make the cut. Be sure to make a smooth and clean vertical cut. The sharper your cutting blade is, the easier it will be to cut the rope light. Once you have made your cut, you will need to trim the inner wires to allow room for the connectors to insert correctly. Bend the end of the rope light sharply to the side. As you do this, you will see the wires inside the rope light protrude out. Trim off the ends of these wires so that when bending the rope light back again, the wires no longer stick out. This completes cutting the rope light and has prepared the end to receive any accessories that might be attached.
The power connector is the key component that links the power cord (along with various other accessories) to the rope light. The easiest way to begin is to attach the connector to the power cord first, then plug the power cord/connector assembly into the rope light. Plug in the "female" end of the power cord into the "male" pins of the power connector and secure with the attached threaded collar. Then separate the screw compression cover from the power connector and slide the cover over the rope light. Align the sharp pins of the connector with the small wire holes of the cut rope light end. Firmly and carefully push the connector and its pins into the rope light, making sure all the pins make contact with the corresponding rope light wires. Then slide the compression cover back over the top of the power connector and screw on. This will compress the power connector and secure it to the rope light. The power cord is designed to be plugged into a standard wall outlet. If you need to hardwire your rope light, simply cut off the plug and strip the outer jacket to expose the wires.
If you are using LED rope lights, note that LEDs are polarized and require the electrical current to be flowing in a particular direction. So if you plug in the power cord and the rope lights do not work, simply remove the power cord from the rope light and connect it to the opposite end.
End caps are a simple, but important, component of a rope light run. They shield the exposed end of the rope from debris as well as protect any protruding rope light wires from getting snagged. To attach an end cap, simply push it into place around the plastic tubing of the rope light until it stops. Optionally, you can further secure and waterproof the connection using PVC sealant.
There are many accessories that you can incorporate into your rope light design to help shape your rope light vision. These include inline splices, T-connectors, extensions, Y-connectors, etc. While they all provide different functions, the basics of how they attach to the rope lights is the same. Once you understand the basics of how a power cord attaches to a rope light, through the ubiquitous power connector and the alignment of its pins with the wires of the rope light, you"ll understand how to attach just about any other accessory. The power connector is the common component in every rope light accessory, and once you know how it works, there"s no limit to what you can do.
Knowing the basics of how to plug in rope lights makes it easy to hang rope lights in a straight line. But what if you need to trace around curves or attach various sections together? More complex rope light designs, such as outlining architectural features or highlighting landscaping, requires accessories. The most common rope lighting accessories are:
Rope lights can be mounted just about anywhere you can imagine, using a variety of methods, creating unlimited forms and shapes. But no matter how you chose to mount your lights, there are a few guidelines you"ll need to follow. After unspooling your rope light, not only should you plug it in to test it, but it is a good idea to keep it plugged in for a few minutes to warm up the outer plastic tubing, making it more pliable. (Be sure to unplug it again before installation.)
Rope lights are very flexible products, but they do not bend at 90-degree angles. Always provide a curved radius of at least 3-4 inches when turning a corner. Also, all rope lights generate some heat during operation and they need to be able to dissipate this heat throughout their length. When mounting, do not crowd the rope light and be sure to allow ample "breathing room" around it. This is also applicable in installations where two or more rope lights might run parallel to each other. Again, allow some ventilation room for heat dissipation and do not let the rope lights touch each other as this could potentially cause them to melt or fuse together. (This is the same reason why you should always unspool your roll of rope light before plugging it in.)
When installing rope light into place, it is very important that you do not pull on, tug on, stretch, or excessively flex the rope light! This can stress the inner wires and damage them, the result of which will be immediately burned out sections. And nobody wants that. Rope lights are a very flexible product, but please use care when handling and installing them.
If using rope lighting outdoors, be sure to use waterproof PVC or silicone sealant to secure all connections, power cords and end caps. Add a small bead of sealant on the inside of the connector, slide the rope light in place and then place another small bead along the outside rim to seal the connection. Remember to secure your end caps in the same manner. For added protection, we recommend using dielectric grease on all metal pins prior to inserting into both the rope light and connectors/power cord. This will prevent corrosion of the metal due to any residual moisture present in the connection.
Mounting clips are a general-purpose accessory that can be secured to just about any surface. Using screws or nails, place the clips at constant intervals along the path of the rope light and carefully snap the light into place, making sure the bulbs are facing outward for the best light.
Mounting tracks are very popular when you"re looking to mount the rope lights in a nice, straight line. Like the clips, they can be secured to a variety of surfaces with nails, screws, or even strong adhesives. After positioning the tracks into location, carefully snap the rope light into place.
Lastly, the common zip tie is a good choice when neither the mounting clips nor the mounting track are applicable for where the rope lights will be going. There"s really no rules to using zip ties. Just secure them to whatever you can, wherever you can, to hold your rope lights in place.
These three methods of mounting rope lights are certainly not the only ways to do it; they are just the three most common. You are certainly open to use your own methods if you like. Just be sure to observe the common mounting guidelines described above.
If you"re looking to introduce some special effects to your rope light creation, it"s time to look at controllers. By itself, a rope light will be in a solid, or "steady-on", state. With the use of a controller, you can have your rope lights flash, fade, chase, and more. Certain controllers will only work with certain types of rope lights. For example, two-wire rope lights can be used with fading or flashing controllers, but not with a chasing controller. Three or more wires are required for advanced effects such as chasing. Refer to the particular controller to see what rope lights it can work with. Attaching rope lights to a controller will usually occur in one of two ways. There can be a standard outlet in the back of the controller into which you simply plug in your rope light power cord. Or there may be an integral rope light power cord and power connector attached to the controller to which you will attach to rope light similar to how you would attach it to a normal power cord.

Item DescriptionThis 3 foot jumper cable has gasketed 2-wire screw connections, allowing you to link together two LED rope light kits to create a momentary gap in your run. Cables can also be interconnected to increase length.

Sheaves facilitate the smooth and safe operation of overhead crane hoists. Damaged sheaves can wear ropes prematurely and cause other dangerous hazards, such as binding wire rope. Konecranes technicians are trained to identify and correct problems with sheaves and other parts of hoisting equipment.
Sheaves carrying ropes which can be momentarily unloaded shall be provided with close-fitting guards or other suitable devices to guide the rope back into the groove when the load is applied again.
The sheaves in the bottom block shall be equipped with close-fitting guards that will prevent ropes from becoming fouled when the block is lying on the ground with ropes loose.
In using hoisting ropes, the crane manufacturer"s recommendation shall be followed. The rated load divided by the number of parts of rope shall not exceed 20 percent of the nominal breaking strength of the rope.
Rope clips attached with U-bolts shall have the U-bolts on the dead or short end of the rope. Spacing and number of all types of clips shall be in accordance with the clip manufacturer"s recommendation. Clips shall be drop-forged steel in all sizes manufactured commercially. When a newly installed rope has been in operation for an hour, all nuts on the clip bolts shall be retightened.
Wherever exposed to temperatures, at which fiber cores would be damaged, rope having an independent wirerope or wire-strand core, or other temperature-damage resistant core shall be used.
Replacement rope shall be the same size, grade, and construction as the original rope furnished by the crane manufacturer, unless otherwise recommended by a wire rope manufacturer due to actual working condition requirements.
Konecranes wire rope inspections can help crane users extend the life of hoist ropes. Ropes, sheaves and other reeving system components are inspected for compliance with crane standards, and to determine if they have flaws that could hinder safe operation. Contact us today to schedule an assessment.

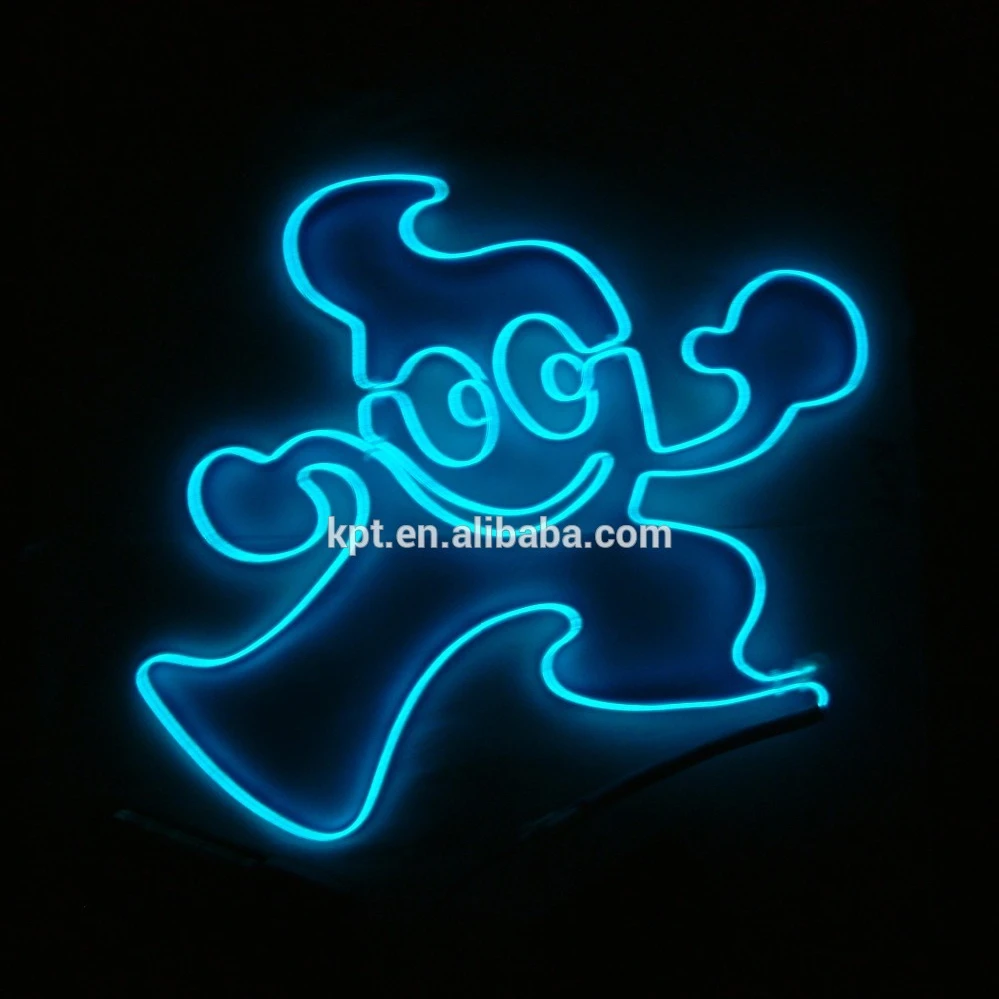
The price for custom LED neon signs start at $112 for a sign with two letters. Our handmade LED neon signs, lamps and wall decor are affordable and we are very competitive on price! In addition to great prices, our experienced team also offers unparalleled customer support, from the design stage through to delivery and aftercare.
All of our LED neon light signs are handmade from LED neon light tubes that are kid-safe and both economical and ecologically friendly! Some great reasons to choose a custom LED sign from us are:
Lightweight - Our custom designed signs are lightweight and portable, making them perfect as LED neon signs for weddings, events, home or business, or truly unique gift ideas.
Our LED Neon is available in 8/9/10mm thickness, and the minimum letter height is approximately 3-4 inches for simple/non-cursive fonts and 4-5 inches for cursive fonts.

ISO 9001:2008 certified. Manufacturer & distributor of standard & custom electronic hardware including wire rope & wire rope cable assemblies. Testing capabilities include tensile, proof-load, hardness, torque shear, failure analysis, hydrogen embrittlement, magnetic permeability, rotational capacity & fatigue, adhesion & bend testing. Materials used include aluminum, stainless steel, Inconel®, Monel®, Hastelloy, wood, silicone bronze & Monel®. Other capabilities include kitting, assembly, custom labeling & barcoding. Meet ANSI/ASME, ASTM & Military Spec. JIT delivery.


 8613371530291