
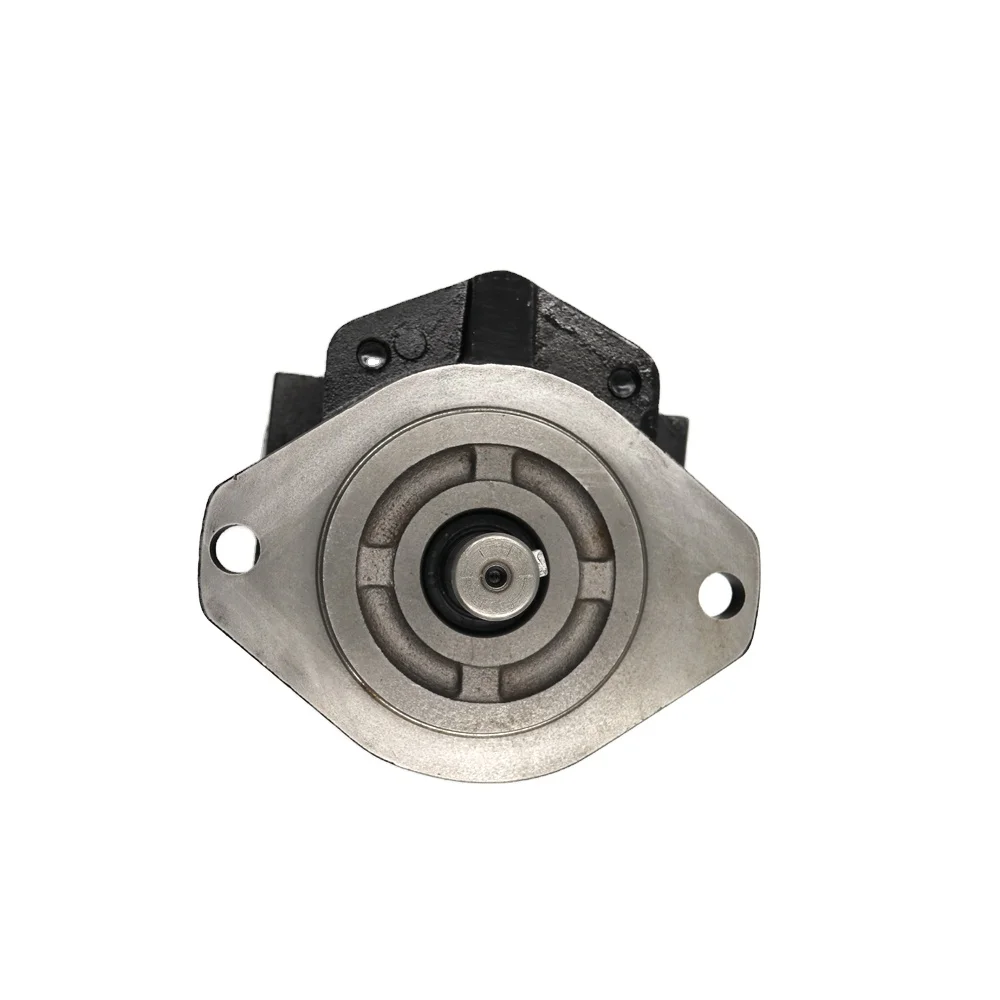
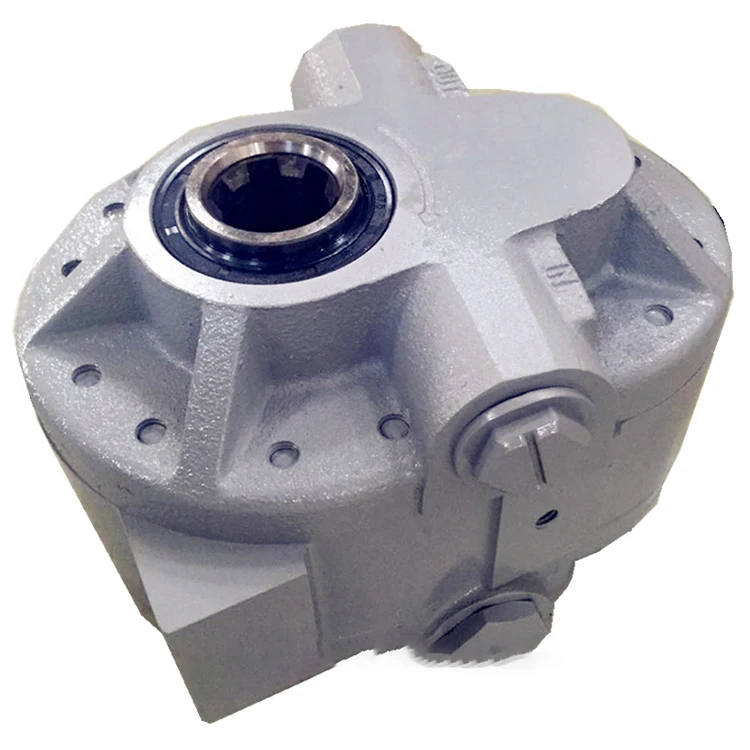
pto hydraulic pump for loader free sample

Check that the electric motor is running. Although this is a simple concept, before you begin replacing parts, it’s critical that you make sure the electric motor is running. This can often be one of the easiest aspects to overlook, but it is necessary to confirm before moving forward.
Check that the pump shaft is rotating. Even though coupling guards and C-face mounts can make this difficult to confirm, it is important to establish if your pump shaft is rotating. If it isn’t, this could be an indication of a more severe issue, and this should be investigated immediately.
Check the oil level. This one tends to be the more obvious check, as it is often one of the only factors inspected before the pump is changed. The oil level should be three inches above the pump suction. Otherwise, a vortex can form in the reservoir, allowing air into the pump.
If the oil level is low, determine where the leak is in the system. Although this can be a difficult process, it is necessary to ensure your machines are performing properly. Leaks can be difficult to find.
What does the pump sound like when it is operating normally? Vane pumps generally are quieter than piston and gear pumps. If the pump has a high-pitched whining sound, it most likely is cavitating. If it has a knocking sound, like marbles rattling around, then aeration is the likely cause.
Cavitation is the formation and collapse of air cavities in the liquid. When the pump cannot get the total volume of oil it needs, cavitation occurs. Hydraulic oil contains approximately nine percent dissolved air. When the pump does not receive adequate oil volume at its suction port, high vacuum pressure occurs.
This dissolved air is pulled out of the oil on the suction side and then collapses or implodes on the pressure side. The implosions produce a very steady, high-pitched sound. As the air bubbles collapse, the inside of the pump is damaged.
While cavitation is a devastating development, with proper preventative maintenance practices and a quality monitoring system, early detection and deterrence remain attainable goals. UE System’s UltraTrak 850S CD pump cavitation sensor is a Smart Analog Sensor designed and optimized to detect cavitation on pumps earlier by measuring the ultrasound produced as cavitation starts to develop early-onset bubbles in the pump. By continuously monitoring the impact caused by cavitation, the system provides a simple, single value to trend and alert when cavitation is occurring.
The oil viscosity is too high. Low oil temperature increases the oil viscosity, making it harder for the oil to reach the pump. Most hydraulic systems should not be started with the oil any colder than 40°F and should not be put under load until the oil is at least 70°F.
Many reservoirs do not have heaters, particularly in the South. Even when heaters are available, they are often disconnected. While the damage may not be immediate, if a pump is continually started up when the oil is too cold, the pump will fail prematurely.
The suction filter or strainer is contaminated. A strainer is typically 74 or 149 microns in size and is used to keep “large” particles out of the pump. The strainer may be located inside or outside the reservoir. Strainers located inside the reservoir are out of sight and out of mind. Many times, maintenance personnel are not even aware that there is a strainer in the reservoir.
The suction strainer should be removed from the line or reservoir and cleaned a minimum of once a year. Years ago, a plant sought out help to troubleshoot a system that had already had five pumps changed within a single week. Upon closer inspection, it was discovered that the breather cap was missing, allowing dirty air to flow directly into the reservoir.
A check of the hydraulic schematic showed a strainer in the suction line inside the tank. When the strainer was removed, a shop rag was found wrapped around the screen mesh. Apparently, someone had used the rag to plug the breather cap opening, and it had then fallen into the tank. Contamination can come from a variety of different sources, so it pays to be vigilant and responsible with our practices and reliability measures.
The electric motor is driving the hydraulic pump at a speed that is higher than the pump’s rating. All pumps have a recommended maximum drive speed. If the speed is too high, a higher volume of oil will be needed at the suction port.
Due to the size of the suction port, adequate oil cannot fill the suction cavity in the pump, resulting in cavitation. Although this rarely happens, some pumps are rated at a maximum drive speed of 1,200 revolutions per minute (RPM), while others have a maximum speed of 3,600 RPM. The drive speed should be checked any time a pump is replaced with a different brand or model.
Every one of these devastating causes of cavitation threatens to cause major, irreversible damage to your equipment. Therefore, it’s not only critical to have proper, proactive practices in place, but also a monitoring system that can continuously protect your valuable assets, such as UE System’s UltraTrak 850S CD pump cavitation senor. These sensors regularly monitor the health of your pumps and alert you immediately if cavitation symptoms are present, allowing you to take corrective action before it’s too late.
Aeration is sometimes known as pseudo cavitation because air is entering the pump suction cavity. However, the causes of aeration are entirely different than that of cavitation. While cavitation pulls air out of the oil, aeration is the result of outside air entering the pump’s suction line.
Several factors can cause aeration, including an air leak in the suction line. This could be in the form of a loose connection, a cracked line, or an improper fitting seal. One method of finding the leak is to squirt oil around the suction line fittings. The fluid will be momentarily drawn into the suction line, and the knocking sound inside the pump will stop for a short period of time once the airflow path is found.
A bad shaft seal can also cause aeration if the system is supplied by one or more fixed displacement pumps. Oil that bypasses inside a fixed displacement pump is ported back to the suction port. If the shaft seal is worn or damaged, air can flow through the seal and into the pump’s suction cavity.
As mentioned previously, if the oil level is too low, oil can enter the suction line and flow into the pump. Therefore, always check the oil level with all cylinders in the retracted position.
If a new pump is installed and pressure will not build, the shaft may be rotating in the wrong direction. Some gear pumps can be rotated in either direction, but most have an arrow on the housing indicating the direction of rotation, as depicted in Figure 2.
Pump rotation should always be viewed from the shaft end. If the pump is rotated in the wrong direction, adequate fluid will not fill the suction port due to the pump’s internal design.
A fixed displacement pump delivers a constant volume of oil for a given shaft speed. A relief valve must be included downstream of the pump to limit the maximum pressure in the system.
After the visual and sound checks are made, the next step is to determine whether you have a volume or pressure problem. If the pressure will not build to the desired level, isolate the pump and relief valve from the system. This can be done by closing a valve, plugging the line downstream, or blocking the relief valve. If the pressure builds when this is done, there is a component downstream of the isolation point that is bypassing. If the pressure does not build up, the pump or relief valve is bad.
If the system is operating at a slower speed, a volume problem exists. Pumps wear over time, which results in less oil being delivered. While a flow meter can be installed in the pump’s outlet line, this is not always practical, as the proper fittings and adapters may not be available. To determine if the pump is badly worn and bypassing, first check the current to the electric motor. If possible, this test should be made when the pump is new to establish a reference. Electric motor horsepower is relative to the hydraulic horsepower required by the system.
For example, if a 50-GPM pump is used and the maximum pressure is 1,500 psi, a 50-hp motor will be required. If the pump is delivering less oil than when it was new, the current to drive the pump will drop. A 230-volt, 50-hp motor has an average full load rating of 130 amps. If the amperage is considerably lower, the pump is most likely bypassing and should be changed.
Figure 4.To isolate a fixed displacement pump and relief valve from the system, close a valve or plug the line downstream (left). If pressure builds, a component downstream of the isolation point is bypassing (right).
The most common type of variable displacement pump is the pressure-compensating design. The compensator setting limits the maximum pressure at the pump’s outlet port. The pump should be isolated as described for the fixed displacement pump.
If pressure does not build up, the relief valve or pump compensator may be bad. Prior to checking either component, perform the necessary lockout procedures and verify that the pressure at the outlet port is zero psi. The relief valve and compensator can then be taken apart and checked for contamination, wear, and broken springs.
Install a flow meter in the case drain line and check the flow rate. Most variable displacement pumps bypass one to three percent of the maximum pump volume through the case drain line. If the flow rate reaches 10 percent, the pump should be changed. Permanently installing a flow meter in the case drain line is an excellent reliability and troubleshooting tool.
Ensure the compensator is 200 psi above the maximum load pressure. If set too low, the compensator spool will shift and start reducing the pump volume when the system is calling for maximum volume.
Performing these recommended tests should help you make good decisions about the condition of your pumps or the cause of pump failures. If you change a pump, have a reason for changing it. Don’t just do it because you have a spare one in stock.
Conduct a reliability assessment on each of your hydraulic systems so when an issue occurs, you will have current pressure and temperature readings to consult.
Al Smiley is the president of GPM Hydraulic Consulting Inc., located in Monroe, Georgia. Since 1994, GPM has provided hydraulic training, consulting and reliability assessments to companies in t...

Things like restrictions and blockages can impede the flow of fluid to your pump. which could contribute to poor fluid flow. Air leak in suction line. Air present in the pump at startup. Insufficient supply of oil in pump. Clogged or dirty fluid filters. Clogged inlet lines or hoses. Blocked reservoir breather vent. Low oil in the reservoir
Now that we’ve ensured that the directional control is not reversed, it’s time to check that the drive motor itself is turning in the right direction. Sometimes incorrect installation leads to mismatched pipe routings between control valves and motors, which can reverse the direction of flow. Check to see that the motor is turning the pump in the right direction and if not - look at your piping.
Check to ensure that your pump drive motor is turning over and is developing the required speed and torque. In some cases, misalignment can cause binding of the drive shaft, which can prevent the motor from turning. If this is the case, correct the misalignment and inspect the motor for damage. If required, overhaul or replace motor.
Check to ensure the pump to motor coupling is undamaged. A sheared pump coupling is an obvious cause of failure, however the location of some pumps within hydraulic systems makes this difficult to check so it may go overlooked
It is possible that the entire flow could be passing over the relief valve, preventing the pressure from developing. Check that the relief valve is adjusted properly for the pump specifications and the application.
Seized bearings, or pump shafts and other internal damage may prevent the pump from operating all together. If everything else checks out, uncouple the pump and motor and check to see that the pump shaft is able to turn. If not, overhaul or replace the pump.
If your pump is having problems developing sufficient power, following this checklist will help you to pinpoint the problem. In some cases you may find a simple solution is the answer. If your pump is exhibiting any other issues such as noise problems, heat problems or flow problems, you may need to do some more investigation to address the root cause of your pump problem. To help, we’ve created a downloadable troubleshooting guide containing more information about each of these issues. So that you can keep your system up and running and avoid unplanned downtime. Download it here.

Excessive or erratic hydraulic pump noise is a symptom of malfunction that could cause damage or accelerated wear if not addressed quickly and correctly. While it’s never nice to hear strange noises emitted from your pump, different forms of noise, which are related to different faults can provide valuable clues that can help you to diagnose your problem and get it fixed before it turns into something major.
So it pays to know what different pump noises mean and with practice you can quickly distinguish between the normal operating sounds and signs that something is wrong. In this article, we’ll talk about what causes some of these sounds, so you can identify them.
A constant hissing sound is indicative of a relief valve that is set too low or is stuck open and is continually releasing pressure. An erratic whistling sound is a symptom that a relief valve is set incorrectly or is damaged. It is common for pump settings to be changed carelessly or inadvertently - sometimes to overcome other issues with the hydraulic system - sometimes due to a lack of understanding of the correct operating conditions, so include this in your regular checks. In addition to noise problems, relief valve damage can be accompanied by slamming of actuators, stalls and excessive heat generation.
Noise issues are just one symptom that gives you a clue when things go wrong with your hydraulic pump. There are several other issues to know and understand, which could help you to identify pump problems quicker. Which means you can sort them out sooner - potentially saving big money down the road. These include heat problems, pressure problems and flow problems.
To help, we’ve created a downloadable troubleshooting guide containing more information about each of these issues. So that you can keep your system up and running and avoid unplanned downtime. Download it here.
The 84-in. wide snowblower quick-taches to the loader on Webster"s 1995 Massey Ferguson 375 4-WD tractor. Originally the blower was powered by an underslung driveshaft that led from the tractor"s rear pto to the snowblower in front.
"The driveshaft was low to the ground and would get hung up on uneven ground," says the Terra Alta, W. Va., farmer. "Another problem was that the blower head could only be raised about six inches. If a snowdrift was higher than the blower, snow would ride back over the top of the blower and get between the blower and tractor, causing more problems. One time it took us more than three hours to free up the tractor after it got hung up on snow. Now the blower lifts as high as the loader will go."
The blower is driven by a 30 gpm hydraulic motor mounted on a steel bracket that attaches to the back side of the blower. The motor is driven by hydraulics from a pto-driven pump at the back of the tractor.
To get enough hydraulic capacity, Webster converted a 40-gal. truck fuel tank into a 3-pt. mounted hydraulic reservoir. He mounted the 3,500 psi hydraulic pump under the tank. Hydraulic hoses lead from the tank to the motor on the blower.
"It solved all my problems and really works nice," says Webster. "My friend Kevin Luckel helped me make the conversion. To operate the snowblower I drop the blower head to the level I want to blow, adjust the chute, engage the pto and begin to blow snow. The motor never �pulls down" and there"s almost no vibration in the machine - it feels like it"ll run forever. The blower can handle snowdrifts up to 10 ft. high with no problem. I just raise the loader, tilt the blower head so that it"s square, and wipe out a chunk of snow. Then I back up and repeat the process until all the snow is gone. I think the same kind of conversion could also be used on rear-mount snowblowers."
To set up the hydraulic system, Webster called a hydraulic company and explained what he needed. They recommended a double pump turning 1,000 rpm"s off the pto, and a hydraulic motor with a maximum of 540 rpm"s (this is the original speed of the blower on the pto-driven system). "It"s important to maintain the correct speed on the blower head or else parts could fly off," says Webster. "This unit isn"t a toy as the hydraulic system operates at 3,000 to 3,500 psi and has a volume of 35 gpm."
Before mounting the fuel tank hydraulic reservoir on back of the tractor, they designed a cage to mount the pump in under the tank. They installed two 3-pt. pins on the cage, secured the tank to the cage, and mounted a top link bracket, allowing Webster to raise and lower the tank assembly. They also added plumbing, a gauge, filter and relief unit.
"It takes less than five minutes to detach the blower head and tank unit," says Webster. "The chute rotates hydraulically from the cab and uses two remote outlets on back of the tractor.
"It didn"t cost too much to build. I paid $100 for the fuel tank, $300 for the hydraulic motor, and about $500 for the hydraulic hoses and quick tach fittings. My total cost was less than $1,000."
Hydraulic-Powered Loader-Mounted Snowblower SNOWBLOWERS Snowblowers 31-6-30 After experiencing some "hang up" problems with the pto-driven Erskine snowblower mounted on front of his tractor, Doug Webster Jr. successfully converted it to hydraulic power.The 84-in. wide snowblower quick-taches to the loader on Webster"s 1995 Massey Ferguson 375 4-WD tractor. Originally the blower was powered by an underslung driveshaft that led from the tractor"s rear pto to the snowblower in front."The driveshaft was low to the ground and would get hung up on uneven ground," says the Terra Alta, W. Va., farmer. "Another problem was that the blower head could only be raised about six inches. If a snowdrift was higher than the blower, snow would ride back over the top of the blower and get between the blower and tractor, causing more problems. One time it took us more than three hours to free up the tractor after it got hung up on snow. Now the blower lifts as high as the loader will go." The blower is driven by a 30 gpm hydraulic motor mounted on a steel bracket that attaches to the back side of the blower. The motor is driven by hydraulics from a pto-driven pump at the back of the tractor.To get enough hydraulic capacity, Webster converted a 40-gal. truck fuel tank into a 3-pt. mounted hydraulic reservoir. He mounted the 3,500 psi hydraulic pump under the tank. Hydraulic hoses lead from the tank to the motor on the blower."It solved all my problems and really works nice," says Webster. "My friend Kevin Luckel helped me make the conversion. To operate the snowblower I drop the blower head to the level I want to blow, adjust the chute, engage the pto and begin to blow snow. The motor never �pulls down" and there"s almost no vibration in the machine - it feels like it"ll run forever. The blower can handle snowdrifts up to 10 ft. high with no problem. I just raise the loader, tilt the blower head so that it"s square, and wipe out a chunk of snow. Then I back up and repeat the process until all the snow is gone. I think the same kind of conversion could also be used on rear-mount snowblowers."To set up the hydraulic system, Webster called a hydraulic company and explained what he needed. They recommended a double pump turning 1,000 rpm"s off the pto, and a hydraulic motor with a maximum of 540 rpm"s (this is the original speed of the blower on the pto-driven system). "It"s important to maintain the correct speed on the blower head or else parts could fly off," says Webster. "This unit isn"t a toy as the hydraulic system operates at 3,000 to 3,500 psi and has a volume of 35 gpm."Before mounting the fuel tank hydraulic reservoir on back of the tractor, they designed a cage to mount the pump in under the tank. They installed two 3-pt. pins on the cage, secured the tank to the cage, and mounted a top link bracket, allowing Webster to raise and lower the tank assembly. They also added plumbing, a gauge, filter and relief unit."It takes less than five minutes to detach the blower head and tank unit," says Webster. "The chute rotates hydraulically from the cab and uses two remote outlets on back of the tractor."It didn"t cost too much to build. I paid $100 for the fuel tank, $300 for the hydraulic motor, and about $500 for the hydraulic hoses and quick tach fittings. My total cost was less than $1,000."Contact: FARM SHOW Followup, Doug Webster, Jr., P. O. Box 9, Terra Alta, W. Va. 26764 (ph 304 789-2488 or 304 698-8777; fax 304 789-3133; dougwebster @verizon. net).
The utility Farmall U tractors offer the ultimate Farmall experience. These heavy-duty, premium utility tractors with high-capacity hydraulics are ideal for the most demanding chores – whether you’re on the ranch, running a mixed grain operation, or even a municipality. Versatility, comfort, and superior visibility is what make the utility Farmall U the ultimate multi-tasker.
Similar to larger Case IH tractors, the utility Farmall U series tractors feature the groundbreaking engineering of Case IH FPT Engines. This powerful, 4-cylinder 3.4L FPT engine features a quick throttle response and builds power fast. Yet, the precise electronic metering of fuel delivered with electronic high-pressure common-rail fuel injection ensures efficient operation while maintaining high horsepower levels. Engineered for dependable, quiet, clean operation, the turbocharged and aftercooled, clean burning, fuel efficient engine is Tier 4 B/Final-emissions certified.
An electronic high-pressure common rail fuel system precisely meters fuel as power demands, delivering both performance and fuel efficiency. This fuel system also provides improved throttle response, fast recovery to load and quieter engine operation with less vibration.
For tasks that require a steady engine rpm regardless of load or ground speed, such as baling hay on uneven terrain or powering a spray pump or other PTO-driven implements, Constant Engine RPM (CERPM) holds a steady engine speed and prevents engine racing or dragging. CERPM lets you create two preset engine RPM levels, and then easily fine-tune them in 10 rpm or 100 rpm increments.
The 16×16 speed semi-powershift transmission earned its top-of-the-line reputation in our Maxxum series tractors. The high-performance transmission includes a clutch-free, electrohydraulic power shuttle for smooth directional changes, plus a host of features designed to help increase operator productivity and reduce fatigue.
The ergonomic power shuttle includes three adaptable settings, allowing you to operate the electrohydraulic power shuttle without taking your hand off the wheel.
The transmission on utility Farmall U tractors features a brake system that improves braking performance. Optional heavy-duty brake disks offer extended life over standard brakes.
Utility Farmall U series tractors offer a truly premium operators environment. Best-in-class accessibility, comfort and visibility help you take on any job the day throws your way — even if it takes all day.
An optional suspended cab provides a smoother ride on rough terrain. Similar to its big tractor brothers, this cab suspension system on utility Farmall U series tractors helps isolate the cab from up-down and side-to-side sway. The most important consideration is how much fresher and more comfortable you remain all day long.
The updated HVAC system puts you in control. Ten dashboard vents help you maintain your ideal work environment throughout the day. Opening side windows provide fresh-air circulation. All controls and levers are within easy reach from the comfort of the operator seat.
Best-in-class accessibility to driver’s seat with 2 doors and self-cleaning steps on each side help make any task go more quickly with less operator wear and tear. We’ve redesigned the steering column for even easier access and better control visibility.
Our premium operators seat includes low-frequency air suspension, a heated pan and personalized adjustments, such as backrest fore/aft and lumbar support and armrest height and angle. An instructor seat comes standard.
All controls and switches are conveniently located for easy access. The steering column tilts and telescopes and provides improved visibility to controls. The right-hand console features conveniently located ergonomic controls for functions, such as PTO engagement, hydraulic levers, MFD engagement and 3-point hitch settings.
The left-hand console includes a closable storage compartment with a removeable tray. Elastic straps on the cover are great for holding a pair of gloves or paperwork. Here, you’ll also find easier access to the in-cab fuse box.
The stylish, sloped hood on Farmall series tractors provides clear, unobstructed forward sightlines to the front wheels, loader and other front-mount attachments.
A curved front window frame top increases loader visibility. The standard high visibility roof panel with opening window lets you the see full-range loader operation, even when the loader is extended to full height. A retractable sunscreen covers the roof panel and upper windshield.
Choose from two standard telescopic mirrors or two optional telescopic wide-angle mirrors for the visibility that best suits the way you use your tractor and the equipment you tow.
PTO and 3-point hitch hook-ups go quicker and easier with the convenience of fender controls. Left and right fender controls come standard on utility Farmall U series tractors.
Choose the PTO configuration that best meets your needs and the way you plan to use your tractor. A 540/1,000 rpm PTO comes standard. Or select the shiftable 540/540E/1,000 rpm option, and take advantage of the increased fuel efficiency the 540E PTO offers during less-demanding applications.
Push-pull button. Utility Farmall U tractors feature simple push-pull button electrohydraulic engagement. Shift among the three speeds of the optional 540/540E/1,000 PTO using an in-cab lever.
With this optional feature, the PTO automatically engages or disengages based on a 3-point hitch position set-point. So, for example, your tractor operates more efficiently when operating equipment, such as a 3-point-mounted finishing mower.
The open-center hydraulic system features closed-center load sensing remotes to safely power hydraulic motors. Rear remote couplers are located on the left-hand side, making it easier to connect implement hydraulics.
Choose between the standard mechanical joystick or the optional electronic joystick for loader operation. Both options feature integrated clutch and convenient transmission upshift and downshift buttons.
Standard telescopic lower links and stabilizers and dual turnbuckle adjustment simplifies implement attachment and leveling. A single turnbuckle provides fore/aft leveling.
Utility Farmall U series tractors feature the same 3-point hitch controls you’ll find on our larger Maxxum series tractors. Electronic hitch controls allow for precise hitch movement. Fine tune 3-point operation with draft sensitivity adjustment, drop-rate adjustment, maximum lift settings and a wheel-slip threshold setting.
Adding the optional multifunctional front axle support allows you to expand the versatility of your utility Farmall U tractor. The front PTO is an excellent option to power pumps or operate side mowers. The front hitch folds out of the way to maintain loader compatibility.
Depending on how you plan to use your tractor, you can select the standard 1.5 HD MFD axle or go with the suspended MFD axle for improved traction and greater operator comfort.
With its electrohydraulic MFD and differential lock engagement, the optional suspended front MFD axle provides additional traction and operator comfort — especially during those long days in the cab. A dual accumulator system dampens both ends of the stroke. The ability to choose automatic self-leveling or manual leveling lets you customize your ride.
The standard 1.5 HD axle also features electrohydraulic engagement and electrohydraulic front differential lock for greater traction when required, such as during light tillage. The solid, cast axle with a dynamic (continuous) capacity of 7,715 lbs. stands up to the stresses of the toughest applications — especially loader work.
Utility Farmall U series tractors offer several tire brand options from the factory. Order your tractor with your preferred brand, and eliminate the need to swap tires at the dealership. For added stability and ballast, you can equip your tractor with four or six 110-lb. rear wheel weights.
A single-piece hood opens without tools. Gas struts support the hood when open for quick, easy access to engine components and checkpoints. Filling the large, 43.5 gal fuel tank and 3.2 gallon DEF tank, is fast and easy with access from the ground.
Under the hood, a common reservoir for transmission, steering and hydraulics lets you check fluid levels with one dipstick. A swing-out condenser and slide-out cooler simplifies radiator clean-out, plus, you can access the engine air filter from the ground.
All utility Farmall U series tractor ship loader-ready from the factory. Your tractor arrives with the appropriate loader-mounting brackets, optional electronic or standard mechanical mid-mount hydraulic valves and joystick and a front grill guard already in place. This convenience package lets you install and remove your loader in minutes.
Your Case IH dealer offers a full line of loader attachments and tractor implements to help you get the most productivity from your tractor. Implements are quick and easy to hook up and include front-, mid- and rear-mount options, ranging from material handling loader attachments to mowers, rotary tillers, snow blowers and more.
Only genuine Case IH parts were made specifically for your machine and designed for peak performance. Find everything you need from filters, fluids, shop products and safety equipment, to owners manuals, parts diagrams, paint, and batteries at the Case IH parts store.


 8613371530291