
drywall master mud pump free sample

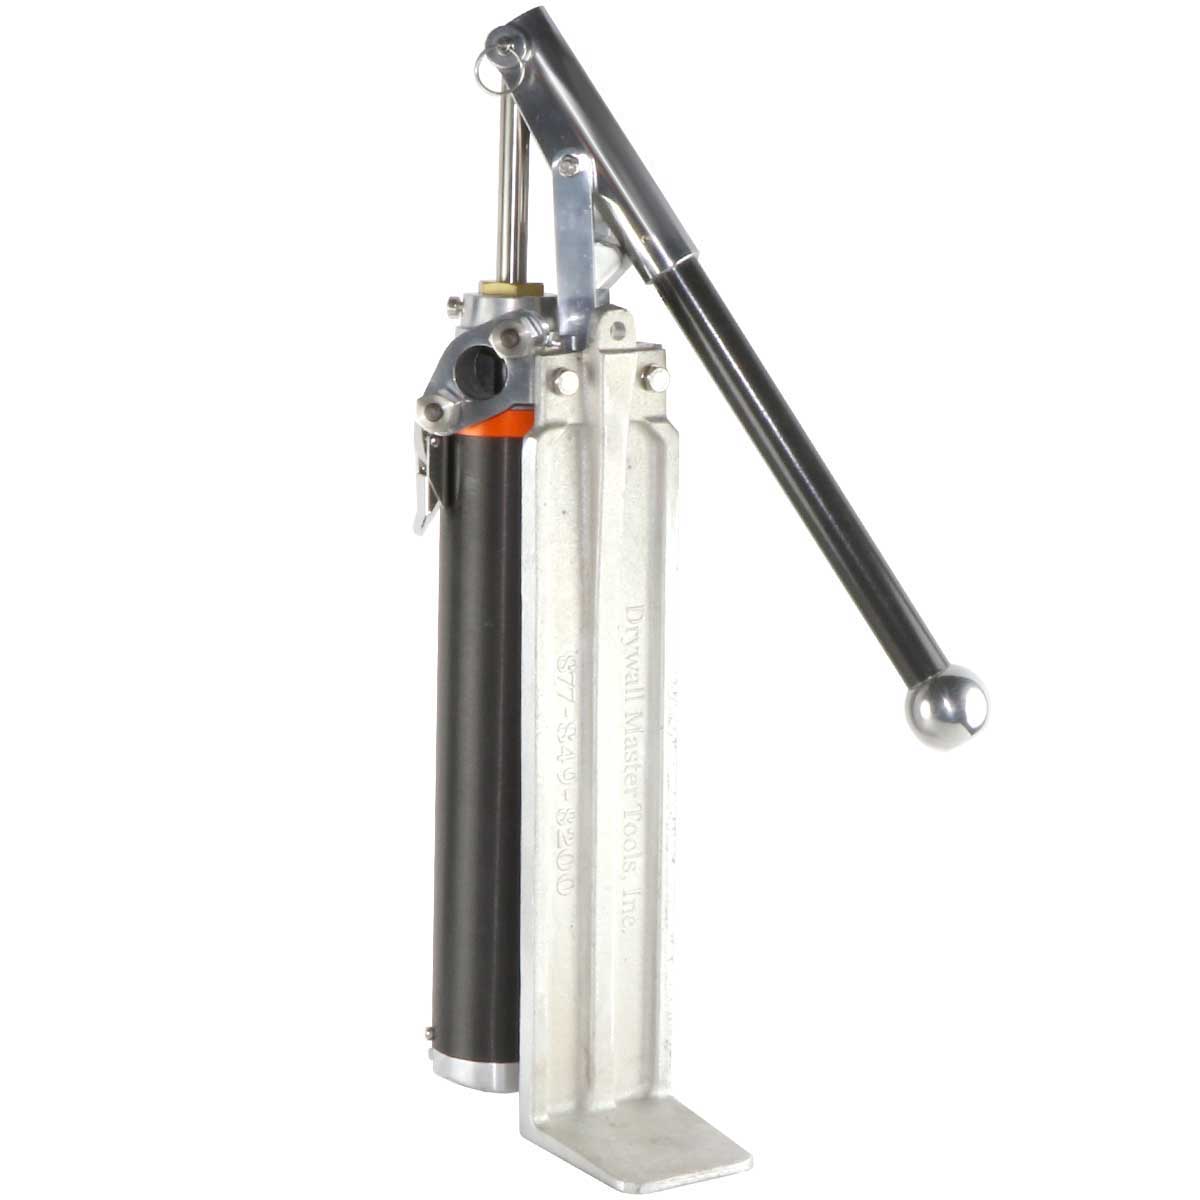
Loading Pumps further increase the efficiency and profitability of our automatic tools by allowing you to quickly and cleanly refill them. The loading pump nearly eliminates downtime to load your tools and to clean up spilled mud at the end of the day. Hang the tube into a bucket of mud, place the leg on the ground, prime the pump by pumping the handle several times, and you’re ready to fill your tool. Available with Gooseneck attachment or Box Filler Adaptor, ensuring that you can use the pump with all your automatic taping tools.

No matter your tool of choice, there’s a pump adapter to keep the mud flowing. The Gooseneck attaches to our Loading Pump and is used to fill the Master Taper. The Box Filler Adapter allows you to use the Loading Pump to fill your flat finishing boxes. All our adapters are engineered with precision for leak-free performance.
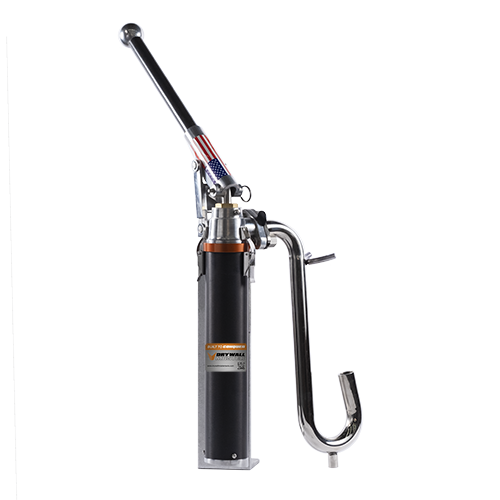
The Drywall Master Pump has an exclusive milled-in O-ring design that prevents mud from slipping between the head casting and tube. Other pumps on the market don"t have this feature, and suffer from tubes that are difficult or impossible to remove after extended use or inactivity. Tubes that don"t come off stop being easy clean! Drywall Master Pumps are built right, so you can be sure that your pump tube will detach - no matter what the conditions are!FeaturesMade In USA Quality

Drywall Master Taping Tools Extended Quick Clean Mud Pump is used to fill automatic taping tools with mud compound. DrywallMaster pump uses gooseneck (sold separately) to fill automatic taper. Box filler (also sold separately) attaches to pump to fill all other finishing tools. Industry exclusive double o-ring head seal on Drywall Master mud pump keeps mud from seeping between head and pump tube for better seal and easier separating, cleaning or maintenance.
Unique dual o-ring head seal keeps mud from getting between head casting and pump tube. This makes pump easier to separate for cleaning or maintenance.
The Loading Pump, with appropriate accessories (Gooseneck and/or Filler Adapter), is used to fill the following tools: Automatic Taper, Corner Applicator/Corner Box, Nail Spotter, and Flat Box. Attach the Gooseneck to fill the Automatic Taper. Attach the Filler Adapter to fill the Nail Spotter, Corner Applicator, and Flat Box. Simply hang the tube of Loading Pump into a bucket of mud, leaving the leg of the Pump on the floor. Attach the appropriate accessory to the pump. Prime the Pump by pumping the handle a couple of times. Now you should be ready to fill your tool.

Italy’s Bianko ProFlex is a new product that has been developed for drywall skim coat, finishing coat plaster and drywall compound. The trowel helps workers achieve walls that will remain clear with no marks; the chromium coating allows a quicker application and an easier and faster cleaning of the blade once finished.
The ezBoxPRO is a tool that marks the location of electrical boxes on drywall and it also protects electrical boxes and wires—this makes the jobs of electricians, drywallers, insulators and builders easier and saves money. The product locates electrical boxes while drywall sheets are hung, eliminating time consuming measuring and cutting while preventing unintended covering of electrical boxes. It keeps both the wires and electrical box covered until it is removed for final wiring.
The Quik Drive PRODW is the newly improved auto-feed screw driving system for attaching drywall, DensGlass and other sheathing to wood or CFS. It provides a precise self-locking depth adjustment, a ratcheting rotatable head (for clearance in space-restricted corners) and a variety of adapters to work with your preferred screw driver motor. Like all Simpson Strong-Tie Quik Drive systems, the PRODW is backed by the Simpson Strong-Tie Limited Lifetime Warranty.
The Washmaster Pro is a drywall tool washing system designed to have a small footprint while doing a big job. The product washes drywall taping tools using a proprietary Washmaster Juice to de-foam and separate the mud from the water. The mud can be recycled and the water used over and over and finally being used to thin future mixes.
The machine is lightweight with a small footprint and is easily transported in the back of a vehicle. The tank cover and pump assembly lid are designed to reduce splashing. Workers can transport or move filled tanks with less splashing.
The BeroGrip line of skimming blades are the most versatile drywall finishing blades in the industry. Available in four sizes from 10 to 20 inches, the line combines a fluted, ergonomic grip with superior INOX stainless steel to make sure that contractors have a perfect tool for applying mud during the pre-fill stage of drywall finishing all the way through to obtaining a glass-like, Level 5 finish. The line features rounded corners to prevent drag lines and a unique design that moves the fulcrum back into the grip, ensuring ten times more contact area with the surface over traditional taping knives.
This thin, flexible and light weight skimming blade is ideal for smoothing with an offset blade and radius corners. The single hand use provides a natural drywall finish feel with little learning curve. It’s also great for use behind finishing boxes for less sanding. The blades are available in 10, 12, 14 and 16 inch lengths. All products are proudly made in the U.S.
The Drywall Master loading pumps further increases the efficiency and profitability of our automatic tools by allowing you to quickly and cleanly refill them. The loading pump nearly eliminates downtime to load your tools and to clean up spilled mud at the end of the day. Hang the tube into a bucket of mud, place the leg on the ground, prime the pump by pumping the handle several times, and you’re ready to fill your tool. Available with Gooseneck attachment or Box Filler Adaptor, ensuring that you can use the pump with all your automatic taping tools.

In this article you will find my buying guide: the key point about even the best drywall primer does not need to have a lot of stain-blocking firepower (explained below). It simply seals and preps for the topcoat.
In my 30+ years as a pro, I’ve found the easiest painting is applying drywall primer. It’s a breeze. It goes on easily and as long as you do not leave drips, it dries flat and you don’t need to worry about looks. Here I highly recommend any top brand: avoid the no name brands.
Water (or other) stains? Drywall primer won’t block them. Kilz Original is the go-to stain blocking primer check this very good product. Another really great deal is Zinsser Cover Stain. Less expensive than others, but will probably handle any water stain in one coat .
The drywall paper and the drywall compound (“mud”) are both porous surfaces butthey absorb paint at different rates. If you do not equalize them with a primer made for this new wall, you will see the difference and it looks sloppy.
You can always apply drywall compound to a crack, wait for it to dry and re-sand. We normally use quick-dry spackle or and caulk that are fairly quick to dry and both that don’t shrink.
After the joint compound is all sanded, the first thing to do is to dry brush the dust off the walls (it clings). This brush fits on your paint pole or broomstick. Then, without stirring up too much dust, gently sweep the floor. You can use a little Shop-Vac with a paper filter, (not your house vac: it will die), then mop the floor. (read about the types of drywall vacuum sanders here),
Does new drywall require 3 coats? Mostly yes, and the first must be a drywall primer sealer. There is good news coming below, however about that primer.
Having said that, painting brand new walls is the only time I’d consider using a paint and primer in one, which may save you one coat of paint. See the section onPaint and Primer in One below. This is definitely not the best drywall primer, but it will do. If you do, buy quality paint and primer in one: use Kilz, a very good name in the drywall sealer world, and a very good paint and primer in one. I trust Kilz’s product, it is also aprimer with low VOCs. It comes in many colors and sheens.
For you traditional 3-coaters (like me), the first good news is that you don’t have to buy some exotic or expensive primer (assuming you have no mold or stains) for priming drywalls. You don’t need oil-based primer either. The best primer for new drywall are the low-cost primers, as they containonly what is needed: a normal drywall sealer does not need ingredients to seal stains, odors, mold, etc.
If your unpainted drywall has been waiting for a long time, especially in a basement, it may have sprouted some mold or mildew. In this case, you’ll need a little more firepower. If so, you’ll need to read the last section of this post.
Why not just put on 2 coats of paint? One word: Flashing. Because you will see the seams (and screw holes, tape, and corner bead) where the (1) joint compound a.k.a. ‘mud’ meets the (2) paper that is the outer face of the rock. The paper and the drywall compound are different surfaces andthey absorb paint at different rates You could apply 5 coats and still have flashing without a good drywall primer. Now you see that a drywall primer sealer means: it seals the pores so they all absorb alike.
Yours Truly learned the hard way: I know you can end up with terrible flashing! So the drywall primer sealer is designed with just the right sealants so there will be no difference in sheen or color changes in your finish paint.
Some painters say leftover flat (and only flat) paint is as good as the best drywall primer and will give a good result. No buddy. This does not work out but I need to make the job perfect: perhaps you don’t.
More good news: you do not have to apply a normal heavy coat of paint as you will with your topcoats; you just need to give the new wall a drink, and the job is done. Get the can of primer well shaken (or stirred, Mr. Bond). This coat can be very fast: you will be done in half the time of painting one of your topcoats. Calculate that into your expected quantity (but all paint seller accept unopened cans in return). Even the very best drywall primer does not have to be a heavy coat: just a film will do.
Probably ok for your home use, but I cannot say for sure that with paint and primer in one you will not see the difference in the sections of the wall: joints vs. paper, but feel free to try. It is not the best drywall primer solution, but for walls in good new condition, some paints do promise to equalize the surfaces at the same time they leave your color.
I understand you may be very tempted because you have painted before and you want to cut out a whole coat. But remember that the result will not be the same as a traditional 3-coat job using the best primer for drywall. Here a more complete post on paint and primer in one.
No, you probably need a shellac in our first coat product. Most wood will have sap (which will bleed through a simple primer like drywall primer and every coat of paint you put on after that. Also, the wood’s tree rings that absorb at different rates (the dark ring vs the light ring). Why is that bad? The softer ring will expand differently as the primer dries and you will not be left with a smooth surface. We use BIN alcohol-based primer (liquid quart),a white pigmented shellac, when priming almost all woods. For that, you need rubbing alcohol for clean-up. Good to have the spray can (shown) also.
Especially with drywall, you will find that the ‘mud’ and the paper of the main sections dry at different speeds. You can easily tell when the last of the primer is dry, usually an hour or two. Don’t rush this step! All drywall primers are relatively fast drying.
Some paint makers will say you must paint within 48 hours after letting the primer dry, but I have never seen any problem waiting longer with the best drywall primer. Dust clinging to the wall while you delay is the only real problem: just use a broom and vacuum and/or mop (see above).
Not really. Some high hiding primers exist and they will fill more cracks than other primers, but at what cost? Drywall primer is cheap so we just fill cracks by hand. If you do manage to have some very small cracks go away after painting, you will find they re-crack quickly in time.
How can I achieve a “Level 5 Drywall finish”?You may have heard of different levels of finish, including Level 5 drywall (the smoothest) or skim coating, and so on. A great website for all you ever need to know and more is drywall101.com.It’s all well described on youtube: if you can afford it, this is the very best drywall for your home. This goes beyond the best drywall primer for sure.
So if see mold and you have started painting, you must stop seal it as soon as you see it. Try my system of buying a cheap paintbrush, cutting the handle so it fits in a small jar. Pour some of your primer in that jar and use that for your spot priming. The best primer for drywall, in this case, is the BIN we mentioned above. (Read about mold resistant paint).
See pump sprayers on this page. We recommend one thatcan also handle spraying light stains for your deck next time it needs it. Or click on the image for a low-budget one.
Here is the way we use primer in situations when we are not sure what kind of stain-blocking power we need: start with the lesser primers like the best drywall primer and if anything bleeds through, hit the spots with the heavy-duty primer. This would apply to the best drywall primer, which may not have the power to block some discoloration.


 8613371530291