
drywall mud pump repair factory
Automatic Taping Tools are more powerful and efficient than traditional hand tools. Whether you"re a drywall professional, remodeler, or DIY, automatic taping tools achieve better results in half the time. Drywall Loading Pumps (mud pumps) are compound pumps that use Gooseneck and Box Fillers Adaptors to fill drywall taping and finishing tools. All-Wall offers the largest selection of Loading Pumps from top brands such as TapeTech, Columbia, Asgard, Graco, and Drywall Master.

{"links":[{"url":"https://www.graco.com/us/en/contractor/solutions/articles/how-to-mix-drywall-mud-for-texture-spraying.html", "anchor_text":"How to Mix Drywall Mud for Texture Spraying"},{"url":"https://www.graco.com/us/en/contractor/products/drywall-finishing-interior-texture/interior-texture-sprayers.html", "anchor_text":"Interior Texture Sprayers"},{"url":"https://www.graco.com/us/en/contractor/products/drywall-finishing-interior-texture/drywall-finishing-tools-accessories.html", "anchor_text":"Drywall Finishing Tools & Accessories"}]}
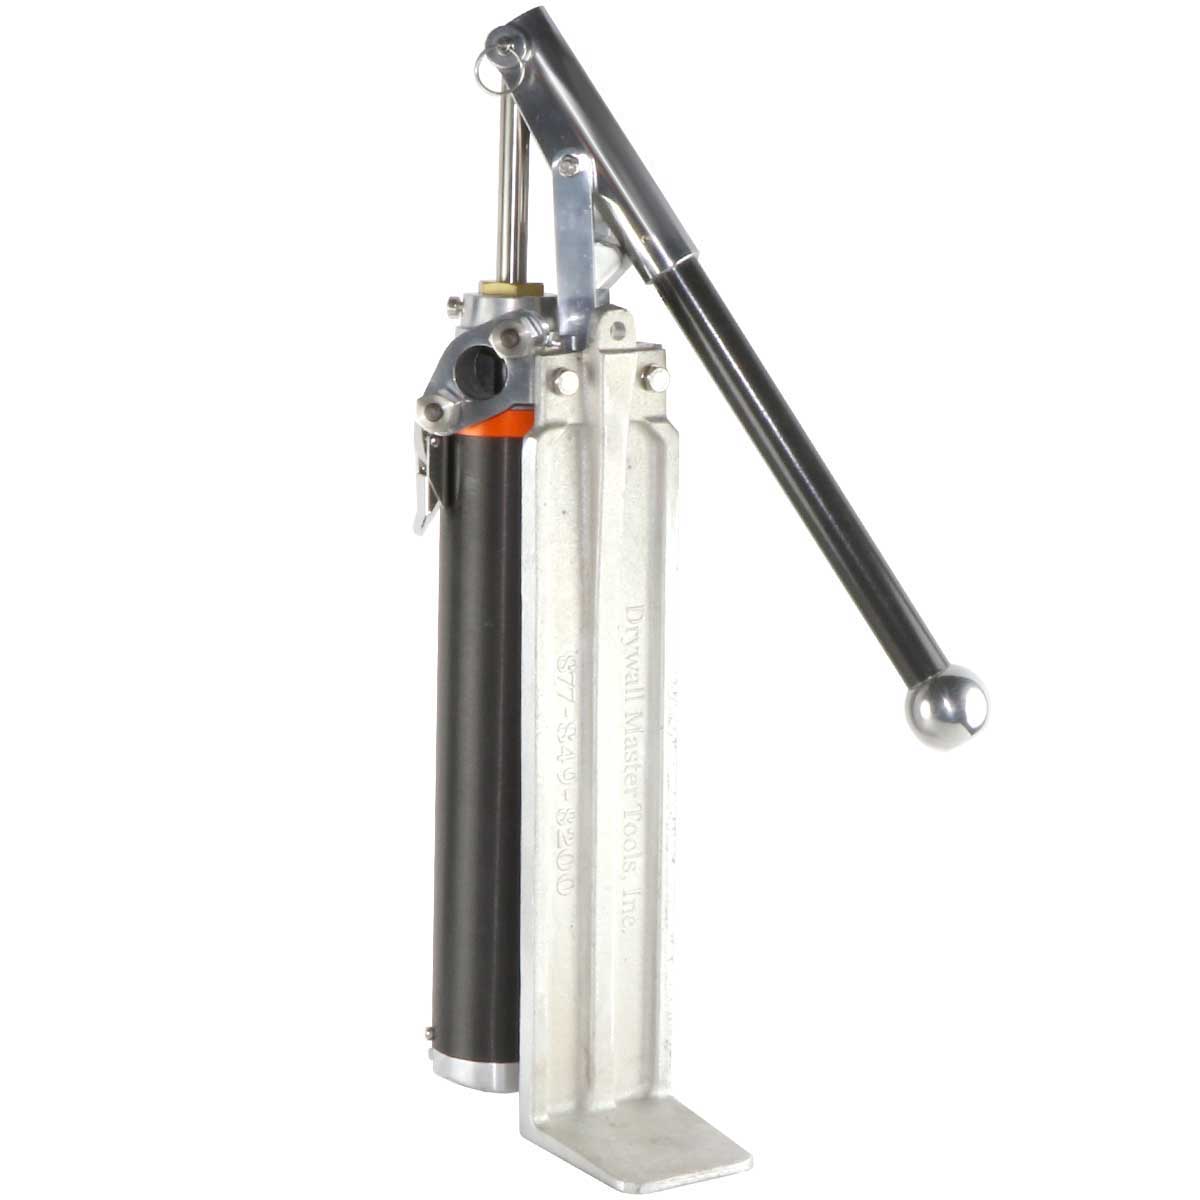
Drywall Master Taping Tools Extended Quick Clean Mud Pump is used to fill automatic taping tools with mud compound. DrywallMaster pump uses gooseneck (sold separately) to fill automatic taper. Box filler (also sold separately) attaches to pump to fill all other finishing tools. Industry exclusive double o-ring head seal on Drywall Master mud pump keeps mud from seeping between head and pump tube for better seal and easier separating, cleaning or maintenance.
Unique dual o-ring head seal keeps mud from getting between head casting and pump tube. This makes pump easier to separate for cleaning or maintenance.
The Loading Pump, with appropriate accessories (Gooseneck and/or Filler Adapter), is used to fill the following tools: Automatic Taper, Corner Applicator/Corner Box, Nail Spotter, and Flat Box. Attach the Gooseneck to fill the Automatic Taper. Attach the Filler Adapter to fill the Nail Spotter, Corner Applicator, and Flat Box. Simply hang the tube of Loading Pump into a bucket of mud, leaving the leg of the Pump on the floor. Attach the appropriate accessory to the pump. Prime the Pump by pumping the handle a couple of times. Now you should be ready to fill your tool.

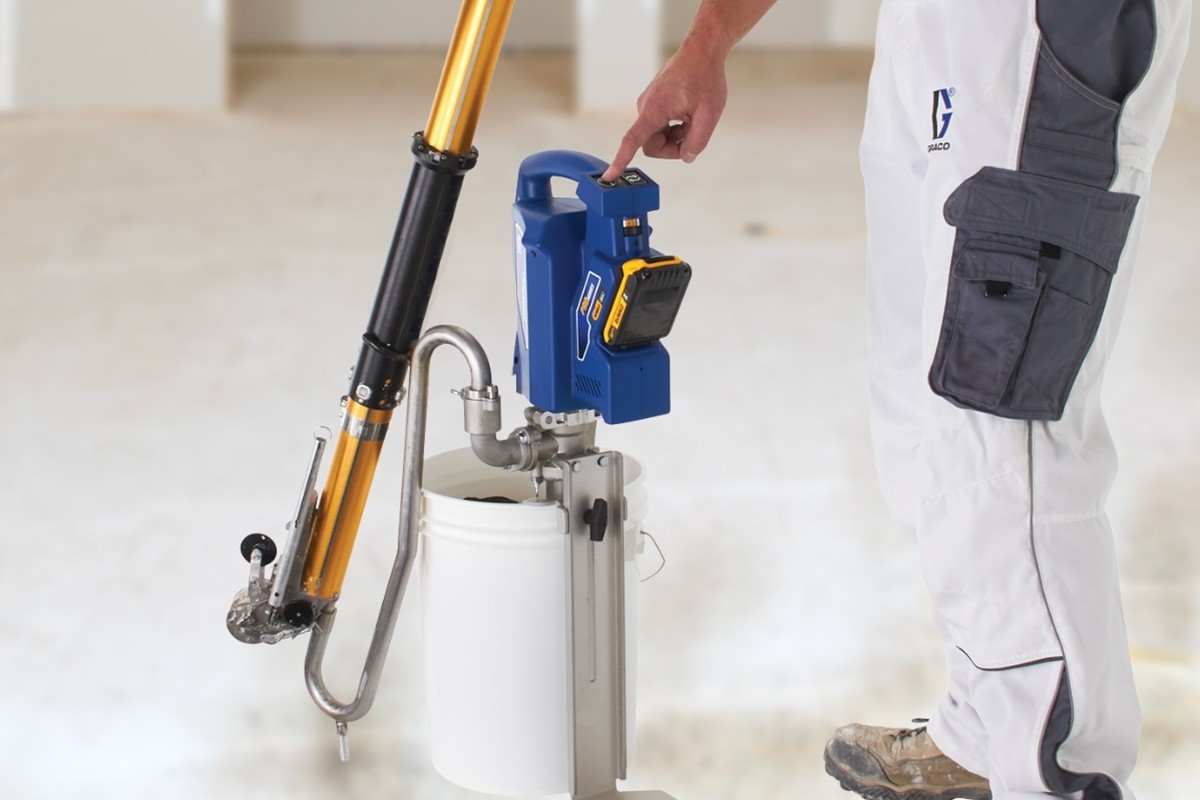
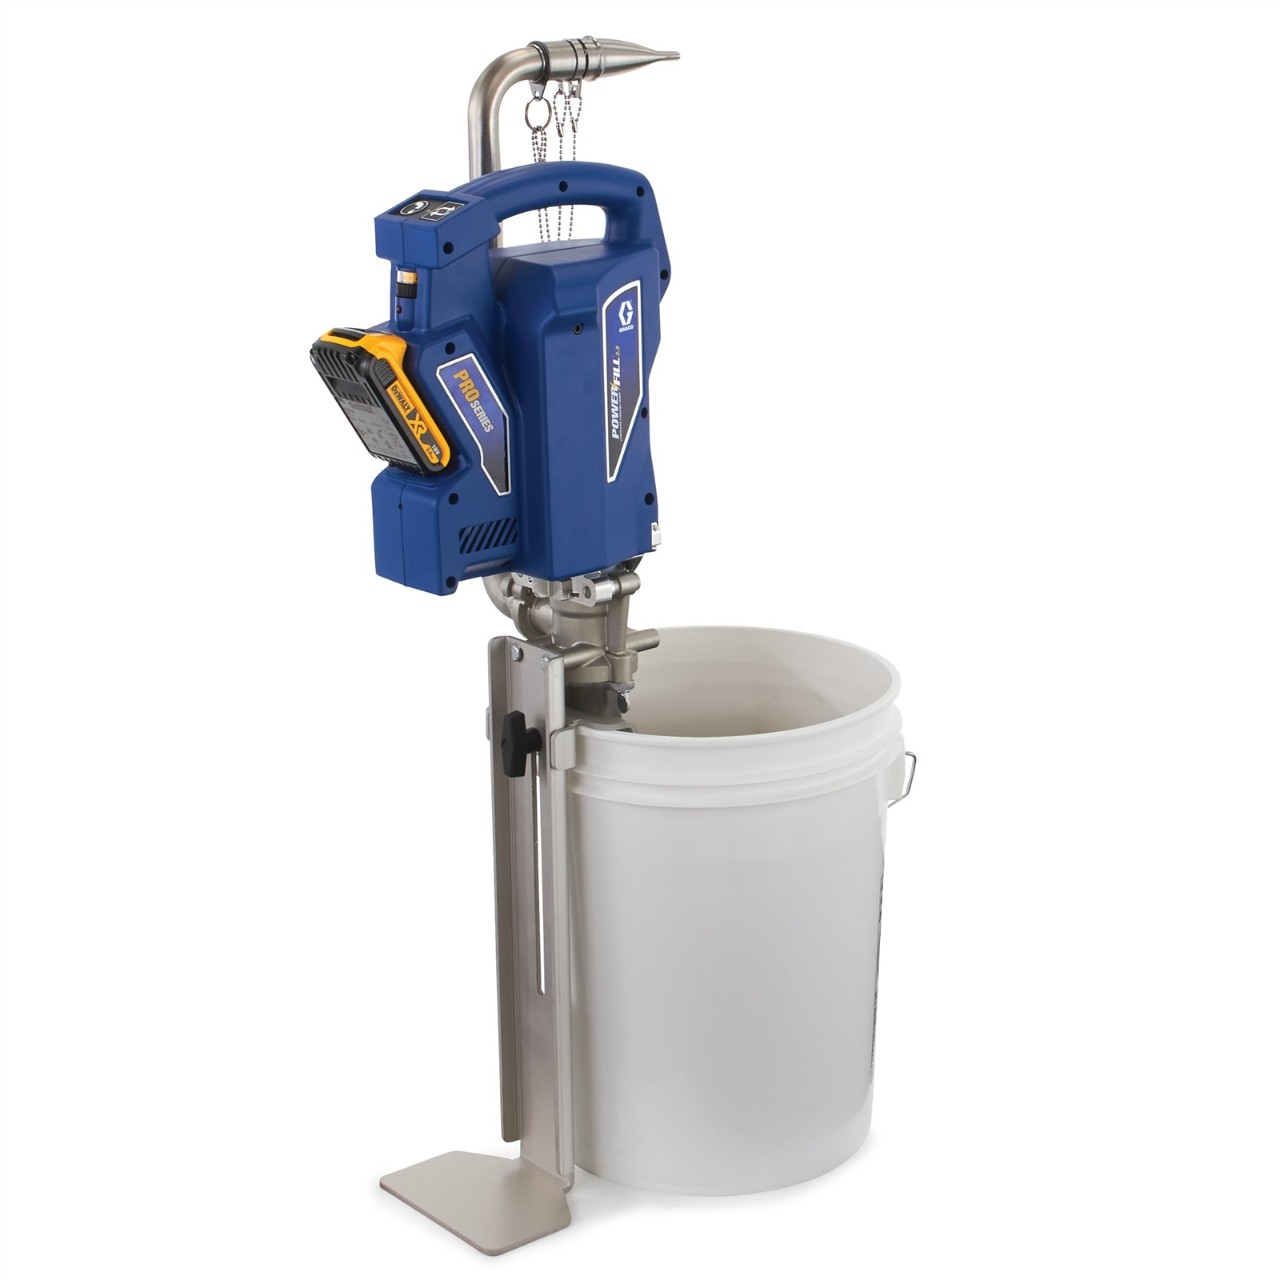
The contractor-proven pump technology and cordless power capability found on Graco automatic drywall mud pumps helps reduce fatigue while maximize efficiencies on interior drywall or texture jobs. Finish every drywall job faster and never hand pump again with Graco PowerFill 3.5 Cordless Loading Drywall Pumps.
We perform a complete inspection of your tools’ primary functions when evaluating what your tool needs to be returned to factory working condition. Our goal is to locate any problems at hand and communicate to you all of your possible repair options. From there we work with you to repair your tools on time and on budget. You will never be billed more than our quote or for anything that you did not approve.

Afghanistan, Albania, Algeria, Andorra, Angola, Anguilla, Antigua and Barbuda, Argentina, Armenia, Aruba, Australia, Austria, Azerbaijan Republic, Bahamas, Bahrain, Bangladesh, Belgium, Belize, Benin, Bermuda, Bhutan, Bolivia, Bosnia and Herzegovina, Botswana, Brazil, Brunei Darussalam, Bulgaria, Burkina Faso, Burundi, Cambodia, Cameroon, Canada, Cape Verde Islands, Cayman Islands, Central African Republic, Chad, Chile, Colombia, Costa Rica, Cyprus, Czech Republic, Côte d"Ivoire (Ivory Coast), Democratic Republic of the Congo, Denmark, Djibouti, Dominican Republic, Ecuador, Egypt, El Salvador, Equatorial Guinea, Eritrea, Estonia, Ethiopia, Fiji, Finland, France, Gabon Republic, Gambia, Georgia, Germany, Ghana, Gibraltar, Greece, Greenland, Grenada, Guatemala, Guinea, Guinea-Bissau, Guyana, Haiti, Honduras, Hungary, Iceland, India, Indonesia, Iraq, Ireland, Israel, Italy, Jamaica, Japan, Jordan, Kazakhstan, Kenya, Kiribati, Kuwait, Kyrgyzstan, Laos, Latvia, Lebanon, Lesotho, Liberia, Liechtenstein, Lithuania, Luxembourg, Macau, Macedonia, Madagascar, Malawi, Malaysia, Maldives, Mali, Malta, Mauritania, Mauritius, Mexico, Moldova, Monaco, Mongolia, Montenegro, Montserrat, Morocco, Mozambique, Namibia, Nauru, Nepal, Netherlands, New Zealand, Nicaragua, Niger, Nigeria, Norway, Oman, Pakistan, Panama, Papua New Guinea, Paraguay, Peru, Philippines, Poland, Portugal, Qatar, Republic of Croatia, Republic of the Congo, Romania, Rwanda, Saint Helena, Saint Kitts-Nevis, Saint Lucia, Saint Pierre and Miquelon, Saint Vincent and the Grenadines, San Marino, Saudi Arabia, Senegal, Serbia, Seychelles, Sierra Leone, Singapore, Slovakia, Slovenia, Solomon Islands, South Africa, South Korea, Spain, Sri Lanka, Suriname, Swaziland, Sweden, Switzerland, Tajikistan, Tanzania, Togo, Tonga, Trinidad and Tobago, Tunisia, Turkey, Turkmenistan, Turks and Caicos Islands, Uganda, United Arab Emirates, United Kingdom, United States, Uzbekistan, Vanuatu, Vatican City State, Vietnam, Wallis and Futuna, Western Samoa, Yemen, Zambia, Zimbabwe

The Northstar Compound Pump Repair kit will breathe new life into your pump, ensuring you maintain the servicing requirements of your pump. The wearable parts of the pump need replacing to continue to get the best results from your pump.

“Mudding,” the process of applying multiple thin coats of drywall compound to the joints and screw indentations in newly hung drywall, sounds messy, and it is. When done correctly, the result is a wall so flat that you cannot spot the seams.
While professional drywall tapers make mudding look easy, do-it-yourselfers find that it takes practice, skill, and—of course—the right gear (in this case, the mud itself and the tape that prevents cracks from appearing in the seams). This guide to how to mud drywall outlines the materials required for the job, and walks DIYers through the process step by step.
There are two main types of drywall mud: premixed and powdered. There are variations on each type, too, which can make it tough to choose the right product for your job. Here’s the lowdown on the types of drywall mud you might find at the home improvement store:
Premixed joint compound is just that: The mud has already been mixed with water to a smooth consistency and is ready to be applied. Within this category, you’ll find all-purpose mud, topping mud, and lightweight all-purpose mud.All-purpose mud goes on smoothly and usually begins to harden in a couple of hours, depending on the temperature and humidity in the room. It’s suitable for all mudding applications, and is the best drywall mud for beginners.
Topping mudis used as a final top coating. It dries to a bright white and is easy to sand, making it a good choice for walls that will be painted a light color. Topping mud has fewer adhesion properties than all-purpose mud, so it’s not suitable for first and second coats.
Lightweight all-purpose mud also dries to a lighter hue, which makes it suitable for walls that will be painted a light color. Some pros use all-purpose mud for the first mudding application and then switch to lightweight all-purpose mud for the second and third applications.
Powdered drywall mud, also called “setting mud” or “hot mud,” contains chemicals that hasten hardening time when water is added to the powder. This type of mud tends to shrink less than all-purpose premixed mud, but it hardens very quickly. Quick-setting mud works well for pre-filling large gaps in walls, or smoothing over crushed drywall corners before starting the actual mudding process.Timed drywall mud: Setting mud is labeled by the maximum amount of time you have to work with it before it hardens. You can choose from 5-minute mud, 20-minute mud, or longer-hardening times, depending on your needs. If you use setting mud, mix only as much as you need, and wash your tools frequently as you work.
Easy-to-sand setting mud: The chemicals in some types of hot mud harden into rock-like ridges on your walls, and you can spend hours trying to sand them smooth. Avoid this by choosing an easy-to-sand variety.
During the mudding process, tape acts as a bond to keep the finished wall from developing cracks along the drywall seams. The different types of tape are paper, mesh, and preformed—and all three have their pros and cons.Paper tapeis used almost exclusively by the pros because it’s very thin, which helps create imperceptibly smooth drywall joints. Paper tape comes with a crease down the center that allows you to bend it along the crease to form sharp wall corners. It takes practice, however, to correctly bed paper tape in the first coating of wet mud without creating bubbles underneath.
Mesh tapeis made from fiberglass threads in an open-weave pattern and comes with adhesive on the backside. While it’s fairly simple to position mesh tape over a dry joint and then apply your first coat of mud on top, mesh tape is thicker than paper tape and can result in more noticeable joints when the wall is painted.
Primed with an understanding of mudding materials, it’s time to familiarize yourself with the process as outlined here. Because paper tape offers the most professional results, we’ll detail how to mud sheetrock using paper tape. If you’re using mesh tape, you’ll find some tips below that will help you use it correctly.
Cover the floor with a canvas drop cloth (plastic drop cloths can become dangerously slick) and don goggles and old clothing. Mudding is a messy process, and splatters can sting if they get in your eyes.
Remove the lid from the bucket of premixed mud. If using powdered setting mud, mix as recommended by the manufacturer, beating until smooth with a heavy duty drill fitted with a paddle bit.
Drywall panels come with slight bevels on both of their long sides. When the bevels are fitted together, they form a small indentation, about 2 inches wide, along the joints. Use the 6-inch taping knife to smooth and work the mud evenly into the joint, filling the entire indentation and wiping away excess mud.
Cut and fit a piece of paper tape over the joint while the mud is still wet for a process called “bedding.” Use the 6-inch taping knife to gently smooth the paper onto the wet mud, working out bubbles as you go. Wipe away excess mud with the knife.
With the 6-inch knife, apply a thin coat of mud to both sides of an inside corner, making sure to work it all the way into the center. Cut, fold, and fit a strip of pre-creased paper tape in the corner over the wet mud. Smooth the paper tape carefully in the wet mud, using either a 6-inch taping knife or an inside-corner taping tool that features a preformed 90-degree shape for easy bedding. Use light stroking movements to bed the tape without dislodging it from the corner. Wipe excess mud from the walls.
If using preformed tape corners, attach them as recommended by the manufacturer, and then smooth mud over the corners, using long vertical strokes on both sides to form a sharp, uniform corner.
You can avoid butt joints, which occur when un-tapered ends of a drywall panel are fitted together, by using sheets of drywall that span the entire room. But if dealing with ends that have no beveled indentations, it’s more challenging to get a smooth finish. Mud them as you did the beveled joints, taking care to use only as much mud as necessary to fill the joint and bed the tape.
Let all the mud dry before applying the next coat. Apply a second coat of mud to the screw indentations, beveled joints, and inside and outside corners in the same order as the first coat—only this time, use only mud. No need to add more tape! Just apply a thin layer of mud and wipe off all excess.
To do a second coat for butt joints, take the 10-inch taping knife, apply two swaths of mud, approximately 8 inches wide, along both sides of the first joint coat, but not on top of the original joint. This imperceptibly builds up the wall depth over a wider area to reduce the appearance of a bulky butt-joint seam. Feather out the edges of the swaths well with the knife for a smooth look.
Apply a third very thin coat of mud after the second coat dries. Use the 10-inch knife for all screw indentations, seams, and corners. The wider knife allows you to feather out the edges of the mud to a razor-thin application. Follow the same procedure for beveled joints and corners as before. On butt joints, apply a thin coat of mud over the previous swaths and the original mud joint. It’s not unusual for the mud swath on butt joints to be 2 feet wide or wider.
When the mud dries, apply one last thin coat only over the butt joints. Feather out the edges very well and let the mud dry. Before moving onto the final step, an important question to ask is, “How long does drywall mud take to dry?” Approximately 24 hours is the answer for most types of drywall mud, but refer to your product’s label for specifics on drying time.
Don your respirator mask and goggles prior to sanding. Use a drywall pole sander or, if it’s important to keep airborne dust at a minimum, rent a power drywall sander from your local construction rental store. Sand all joints and nail indentations until the wall is perfectly smooth. Now you’re ready to paint or wallpaper!
Unlike paper tape that requires bedding in wet mud, self-adhesive mesh tape is applied over seams and then, when mud is applied, an adequate amount seeps through the mesh into the seam beneath. The order of taping is the same: Do screw indentations and beveled joints first, inside and outside corners next, and butt joints last. If you use mesh tape on flat joints, note that it’s not suitable for corners. Use pre-creased paper tape for inside corners and preformed tape for outside corners.
During our repair services we disassemble and inspect all moving parts, replacing all wear parts and returning the tool to factory specifications. Tools needing excessive cleaning may warrant additional cost.

The TapeTech 76TT-CA EasyClean® Loading Pump combines reliability with innovation. The 76TT features the slim tube design preferred by professional finishers and robust construction for dependable performance and long life. The TapeTech 76TT Loading Pump has a redesigned head and a new Twist-lock foot valve that provides secure attachment and easy removal for cleaning and maintenance. And the 76TT does not require a paper gasket for the filler adapter or gooseneck due to an innovative, integrated O-Ring that provides a terrific seal with fewer headaches from lost, worn or damaged paper gaskets.
The 76TT-CA EasyClean® Loading Pump is specifically designed to work with standard joint compound buckets in Canada, which are slightly taller than standard U.S. buckets. The additional length provides stability and allows the foot valve to reach the bottom of the bucket, maximizing joint compound usage. The 76TT-CA pump has all the same unique features of the 76TT, including the tool-less foot valve, integrated outlet gasket and EasyClean® design. The 76TT pump accepts the standard 85T gooseneck and 90T filler adapter.

Fill the lower part of a paint tray with premixed wallboard compound, thinned with water to a consistency of pancake batter. Apply the compound to the repaired area, using a 3/8-inch nap roller.
Working from the center of the repair area out toward the original textured area, "feather" the effect by lightening up on the roller pressure as you approach the non-damaged areas.
One of the newest ways to repair textured walls and ceilings is with a gravity-fed, manually powered pressure sprayer. This technique will be most appropriate if you have very large areas of damage or are applying a new orange-peel texture to entire wall surfaces.
This handy tool does not require an air compressor or another power source—just your hand pressure. When you pull back the lever, the chamber sucks in the textured paint, and when you pump the lever, it pushes the paint out through the front plate. By adjusting the front plate and lever, you can control the sprayed textured pattern.
Depending on the manufacturer and product used, hold the can between 12 inches and 24 inches from the wall surface. Spray using a circular motion, and cover only about 50 percent to 75 percent of the repair area with texture at once.
You can typically lease this equipment from a rental store. You put a thinned mixture of drywall joint compound (e.g., 30 pounds of a compound to 5 pints of water) mixed to a consistency like runny batter into the hopper, then run the gun half-open through a small nozzle at about 25-30 psi. This setting usually gives you splatter the right size for an orange-peel texture.
If you used an oil-based product, the best way to remove a small area is by sanding. A handheld block sander will give you a fairly uniform removal. Use 150-grit sandpaper to get the high points then move to 220-grit to get it fairly smooth. Make sure not to apply too much pressure, or you may accidentally sand down into the drywall paper layer. Once the oil-based area texture is removed, prime and spray with a latex orange-peel texture spray.


 8613371530291