
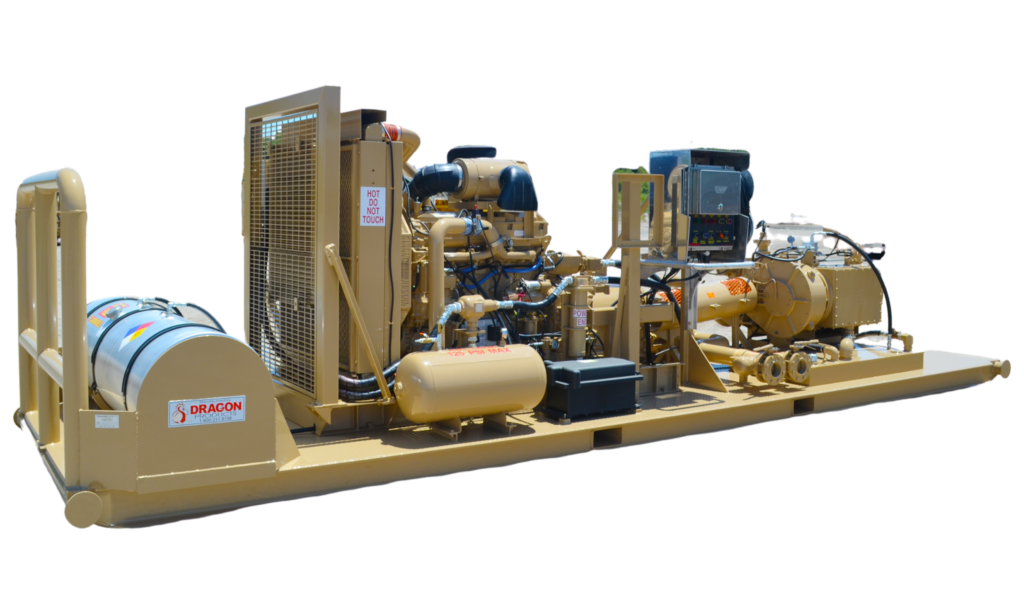
mud pump for 100 feet dug wells brands

If you live in a rural area, the odds are that the water system to your home is served by a well. It’s the nature of living where we do, and having been on a well for a large chunk of my life, I like not being dependent on my locality to keep things flowing to my family and me. But, that also means arranging my own maintenance for the well system, and having the best well pump helps to ensure consistent water supply and rare upkeep.
I remember when my much-younger self first saw the inner workings of a home well system. The gauge at the well head wasn’t deep enough in the ground and froze during a particularly bad winter. Everything came out of the ground as we inspected the whole system to make sure nothing else was damaged. Hundreds of feet of tubing were attached to the tow ball of a pickup truck as we hauled it out of the ground, taking a look at the well pump at the end.
Though the weather didn’t impact the pump that far below ground, it had some damage from banging into the walls of the well itself, and we had to add a guard to keep the pump working for a few more years.
Most experts will tell you that a submersible well pump, like what most rural homeowners and farmers have, will last about 10 to 15 years — hopefully more toward the higher side of that. Replacing these units aren’t cheap, and if you pay for the labor, too, the bill can really increase.
Not everyone knows all the ins and outs of their well system, unless they’ve had to do some work to it. If you buy a home, it’s unlikely that you’re given much documentation on the history of the well. In most circumstances, your well is at least 100 feet deep, and some wells can be upwards of 500 feet down! Of course, a lot of that depends on exactly where you live. Having the pump submerged into at least 25- to 30-feet of water is ideal.
I have two wells on my farm — one is 183 feet and the other is 294 feet (the deeper one produces better-quality water). In recent years, we’ve had to have pumps on both wells replaced, and both required different horse powers to effectively get the water the full length and into my home, as well as get a sufficient number of gallons per minute into my pressure tank.
Having gone through that process, I learned a thing or two about well systems and trying to pick the best well pumps. After going through many options with experts, here are my Top 5 best well pumps. While we’re largely only highlighting one model from each of these well pump lines, know that there are often also similar 0.5-, 0.75, 1-, and 1.5-HP models for a lot of these available — at significantly different prices:
This is one of the best-selling well pumps you can find. It’s made for supplying water to rural homes, farms, and cabins that have 4-inch-or-greater diameter drilled wells to depths of about 250 feet. This pump is powered by a three-wire motor (a control box is included with all three-wire pumps) and has a built-in check valve that prevents backflow and ensures system pressure. It also has a stainless steel shell and thermoplastic discharge and motor bracket. It is is 230 volts.
The Flotec FP3332 4-inch Submersible Well Pump is for use with wells 4 inches or larger. The Flotec well pump is energy efficient and ideal for pumps with average yields. A floating stack design that’s patented ensures that the Flotec FP3332 pump will be resistant to sand locking, and a stainless steel pump ensures that it will be resistant to corrosion. A built-in check valve and easy service control box make installing and servicing the Flotec well pump easy. It’s a three-wire, 230-volt pump.
Showcasing a Franklin Electric, this pump combines a long and powerful reputation in both brand name and manufacturer. The Little Giant is available with a thermoplastic discharge and motor bracket, or a stainless steel discharge and motor bracket, and it has a ceramic bearing sleeve for durability. Behind 230 volts, it also has a hex rubber bearing with an extra large surface to assure shaft stability and multiple flow channels to keep small particles away from bearing surfaces.
The Grundfos 10SQ07-200 96160141 Submersible Well Pump offers a wide performance range. The 4-inch SQ is a compact multistage centrifugal pump that can be installed in a borehole no larger than the pump itself. With their built-in electronics, SQ pumps are very easy to install and operate. Equipped with permanent magnet motors, these flexible and compact pumps offer excellent efficiency levels and will supply pump heads up to 200 meters.
The BURCAM 101131H 230-volt, 2-wire + ground deep well submersible pump is recommended for homes, cottages, and farms for installation in water wells that are 4-inch in diameter or larger. Made of non-corrosive 316 stainless steel with a NEMA standard interchangeable head that includes 12 stages of precision machined stainless steel impellers and diffusers and a hexagonal stainless steel drive shaft, this pump features a continuous duty motor for durability. It pumps up to 900 U.S. GPH and has a maximum head of 275 feet. Best efficiency is between 114 and 198 feet (with a 20/40 PSI pressure switch) or 91 to 175 feet (with a 30/50 pressure switch).
Many wells that we’ve encountered are at least 100 feet deep, and some wells can even be drilled as deep as 500 feet. It depends exactly on where you live and how close your drilling technician can get to a good vein of water within the earth. Having a well pump submerged into at least 25- to 30-feet of water is ideal, and in many instances, they’ll last you 10 to 15 years.
Certainly a lot will depend on your location, and prices fluctuate along with the economy, but it’s likely you’ll end up paying $15 to $30 a foot (so $1,500 to $3,000 for a 100-foot well). And be aware that if the drilling doesn’t strike viable water, you still have to pay for that work. Usually a technician will charge you the low end of their price range for an unsuccessful attempt. Then you pay for the next attempt at drilling. Also note that there may be permitting regulations in your area, which can add to the cost.

This website is using a security service to protect itself from online attacks. The action you just performed triggered the security solution. There are several actions that could trigger this block including submitting a certain word or phrase, a SQL command or malformed data.

When choosing a size and type of mud pump for your drilling project, there are several factors to consider. These would include not only cost and size of pump that best fits your drilling rig, but also the diameter, depth and hole conditions you are drilling through. I know that this sounds like a lot to consider, but if you are set up the right way before the job starts, you will thank me later.
Recommended practice is to maintain a minimum of 100 to 150 feet per minute of uphole velocity for drill cuttings. Larger diameter wells for irrigation, agriculture or municipalities may violate this rule, because it may not be economically feasible to pump this much mud for the job. Uphole velocity is determined by the flow rate of the mud system, diameter of the borehole and the diameter of the drill pipe. There are many tools, including handbooks, rule of thumb, slide rule calculators and now apps on your handheld device, to calculate velocity. It is always good to remember the time it takes to get the cuttings off the bottom of the well. If you are drilling at 200 feet, then a 100-foot-per-minute velocity means that it would take two minutes to get the cuttings out of the hole. This is always a good reminder of what you are drilling through and how long ago it was that you drilled it. Ground conditions and rock formations are ever changing as you go deeper. Wouldn’t it be nice if they all remained the same?
Centrifugal-style mud pumps are very popular in our industry due to their size and weight, as well as flow rate capacity for an affordable price. There are many models and brands out there, and most of them are very good value. How does a centrifugal mud pump work? The rotation of the impeller accelerates the fluid into the volute or diffuser chamber. The added energy from the acceleration increases the velocity and pressure of the fluid. These pumps are known to be very inefficient. This means that it takes more energy to increase the flow and pressure of the fluid when compared to a piston-style pump. However, you have a significant advantage in flow rates from a centrifugal pump versus a piston pump. If you are drilling deeper wells with heavier cuttings, you will be forced at some point to use a piston-style mud pump. They have much higher efficiencies in transferring the input energy into flow and pressure, therefore resulting in much higher pressure capabilities.
Piston-style mud pumps utilize a piston or plunger that travels back and forth in a chamber known as a cylinder. These pumps are also called “positive displacement” pumps because they literally push the fluid forward. This fluid builds up pressure and forces a spring-loaded valve to open and allow the fluid to escape into the discharge piping of the pump and then down the borehole. Since the expansion process is much smaller (almost insignificant) compared to a centrifugal pump, there is much lower energy loss. Plunger-style pumps can develop upwards of 15,000 psi for well treatments and hydraulic fracturing. Centrifugal pumps, in comparison, usually operate below 300 psi. If you are comparing most drilling pumps, centrifugal pumps operate from 60 to 125 psi and piston pumps operate around 150 to 300 psi. There are many exceptions and special applications for drilling, but these numbers should cover 80 percent of all equipment operating out there.
The restriction of putting a piston-style mud pump onto drilling rigs has always been the physical size and weight to provide adequate flow and pressure to your drilling fluid. Because of this, the industry needed a new solution to this age-old issue.
Enter Cory Miller of Centerline Manufacturing, who I recently recommended for recognition by the National Ground Water Association (NGWA) for significant contributions to the industry.
As the senior design engineer for Ingersoll-Rand’s Deephole Drilling Business Unit, I had the distinct pleasure of working with him and incorporating his Centerline Mud Pump into our drilling rig platforms.
In the late ’90s — and perhaps even earlier — Ingersoll-Rand had tried several times to develop a hydraulic-driven mud pump that would last an acceptable life- and duty-cycle for a well drilling contractor. With all of our resources and design wisdom, we were unable to solve this problem. Not only did Miller provide a solution, thus saving the size and weight of a typical gear-driven mud pump, he also provided a new offering — a mono-cylinder mud pump. This double-acting piston pump provided as much mud flow and pressure as a standard 5 X 6 duplex pump with incredible size and weight savings.
The true innovation was providing the well driller a solution for their mud pump requirements that was the right size and weight to integrate into both existing and new drilling rigs. Regardless of drill rig manufacturer and hydraulic system design, Centerline has provided a mud pump integration on hundreds of customer’s drilling rigs. Both mono-cylinder and duplex-cylinder pumps can fit nicely on the deck, across the frame or even be configured for under-deck mounting. This would not be possible with conventional mud pump designs.
The second generation design for the Centerline Mud Pump is expected later this year, and I believe it will be a true game changer for this industry. It also will open up the application to many other industries that require a heavier-duty cycle for a piston pump application.

Calling a submersible pump the most crucial part of the well water system isn’t an overstatement because as soon as it runs out, you can say goodbye to the water supply at your home. Replacing it takes time and money, so you need to make sure you buy the most reliable one on the market.
To help you sort out the cheap and unreliable models, I have extensively researched the leading brands. Give it a read to find the perfect submersible pump for your home.
Red Lion submersible well pumps have the right balance of price, power, and durability. This American-made pump performs exceptionally well on all fronts, making it the best submersible well pump for residential use.
Red Lion has been manufacturing industrial and residential-grade products for moving water since 1935. Its RL12G05 model is one of the most advanced and efficient submersible pumps out there. You can use it for rural homes, cabins, or even a small farm.
It packs a 1/2 horsepower (HP) motor or 376 watts of power consumption, which is quite efficient. It can easily run on a local generator and a small KV solar power setup. Its pressure-building capacity is also quite remarkable and works well with 30/50 or 40/60 pressure switch settings from depths greater than 90 feet. The average drilled well is about 100–120 ft deep. So, this pump is ideal. If your well depth exceeds 150 feet, I recommend checking out Red Lion’s higher horsepower pumps.
I also found the motor to be quite powerful with a flow rate of 12 gallons per minute (GPM). It’s a compact stainless steel pump suitable for wells with a diameter of four inches or greater. It also has a built-in check valve to protect your plumbing system.
Red Lion isNSF/ANSI 372 certified, which means water pumped through the 12G submersible pump series is certified safe to drink. The components don’t contaminate drinking water in any way. Most submersible pumps are safe for extracting drinking water, but a certification gives an added assurance.
This particular model comes with a two-wire system. The whole package includes 48 inches of (4 ft) lead wires, a wire splice kit, and an installation manual. The wire splice kit is really handy and easy to install without any expert supervision. Installing the control box is optional, and the company doesn’t recommend it for this model.
What you may like best about this Red Lion pump is its durability. It’s fitted with a Franklin Electric (Red Lion’s parent company) motor, which is heavy-duty and robust.
Red Lion’s RL12G01 works well but creates a loud noise, which isn’t a deal breaker if your well is far enough from the house. Apart from that, it’s more expensive than pumps with similar specifications further down the list, but Red Lion makes up for it with an extended warranty and after-purchase services, including industry-leading customer support.
The Red Lion RL12G05 well water pump is great for homes with 100–120 feet deep wells and normal water usage. It’s powerful and can retain proper water pressure throughout the home.
If you want a powerful and durable submersible pump that is efficient in extracting groundwater from your private well, then the Red Lion RL12G05 is the number one choice.
Grundfosis another popular brand when it comes to high-quality pumps. Based in Denmark, it has dominated the pump manufacturing market since 1945. However, the higher quality and brand name don’t justify the exorbitant rates. Thus, Grundfos secured second place on my list.
Grundfos’ SQ series has some phenomenal submersible pumps for residential and small-scale agriculture/irrigation systems. The 10SQ05-160 carries 1/2 HP, which is strong and efficient. It can draw 10 GPM of groundwater at a steady rate.
The brand recommends installing a Grundfos CU 301 control box for constant water pressure and supply. This can improve the performance but can ramp up the total cost.
I really like some of the features that are unique to this pump, such as soft-start, dry-run protection, under-voltage protection, overload protection, and wear resistance impellers. This certainly increases the life of the submersible pump.
Even though Grundfos is a big brand, I have an issue with its prices. Red Lion provides the same features at half the price and the Grundfos only includes only the pump. You have to pay extra for cables and a splice kit. If you add the cost of accessories, including the cables, wire splice kit, and the control box, the price soars.
The company claims it to be generator and inventor friendly, but during my research I found out that despite its 1/2 HP, it draws about 1000 watts, which is a lot. So, if you’ve got a solar or generator system, you need to be mindful of that.
At this price, you can find pumps with greater horsepower. And with only a one-year warranty, you’ll have to hope nothing breaks after the first year. At this price point, you’d expect more promising after-purchase services.
Grundfos provides good value for money, especially if you are fond of European products. The pumps are high quality and versatile in application. This is why the 10SQ05-160 is second on my list of top submersible pumps for rural areas.
While these pumps are expensive, they are certainly a reliable second option for small-scale usage. If you just want a good pump and you’re willing to pay for it, and you aren’t fussed about any extras, check out the details here.
Flint and Walling, aka F&W, have been around since 1866 and started with traditional hand-powered pumps, eventually transitioning to electric-powered machinery. This pump is the most powerful on the list, but its high price and big pumping capacity are overkill for small-scale homes, which is why it’s third on my list.
F&W’s 4F10S10301 deep well submersible is as powerful as it gets, hosting 1 HP of pumping capacity and drawing 13 GPM of water at 100 ft depth. Greater depth causes variation in the flow rate, but its powerful impeller can sustain the pressure. With this capacity, you can target a well depth of up to 470 ft.
F&W’s pump has a stainless steel body with impellers made from Noryl, a plastic resin possessing wear-, heat-, and corrosion-resistant capabilities. There is no concrete evidence of it being superior to steel and bronze impellers, but the company claims it to be more durable.
It runs on an 8.2 Amps current and 230 volts, consuming 1886 watts of power, so if you have exceptionally high water needs, you can rest assured this pump can meet them.
You must consider the high power of this model if you power your home with a generator or solar panel. Sometimes home private energy generation systems fail to bear the load and can cause interruption in water supply. Because of its size, it does need a control box (unlike the Red Lion RL12G05), which is quite common in larger pumps.
F&W’s high-power pump doesn’t come cheap and costs $1287 without any accessories. You’ll have to buy the wire, splice kit, and control box separately. F&W has high-performance and durable machinery but the higher purchasing and maintenance costs may prove too steep for some homeowners.
F&W’s deep submersible pump is a powerful and efficient machine and deserves the third spot on my list. While the Red Lion has much more features at half the price, this is still a go-to option if you want higher flow rates. If you want to learn more about F&W’s products, click here.
Flotec’s three-wire submersible pump lands in the fourth position on my list. It is designed to pump up 20 GPM from wells between 20–150 ft. With its patented floating stack design and corrosion-resistant stainless steel body, this pump will certainly last long in a sandy well.
This $695 pump has a built-in control box, so you don’t have to pay extra cash for it. The control box keeps all the electrical components safe outside the pump. If there’s any malfunctioning wire, you can simply replace the control box without uninstalling the entire pump. It saves maintenance costs in the long run.
Installing the Schraiberpump deep well pump is a breeze, and it takes only fifteen minutes to assemble and wire the product. It can smoothly fit in a four-inch well pipe. If you’re looking for an inexpensive option, this pump is a great choice and offers good value for the money.
The powerful motor can pump up to 22 GPM from a well as deep as 200 ft. However, the manufacturers don’t recommend this model for wells deeper than 200 ft. So, if your well is deeper than 200 ft, you can skip this suggestion.
The wiring is too flimsy and weak for such a powerful motor. I doubt such fragile wiring can last long. Scriaberpump does offer a one-year warranty, which is not very impressive either.
Another issue I noticed was the lack of a spring-loaded check valve. If you’ve familiar with submersible pumps, you know the importance of these little dudes. A check valve prevents the water from flowing in the opposite direction and prevents disastrous events such as water hammering, backspin, and upthrust in your pipe. Your submersible pump should have at least one high-quality check valve to keep your motor safe.
Hallmark Industries has manufactured this champ of a submersible pump that works wonders in a sandy well. This well pump might be a good investment if your well is sandy and old.
At just $145, this two-wire pump offers a heavy flow of 33 GPM and a depth of 207 ft (for no pressure tank). However, it doesn’t come with an external check valve, so you will have to add a check valve to your shopping cart and pay an additional $40–$60 if you’re buying this pump.
One downside of this well pump is it comes with a flimsy 12-gauge ground wire that will need changing if you don’t want your motor burning up within a week. Some users report that this pump is not as reliable as you’d like.
In addition, Hallmark pump guarantees its unit for only one year. Since reviews report it breaks easily, you’ll be wishing for a better warranty soon enough.
The Countyline submersible pump offers 3/4 HP, a pumping power of 10 GPM, and a well depth of 200 feet. It’s a small yet powerful unit and good enough for a small household with 13 or fewer faucets and fixtures.
The VEVOR deep well pump is yet another pump offering a lot of specifications for only a couple hundred dollars. With a 2 HP motor, this product can pump up a whopping 42 GPM from wells as deep as 400 ft.
According to his experience, this pump worked wonders for a few days until it stopped altogether. The customer support was not very helpful, and they demanded an extra cost for removing and replacing the pump.
After a lengthy procedure of vetting the leading submersible deep well pumps, I can safely conclude that the Red Lion Submersible Deep Well Pump takes the win. Red Lion offers the best features at a price that won’t break your bank.
This unit is guaranteed to be your best pal if you’re sick of cheap and rinky-dink pumps that don’t even last thirty days. Red Lion‘s dependable well pump will provide you with an uninterrupted water supply for a long time. I suggest you order it today and make your life easier.
Water is the most critical element of life, and certainly, a lot of resources are spent on research for improving plumbing technology. Many big brands that are leading the market are at least a century old. This speaks a lot about their experience in manufacturing durable well pumps.
The above filters helped me pick the most energy-efficient and budget-friendly submersible pumps for residential use. Supposing this isn’t your first rodeo, you probably know how the cost of submersible pumps adds up. What you want is a long-lasting product that keeps running without having to pull it up from ground frequently.
To hit the nail on the head, I wanted to interview real-life customers about their experiences with these submersible machines. Since the lifespan of such pumps lasts 10 to 30 years, an experienced customer’s opinion would weigh a lot.
Surprisingly, many people had a bad experience with warranty claims—some companies refused to honor them based on certain technicalities. I also found out that hard water (salt water) in a particular area affected the lifespan of pumps.
Some homeowners used these pumps to water their small farms and even for supply in local waterworks. I also contacted local plumbing services and asked them for their valuable insight. After interviewing more than 50 people, I had a solid basis for ranking the best submersible pump.
Keeping things fair, I contacted the different brands and asked about their submersible pumps. During my survey in the previous step, I encountered many complaints about pumps not maintaining certain pressure even well within the depth limits mentioned on the packages.
After an extensive survey and deep research, I gathered all the data for the most efficient and durable deep-well submersible pumps available in the market. I used a point score system based on the following criteria:
The top three on my list turned out to be the most efficient, heavy duty, and powerful submersible pump options available on the market. In fact, Red Lion took the lead on all fronts and is number one on my list of the best deep water submersible pumps for residential use.
For top-of-the-line efficiency, modern features, and industry-leading customer support, the Red Lion Submersible Deep Well Pump will give you the power and function you’re looking for.

This website is using a security service to protect itself from online attacks. The action you just performed triggered the security solution. There are several actions that could trigger this block including submitting a certain word or phrase, a SQL command or malformed data.
Drilling a well by hand is a lot of work, but it can be done with the right equipment. Whether you’re looking to drill a shallow or deep well, this skill is perfect for those seeking self-reliance.
Wells are normally drilled on private land where city or rural water isn’t available. It’s possible to hire a licensed professional to provide this service but you can expect to spend several thousand dollars. If you want to save money, you can do it yourself, but prior to getting started, you need to research local regulations.
Once you receive a green light to move forward, it’s time to learn more about your land. Go to thecounty agriculture extension office to find out what soil type you have. This could include sand, clay, rock, or a combination.
The local courthouse may also have well drilling logs from professional well drillers. These will include things like when they hit first water, what type of soil condition they encountered, and how deep they drilled the well. This could be helpful information but do remember that every property is different. The very first step might be determining how deep you need to drill.
The final thing to do before drilling is to contact utility companies to make sure you don’t hit any underground pipes or lines. Sometimes this information can be found on your original land plot, but it’s always good to double-check.
Drilling a shallow well is a pretty simple task, going down about 25 feet or so when you hit first water (at least in my location). This type of well could be drilled in a weekend by hand using a general purpose, extendable post-hole auger.
This type of well can be cased off with a manual pump and used for irrigation. This would be more of an emergency setup that could also provide water needs at a weekend cabin in the countryside.
Shallow wells have a difficult time keeping up with average water usage. It’s estimated each person uses between 80 and 100 gallons of water a day. Imagine storing 20, 5-gallon jugs a day per person.
Professional well diggers will often recommend a depth of 200 feet or more, but remember, for hundreds of years every well in this country was hand-dug and that’s how people survived.
In addition to the drill, you’ll also need a very powerful air compressor to run the equipment. These can easily cost two or three times as much as the drill. A couple of ways to keep costs down include purchasing a used compressor, or purchasing a new one and then after the project is completed, selling the almost-new equipment for a few hundred dollars less than what you paid.
This brings us to the drill setup. This will require a day of planning before drilling begins. Most home improvement stores will carry almost everything you need.
Step 1: After purchasing the necessary supplies and choosing the drill location, begin digging the main drill hole with an auger or post-hole digger. Dig about 4 or 5 feet. Then, if necessary, cut the 8-inch PVC to fit the hole, allowing 4 inches to stick above ground. In the side of the PVC pipe aligned with the settling pond (see Step 2), drill a hole large enough to insert the 2-inch connecting PVC pipe.
Step 2: Dig a shallow settling pond 10 feet behind the well, no less than 4 feet across. Then dig a shallow 8-inch ditch connecting the pond to the well hole. Connect these spaces with 2-inch PVC pipe and cover. This pipe will transfer clean water from the pond to the drill hole. The pipe opening in the pond will need covering with netting so debris doesn’t flow back into the well.
Step 4: Attach 1-inch PVC pipe to the pneumatic drill using PVC glue and secure with duct tape to prevent leaks. Use a marker every 5 to 10 feet so you can keep track of how far down you have drilled. Rest the other end of attached PVC pipe in the 55-gallon drum. While the drill is running, mud and water will enter the pipe through small holes above the drill and be pushed up by the compressed air, traveling through the pipe into the drum and settling pond to be cycled back into the well hole.
Note: Depending on your soil type, you may not need the 8-inch PVC. Our soil, for example, is hard clay and stable enough to keep the hole from collapsing without the pipe.
Drilling a well with this tool can take anywhere from 15 hours to weeks depending on the soil type, so make sure a chair is handy and you’re working with at least three people. One to operate the compressor, another to drill, and a third for breaks.
The air supply to the drill should never be turned off while the drill is underwater. If this happens, you’ll have to stop drilling and clean the motor before starting back up. This can take time and delay progress, which means it’s important that your drill team understands the process from start to finish.
Begin by filling the well hole with water. Turn the drill on before inserting, and then begin drilling. The bit will drill through all soil types, but when it hits clay or rock the process will slow down. Don’t get frustrated, just keep drilling and, before you know it, first water will be hit.
Move the drill in an up, down, and side-to-side motion as this will help the drill drive through the soil. The motion should be constant but not forceful; the drill will do the work. When you reach the point of needing to add more pipe, pull the running drill from the hole and, once it’s out of the water, turn the air pressure off. As you add pipe, secure each addition with PVC glue.
Add the next several feet of pipe and start again. Once the desired depth is reached, it’s time to case off the well. Casing is a matter of inserting SDR 35 pipe and securing in place with pea gravel and concrete. To do so, drill a hole through both sidewalls of the first piece of pipe, 2 or 3 inches from the bottom so you can attach the rope to lower the pipe into the well. When the top of the pipe is even with the ground, apply PVC glue and attach the next piece of pipe. Let dry for 15 minutes and then continue to lower down and add pieces as you go to meet the depth of the well. The last piece of pipe will be cut about 3 feet above ground level and capped off.
Pour pea gravel between the casing and the dirt. Next, mix the concrete and pour between the ground and casing. This will prevent the well from becoming contaminated from runoff. Once this is complete and you’ve added a well pump, you’ll need to run the well for a couple of days until the water is clear, and it’s always a good idea to get the water tested before using it for drinking.
Drilling a well can be a long process, but if you can save money and learn a new skill at the same time, why not give it a try? It’s a matter of getting back to basics and doing more for yourself.

Ok! This is not an easy task, and I recommend that anyone thinking about doing it AT LEAST consider having the well pump identified as the failed component by a professional prior to undertaking it. In my case, the water in my house stopped working (on a Friday night, of course). I know my system pretty well and was able to determine that the fault in my system COULD NOT BE ANYTHING BUT my well pump motor before I took any action. Guess what? I called the plumber anyway. If nothing else, you"ll pay $60 to have your diagnosis confirmed and maybe even get an estimate that will provide you with the motivation to do the job on your own. (My estimate to pull and replace the well was $2400... By following these steps I was able to do the job myself for less than $400!)
So this is what we start with. The drawing is not to scale, but essentially most wells look a bit like this. There are several different variations on what ends up being pretty much the same thing. In my case, the casing (which is the steel pipe that everything fits into and goes into the ground) has a 6" diameter. Some casings can be as narrow as 4". If you"re doing something like this on your own, wider is better! A 6" well casing gives you plenty of room to work on your own. Narrower casings can make things... complicated.
The well used in this example is relatively shallow. It only runs about 100"-120" deep. Some wells can run to depths of hundreds (or thousands!) of feet. In the case of anything deeper than about 250" I would recommend that you have it pulled by a pro. Why? Because it"s HEAVY! And there are special tools that contractors have to lift the pump from that kind of depth. Look at it this way: Even if you have someone else pull the well, you can do the repair/replace action on your own once it"s out of the ground, and still save money. ;)
My well was dug about 25 years ago. One of the things that happens with older wells is that, over a period of several years, silt from the aquifer can seep into the bottom of the casing. That"s a bad thing. Why? Because the silt builds up to a depth that"s too close to the pump, and the pump ends up sucking up the silt and muck from the bottom of the well, and then pushes it into your house! (You"ll see the result of this kind of thing in the following pictures.)
The weight of the whole pump assembly hangs on the water hose that the pump uses to push water into the house. Up near the top the water tube hits what"s called a "pitless connector," where it makes a hard right turn toward the house.
See how the pump looks a bit like a bottle made of two pieces? The bottom part is the motor. The top part is the impeller that sucks the water out of the well and sends it to the house.
When one turns on the sink to wash one"s hands or when we flush a toilet, we tend to think that we"re pulling water directly from the well to do it. In actuality, we"re not! In a properly outfitted house, you"re pulling water from a pressurized tank that acts as sort of a "middle man." (Some artesian wells don"t have this set up, but let"s pretend they do!)
When you turn on the water to wash your hands or flush your toilet, the amount of water stored in the pressure tank is reduced. Reduced water in the tank means reduced pressure. The pressure switch on the tank is set up so that it knows what point to turn ON the pump (pulling water up from the well to replace what you"ve used), and what point to turn OFF the pump (to keep your system from exploding). Having a pressure tank does two things for you:
Ideally, your well pump should be able to push more water than above-average household use will require. (Most houses are recommended to have a pump that will support 5 gallons per minute.) That way, more water per minute is pushed up from the well than you can (normally) expect to be able to get out of a sink, or a shower. By having a pump that exceeds your practical use, the pressure tank is able to maintain steady flow. There will always be more water available to the tank than you can pull from the tap. With the right pump, you can have two showers, a sink and a toilet all flowing at the same time without any discernible drop in pressure.
Once you"ve made your wrench, you just stick it down into the well, thread it into the connector and get ready to PULL. While you do that, make sure someone is holding onto the safety rope! If anything goes wrong, and your partner happens to NOT be holding the rope, the well pump will fall into the abyss... lost forever.
Once the cap is off, take a look down the well with a flashlight. You should see something that looks a little like this image (which I "borrowed" from a google search, because I forgot to take my own picture). You"ll see utter and complete darkness at the bottom of the well... maybe some water, if it"s shallow... and the pitless connector on the inside of the casing. You"ll also see your safety rope, and the electrical wires that power the motor.
As you can see, the pitless connector is where the water makes "a hard right turn" out of the well and toward your house. It"s a pressure fitting, and it"s usually made of brass. On most wells they"re about 4" down from the top of the well... which means they are usually BURIED... which is scary.
"Why are they buried?" You may be wondering. "It"s awfully inconvenient for them to be down so far in the well." Yes! It is... but that"s just the way it has to be. Pitless connectors have to be located BELOW the frost line for your area. If they aren"t, all it will take is one really cold night to freeze up. As I mentioned above, the connectors are usually brass. Brass is a soft metal. It doesn"t take much for it to split.
Seriously. Very gentle taps with a hammer as you turn the wrench should do the trick. It will allow for you to thread the pipe fully. It worked beautifully for me.
B) Try to pull it up without being 100% confident that it"s got a good connection. Nice and snug! If you don"t have a snug connection, you take the chance of dropping everything down to the bottom of the well. If that happens, get yourself a shovel and a checkbook.
It"s very important that you NOT get any kinks in the water line (the black tube). So, pulling the pump is definitely a two person job. As one person pulls it up out of the well, the other person walks it (in a straight line or in a curve) away from the well.
Dogs are really helpful to have around when doing a job like this. Moral support is important. Especially when, after a couple of minutes pulling up the well pump, you realize that you"ve been making some very poor decisions about exercise and eating habits.
Keep in mind, the well pump (itself) usually weighs about 50 lbs. The water trapped in the tube also holds significant weight. The deeper the well, the more weight you"re dealing with. Plus, there"s that whole "physics and leverage" thing to deal with.
Bottom line: I"m guessing that I had to pull a 70lb weight, nearly 100 vertical feet. It"s quite a job. Forearms, back, hips, biceps... all of them hurt the next day.
Furthermore, up until this point, I had no idea what kind of well pump was down there. They come in various configurations of power, voltage, number of wires, and number of gallons per minute. Normally, the Horsepower Rating is written (as a courtesy) on the underside of the well cap. No such luck here. I had to pull it up just to find out what it was. You may be in the same boat when it"s time to do yours.
Turns out that mine was a 3/4 HP Jacuzzi. They sold out to a company called Franklin Electric years ago. Since it was just the motor that fried, it might have been possible to order a replacement motor (which would generate significant savings), but that might have taken days or weeks to find/deliver. I didn"t want to measure the amount of time I was without water in terms of "days or weeks." Plus, this pump was so clogged with gunk that it wasn"t worth taking the chance on another failure. A whole new pump was definitely required.
Note: This is one of those moments where it"s good to get along with your neighbors. Thanks to mine, we were able to hose off the motor to find out exactly what the specs were. (See, the source of my water was sitting on the ground... Hence I had no water with which to hose off the pump!) The worn out pump ran on about 8 amps, and pushed about 6.8 gallons per minute. It"s a 220V, two-wire motor. That"s exactly the sort of thing you need to know when you"re buying a replacement. Make notes or take pictures of this information and take it with you to the store.
Let"s take a look at the cleaned-off pump. You"ll note the two pieces, (like in my drawing). The far left is the electric motor. The dirty clyinder in the middle-left is the impeller. The black stuff in the middle is a WHOLE LOT of electrical tape, covering the spliced electrical connections for the motor and the check valve that keeps water from flowing back into the well. The thing that looks like a bulb (toward the right) is called a "torque arrestor." Remember how I told you that my well casing is 6" wide? Well... the well pump is only 4" wide. The Torque Arrestor rubs up against the well casing and keeps the pump from spinning at the bottom of the well.
Also, did you notice that everything is resting on a couple of saw horses? Yet another application in which such a simple tool can be incredibly useful. If you don"t have a set I highly recommend picking a couple up for the purpose of doing this job. The ones I"m using are quite inexpensive, lightweight and strong.
In most cases there are going to be salvageable components. For mine, the torque arrestor was in pretty good shape, as were the hose clamps that held them onto the water line. Once you get them all off, set them in a safe place for later.
Since I knew that the well pump had been sitting in muck for who knows how long, it seemed like a good idea to shorten the length of the water tube. As you can see, I walked off about 10" of tube length from the well pump and prepared to make my cut. (By the way, I used a set of ratcheting pipe cutters. If you don"t have a set of these, they go for about $11 at home depot and they make life SO much easier when you"re doing plumbing.) Making the tube shorter would result in a shallower suspension and (hopefully) preserve the life of the new pump.
YUCK! That"s a 1" tube so full of compacted muck that it really restricted the flow of water to my house. NO WONDER THE PUMP FAILED! Keep in mind, we"ve done testing for harmful bacteria and a slew of other things on our well and it"s always come up clean... but still. Ew!
Before we head to the store to buy the replacement pump, we needed to make sure that the shopping list included EVERYTHING. We already knew we needed the well pump and the water line, but what kind of shape was the pitless adapter in? I know it looks rough, but it"s actually not that bad. I gave it a quick scrub under the garden hose, and inspected the O-Ring.
I genuinely recommend that you do a little searching around on the web for a replacement pump before jumping in your car and assuming that Home Depot or Lowes will have the one you need, in stock. I got extremely lucky. I didn"t search before I got in the car. The nearest store happened to have the pump I needed. I later learned it was the only one in stock within 30 miles of me! As luck would have it, it also turns out that this one produces TEN gallons per minute at a lower rated amperage than the original. (Hooray for improvements in technology!)
This Flotec pump had a sticker price of under $340. Since it was Memorial day, they gave me the 10% Veteran"s discount at Home Depot, (shameless plug for businesses that respect military service). In the end, it wound up costing me a little over $300. GOOD DEAL!
Note: This model did not come with the check valve, or the reducer needed to get down to the 1" spur I would need for the water line. Sadly, home depot didn"t carry the right check valve, or spur, for this pump. I had to go somewhere else for that.... a place that did NOT offer the Veteran"s discount and hence shall not be named in this instructable.
I got everything home and started throwing it together. Note that I DID NOT use pipe dope. I used Teflon tape. Pipe dope isn"t always safe for potable water, so it"s recommended that you just stick with Teflon.
Looking at the close-up picture of the assembly, there"s a 1 1/4" stainless nipple threaded into the top of the well pump, a 1 1/4" check valve (brass) and a stainless steel reducer (aka "spur") that goes into the hose line. I used my salvaged hose clamps to secure the new water line to the reducer.
Some people may read this and wonder, "What is a check valve?" It"s basically a valve that only allows fluids to move in one direction. Water can flow into your house when the pump pushes it, but it can"t drain back into the well when the pump stops. This is a vital component, because when your system gets pressurized the check valve keeps all the water in your house from dumping back down into the well. Kind of a big deal.
While you"re at the hardware store make sure to pick up a set of crimp connectors for the electrical connections. It should come with two connectors and some heat-shrink material. Strip a clean bit off of the wires coming from the house and crimp the connectors with a good pair of pliers. Slide the heat-shrink material over the connection and then heat it with a heat-gun, or a butane torch. (A lighter doesn"t get hot enough to do a good job.)
Once you get to this point, you"re ready to make sure the well pump is working. I forgot to take a picture of that part, but it goes like this: Get a BIG bucket (like a 10-20 gallon plastic tub) and use your awesome neighbor"s hose to fill it up with water. Then submerge the assembled well pump into the water, making sure water covers the impeller intakes.
Then put your cell phones to good use. Have your assistant go down into the basement and flip the breaker that will turn on the pump. You should immediately see it sucking water out of the tub at a rapid rate. If it does, the pump is ready to go back down in the hole!
Feed the pump back into the casing slowly, using the safety rope. Line up the pitless connector, using a flashlight. Slide it into place and then seat it fully by giving it a couple of downward whacks with a hammer until you feel it seated properly.
For the pressure tank to work correctly, the ambient pressure (while completely drained) has to be -2lbs from the pressure at which you want the well pump switch to kick on. I like my water pressure to be between 55 and 75 psi. That means, the ideal air pressure for the bladder in the tank was about 53 psi. I hooked up an air compressor and filled it until it reached that point.
Not performing this step will cause a variety of problems, not the least of which is "short cycling." If you have too little (or too much) air in the tank it can throw off the actual volume of water the tank will hold. That can lead to the pump constantly switching on/off... which eventually burns out the pump, or the pump switch. Not good.
What you"re looking at here is a well pump switch. They come pre-set for 30/50 and 40/60. The first number is the psi at which the switch will sense the pressure in the system is too low, and it will turn the pump on. The second number is the number at which the pressure in the system makes the switch say "Okay... that"s enough."
This well switch is brand new. I bought it the night before I replaced the well pump, hoping that it would fix my well problem. Obviously, it didn"t.
Anyway, I don"t like it when my water pressure is set for 40/60. I like it to be at about 55/75. This particular model of well switch is adjustable. With a few turns of this nut, I can raise the ratio to the place where I want it.
You have to be VERY careful when you do this, and I don"t recommend that anyone try it. The reason I do it, is that it lets me make my adjustments without constantly having to reset the breaker. I tweak it, and let the pressure tank fill up. I then use the valve underneath to release water pressure. As I release the pressure, I watch the gauge to see what point the switch kicked on. Once I adjusted it to the point where the pump flipped on at 55 psi, I was good to go.
First, you have to calculate the volume of water that"s in the well. In my case, I"m going to guess that it"s about 70" of total water space in a 6" tube. Using the formula πr²h (3.14159x9x840) you get a total volume of about 23,750 cubic inches. That"s about 102 gallons of water occupying the well at its fullest point.
Proper chlorination requires 3 pints of 5% chlorine bleach per 100 gallons of water in the well, PLUS 3 pints of the same to sanitize the plumbing inside the house. That"s a total of 6 pints of 5% chlorine bleach. A gallon is 8 pints, so a single gallon will be enough to do the job AND sanitize the well cap before I put it back on.
Here"s what you do: Dump about 3/4 of the gallon of bleach in the well (with the water pump still on, so you can still use your hose). Then run your hose down the well to circulate the bleach. This process WILL pull bleach water into your house, so don"t plan on using the water during this process. Run the hose for about an hour to get the water from the bottom all the way back up to the top, ensuring that the chlorine mixes with ALL the water in the well. Then use the remaining 1/4 of the bottle to sanitize the well cap. Put the cap back on and go inside.
Repeat the process using the HOT water. It"s going to take a little longer for the bleach smell to show up, because the water from the well is going to have to make it through your water heater, and then up through the hot water pipes.
Go to sleep. It has to sit for at least 12 hours, undisturbed. No sinks. No flushies. No washies. The next day, hook up your hoses and start purging. DON"T SUCK THE WELL DRY WHILE YOU DO IT. Also, DON"T DRAIN THE BLEACH WATER INTO THE LEECH FIELD FOR YOUR SEPTIC SYSTEM. Remember, there were about 100 gallons in the well, so figure out how many gallons per minute you push through the hoses and stop when you hit about 150 gallons through the system. In my case, that was about an hour and a half.
Make sure you dump the water someplace safe. Run each tap for a couple of minutes. Give the toilets a flush or two. Then test the water for chlorine content to make sure it"s safe to drink with a kit you can get from the hardware or pool supplies store. Keep running the water until the test comes back at safe levels to drink.
Thanks for reading! I really hope that this instructible is helpful for those of you that find yourself in a spot of trouble, and for anyone that"s just curious about how this process works. It was my first time going through it, and the main reason I put this together was that I couldn"t find a really good resource that guided me through the whole thing, step-by-step. This is my way of paying the world back for all of the little kindnesses I"ve experienced in life. If you ever find yourself in a similar position, regardless of the topic, I would ask that you consider doing the same. You never know who you might be helping!
I"ll spare you all the details of what I went through to figure out the problem. Bottom line: When I replaced the well pump, I probably should have replaced the electrical wiring going down to the pump. Two reasons for this:
1) The wire I inherited was some kind of specialized, 12 gauge, submersible pump wire. Old school. Prone to problems. It didn"t have a ground wire, which I thought was weird at the time but figured the previous pump had been working for years without it... so... made due with what I had.
2) That old school wire can go bad on you. Even with a torque arrestor in place the pumps can spin inside of the casing, which twist the power line. If given enough time, the wire will eventually break... which is what happened to me.
The moral of the story: Replacing your electrical wiring only costs about $150 (if you go with the high-end, 12 gauge, no-casing, submersible wiring you can get at places like Lowe"s). The good thing about the newer stuff is that it doesn"t tend to break when it gets twisted up. If you don"t want to have to pull your well pump up out of the casing again, just to change the wiring three years after you did the job, maybe take care of it while you have it out of the ground the first time.
Just looking at the pictures of the slimy red gunk in your pipe and around your pump makes me think you should do some googling on "Iron Bacteria". I can"t be certain but it could be a possible cause of your issues.
When selecting the replacement pump don"t just assume that the last guy chose the perfect pump for the job. After all there could be a reason the original pump failed. I would recommend going back to basics and select a pump based on:
Pump ends are made up of a stack of impellers. Each impeller increases the pressure developed by the impellers below it (without increasing flow). So a shallow well might need a six impeller pump, while a deep one will need more. Perhaps twenty or more. The upshot of this is that there are hundreds of motor/pump end combinations to choose from, and while it"s not a particularly exact science it"s important to choose one that will operate happily in your application. You should be able to find pressure/flow charts on pump company websites and catalogues.
Sorry, got a bit carried away there. My brother and I used to own a pump company (Pumpmaster Australia) so pumps have played an important role in my life.
Iron bacteria! Thank you for the tip. We"re in a situation here where the house had two owners before we bought it in 2011. The first owners were amazing. The second owners were really nice folks, but the word around the neighborhood (and the evidence we"ve seen around the house) is that they were not "maintenance people." We"ve gradually been replacing the big-ticket items as they fail from the years of neglect. I"ve already replaced most of the plumbing between the well pump switch and the house, including the water softener and neutralizer. They were both so clogged up with gunk that the valve systems failed. (Nothing like a mouth full of salt water after a regeneration!)
We"ve had the well checked for harmful bacteria a couple of times. It always comes up clean. I don"t know for sure if they test for stuff that isn"t particularly harmful. Now that you"ve mentioned it, it"s definitely on my radar. I had never considered that bacteria might be the cause of the sediment sticking to the plumbing.
Hi. I don"t have a solution for cleaning out your pipe, but I"m not a plumber. I"m sure there must be a way. Maybe you could put the question to the Instructables community via a forum topic.
I guess you live in a place with cold winters. I"ve never seen a pipe buried so deep. That must really complicate things. Bores in Australia just have the pipe coming straight out the top of the well. No need for that pitless connector.
I don"t need to fix a well nor do i own a house or a well but this was so well written and interesting I had to read the whole thing it"s interesting how these things work look forward to more instructabels from u in the future thanks for the great ible
2) This was my first "ible." It has been so well received that I think I am now hooked. You will definitely be seeing more from me, and I hope they are as entertaining and informative as it appears this one has been.
3) Service is as service does. I"m just glad to be useful. Whether it was in uniform, or in my own back yard, it"s all the same: A little bit of effort can make the world better, often in ways we did not anticipate.
Yep, works fine....Started out knowing jack shit about well pumps, about to call a pro for a emergency repair in a rural area...sent your instructable to my brother, mom, and dad...we all reviewed it, made notes, shopping list...printed/saved it to have on hand...got it done no problem....like seriously a life saverReplyUpvote
Side note for those reading this. Your probably passed this point and its a rare case but possibly note for the future. The other night we were struck by lightning. After a little over a $1000 of repairs to my electrical system ( not including labor, im an electrician) i got power restored but didnt think of testing my well pump. It was only running on one leg (120 v not the 240v its supposed to) . It was operating at a severely reduced rate and potentially energized my water. I dont think i need to get into why its bad and unsafe but if this happens make sure you mention to a qualified electrician doing the damage inspection that you have a well. There is alot of components to an electrical system and your well can be easily overlooked. Make sure you well pump gets megared ( insulation tested) before its put back into service. It also a good test for suspected pump failure aswell. Its a pass or fail test. If its within specs your safe if its not it needs to be replaced
You sir, are a scholar and a gentleman! Thanks to your amazing and detailed description, I felt confident enough to tackle this task, which I managed to do, start to finish. I’m now enjoying the amazing water pressure and volume of a brand new deep well pump! I owe you a big debt of gratitude.
Hey, my DIY husband is attempting this on a 95° day with high humidity. Just wanna thank you for the great instructions/images. He"s not in the mood to answer questions, yet I"m the one running to the hardware store. Especially helpful was the pictures of the gunk in the pipes. Instead of gagging and running away, I simply nodded my head and agreed to get more pipe. Another marriage saved!
I, for the first time, just completed this project too. I however had a bad tank that I replaced as well. The tank is likely what took the pump out. Anyway, between watching dozens of YouTube videos and a lot of reading, I was confident enough to tackle this. Just for those that are wondering, total cost was $950, and I got 2 different quotes of $2800 and another at $3100 to do this job! The whole project took about 12 hours total, 2 days off from work, and some help from my awesome brother! Lastly, and I should have led with this, but this instructable is seriously the absolute best one for this project out on the internet that I found. He really covers everything! Thanks for sharing. It truly helped to give me the confidence needed to tackle this. I saved $2,000! Full disclosure though, I am an extremely accomplished DIYer, I own many, many tools, and have a strong knowledge of plumbing, electrical, and carpentry. I occasionally help a good friend with his home improvement business.More CommentsPost Comment
This article describes the foot valve used on well piping for water well Pumps & Water Wells: we explain what a foot valve is, how they work, why they are used, and how to diagnose troubles with this special in-well check valve found at the bottom of well piping in some wells.
Where do we find the foot valve (if any) and why are foot valves used on pump and well systems? Is it a good idea to use more than both a check valve on a pump and a foot valve on the well piping? Causes of well & pump foot valve failure.
Carson Dunlop Associates" sketch (left) shows the main parts of a one-line jet pump well installation. Nearly all well pumping systems, one line jet pump, two line jet pump, or submersible well pump, require a foot valve installed at the bottom of the well piping.
Watch out: without a working foot valve, a shallow well jet pump is likely to lose prime and will stop working properly, risking loss of water supply to the building and even damage to the pump itself.
As you may guess, a foot valve is basically a check valve combined with an inlet strainer (visible in our page top photograph). The strainer prevents picking up large debris that could clog or jam the foot valve in its open position (or that might damage the water pump itself).
The check valve is a one-way valve that lets water flow up from the well and into the well piping. The spring loaded check valve closes when the well pump stops pumping.
the well (inches to a few feet). We need this clearance to reduce the tendency of the well pump to pick up mud and debris from the bottom of the well.
I have model pkg 1-54AP 2" single pipe jet kit for a sta-rite sld-l 3/4hp jet pump. Does the jet package come with a built-in check valve and if it does, do I need a foot valve? Thanks! - David
The foot valve is placed at the bottom of the intake water line in the well; since your jet pump is above ground, it"s a physically separate component.
It"s true that some jet pumps include a check valve in the nose of the pump; and it"s also true that some experts recommend only using a single check valve. If your well is quite shallow, say less than 27 ft. you might get away without a foot valve. But if I were installing new equipment including piping into the well, I"d put in a foot valve - as the most reliable component, and because it"s easy to do now and more trouble to add later.
The pressure difference necessary to open a foot valve or check valve is defined as its "cracking pressure" the pressure necessary to overcome the spring or the weight of water used to keep the valve closed when the pump is off.
Ball type check valves are used most-often on pumping systems that include either thick liquids or sewage, as the valve design, a full-ported valve seat, resists partial blockages that prevent the valve from closing when it should.
A flapper type foot valve uses a hinged rubber (or in older valves leather) flapper, a flat bit of material that is hinged on one side, usually the top of the valve. The weight of water against the flapper closes the valve when the pump is off. When the pump is on, suction and thus reduced pressure on the inlet side opens the flapper to allow water to flow.
Spring type foot valves use a spring to close a round "poppet" or closure stopper when the pump is not running. When the pump runs suction on the inlet side (reduced pressure) opens the valve against spring pressure. When the pump stops the spring pushes the valve closed.
Both foot valves and "check valves" are sim


 8613371530291