
how to weave overshot brands

One of the great things about having been a blogger for 12 years (did I actually just admit that?!) is that you occasionally get to look back and see how very far you’ve come.
Over three years ago, when my David Louet floor loom was still somewhat new to me, I wrotethis post on overshot. If you read it, you will discover that my initial relationship with overshot was not a very positive one.
Back then, I was a little harder on myself as a learning weaver. By now, I’ve realised that weaving, just like life, is a journey that has a beginning but no end. Back then, I thought that my ultimate goal was to be a “master weaver”.
Honestly, I don’t even really know what that means but it no longer matters to me. I just want to be the best weaver I can be, but even more importantly, to continue to be fulfilled, challenged and rewarded by doing it.
The happy ending to the initial overshot sob story is that I can weave overshot now. Quite well, in fact! And I also teach it. And I happen to love it, very, very much. Don’t you love a happy ending?
I don’t think there was any particular moment where I thought to myself “I can weave overshot now!” I didn’t even weave any overshot for quite some time after that initial attempt. But slowly it tempted me back, and we started over. It was just a matter of sticking with it, employing some specific techniques and practice, practice, practice until it feels like an old friend.
My love of overshot has only increased with my more recent discovery of American Coverlets. I loved the look of the coverlets and the history behind them before I realised that so many of them were woven in the wonderfully humble 4 shaft overshot.
I’ve put a lot of research time into coverlets this year and have made it a big weaving goal of mine to weave my first coverlet, which is quite an undertaking, but I relish the thought.
Now that I have quite a lot of experience weaving overshot, I want to share my best overshot tips with you in hope that you too will fall in love with this wonderful weave structure.
I know, I know, sampling takes time and yarn, it’s true. But it teaches you so, so much. It can also be more economical, as you can test your yarns out for suitability before committing to a larger project. Trust me, sampling is so well worth the time!
To weave overshot you need a warp yarn, a tabby yarn and a pattern weft yarn. Using the same yarn for warp and tabby works perfectly. For the pattern weft, I like to use a yarn that is twice the size of the tabby/warp yarn. I have experimented with using doubled strands of tabby/warp yarn in a contrasting colour, but it just doesn’t look as good. A thicker pattern yarn is the way to go.
What will the size of your item be? A miniature overshot pattern may get lost in a blanket, but may be perfect for a scarf. As a general rule, a good way to estimate the size of one repeat of your pattern just by looking at the draft is to see how many repeats are in one threading repeat. Also consider the thickness of your yarns and the sett you intend to weave.
Just to give you an idea, my current project is woven at 20 ends per inch with 8/2 cotton for warp and tabby and fingering weight wool for the pattern weft. The weaving draft has 50 threads in one threading repeat. My design repeats on the loom are around 2.5″ wide and just under 5″ long, which is a great size for the 30″ x 99″ throw I’m weaving.
I throw my picks gently to avoid drag on the selvedges and therefore preventing excessive draw in. I give a generous angle to the weft pick and keep it soft at the edges. I do adjust the picks at the edges before beating when necessary, but mostly I prefer to leave them alone and let them settle into place on their own.
This is a non negotiable for overshot if you want neat edges and less headaches! You get used to using floating selvedges very quickly, so don’t stress if you have no experience with them.
This is another selvedges tip. I’ve experimented with crossing the two weft yarns at the selvedge to see whether it gives a neater edge, but it doesn’t, at least for me. So, instead of twisting the two wefts at each selvedge when throwing a new pick, I just let them follow one another sequentially and my edges are much neater that way.
Besides the thickness of the pattern weft yarn, you will also want to consider what kind of bloom it may have after wet finishing. For example, I know that my fingering weight wool blooms beautifully, whereas a cotton of the same size would not bloom in the same way. I very much like the contrast of the 8/2 cotton background with the plump wool pattern weft.
I’m going to sound like a broken record, but once again, a sample will show you everything you need to know about how your yarn will behave as a finished piece.
I’m often surprised by the potential of yarns to leach dye in the wet finish process. I’ve had certain yarns that I’ve used frequently that will leach dye sometimes and not others.
This is a particular problem if your colours and white on red or navy on white – you want to preserve that white and not have it come out of the wash as a pink or light blue!
The best way to avoid this is through vigilance, especially in the first 10-15 minutes of your woven piece making contact with water. If you see dye beginning to run, take it out of the warm wash and rinse in cold water until the water runs clear. Place back in the warm water and maintain your watch on it. Repeat the rinsing process if needed.
There are 6 treadles needed for overshot, even though you weave on 4 shafts. The two extra treadles are for the tabby weave. I always set up my pattern treadles in the centre of the loom – two on the left and two on the right. Then I set up a “left” tabby and a “right” tabby treadle. To do this on my 8 shaft loom I leave a gap between the pattern treadles and the tabby treadles so that my feet can “see” and differentiate between a pattern and tabby treadle.
I like to advance little and often. You will find your own preference or “sweet spot” for weaving, but I find that with overshot I advance a lot more frequently at a much smaller amount than I do usually.
The firmness of beat will depend on a few things. Your chosen yarns, the weave structure, the width of the project and the tension your warp is under are all important considerations. I let the project dictate.
An example of this is that I wove an overshot sampler right before Is started my main project (the throw). It was a narrow warp (around 8″) and a different overshot threading and treadling than I’m using for the project.
But for my throw project, I am beating harder and sometimes having to beat twice. Because of the width of the project, I need to be careful that I’m beating evenly, and that is easier to do if I’m beating more firmly.
I personally do not use a temple. Some weavers will say they won’t weave without one. I’ve tried using a temple on many of my projects, particularly if I’m getting broken edge warp threads (signs of tension problems and too much draw in). But I will avoid using one wherever I can get away with it, and I don’t use one for weaving overshot.

Overshot is a magical structure. The first time you weave it you can hardly believe the cloth that grows on your loom. Traditionally used to weave bed coverings, overshot has many beautiful applications in today"s world, from useful household textiles to breathtaking works of art. This versatile weave is subject to endless variations. Here are a few of our favorite tips and a few truly spectacular projects, too! If you are inspired, come visit us and learn from a master weaver, Joanne Hall. See details below about her workshop.
A slouchy bag by FiberMusings on Weavolution pairs leftover BFL singles with sturdy Cottolin to create a fashionable yet functional multi-colored bag. The draft is a design from Ann Weaver"s Handweavers Pattern Dictionary, and it"s a great way to integrate Overshot techniques while making an eye-catching accessory!
Another project that caught our eye recently was a shower curtain shared by GailR@30 shared on Weaving Today - it"s nothing short of amazing (click here to see for yourself)! Consisting of thirteen different overshot pattern threadings woven in thirteen different treadlings, 169 different design effects are created based on designs from Osma Gallinger Tod"s book The Joy of Handweaving. As Gail noted on her project page, a great way to make each design stand out is to separate them with twill bands (even though it might mean a little more work in the process!)
Or, you may choose to elevate your weaving like the work of art it most certainly is, as Evaweave did with her Overshot Study pieces. These two miniature silk rugs look lovely in a frame, don"t you think? The overshot pattern was adapted from Overshot Weaving by Ellen Lewis Saltzman, complementing one another perfectly.
Think overshot is too difficult to try? Deb Essen thinks otherwise! Fiber artist, designer, and teacher, Deb is a passionate weaver who specializes in using overshot name drafts to create "secret messages" in cloth.
On her website, she explains: "Overshot is a weave structure and a draft is the weaver"s guide to creating patterns in cloth. Overshot name drafts assign the letters of a name or phrase to the shafts on a loom, creating a pattern that is unique. The one-of-a-kind patterns become a secret hidden message in the cloth and only those knowing the secret can break the code."
Deb lets you in on the secret with her clever kits, each with a hidden message. We"re particularly fond of her That"s Doable kit, which features Mountain Colors hand-painted yarns and, as the name would imply, is our first choice for those new to overshot weaving.
In the video, I mention learning how to weave Krokbragd. If you are interested in learning about this weaving technique, I encourage you to check out our course at the School of SweetGeorgia, Weaving Krokbragd, taught by Debby Greenlaw.
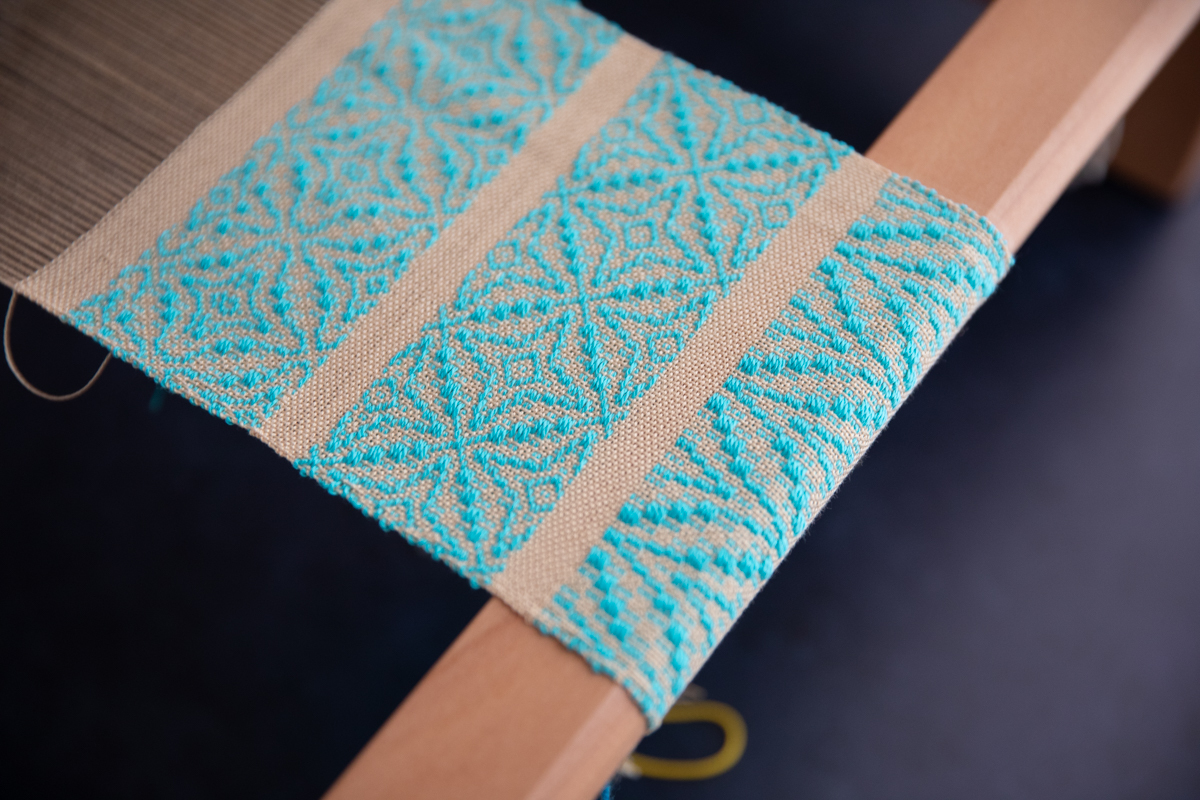
The overshot weaving project shown is woven on a 16″ Ashford Table Loom 8 shaft, The yarns used are Ashford 100% mercerised cotton in 10/2 and 5/2. (We don’t have this yarn currently listed on our site, but we’re able to order it in for you. Send us an email at: info@sweetgeorgiayarns.com!) The pattern is Overshot Sampler from the book Next Steps in Weaving by Pattie Graver
Congratulations to Katrina at Crafty Jaks as she just hit publish on the Crafty Jaks – The Inquisitive Crafter YouTube channel! If you love spinning, dyeing and wool, please go check it out and subscribe.

This website is using a security service to protect itself from online attacks. The action you just performed triggered the security solution. There are several actions that could trigger this block including submitting a certain word or phrase, a SQL command or malformed data.

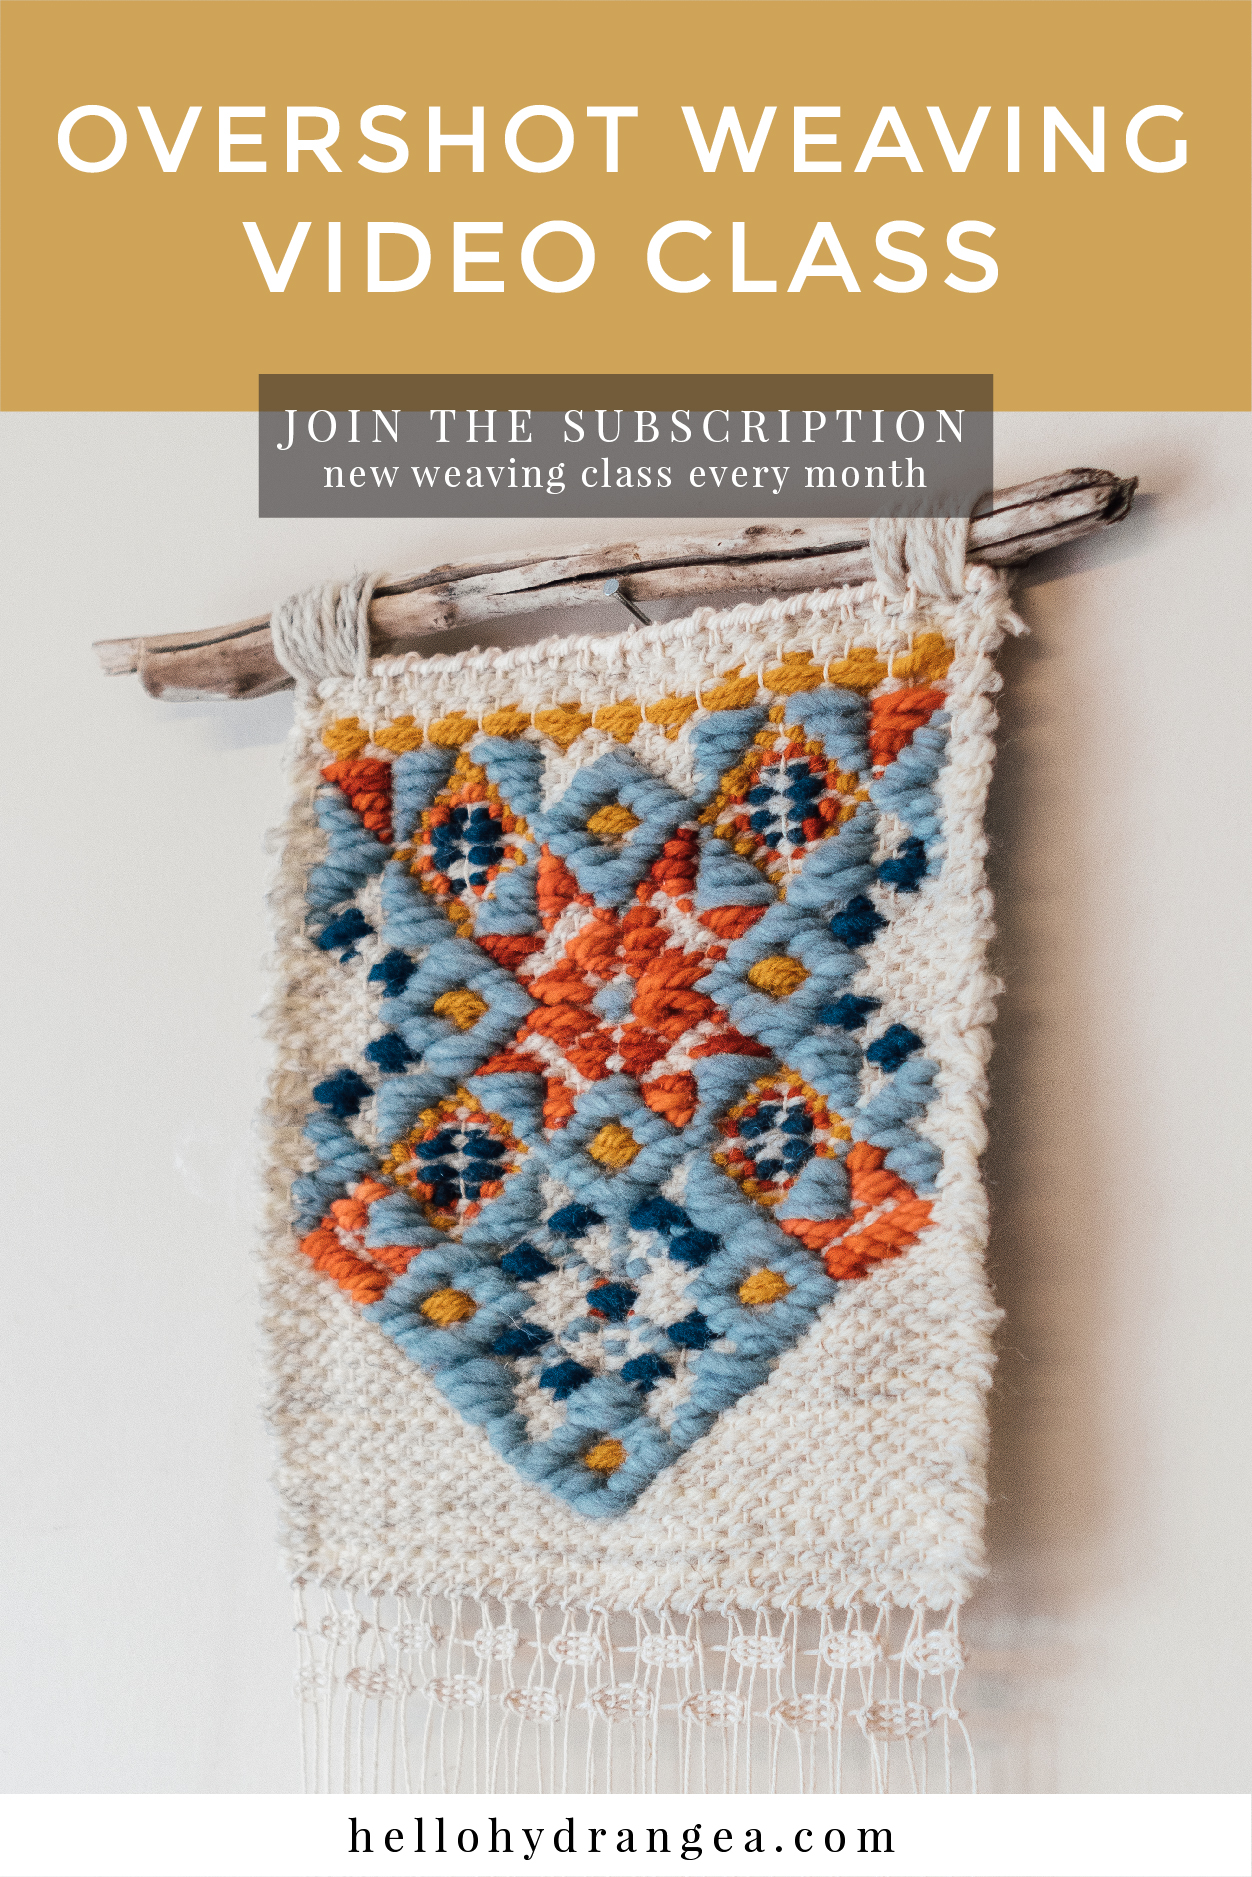
Learn how to weave the overshot technique. Overshot is a supplementary weft weaving technique that allows you to create patterns on the surface of your tapestry that are much more detailed than you would be able to create with regular tabby weaving. In this video class I"ll show you step-by-step how you can master this weaving technique with detailed instructions and patterns. #diyweaving #weavingart #yarncrafts #helloyhydrangea
Classes are emailed to you as a downloadable pdf ebook. Just save the pdf to your computer, device or cloud storage - you have access to it forever! You can work at your own pace. Inside the ebook are links to videos. Use whatever materials you have on hand to practice the techniques.
Patterns, videos, written instructions, photos, and pdf designs are copyright. If you purchased a class and created the project, you are more than welcome to sell the piece if you wish. You made it, so be proud! However, please do not purchase my classes and share/sell the techniques or patterns via YouTube, Instagram Stories/Posts, Workshops, etc. I only ask that while you are showing off your amazing new skills, you send anyone who is interested in learning my way, instead. Thanks!
No refunds on digital classes due to the nature of these products not being able to be returned. Subscription membership can be canceled by logging into your account and canceling your subscription. You can also rejoin at any time. No refunds on physical products, such as looms or kits. Please reach out with any issues and I will work to resolve the problem with you. Thank you!

[et_pb_section fb_built="1" admin_label="section" _builder_version="3.22"][et_pb_row admin_label="row" _builder_version="3.25" background_size="initial" background_position="top_left" background_repeat="repeat"][et_pb_column type="4_4" _builder_version="3.25" custom_padding="|||" custom_padding__hover="|||"][et_pb_text admin_label="Text" _builder_version="3.27.4" background_size="initial" background_position="top_left" background_repeat="repeat"]
Supplementary-weft weaving has been around for a very long time. There’s evidence of it in some of the earliest weavings from India and Egypt including in the tomb of Tutankhamun. The idea of creating a decorative fabric by weaving a simple tabby cloth simultaneously with a contrasting, superimposed pattern has shown up in cultures worldwide; Latin American brocades, Branoe or branded folk weaving from Russia, Smalandsvav in Sweden and Skillbragd in Norway inlay/overshot techniques, Sanga and Songket from Southeast Asia, Saga Nashiki from Japan, traditional Slavic weaves often used for belts, and American overshot coverlets from the 18th century all create a similar fabric structure using variations of decorative supplementary weft over a plain, tabby background. Many of these techniques even have motifs in common, despite being separated by great distance and time, most likely due to human migration. As is the tradition with many crafts, each province, prefecture, county and clan typically used a specific weaving designs to distinguish the area where it was made.
There are techniques that use a more freeform approach, like the figurative works from Peru, Mexico, and Guatemala, as well as many from India called weft-float patterns. These fabrics usually include individual figures or animals and are woven with a discontinuous supplementary weft. A distinction can be made for color changes across a row, between continuous supplementary wefts, where the pattern weft continues from selvedge to selvedge, and discontinuous supplementary wefts, where the pattern weft only travels across a portion of the row. Most discontinuous styles use different colors traveling partially across the same rows similar to tapestry weaving, to create different figures.
One night, while browsing weaving videos on Youtube, as I often do, I stumbled on the little known technique called Branoe weaving from Russia. I love the rigid heddle for it’s ease and portability and especially for the small commitment with speedy dressing that gets me weaving in a very short time. I quickly realized while watching all of Kelly Casanova’s fascinating videos on Branoe weaving that something about it was very familiar. I also love to do Fair Isle, stranded and mosaic knitting. Each is done by following a simple gridded chart and working one stitch at a time across a row to create a beautifully patterned fabric. I tried the Branoe technique from the video and ventured off into a rabbit hole that I still haven’t emerged from that resulted in a book called “Crazyshot!- Creative Overshot Weaving for the Rigid Heddle Loom," - a deep dive into combining traditional charts from various fiber arts and the Branoe/overshot styles of weaving.
Simply put the cloth is woven by alternating picks of tabby weave that match the warp in weight and color with a heavier yarn that follows a chart for a patterned relief that sits on the surface of the fabric. One of the coolest things about this method is that the fabric is entirely reversible since the pattern sits over both the front and the back. While it’s definitely a labor of love to sit and pick every other row individually, I find it very meditative and rewarding. Most forms of overshot weaving on the rigid heddle loom, where the fabric and decoration are woven together with different thicknesses of thread or yarn, usually entail a laborious preset of multiple warps and or heddle rods with string heddles mimicking a four shaft loom. Because rigid heddle looms typically only accommodate one or two heddles, additional pick-up sticks or heddle rods with string heddles are often employed. There are even some methods where three heddles are employed and used in various combinations to duplicate all four shafts. In this case the overall design is predetermined and warping through each heddle follows a very specific route based on the pattern chosen. One mistake in warping can cost you the entire outcome of the fabric.
What makes Branoe and the simple supplementary-weft techniques so exciting and accessible to anyone who can weave a plain cloth is that it uses only one heddle and one pick-up stick to create complex-looking patterns with endless variations. A multitude of patterns can be created including some which would be impossible to weave on a multi shaft loom. It’s also very easy to correct mistakes by watching each row as you weave, much like knitting, and unweaving incorrect rows before you progress.
Because fabrics made with a supplementary-weft techniques tend to be thicker and firmer than plain weaves, most are used for decorative home goods and accessories. These fabrics may not be suitable for clothing, where drape is a concern, but can be used as beautiful borders. I’m currently experimenting with weaving different weights of thread and yarn to see if I can produce a more wearable fabric. The adventure continues! More info about Crazyshot with lots of photos can be seen at: myrawood.com/crazyshot

Overshot is known as a coverlet structure, but it’s also ideal for placemats, runners, blankets, fashion accessories, table linens, rugs, and much more. Just about anything you want to weave can be done in overshot.
Our class project is a series of coordinated placemats and table runners, woven in inexpensive, easy to get materials you may already have in your stash. You’ll choose from three different threadings composed of classic overshot motifs, then treadle them in star fashion, rose fashion, and many other ways.
Don’t feel like weaving placemats, runners, OR samples, or don’t have a loom available? No problem! You can still participate in the class without weaving at all. The lessons, videos, Q&As, and pen and paper exercises will help cement your understanding of overshot even if you don’t take it to the loom right away.
In order to weave the class project, you"ll need a shaft loom with at least four shafts. Table or floor; direct tie-up or lamms and treadles; jack, counterbalance, or countermarche – it doesn’t matter! They’ll all work!
Don’t have that kind of loom? No worries! You can still read, watch, listen, and do all the pen and paper exercises. Your deeper understanding of overshot will be beneficial when you do have a loom to use it on or decide to explore how to weave it on the loom you already have on your own.

Elegant patterns on a Rigid Heddle Loom are easier than you can imagine! Crazyshot - creative overshot weaving - introduces anyone who uses a rigid heddle loom to a whole world of creative weaving. Using just one heddle and one pick-up stick, you"ll explore color, design, and texture, taking your weaving to the next level. Complete step-by-step instructions are included for weaving all 14 designs in this book. Also provided are how-tos for the single heddle overshot technique, reading charts for the rigid heddle loom, and finishing techniques, along with lots of tips and tricks for successful and satisfying results. Complex patterning is easier than it looks with this simple charted technique. All you need are basic rigid heddle warping and weaving skills to start your next weaving adventure! With one heddle and one stick, Myra Wood explores the art of working with ground and pattern wefts in this creative approach to rigid-heddle weaving. Known for her for colorwork across many mediums, Myra beautifully illustrates that complex does not have to be complicated. --Liz Gipson, Author of A Weaver"s Guide to Yarn and other books for rigid-heddle weaving and the host of the Yarnworker School

Ask most people what “overshot,” and most weavers think of American colonial weavers and their coverlets. While coverlets are represented here, this collection also includes projects that dazzle with color, drape with luscious softness, and take overshot in new directions. Scarves and shawls, runners (for table and floor), tablecloths and clothing—all appear in this comprehensive collection. Overshot, even in its colonial interpretation, was a miracle weave, allowing unbelievable patterning on only four shafts. Add to pattern the use of color and fine and luxurious yarns, and you’ll start your own love affair with overshot. This is the second eBook on overshot (see also A Baker"s Dozen: Top Projects in Overshot eBook)
This ebook, and all of Halcyon Yarn"s ebooks, are printed in full color on acid-free coated stock, saddle-stitched and ready for immediate browsing and convenient posting next to your loom.

Lots of people think that overshot must be a complicated 8-shafts-and-above weave structure, but that is far from true. Most overshot designs can be woven on 4-shafts, and once you get into a weaving rhythm of pattern-tabby-pattern-tabby, weaving goes smoothly as the beautiful patterns emerge on your loom. That said, designing and weaving overshot requires a bit more concentration than plain weave.
Here are five tips from designer Pattie Graver, author of Next Steps in Weaving, to ensure great overshot results. The first three are probably ones you’ve already heard about weaving other structures, but the last two are about looking at overshot designs and color choices in a mindful way.
I follow the advice of Helene Bress in The Weaving Book: “Identify a diagonal line that appears in the cloth as you weave and try to keep that at 45 degrees.” I keep a protractor by my loom!
Consider putting on at least an extra yard of warp in order to get a feel for the draft. This will allow you to test for proper beat, colors, and other “what-ifs.” I often put on a 6-yard warp and use at least half of the warp for sampling.
You may wish to choose a different starting/stopping point than the one specified. As you study the drawdowns, you will discover that some drafts have small sections that can be woven separately from the overall design.
A small portion of the overall pattern makes a nice border on this Primrose Table Runner designed by Norma Smayda and woven by Ann Rudman, Handwoven November/December 2017. Photo by George Boe.
If warp and pattern weft are too close in value, the overshot designs will not appear in strong contrast. Remember, too, that the eye follows light, so bits of lighter pattern weft add interest to the cloth.
Debbi Rutherford used name drafting to create this overshot pattern and then used a variegated yarn for her pattern weft. Handwoven January/February 2017. Photo by Joe Coca.

Have you ever been intimidated by the overshot weaving technique? This book will relieve your hesitations and misconceptions of a technique that looks more complicated than it actually is.
Author Kesler-Simpsonoffers an extensive discussion of the threading, treading and tie-ups for overshot, along with different ways to create borders and manage selvedges.
By supporting our store with your book purchases, you enable us to continue bringing you a comprehensive selection of weaving resources. Thread Collective is a family run business and is passionate about weaving; your support is truly valued.

Overshot weaving is an American artform of the Appalachian region of the United States. Overshot’s geometry may be familiar because of its ubiquity in coverlet weaving in that area in the 18th century. Its origins go even further back, its motifs appearing in northern Europe, the Phillipines and ancient Persia.
Overshot is a weave structure, woven on four harness looms. It is typically composed of a plain colored, cotton or linen warp (the threads held under tension on the loom) and a colorful, woolen weft (the floating yarn, wound onto a bobbin and passed through alternating warp threads). The warp threads are tied onto the loom in a sequence that allows for floating, woolen wefts to create the stunning, optical effects that lend overshot its distinctive patterning.
I was invited to design this pattern for one of my all time, favorite yarn stores, Ritual Dyes, who generously supported me through the design process and supplied the absolutely wonderful yarn! This project was made for their Fall Equinox pattern release as a part of a kit. The kit includes the printed pattern, the yarn and a little gift, all housed within a beautiful, hand screen printed bag. Find the kit, while they last, here:
Ritual Dyes Marona (DK weight / custom-milled 3-ply; 100% Cormo non-superwash wool; 225 m / 250 yds per 100g / 3½ oz). Two skeins are used for this project. For the kit we chose, Obsidian and Hazelnut
Only one needle size is given for this pattern. If it is necessary to size down for the rib or to size up for the colorwork, please do so. The samples pictured were knit on size #4 US - 3.5mm needles.
This pattern is worked using circular needles and the magic loop method. 32” or 40” needles can be used depending on personal preference. Keeping the stitches on a long cabled, circular needle makes for keeping better tension during the colorwork portion of the tam. If it is more comfortable to use a short cabled needle or double pointed needles for the brim and/or the crown please do so but remain mindful of tensioning.
This pattern is worked in two contrasting colors. One color will be worked primarily in knit stitches (stockinette stitch) and the other color will be worked primarily in purl stitches (reverse stockinette). These alternating stitches are what give the pattern its clean lines, texture and dimension. Therefore, it will be necessary to carry two yarns under tension at once! There are many ways to do this: Some knitters carry one yarn in the left hand and one in the right hand at the same time. Others may carry the purling yarn under tension and pick up the knitting yarn with left thumb and middle finger when it’s needed. Please find the most comfortable method for personal efficiency. There is no single correct way.
Italian tubular cast on is employed in this pattern for its elasticity and it is necessary for the pick up row where the hat band is folded and knit to itself. If a different cast on method is preferred, it may be used as long as it is sufficiently stretchy. Traditional long tail cast is not suitable for this project.


 8613371530291