
overshot weaving rigid heddle loom factory

Crazyshot - creative overshot weaving - introduces anyone who uses a rigid heddle loom to a whole world of creative weaving. Using just one heddle and one pick-up stick, you’ll explore color, design, and texture, taking your weaving to the next level.
Complete step-by-step instructions are included for weaving all 14 of the designs in this book. Also provided are how-tos for the single heddle overshot technique, reading charts for the rigid heddle loom, and finishing techniques, along with lots of tips and tricks for successful and
Complex patterning is easier than it looks with this simple charted technique. All you need are basic rigid heddle warping and weaving skills to start your next weaving adventure!

Whenever I hear a rigid-heddle loom referred to as a “beginner’s loom,” I can’t help but shake my head in disappointment, for while the loom itself might be simple, it is capable of producing complex cloth. If anything, the rigid-heddle loom is an everybody sort of loom—so I’m here to dispel some rigid-heddle weaving myths.
Let’s start with the thing I hear the most, that the rigid-heddle loom is a gateway loom to “real weaving.” Just typing that makes me cringe. It’s true, the rigid-heddle loom is perfect for people new to weaving. It is significantly less expensive than a multishaft loom, takes up far less space, and isn’t complicated or intimidating to those just learning the difference between warp and weft. Saying something is good for beginners, though, doesn’t mean it’s automatically useless for more advanced weavers. Sometimes you want to weave a project but don’t want to spend the hours needed to wind and warp a floor loom. Sometimes you want to just play with color and texture. Sometimes you want to weave outside. For all those times, there’s the rigid-heddle loom.
This one always makes me roll my eyes. The rigid-heddle loom is a very simple loom that’s set up to weave plain weave, but a simple loom does not mean simple cloth. Backstrap looms are very simple looms, and yet they are used to produce some of the most intricate weaving out there. Rigid-heddle looms make hand manipulation of threads much easier, and with the aid of a simple pick-up stick or two, you can create designs that would take dozens of shafts. You can also use hand-manipulation techniques to create warp or weft floats, Danish medallions, rya, Brooks bouquet, and other wonderful designs.
Okay, so this is less a rigid-heddle myth and more of an all-of-weaving myth. For some reason, plain weave has become synonymous with boring, similar to vanilla, and I’m sorry, but I love both plain weave and vanilla. Plain weave is a great structure for playing with color—you can weave stripes, plaids, or seemingly complex color-and-weave designs in plain weave. Use plain weave to showcase yarns with fun textures or color variegation. If you think plain weave is boring, then you’re doing it wrong.
First off, I just want to say that a real weaving yarn is whatever yarn you choose to weave with, whether it’s a run-of-the-mill 8/2 cotton or a crazy, textured handspun art yarn. If you can weave with a yarn, it’s a weaving yarn. That said, you can use yarns such as 8/2 cotton on your rigid-heddle loom to weave towels and napkins and whatever else you like. You can even use silks on the rigid-heddle loom. It’s true that “knitting” yarns and fashion yarns work beautifully on rigid-heddle looms, but there is no reason you can’t use other yarns on the rigid-heddle loom, too!
So there you have it, the rigid-heddle loom is a loom for every level of weaver, whether you want to weave nothing but beautiful plain weave or experiment with complex pick-up designs. It’s the kind of loom that you can enjoy and explore for years to come.

If you are lucky enough to have a local shop nearby that supports weaving, please support them. They can give you personal handholding when you need it, and they offer you the invaluable service of allowing you to get hands-on experience when picking your yarn, fiber, and equipment. Consider your loom, book, and other materials support of this service.
This page includes affiliate links from Amazon. I encourage you to support your local retailer, although I fully recognize not everyone is lucky enough to have a local book or weaving store nearby. The small income from these links help fund this site.
Craftsy/BluPrint was recently purchased by TN Marketing. There were a number of rigid-heddle classes available under the Craftsy brand. Keep an eye on their website for updates.
Below are manufacturers that currently manufacture rigid heddle looms. You may find other discontinued looms at a garage sale or online. Although they may seem like a bargain, many of the current loom manufactures have redesigned or reissued their looms with today’s weaver in mind. Buying a good tool is always worth the price!
*These manufactures have updated their loom designs. If you first experienced the rigid-heddle loom more than a decade ago, these are not the looms you remember. Advanced manufacturing technology has made more features possible. There is a good loom comparison chart posted in the Rigid Heddle Loom group on Ravelry that was compiled by triplr95 and Stella8523 and updated by Climberknits in October of 2017. This blog post I wrote on beams may also help you think about your loom choice.

Want to get started weaving on a rigid heddle loom? These are perfect for those looking to start weaving on an affordable, portable loom that can get you weaving quickly. This course walks step by step through the process of creating a project from beginning to end, using audio slideshows with clear photos and illustrations. From learning the parts of your loom to tying fringe on a finished piece, this course has everything you need to get started. The course includes a pattern for weaving your first scarf. Take the stress out of weaving with this friendly, thorough introduction!
There is so much you can do with a rigid heddle loom! It can be hard to know where to get started once you’re ready to branch out beyond simple plain weave projects. This course covers how to use colour, pattern, and texture to expand your rigid heddle horizons. Using audio slideshows, we talk through the theory behind each element, then move onto tips and tricks for how to put your new knowledge into practice. The course includes three projects, one for each module, that will let you learn with your hands as well as your head. Learn pick-up sticks, colour-and-weave, different finishing techniques, and how to plan colour gradients!

Choosing yarns for warping will depend on a few things — the loom you’re working on, how many ends per inch (epi) your project requires and the end use of your textile. All of the warp yarns suggested below can also be used as weft while weaving. We’ve also created this guide to choosing a weft yarn.
A good warp yarn needs to be strong, so that it will not break while under tension on the loom. It also needs to be smooth and without a lot of texture or stretch, especially when working on a rigid heddle loom or floor loom. On a floor loom the warp will be threaded through heddles and the reed, and undergo friction as the cloth is beat down and advanced forward. If the warp yarn has nubs, loops or an uneven texture, it can catch on the reed or break down over time. If a yarn has elastic or is stretchy, it can create tension issues that cause irregularities in your woven textile.
The epi refers to how many individual warp threads land in 1” of your cloth. Ends per inch can also be referred to as the sett, which is determined by the size yarn you’re warping with, and subsequently the size reed you’ll use on the loom. As an example, if you have an epi of 12, you’ll used a 12-dent reed. The higher your epi, the finer your yarn will be — which normally also translates to denser and tighter cloth. A soft and drapey scarf might use 8/4 cotton and have an epi of 12, while a finely woven linen tea towel might have an epi of 24. We make these handy epi counter keychains to help you determine the epi of a warp for various size yarns, but you can also use a ruler. You can see answers to more weaving FAQ’s here.

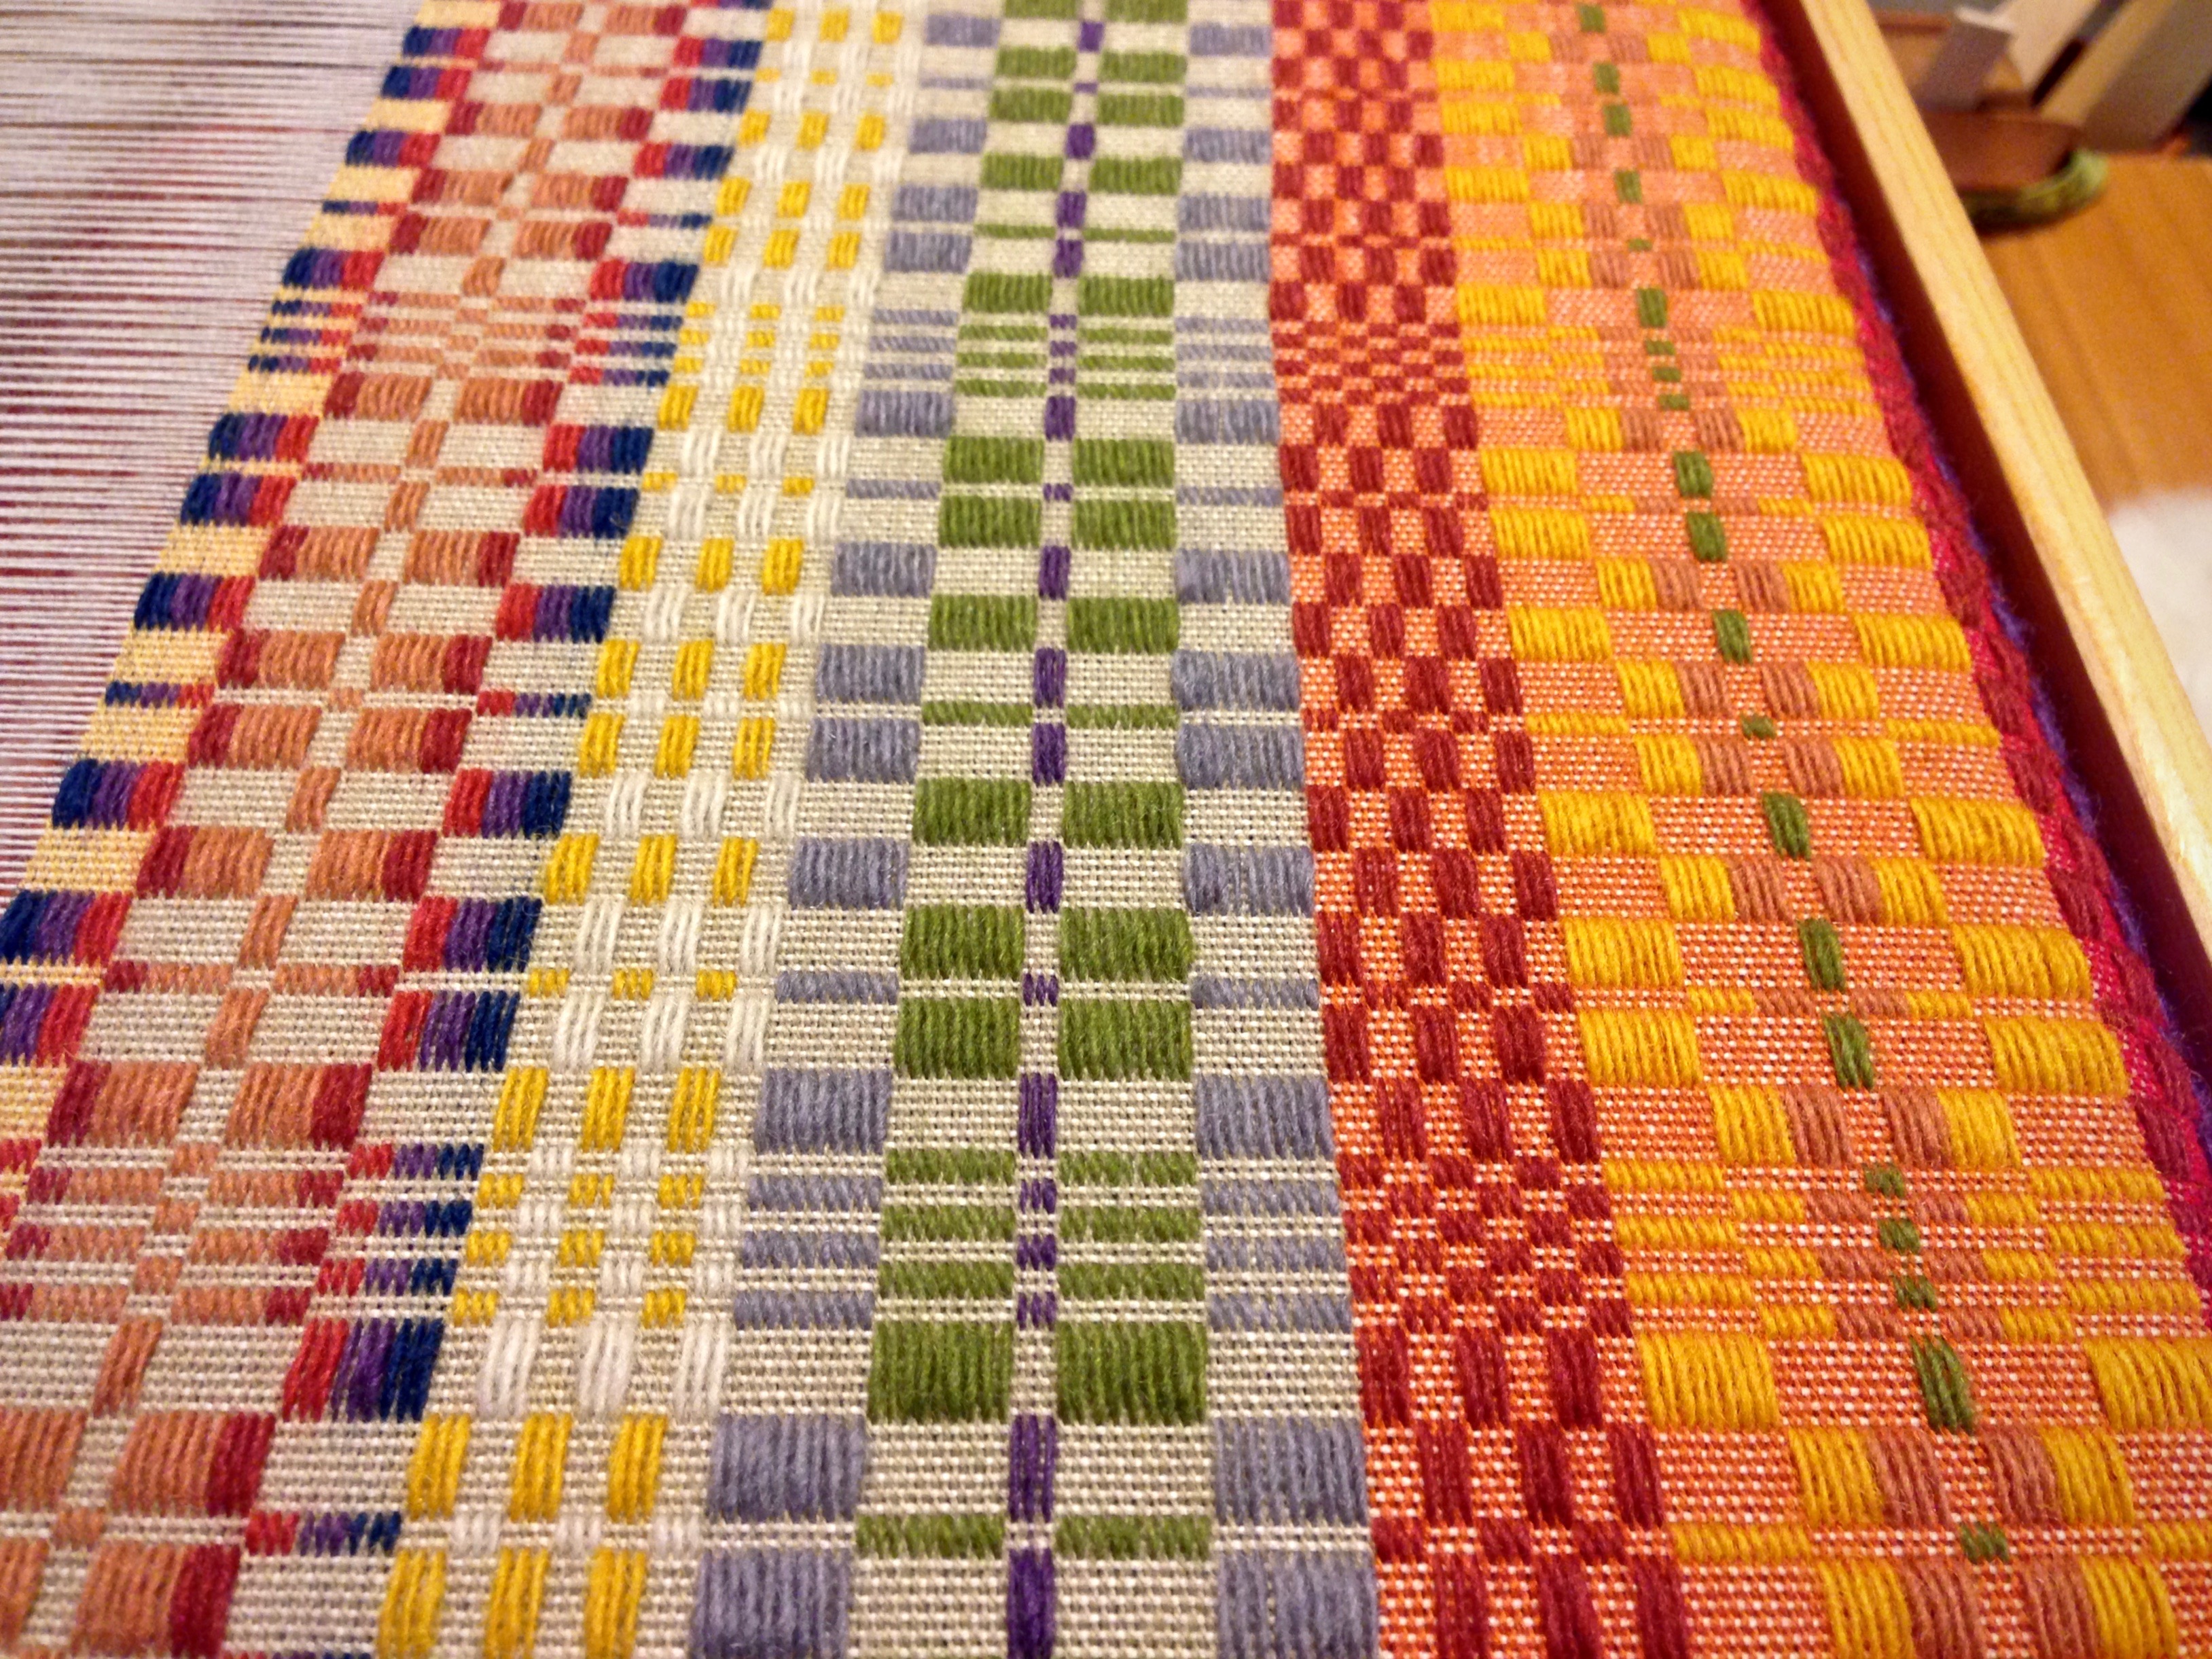
A set of cotton and linen towels woven with Mallo Cotton Slub and Duet Cotton/Linen. This rigid heddle pattern uses a pick-up stick and a supplementary weft to create weft floats inspired by the Halvdräll Towels (a 4-shaft pattern) by Arianna Funk.
Warp Length: 4 yards (assumes 26" warp length per towel plus generous loom waste, room for sampling, and about 18% take-up/shrinkage on length and width)*
1. Warp the loom using your preferred method (direct or indirect) with a total of 156 warp ends, 4 yards long, alternating 1" sections (12 ends each) of Yarn A and Yarn B. Begin and end with Yarn A, for a total of 13 stripes. Center for a weaving width of 13" and sley 1 end per hole and slot in a 12 dent heddle on a rigid heddle loom.
Place the heddle into the “down” position. Behind the heddle, only the slot threads are up. Place a long piece of cardboard, like a section of manila file folder under the raised threads to help you see which threads to pick up (See photo 1)
Pick 2: heddle is in NEUTRAL, pickup stick slides forward to heddle and turned on its side to create the weft float shed, weave with Yarn A (See photo 4)
4. Repeat the four picks above nine times, then replace Yarn A with Yarn B and repeat sequence another nine times with the new color. Alternate these blocks of Yarn A and Yarn B until you have woven 11 blocks total (6 of Yarn A, 5 of Yarn B). Towel should measure ~26" in loom under tension. Finish with 2" of tabby using Yarn C. Weave a few picks with contrasting scrap yarn to in between towels, then repeat the above steps to complete 3 additional towels.
5. Cut yardage off the loom and zig zag stitch the edges. Machine wash cold on delicate cycle, tumble dry low and press. Cut towels apart at scrap yarn markers. Hem using your preferred method.
In addition to being Gist"s Operations Manager and Wholesale Director, Christine is a weaver and exhibiting fiber artist. She scampered down the rabbit hole of rigid heddle weaving several years ago as a way to use up her knitting stash and never looked back. In addition to very practical cloth woven to adorn home and body (tea towels are her favorite home linen projects to weave), Christine also weaves conceptual works that explore themes of mood and memory, strength and fragility, and often reflect on the current political and ecological landscape. Her work is held in private collections across the country and is shown regionally in New England galleries. To see more of Christine"s work, check out her Instagram.
There are all types of looms, enough to match every kind of weaver. If you took a survey of weavers and the number of looms that they own, there is always more than one. Some looms are only capable of certain types of weaving and others are very flexible almost appearing to be reconstructed for each warp placed on them. I hope to share with you images of looms that you might not be familiar with. I will also display images of looms that I have found for sale so that you have an opportunity to pick one out for you to weave on at home.
Drawlooms: Complex looms that require the weaver to “draw” a cord or pull to weave a pattern. Drawlooms permit weavers to weave a “ground” cloth and a secondary structure for the pattern.
Jacquard Looms: Known best for their ability to draw pictures, they are looms that are capable of weaving complex patterns by controlling single threads, by the use of punched cards. The first Jacquard Looms were originally drawlooms which had a second level (platform) built above for a Jacquard machine to be mounted on it. It because possible for multiple machines to be mounted on the loom, a small one for the ground weave and a larger one for the patterning.
Computer Controlled Looms: Both a dobby loom and a jacquard loom can be computer controlled. The weaver does the actual weaving and the computer determines which threads will be raised.

Advance the Warp Move the warp forward by releasing the pawl on the ratchet on the back beam and winding it forward with the ratchet on the cloth beam. It seems counterintuitive to stop weaving and advance the warp every few inches, rather than weave as far as possible before advancing; however, I have found that my cloth has more consistent quality when I advance the warp frequently.
Anchor Pin Used with Texsolv cord to secure the cord for various uses. The nylon anchor pin has a button on the back and two little feet on the bottom. I like to think of them as little men. The button goes into a “hole” in the Texsolv cord, and the feet go into a hole in another device or part of the loom, such as shaft holders, lamms, and treadles.
Arrow Peg Used with Texsolv cord to secure the cord for various uses. The nylon arrow peg can be inserted through a hole in the cord to secure a loop. The arrow peg can also be used when a hole on a loom part is not the correct size for an anchor pin.
BandMy Norwegian friend calls this a ribbon.Narrow woven strip, from 1/4-inch to a few inches in width. Can be woven on any loom, but most of mine have been woven on my inkle loom or on my band loom. One of my very first inkle band projects was a pair of shoe strings for my (then) five-year-old. I keep a box of bands that I have woven over the years, that I turn to when I need a piece of trim, or a handle for a bag, or a tab for a handwoven towel, or a pretty cord to tie up a rolled handwoven rug.
Band Knife Tool that is used as a beater for the band loom, to beat in the weft. I have a Vävstuga band knife that has a wooden handle and dull metal blade. The weight of this band knife is perfect for getting a firm and steady beat. I also have a shaped band knife that I use with a rigid heddle. The weft is wound on an indented area of the handle, making a smooth and efficient way of placing the weft, and then beating it in place.
Band LoomI have a Swedish Glimåkra two-treadle band loom. It is made for weaving narrow bands, up to four or five inches in width. Because there is a back beam and front beam with ratchet and pawl, it can hold quite a bit of warp. I have done a seven-yard warp, but it will hold much more than that. Bands weave up quite a bit quicker on the band loom than on the inkle loom; therefore, my inkle loom has been feeling neglected ever since I acquired this band loom.
Beam, Back Squared crossbar at the back of the loom, over which the warp passes as it unwinds from the warp beam directly below it. Many a weaver will tell a story of forgetting to send the warp over the back beam. It is a mistake that makes the weaver groan, and usually happens only once. You can guess how I know.
Beam, Breast Squared crossbar at the front of the loom, over which the warp passes as it comes from the reed. I sit very close to the breast beam, and high on my bench, so that my elbows clear the beam. This posture is ergonomically healthy for my back and shoulders.
Beam, Foot This beam acts as a foot rest, which my legs are thankful for. Besides that, it is also critical support for the structure of the loom. These Swedish looms are simple in concept, but extremely sturdy.
Beam, Treadle The treadles pivot from a rod supported on this beam at the back of the loom. The rear-pivot treadles contribute to light touch treadling, which is very kind to my legs and feet.
Beam, Warp Back roller onto which the warp is wound. My Glimåkra looms have octagonal warp beams, with ratchet and pawl to tension the warp. The turning wheel reminds me of the skipper’s wheel my dad had on his sailboat.
Beam Cords Long Texsolv cords that extend from the cloth beam to the front of the loom, and from the warp beam to the back of the loom. The beam cords hold the tie-on bars, to which the beginning and the ending of the warp is attached. I attach the beam cords to the beams using the “Attached Continuous Cord” method, as described in Learning to Warp Your Loom, p. 17, by Joanne Hall.
Beaming The process of rolling the warp onto the warp beam. I prefer to do this single-handedly; though Swedish weaving tradition, I’m told, assumes you have helpers at this step.
Beater The swinging frame at the front of the loom that holds the reed and is used to beat the weft into place. My Glimåkra Standard and Ideal looms have overslung beaters. Gaining a rhythm with the beater while throwing a shuttle takes the coordination of playing a grand musical instrument.
Beater Cradle The place from which the hanging beater pivots. There are three notches in the cradle on my looms which enable the weaver to move the beater back as the weaving progresses.
Choke Tie Tight tie around the threads of a just-wound warp to keep warp threads from shifting before they are in place on the loom. I place a choke tie about every yard/meter along the length of the warp. I wrap the choke tie cord around the warp threads twice, and then tie it in a bow. Choke ties are removed during beaming.
Countermarch Loom action in which each shaft is raised or lowered independently by using two sets of lamms connected by cords to one set of jacks at the top of the loom. Some shafts rise and some sink, which form the shed. My Glimåkra Standard loom has a vertical countermarch, and my convertible little Glimakra Ideal loom has a horizontal countermarch.
Cutting Off After weaving as far as possible, the exciting moment arrives for the weaver to cut off the woven cloth from the last bit of the warp. I have also had a few times of cutting off prematurely. Sometimes it makes sense to cut off and start over to get a new beginning. Also, when weaving heavier items, such as rugs, I often cut off a rug or two at a time to prevent the cloth beam from getting too full.
Deflected Double Weave Groups of threads (blocks) exchange layers in this double weave. There are two distinct layers of cloth, usually a light and a dark layer, that trade places with each other. Off the loom, the warp and weft threads relax, causing them to “deflect” and shift out of their straight lines.
Double Weave Two layers that are woven simultaneously. The layers can be woven together at one or both sides, or interlocked in between. If the layers are connected at one side, the result is a woven fabric that is twice as wide as the weaving width when it is unfolded.
Draft A diagram that represents how the heddles are threaded, how the shafts are tied to the treadles, and the treadling order to follow for a specific weave. It is the “map” for the weaving. Most of my projects have started as drafts from Swedish books, which I personalize. I have created a few drafts of my own, using weaving software. I have used a spreadsheet on my iPad to write out drafts, but lately I find I like simple graph paper the best.
Draw Cord Used for raising pattern shafts and/or pattern units on a drawloom. For raising shafts, handles at the front of the loom are attached to the draw cords, which are attached to pattern shafts. For raising pattern units, draw cords are attached to single units of warp ends. I use small lanyard clips to attach the draw cords to pattern units, via lift heddles.
Draw Handle One of a series of small wooden handles on the drawloom. On the Myrehed shaft drawloom each small wooden handle at the front of the loom is attached to a pattern shaft with a draw cord. Pulling (drawing) a handle raises a pattern shaft.
Draw-in The natural pulling in at the selvedges that happens as weft threads cross over and under warp threads. If the selvedges pull in too much, warp ends may break. Excessive draw-in is prevented by using adequate weft. Using a temple while weaving also helps prevent excessive draw-in.
Drawdown The part of the weaving draft that shows the diagram of the cloth–a graphic representation of the interlacement of the warp and weft threads. In a Swedish draft, the drawdown is above the threading pattern.
Drawloom A loom with two sets of shafts–ground weave shafts, and pattern shafts. The pattern shafts are used to make patterns that are not possible on an ordinary loom. Putting a Myrehed drawloom bridge on top of my Glimåkra Standard loom, and adding an extension, made my loom into a drawloom.
Drawloom, Combination A shaft drawloom that is combined with a single unit drawloom. With a combination drawloom, the weaver can choose the shaft drawloom for repeating patterns, or the single unit drawloom for pictorial designs, or use both in the same project.
Drawloom, Shaft Handles at the front of the loom are attached to draw cords, which are attached to pattern shafts. Drawing (pulling) a handle raises a pattern shaft. My shaft drawloom has the capacity to hold fifty pattern shafts. Depending on the threading for the pattern shafts, the images in the weaving can be repeated, and symmetrical, or non-symmetrical.
Drawloom, Single Unit Draw cords are attached to single units of warp ends. Pulling a draw cord at the front of the loom raises a single unit of warp threads. This allows the weaver to incorporate limitless possibilities of pictorial designs in the weaving, including lettering. An image one can draw on graph paper can be woven on the single unit drawloom, depending on the number of pattern units in the warp.
Dressing the Loom Process of placing the warp on the loom. This includes beaming, winding on, threading the heddles, sleying the reed, tying on to the front tie-on bar, and tying up the treadles. Ready to weave!
Fabric Protection Board (Belly Board) A board that slips into the front of the breast beam. It acts as a protector for the fabric being woven as it comes around the breast beam, serving as a barrier between the fabric and the weaver. Only my Glimåkra Standard has a fabric protection board. My other smaller looms do not have one.
Fell The edge of the weaving where the last pick was beaten into place, and against which the next pick will be beaten. This is the line where woven cloth meets yet unwoven warp.
Finishing The final work that is done on a piece to complete it, usually after it is cut from the loom. Finishing treatments include repairing errors, securing warp ends, twisting fringe, washing, pressing, hemming, or adding embellishments like beads, embroidery, or crochet, to name a few. Many finishing techniques are done by hand, and can be a relaxing way to enjoy the feel of newly woven fabric between your fingers.
Float A warp or weft thread that passes over two or more threads. This can be an intentional element of a weave structure, such as in my “3-shaft twill with warp floats” towels. Floats can also be caused by errors, which are unintentional, of course. A little bit of needle weaving can usually correct these errors.
Ground Weave Background of a pattern weave, such as rosepath, overshot, or monksbelt. The ground weave is most often plain weave; but I have done monksbelt over weft rep ground weave.
Half-Heddle Sticks Used for saving a pattern shed. A stick or wooden slat has heddles, folded in half, that pass under selected warp threads. A series of the half-heddle sticks can be prepared and placed on the warp in front of the back beam. I used this method to weave monksbelt in an irregular arrangement for the front of a small handbag.
Heddle Polyester loop (Texsolv heddle), suspended on the shafts, has a central eye through which an individual warp end passes. I have only Texsolv heddles on my looms, with the exception of my inkle, which has string heddles. The number of heddles used varies depending on the width of the warp and the size of the thread. I have used as few as a dozen heddles for a narrow ribbon on the band loom, and as many as 2,760 heddles for warp rep weave on the Glimåkra 47-inch Standard loom.
Heddle, Lift Small heddle is looped around a pattern unit on the drawloom, which enables the lifting of a pattern unit with a single-unit draw cord. The draw cord is usually threaded through the lift heddle. I use small lanyard clips to clip the lift heddle to the draw cord.
Heddle, Pattern Long heddle with regular 1/2″ eye that is used for pattern ends on the drawloom. Warp ends are threaded through the heddles. When weaving, the weft passes through the warp ends wherever the pattern heddles are raised.
Hemstitch Encircling warp ends with an extended weft thread or a supplemental thread to prevent weft from unravelling. I do the hemstitching while the article is on the loom. Normally, it is used at the ends of articles that will have fringe, and adds a decorative element as well.
Ink the Warp Making marks on the warp to use as an outline or guide for tapestry weaving. I use a fine-point Sharpie to put dots on the warp that coincide with the cartoon underneath. Or, when weaving without a cartoon, I may mark the warp with a curved line or other shape to follow for the tapestry design.
Inkle Loom My husband built my inkle loom in the 1980’s after studying a handmade one that someone let me borrow. An inkle loom is used for weaving narrow bands. I have woven bands that became shoe laces, hair ties, belts, purse straps, towel loops, jacket trim, Christmas ornaments, little dolls, package ties, bookmarks, and more. And there are plenty of inkle bands that are still waiting to be used.
Lamm Horizontal wooden rods below the shafts that attach the treadles to the shafts. On countermarch looms like mine, there are two sets of lamms — upper lamms and lower lamms.
Leveling String A string that adjusts all the tied-on bundles on the front tie-on bar to an even level. I use 12/6 cotton seine twine for the leveling string. The leveling string is tied securely through the hole at one end of the front tie-on bar, woven by hand under and over the tied-on bundles, tightened well, and then tied firmly to the other end of the front tie-on bar. This simple procedure, together with small tied-on bundles, makes it possible to eliminate the weaving of waste yarn for evening out the ends, in most cases.
Lingo A two-ounce U-shaped weight that is suspended from each pattern unit on the drawloom. At times, during active weaving they swing into each other and sound like lovely wind chimes.
Opphämta A pattern weave that can be woven on the drawloom. The ground weave is plain weave, with weft that is the same or similar thread as the warp thread. The pattern weft is usually double the thickness of the warp thread. This is woven from the back side, so I keep a mirror handy to view the right side, which is underneath.
Retaining Cord Cord that stretches across a bar and is tied at both ends of the bar. For shaft bars, the retaining cord secures the heddles on the shafts, which is especially useful when weaving a wide warp. A retaining cord can be used on the front tie-on bar to secure warp loops before beaming the warp, and as a leveling string to flatten the warp before weaving. I use a half-bow slip knot at each end because it is easy to untie, making these retaining cords re-usable. All my retaining cords are made from 12/6 cotton seine twine.
Rigid Heddle A wooden tool with slot and holes, used for weaving bands. I like to say that band weaving my “knitting,” since it is so portable and the whole project easily fits in a small bag. My husband has made a rigid heddle from Spanish Cedar, and another one from Walnut–beautiful tools to hold and use. I have another rigid heddle that has pattern slots, which makes it easy to pick up pattern threads.
Rigid Heddle Loom A frame loom that has a plastic rigid heddle with slots and holes. The weaver lifts and lowers the heddle to move the threads. The rigid heddle also serves to spread the warp, and is used to beat in the weft. Depending on the size, the loom may sit on a stand, or lean up against a table for weaving. My Beka 32″ rigid heddle loom gave me many years of weaving enjoyment. I now have a 35cm Glimåkra Emila rigid heddle loom, perfect for taking with me when I travel. I have added a 40cm Glimåkra Siru rigid heddle loom, with built-in double rigid heddle supports, also a perfect loom to take with me on camping travels.
Rya Inlay technique that forms knots over pairs of warp ends, producing a pile surface. I have made rya weavings with thick wool yarns, combination of wool and linen strands, and with short strips of fabric.
Shaft Two rods with heddles hung between them. The shafts are suspended by cords from the jacks in the countermarch at the top of the loom. My Glimakra Standard loom has twelve shafts (12 pairs of rods); I have used as few as two shafts, and as many as twelve. My convertible Glimakra Ideal has four shafts, and there is no shortage of beautiful weaves you can create on just four shafts.
Shaft, Ground The drawloom has two sets of shafts. The ground shafts are the usual shafts that are directly behind the beater, in front of the pattern shafts. The threading of the ground shafts determines the structure of the cloth, such as broken twill, 5-shaft satin, or 6-shaft irregular satin.
Shaft, Pattern The drawloom has this second set of shafts for the pattern heddles with the pattern warp ends. The pattern shafts barely rest on the long pattern shaft holders that hang on each side of the loom, behind the ground shafts. Each pattern shaft is attached to a drawcord the ends with a small wooden handle at the front of the drawbridge. Pulling a handle raises that pattern shaft.
Shaft Holders Upper shaft bars sit in the holders, while the lower shaft bars hang in the bottom of the heddles. I use shaft holders while dressing the loom.
Shuttle Tool that holds the weft thread or yarn, carrying it from one side of the weaving to the other. I have a variety of boat shuttles, stick shuttles, ski shuttles, inkle shuttles, and band loom shuttles. Each kind serves a purpose. I’ve used them all at one time or another.
Shuttle, Band Loom This little wooden tool holds the weft thread, which is wound directly onto the shuttle. The shuttles I have were hand-carved by my husband, modeled after an old Glimåkra shuttle that Joanne Hall showed us. Holding it with my left hand, keeping my thumb above the warp threads, I pass the little shuttle back and forth in rhythm with the changing shed and beating in of the weft.
Shuttle, Ski A shuttle with upturned ends that is used for weaving rugs. My husband crafted a beautiful cherrywood ski shuttle for me. It is beautiful to the eyes and to the touch. I usually wind about a five-yard length of fabric strip on my ski shuttle when weaving a rag rug.
Shuttle, Stick A flat stick that has cut out ends, around which yarn can be wound. I have several hand-made stick shuttles in various lengths for weaving on the rigid heddle loom. Some are made from yardsticks that have been cut to size. A stick shuttle can also come in handy for pushing a shorter weft across the shed in a floor loom.
Skeleton Tie-up A tie-up which allows more than one treadle to be pressed at a time, expanding the use of available treadles. This may be used when a weave structure requires more treadles than are on the loom. Normally, on a countermarch loom, treadles are tied to sinking shafts and rising shafts, making it infeasible to press two treadles at once. Strategically omitting some of the shafts in the tie-up make it possible to press two treadles at the same time. My kuvikas project uses a skeleton tie-up.
Smålandsväv This Scandinavian weave has weft pattern floats on a plain weave background. I have been enthralled with this exquisite weave structure ever since I saw Becky Ashenden’s Smålandsväv coverlet, which was stitched to gorgeous, fluffy sheepskin. In Vävstuga’s More Swedish Classics, we wove this structure in all linen, with stunning results. This structure has some similarity to Opphämta, but without the pick-ups. Special set up is required for the loom, as this weave structure requires one set of shafts for the ground weave and another set of shafts, using long-eye heddles, for the pattern weave.
Soumak A hand-manipulated technique used in tapestry weaving to make an outline that follows a curved or straight line. Weft thread crosses over a certain number of warp ends, and then wraps around one or two warp ends. This makes a slightly raised line that can go from selvedge to selvedge. On my tapestry/inlay sampler, the soumak weft goes over three warp ends, and wraps around one.
Spreading the Warp (Pre-Sley) Before beaming the warp, the ends must be evenly spread out to the desired weaving width. I spread the warp through a reed. This can be done at a table before taking it to the loom. However, I usually set the lease sticks and reed on support sticks on the loom, and spread the warp right there at the back of the loom.
Square the Pattern The practice of weaving a motif with sides that are equal in height to the width of the motif. Often, this consideration is necessary when weaving with a tabby and a pattern weft. The weaver must determine how many pattern wefts are needed to make the motif pattern square. Another factor to keep in mind is possible differences in the width and height after the cloth is cut from the loom, and washed and dried. Sampling is a good idea!
Straight Draw Shafts that are threaded in sequential order; i.e., heddles are threaded 1-2-3-4, 1-2-3-4, etc., or 1-2-3-4-5-6-7-8, 1-2-3-4-5-6-7-8, etc.
Tabby (see Plain Weave)Ground weave for a pattern weave, such as overshot or monksbelt, or for rosepath, as in rosepath rag rugs. Tabby refers to the plain weave the comes between the picks of the pattern weave.
Tapestry Weaving technique that enables geometric or pictorial designs through placement of discontinuous weft. I have tapestry frame looms for weaving small tapestries, including one, the size of an iPad, that I use for weaving when I travel. I weave larger pictorial tapestries on my floor looms, using special techniques I learned from Joanne Hall.
Temple (Stretcher) Adjustable wood or metal tool that holds the warp out to its full width during weaving. Sharp points at the ends of the temple, set into the selvedge threads, hold the fabric in place. Moving the temple frequently as the weaving progresses helps to maintain consistent fabric quality.
Threading Inserting the warp ends through the eyes of the heddles. The warp ends are distributed in a precise order to arrange the ends sequentially through the heddles on the shafts. I have threaded a simple 1 2 3 4 (known as straight draw), repeated across the width of the warp; and I have threaded a complex sequence that required intense concentration to avoid threading errors. Fortunately, threading errors can be corrected. Unfortunately, most threading errors are not discovered until the first few inches of fabric have been woven — that’s not the fun part.
Thrums The thread that is left at the end of the warp after weaving as far as possible. If I can find a good use for these “leftover” threads, I may start saving some of them.
Tie-on Bar There is a tie-on bar at the front for the cloth beam and at the back for the warp beam. The warp is attached to back tie-on bar as part of the warping process. After the warp has been wound on the warp beam, threaded through the heddles, and sleyed through the reed, the warp ends in front of the reed are evenly tensioned and tied on to the front tie-on bar.
Transparency Weaving that has a loosely woven background (transparent), and a pattern made with weft inlays, often forming geometric or pictorial designs.
TreadleFoot pedal that lowers or raises the loom’s shafts. My Glimåkra Band Loom has two treadles; the Glimåkra Ideal has six treadles; and the Glimåkra Standard has ten treadles. The number of treadles used varies depending on the weave structure. I love dancing the treadles. On the big loom (the Standard), I often pretend I’m playing a big church organ.
Twining Two or more wefts that alternately go over and under the warp ends and twist around each other between warps. A row or two of weft twining is often added at the start and at the end of a woven item, especially a rug. I often add twining at the start and end. It is the best thing I have found to secure the wefts, keeping them from wiggling out of place when I cut the warp from the loom. Twining also provides a firm beginning that makes it possible to beat the weft in securely right from the start.
Unit The smallest group of threads that interlace in a weave structure. For drawloom weaving, warp ends are separated into these units, and the weft is also woven in units; i.e., 5-shaft satin has units of 5 warp ends, and 5 passes of the weft.
Unit, Single A group of threads that is raised in a single unit drawloom. Each unit of threads can be lifted independently of each other, using the single unit draw cords.
Warp The lengthwise threads in a weaving. The weaver carefully plans, measures, and counts (and counts, and counts) these threads, and arranges them in a specific order to be able to produce a pre-determined type of cloth. As a verb, to warp the loom means to put the warp threads on the loom.
WeftThe crosswise threads in a weaving. The weft can be thrown across in a boat shuttle, handed across in a stick or ski shuttle, or placed in patterns by hand. I have used various materials for weft — thick wool yarn, thin cotton thread, linen thread, new cotton fabric cut into narrow strips, and assortment of upcycled cloth cut into strips.
Winding a Warp Measuring the warp to prepare it for the loom. I wind the warp with two threads together, sometimes more, which helps prevent the threads from tangling during the warping process.
The terms and techniques used for handweaving make up a distinct set of words, as if it is a language all its own. Just like any verbal or written language, there are dialects and variations of usage according to locale, tradition, culture, and preference. I am writing from my limited experience and understanding of the terms with which I am familiar. Please consult some of the many books and resources available to find other authentic meanings and uses of these terms.


 8613371530291