
overshot weaving rigid heddle loom free sample

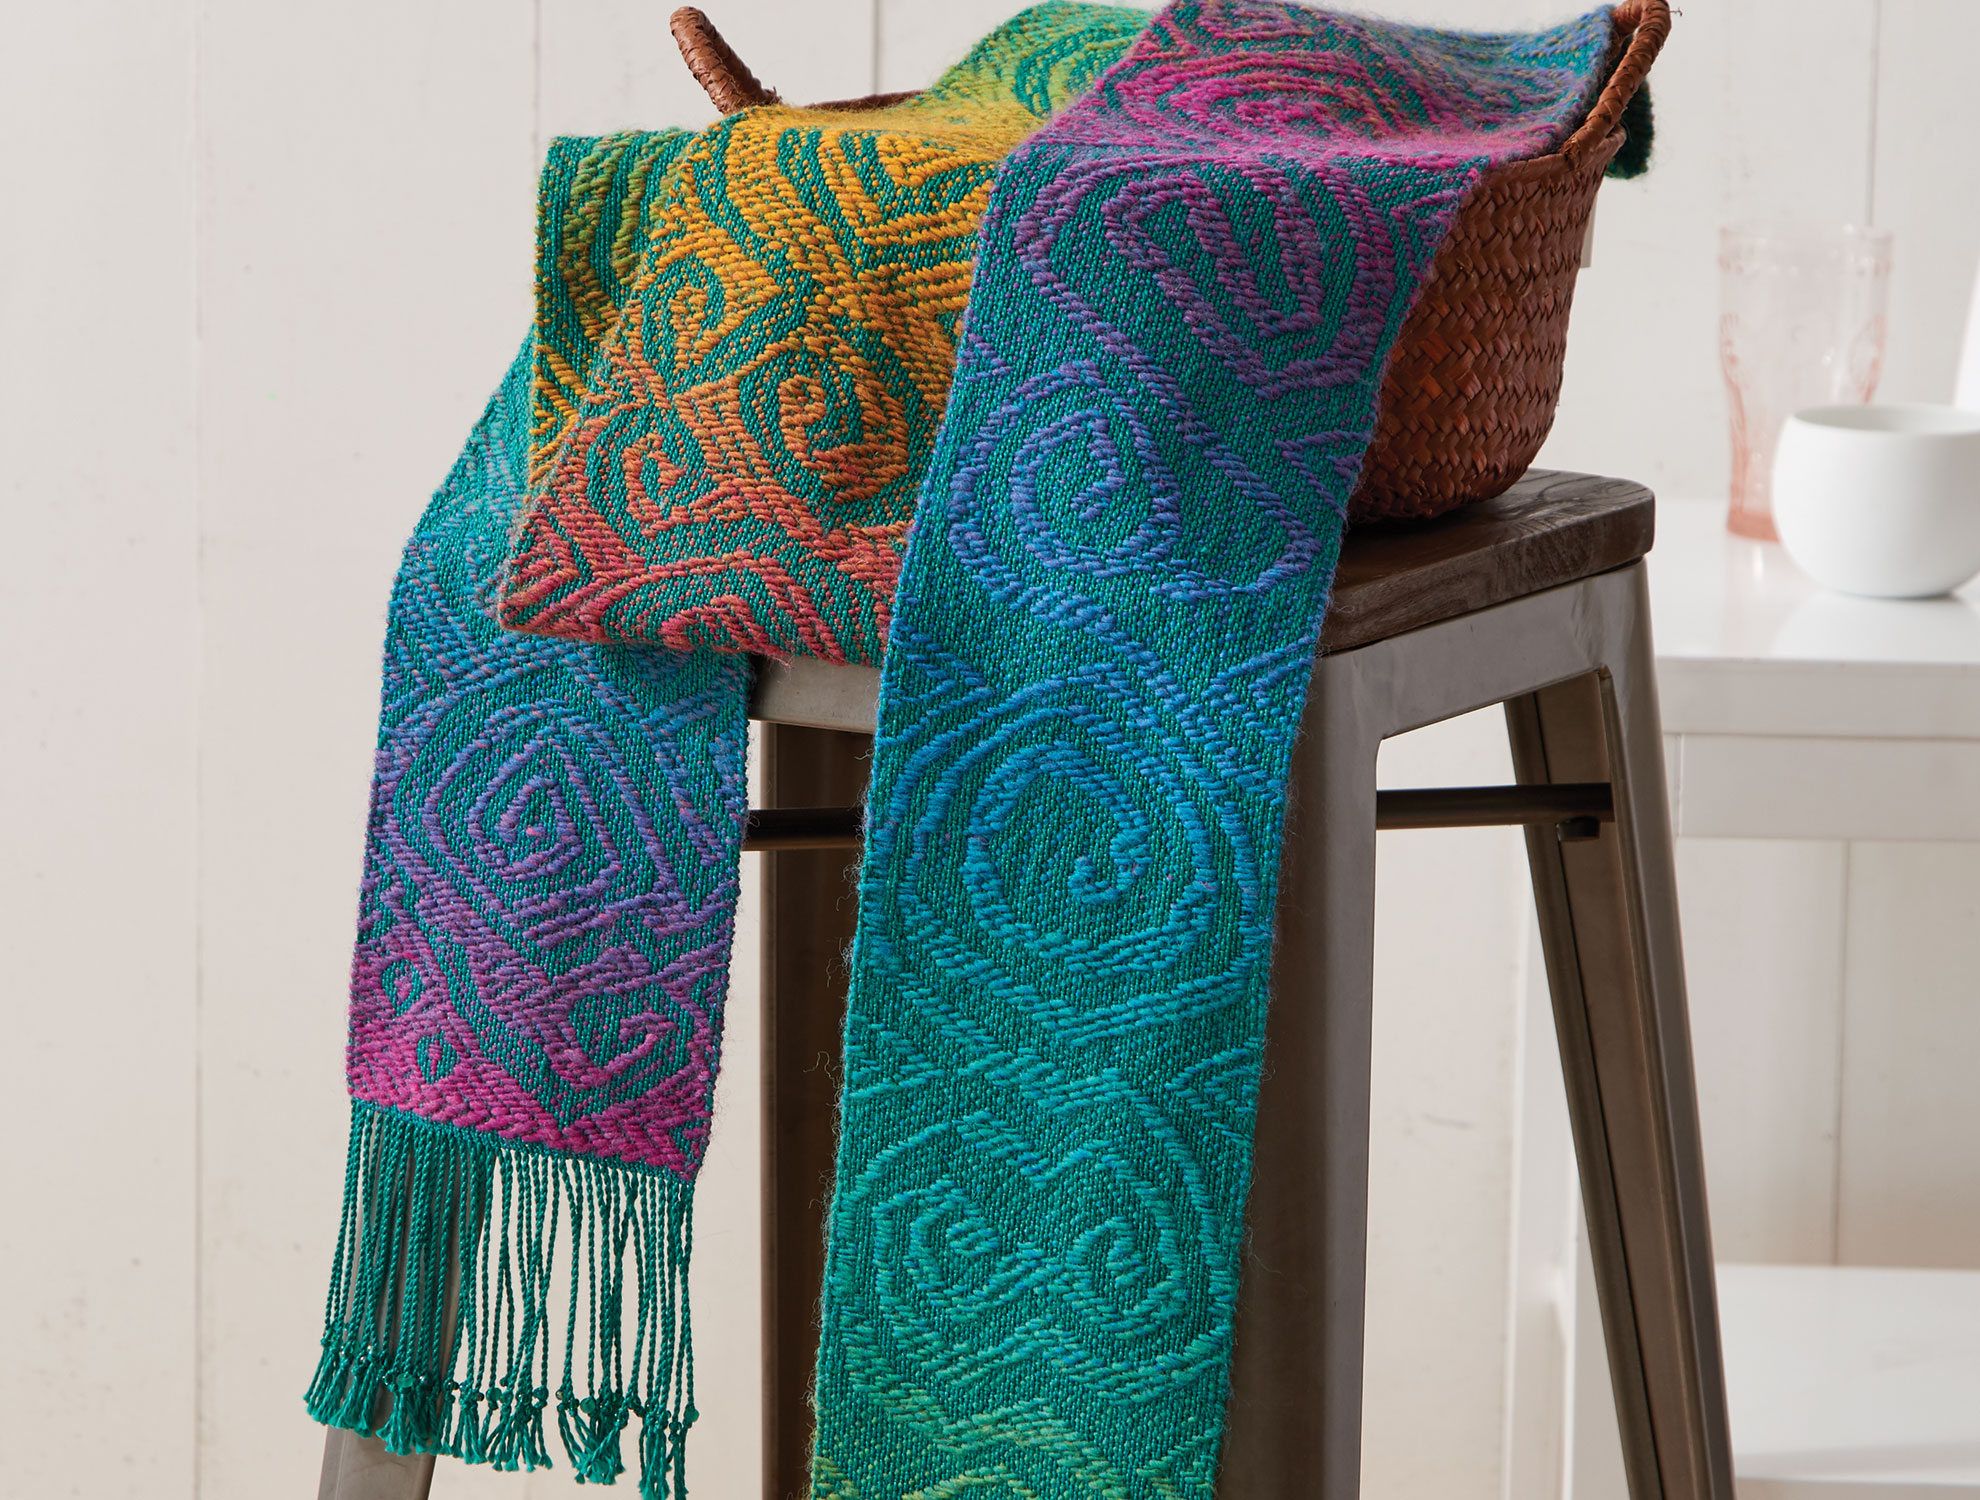
A set of cotton and linen towels woven with Mallo Cotton Slub and Duet Cotton/Linen. This rigid heddle pattern uses a pick-up stick and a supplementary weft to create weft floats inspired by the Halvdräll Towels (a 4-shaft pattern) by Arianna Funk.
Warp Length: 4 yards (assumes 26" warp length per towel plus generous loom waste, room for sampling, and about 18% take-up/shrinkage on length and width)*
1. Warp the loom using your preferred method (direct or indirect) with a total of 156 warp ends, 4 yards long, alternating 1" sections (12 ends each) of Yarn A and Yarn B. Begin and end with Yarn A, for a total of 13 stripes. Center for a weaving width of 13" and sley 1 end per hole and slot in a 12 dent heddle on a rigid heddle loom.
Place the heddle into the “down” position. Behind the heddle, only the slot threads are up. Place a long piece of cardboard, like a section of manila file folder under the raised threads to help you see which threads to pick up (See photo 1)
Pick 2: heddle is in NEUTRAL, pickup stick slides forward to heddle and turned on its side to create the weft float shed, weave with Yarn A (See photo 4)
4. Repeat the four picks above nine times, then replace Yarn A with Yarn B and repeat sequence another nine times with the new color. Alternate these blocks of Yarn A and Yarn B until you have woven 11 blocks total (6 of Yarn A, 5 of Yarn B). Towel should measure ~26" in loom under tension. Finish with 2" of tabby using Yarn C. Weave a few picks with contrasting scrap yarn to in between towels, then repeat the above steps to complete 3 additional towels.
5. Cut yardage off the loom and zig zag stitch the edges. Machine wash cold on delicate cycle, tumble dry low and press. Cut towels apart at scrap yarn markers. Hem using your preferred method.
In addition to being Gist"s Operations Manager and Wholesale Director, Christine is a weaver and exhibiting fiber artist. She scampered down the rabbit hole of rigid heddle weaving several years ago as a way to use up her knitting stash and never looked back. In addition to very practical cloth woven to adorn home and body (tea towels are her favorite home linen projects to weave), Christine also weaves conceptual works that explore themes of mood and memory, strength and fragility, and often reflect on the current political and ecological landscape. Her work is held in private collections across the country and is shown regionally in New England galleries. To see more of Christine"s work, check out her Instagram.
It is sometimes presumed that the rigid heddle loom is a plain weave loom. This is because, at it’s most basic, it is a two shaft loom, and plain weave is woven on two shafts.
While it’s true that plain weave is often woven on a rigid heddle loom, it’s capabilities for weaving patterns can be surprising (and very pleasing to the newer weaver!)
Plain weave is very simple on a rigid heddle loom and easy to set up. Thread one slot and one hole alternating for the width of your project, then when weaving alternate the heddle between the up and down position, and you’re on your way!
The question that I have come to challenge myself with more in recent times is “is there anything I can’t do on a rigid heddle loom?” Yes, it’s really that capable.
There is just so much you can do with one, two or more pickup sticks. Besides picking up behind the heddle to weave patterns, you can also pick up at the front to weave a type of overshot. This is where your pattern will sit on top of the background weaving rather than being incorporated in (this is called a float). If you arrange your floats and colours in particular ways, you can weave all sorts of cool patterns!
I have a lot of these overshot style videos on Youtube, but considering the Christmas theme is so loved, here are a couple of the most popular videos:
This is intended to be a brief overview of pattern weaving on a rigid heddle loom, there is so much more! I haven’t touched on Colour and Weave here, as it deserves it’s own post. You can read more about Colour and Weave in this article. I have, however written about plaid and made some free drafts for your use. You can read that post here.
You can find even more resources for weaving more stunning patterns in this post where I take you through techniques like doubled weft, pick up rows, staggered pick up, dots and butterflies. So many possibilities!
If you are just starting out with rigid heddle weaving, I highly recommend my beginner’s online class From Woe to Go! It takes you step by step through everything you need to get up and weaving.

Full Disclosure: I have a 24-harness 45" wide loom that takes up most of a room. It"s tall and sturdy—in fact, I like to joke that if that big earthquake ever hits here in Southern California I"m hiding inside it. What that big loom isn"t, is flexible and portable. It is quite large and because I tend toward inertia, it might prevent me from ever relocating. Just the thought of figuring out how to move it is tiring. As for flexibility, I guess you could say being able to change tie-up and treadling sequences using a computer is an advantage but it isn"t the loom I look to for sampling and experimenting.
Flexibility and portability are two attributes I associate with the rigid-heddle loom, and I think they are what make them such a popular tool in weaving. Their portability is easy to describe: rigid-heddle looms are looms that travel easily from room to room and from house to house. I"m pretty sure that someone at some point has brought one in their carry-on bag and woven on their way across country. Having met my husband on an airplane, I can only imagine the conversations that could start.
Flexibility is what makes them the loom I often reach for when I have an idea in my head that needs to get out. From seeing the rigid-heddle projects in Handwoven, at my local guild, and on the internet, I know I"m not alone. The ease and speed of direct warping allows for a quick start up and gets the weaver to weaving faster than other looms. I believe for many of us, having that shorter time commitment up front allows more freedom of expression.
That freedom of expression can be seen in the beautiful Mermaid Scarf by Lisa Rayner on the cover of Handwoven November/December 2015. Without the ease of pick-up the rigid-heddle loom affords, that scarf might never have been woven. Because the loom works well with knitting yarns, many projects that would probably be difficult to weave on a multishaft loom have come to be, such as Judy Pagel"s Classic Caplet featured both in Handwoven May/June 2015 and in the book Simple Woven Garments that uses Brooks bouquet and a fingering weight yarn. Finally, and not to blow my own horn, I can tell you definitively I would never have thought of doing the little inlay squares on my towels that were in Handwoven September/October 2014 if I hadn"t been working on a rigid-heddle loom and “playing around.”
My advice: learn your looms" strengths. Use your multishaft looms for what they are intended for and look to your rigid-heddle loom for the freedom of expression it allows (And when that earthquake hits, join me in my loom, with your rigid-heddle loom.

Crazyshot: Creative Overshot Weaving on the Rigid Heddle Loom introduced weavers to a whole new world of creative weaving on a rigid heddle loom using just one heddle and one pick-up stick.
And now Crazyshot Wearables: Creative Overshot Weaving for Wearables on the Rigid Heddle Loom offers patterns – for scarves, cowls, shawls, ruanas, tops, and handbags – that incorporate charted Crazyshot designs, either as fabric borders or as all-over patterns.
Complete step-by-step instructions for the weaving and sewing of each item are included, so you can successfully create your own Crazyshot garments and accessories!

As always, it’s been a busy couple of weeks. One of the members of my online weaving group on Our Unraveled indicated that she would like to make towels in the Lee’s Surrender overshot draft. Now Lee isn’t easy. It may be only a 4-shaft overshot draft, but it combines several elements, has a wicked border and isn’t for the faint of heart. Or at least isn’t for beginning weavers. The good news is that it is in Marguerite Porter Davison’s A Handweaver’s Pattern Book. The original book is from the 50’s and the draft is written out in the older format, but it still manageable. (Hint: beware of getting a new version of the book. I’ve heard that it has been gutted and has maybe half the drafts of the earlier editions.)
I don’t know where the original draft came from. In the book Davison says that it is adapted from an earlier pattern. Since weaving drafts, like quilt patterns, are frequently named for historical events, I assume this one is truly named for Lee’s Surrender of the Confederate troops at Appomattox Courthouse. If so, that would place it in the late 1800’s. The border is based on the Blooming Leaf pattern that appears in other overshot drafts, and this gives the border its intricate, eye-appealing size. The tables that form the center design are themselves quite simple – a star design commonly found in overshot. However, they allow the piece to be wider or narrower at the weaver’s discretion simply by adding or removing repeats.
Lee and I are no strangers. Many years ago I decided to tackle this draft in a very fine thread intending to make a set of four place mats in the classic blue pattern on white background. One must understand, however, that I am a Southerner. As nearly as I an tell, all eight of my great-great-grandfather’s fought for the Confederacy. So either some curse got thrown in my direction or I got a bad cone of white cotton, but it was one broken warp thread after the other. After two place mats and 20+ broken warp threads, I cut the piece off the loom. Still, the two place mats turned out beautifully.
I volunteered to make the draft for the requested towels and post it to the group. I also suggested that we use it as an overshot weave-a-long or WAL. Several people agreed and I think we’ll get going on the first of September. I was able to find the original notes and WIF (Weaving Information File) I entered when I made the place mats. I hadn’t finished the treadling diagram, but it wasn’t hard to finish up. I did all the calculations for two towels and wrote up the instructions. Unfortunately, I couldn’t test the towels prior to releasing the PDF. I’m hopeful that everything is fine and I didn’t make any mistakes. I suppose we’ll see.
Equally unfortunately, I decided to make the towels in Ashford’s 10/2 and 5/2 cotton. Sadly, we’re out of the colors I wanted at Yarnivore, Hopefully, the cones will be in before long and I’ll be able to get the towels on the loom. I’m planning to get the origami blouse fabric off the old Schacht Standard so the towels can go on.

We have been getting lots of questions from folks wanting to try out new crafts now that most of us are spending a lot more time at home. We"re excited that lots of new fiber artists are going to enter the world! Since we"re getting so many questions we decided to make a series of blog posts with some basic info to start you off with several different fiber craft disciplines! This week we"re going to cover: Rigid Heddle Weaving!
A rigid heddle loom is an ideal choice to economically learn to weave. The name is derived from the structure of the heddle. A heddle functions to raise or lower the warp threads. A rigid heddle is a fixed panel that moves the warp threads as a group, as opposed to individually thread movement like a wire or Texsolv heddle. A rigid heddle loom is the equivalent of a 2-harness loom, it will allow you to weave light work, such as placemats, dishtowels, scarves, shawls or fabric for clothing. Rigid heddle looms cannot support the tension required for projects like rugs.
At The Woolery we often recommend rigid heddle looms to newbie weavers who want to jump into weaving but don"t want too large of an investment in a new hobby. Rigid heddle looms can be very small and affordable, and are perfect or giving weaving a test drive! The skills and techniques developed on a rigid heddle loom are all transferable to other types of looms, including the larger table and floor looms.
Weaving Width - This is the maximum width your projects can have. It is not something that can be changed later on and is set in stone from the moment you purchase the loom. Remember that you can always weave narrower than your maximum weaving width, so it"s safer to go with a wider loom to make sure you have enough versatility for the types of projects you want to weave.
Second Heddle- This is another thing you need to think about in the beginning because some rigid heddle looms have the ability for a second heddle to be added and some do not. The second heddle has two functions. It can allow a rigid heddle loom to mimic a four-harness loom. It also can allow a weaver to use the finer cotton weaving yarns more commonly used on floor and table looms.
Space- If you are limited on space you might want to consider a loom that can be folded so as to take up even less space than a standard rigid heddle loom.
Wood Finishing - Some looms are sold with unfinished wood. We highly recommend that you finish unfinished loom wood before working with your loom. If you don"t want to bother with wood finishing, pick a loom that has finished wood.
Available Heddle Dents- The dent size of your rigid heddle determines how far apart your warp ends are going to be and also determines the size yarn you can use. Certain brands have a larger amount of sizes available. If you already know you want to use Laceweight or small yarns you might need to take this into consideration. If you are not already attached to a certain size of yarn, then you don"t need to worry about this.
Most of the other differences between rigid heddle looms are going to superficial personal preference type options such as; brand, visual style, and wood type.
We have several rigid heddle loom options, these are our favorite options for beginners:Schacht Cricket Loom - The Cricket Loom is compact, capable and cute! It comes in both 10" and 15" weaving widths. Both options come with everything you need to start your first project in the box. There are floor stands available for both sizes of this loom. The loom comes with an 8 dent heddle (suitable for Worsted Weight) and 5, 10, and 12 dent heddles can be purchased separately. There is NOT a 2nd heddle option for this loom. This loom is made of unfinished maple and apple plywood and comes unfinished.
Ashford Knitters Loom - The Ashford Knitter"s Loom is lightweight, collapsible, and portable. It comes fully assembled and finished. There are 3 available weaving widths, 12", 20", and 28". There is a floor stand available for all three sizes. It comes with a 7.5 dent heddle and you can get additional heddles in 2.5, 5, 10, 12.5, and 15 dent heddles separately. Ashford rigid heddle looms offer the most variety for dent sizes. It comes with everything you need for your first project except yarn. It even comes with the 2nd heddle blocks so you can install them and have the capability for two heddles right away. If you don"t need your loom to fold or care about the wood being finished look into the Ashford Rigid Heddle loom as it has most of the same features (but does come in different weaving widths).
Kromski Harp Forte - If you are into a more traditional style of elaborate turned wood features, the Harp might be the loom for you! The harp is available in two different finishes a light wood and walnut. There are four available weaving widths, 8", 16", 24", and 32". It can fold for a smaller storage profile. The loom comes with a 8 dent heddle and 5, 10, and 12 dent heddles can be purchased separately. It comes with a 2nd heddle block option. There is also a floor stand available.
Most looms we carry come with all of the necessary bits and bobs to get started weaving, but there are some additional items you may wish to purchase to expand your weaving journey.Pick Up Sticks - These allow you to create additional sheds in your weaving to create more elaborate patterns. We do not recommend them for your first projects, but after you have a couple projects under your belt it might be something you want to explore.
Warping can often be the process of weaving that scares away beginners, but we promise it"s not scary! All of the loom models we recommend here come with booklets with instructions for warping that particular loom. There are also very helpful YouTube videos available:
You can use almost any yarn on your rigid heddle loom as long as you are using the correct heddle dent size. Here are some options that are particularly good for beginners as they can be woven with the heddle that comes with your rigid heddle loom.
Omega Sinfonia - This is a 100% Mercerized Cotton, 6 ply yarn. It comes in balls of 218 yards. This is a sport weight yarn so it"s a little smaller than you would normally weave with on an 8/7.5 dent heddle, but that"s okay your project will just have a little bit looser weave!
While YouTube is a fantastic resource, sometimes nothing can beat a quality book.Weaving Made Easy by Liz Gipson - Author Liz Gipson give you the tools to make working on a rigid-heddle loom a joy in this revised and updated version of her much loved book. Added to this edition is step-by-step instructions on how to set up your loom in twenty minutes or less, finishing tips, and two new projects, as well as more headers to make it easier to find just the tip you are looking for to make your weaving time more enjoyable.
Inventive Weaving On A Little Loom by Syne Mitchell - This essential guide explores the full capabilities of trigid heddle looms, covering all the basics and offering an amazing array of projects. Crafters will be thrilled by the possibilities: satisfying tapestry and transparency projects, bead weaving and e-textiles, and dramatic effects using simple finger-manipulated techniques. Adding a second or third heddle allows for more complex weaving, such as overshot, shadow weave, and very fine threads
Ashford Book of Rigid Heddle Weaving by Rowena Hart - International weaving teacher, Rowena Hart, shows how you can create exciting, beautiful garments and crafts - all on the simple two shaft rigid heddle loom. In the book she guides you step-by-step through the many techniques, showing just how easy it is to make your woven creations come alive through color and texture.
There are so many creative things you can do with a rigid heddle loom! The most common types of projects are scarves, placemats, dishtowels, or shawls. You can also weave fabric and then sew it with other fabrics to create garments or bags. You are limited by the weaving width of your loom so if you were wanting to make something very wide like a blanket you could only achieve it by sewing together multiple panels of fabric. We recommend playing with plain weave (just standard back and forth weaving, no fancy patterning) and then maybe branching out to try some different techniques! We have a blog post, Rigid Heddle Texture Infusion that details how to make a plain weave scarf using some fun different yarn textures!
We also carry some kits that are great for rigid heddle looms!DJE Timeless 2 Tea Towel Kit - The reason things become "a classic" is timeless appeal and usefulness. Woven on one warp, this classic plaid and striped towel kit (1 towel of each design) features The Woolery"s Bluegrass Mills Hemp yarn. The hemp yarns make a super absorbent fabric with great body, durability and just a touch of shine. With the warp already wound, this is a fast, easy weave for all experience levels. You will need two 8-dent heddles.
DJE Bloom Scarf Kit- Featuring Mountain Colors hand-painted 4/8"s 100% merino wool and two variations of leno lace weave, this kit celebrates spring foliage colors. Wet finishing the scarf makes the yarns bloom, creating a super soft, cuddly scarf that is light enough to wear indoors, yet warm enough for snuggly comfort outdoors.
It is important to note - You cannot make rugs on a rigid heddle loom, only rug shaped objects. A rigid heddle loom cannot stand up to the high level of tension required to make a durable rug. This means that any "rug" you create on the rigid heddle loom will deteriorate very quickly to use and be more of a "rug shaped object" than an actual useable rug. If you try to jack up the tension on your rigid heddle loom you will cause the loom to bend out of shape and become damaged over time. If you are insistent that you want to weave rugs you"re going to be looking at a floor loom, not a rigid heddle loom.
We hope this is a good jumping off point for your in your rigid heddle weaving journey and we can"t wait to see all of the beautiful hand woven projects you create!

Want to get started weaving on a rigid heddle loom? These are perfect for those looking to start weaving on an affordable, portable loom that can get you weaving quickly. This course walks step by step through the process of creating a project from beginning to end, using audio slideshows with clear photos and illustrations. From learning the parts of your loom to tying fringe on a finished piece, this course has everything you need to get started. The course includes a pattern for weaving your first scarf. Take the stress out of weaving with this friendly, thorough introduction!
There is so much you can do with a rigid heddle loom! It can be hard to know where to get started once you’re ready to branch out beyond simple plain weave projects. This course covers how to use colour, pattern, and texture to expand your rigid heddle horizons. Using audio slideshows, we talk through the theory behind each element, then move onto tips and tricks for how to put your new knowledge into practice. The course includes three projects, one for each module, that will let you learn with your hands as well as your head. Learn pick-up sticks, colour-and-weave, different finishing techniques, and how to plan colour gradients!

"Thank you, Kelly, for providing this RHL Overshot Class. Because of all your videos, I have gone from newbie to being able to produce this beautiful scarf! I learned how to read a four shaft pattern draft and from that, warp and thread my loom. I learned how to manage more than one heddle and handle different combinations of them. It was also helpful to learn about floating selvedges. I will never do another project without them."
"This was one of the best weaving courses I have taken on line. Your calm and slowly paced weaving videos are excellent. Very easy to follow. Also the feedback you give to questions is much appreciated and it always works. I like being able to go back an replay the videos as I progress to make sure I didn"t miss anything. Good job."
This is the section to explore the possibilities of overshot with many variations, test out your yarn and get some practice in weaving with this structure.
Kelly is a self taught weaver with a big passion for sharing the timeless art of weaving with others. Kelly is known for her calm and slow teaching style and she bases her classes on how she would have liked to have been taught. She designs all of her own projects and caters for levels from beginner to intermediate. Most available classes are for the rigid heddle loom, floor, table and inkle loom weaving.

Last week we discussed choosing the right loom. This week is about providing your loom with what it needs to thrive. It might be your loom’s responsibility to please you, but it is your responsibility to provide it, and you, with the proper tools and equipment. A new loom package will give you everything you need, except the yarn, to get started with basic weaving. You will get a loom, a reed (some let you choose the size, most give a 7.5 or 8 dent reed) 2 shuttles, clamps, warping peg and a threading hook.
It can be tempting when starting new hobby to minimize expenses. After all, you may not like it. But I guarantee you won’t like it if you don’t have the right equipment! Trying to weave on a 32” loom without a stand will cause you physical pain and you’ll start to associate weaving with pain. Not getting the size reed to use the yarn you really want to use will leave you feeling dissatisfied with your finished products. And using poor quality fibres can create so many problems that you dread going to your loom. Skimping can sabotage a potentially beautiful relationship. Besides, for most of us it is psychologically less painful to drop $600 in one fell swoop and have everything we want/need than to be continually spending $100-150 while still feeling there is more we need to be really content.
1. A stand is a must if you are getting a loom bigger than 24”. If you are getting less than 24” I still recommend a stand because it makes warping so much easier. If you or someone you know is handy go ahead and build your own…but remember that the designers of the stand for your loom have had lots of experience and know what height and angle is best and how to balance it so it isn’t prone to tipping!
2. Extra reeds. Think about the yarns you want to use and the projects you want to weave and get the right reeds. The 7.5 or 8 dent reeds that many looms come with are great for dk and worsted weight yarns. 10 dent for sport and fingering, 4/8 cotton, or 2/8 cotton doubled; 12.5 for fingering; and 15 for lace. At the other end, a 5 dent is good for aran/bulky and a 2.5 for super bulky. You might also consider getting 2 of the same size so you can learn double weave to either weave wider blankets, get the sett you want (2 10 dent reeds allow you to weave at 20 ends per inch) or weave twill.
3. Extra shuttles of various sizes. Just because you have a 32” loom does not mean all your shuttles should be 32”. The shuttles should be just a little longer than your project is wide. It’s just more comfortable. Using a 32” shuttle takes a lot of shoulder energy and can be tiring so if you are working on a 12” scarf, using a 14” shuttle is much more comfortable.
6. Good quality fibres that you love! Life is too short to use ugly yarn. This is your hobby and you should enjoy every moment spent at your loom. Don’t sabotage a potentially beautiful relationship by using poor quality yarn because it’s cheap. Get the best you can afford, something that feels nice in your hands and gives you pleasure just to look at. Even for beginner projects, maybe especially for beginner projects! Your first projects may not be perfect but if you hate the yarn, can’t stand the feel if it or it"s a mess on the loom you will begin to associate weaving with negative emotions. First impressions are important!
Just a quick note about buying used looms. This is a great way to get a fantastic deal. Before you buy, make sure all the pieces are there, that the loom holds tension and that you can get parts if you need them (extra reeds, double heddle kit if it isn’t built in, stand if you want one etc). It’s not a deal if you can’t use it.
I hope if you are considering a loom, or are a beginner weaver, you have found this helpful. If you are not a weaver, and you’ve read this far…wow! Thanks! Here’s my words of wisdom for the week: Life is always easier with the right tools (whether it’s a skill to learn or a physical object). It’s worth learning what they are and acquiring them. So many times we “make do” and struggle, but if we used the right tool (or skill) the job would have been done faster and better, with less grief, and we might have enjoyed it! I don’t believe we need to buy everything, on the contrary I believe we should buy less. Borrow when you can, share what you have. But when you do buy, buy the right tool. You will enjoy life more!

Choosing yarns for warping will depend on a few things — the loom you’re working on, how many ends per inch (epi) your project requires and the end use of your textile. All of the warp yarns suggested below can also be used as weft while weaving. We’ve also created this guide to choosing a weft yarn.
A good warp yarn needs to be strong, so that it will not break while under tension on the loom. It also needs to be smooth and without a lot of texture or stretch, especially when working on a rigid heddle loom or floor loom. On a floor loom the warp will be threaded through heddles and the reed, and undergo friction as the cloth is beat down and advanced forward. If the warp yarn has nubs, loops or an uneven texture, it can catch on the reed or break down over time. If a yarn has elastic or is stretchy, it can create tension issues that cause irregularities in your woven textile.
The epi refers to how many individual warp threads land in 1” of your cloth. Ends per inch can also be referred to as the sett, which is determined by the size yarn you’re warping with, and subsequently the size reed you’ll use on the loom. As an example, if you have an epi of 12, you’ll used a 12-dent reed. The higher your epi, the finer your yarn will be — which normally also translates to denser and tighter cloth. A soft and drapey scarf might use 8/4 cotton and have an epi of 12, while a finely woven linen tea towel might have an epi of 24. We make these handy epi counter keychains to help you determine the epi of a warp for various size yarns, but you can also use a ruler. You can see answers to more weaving FAQ’s here.


 8613371530291