
4 axis rotary table free sample

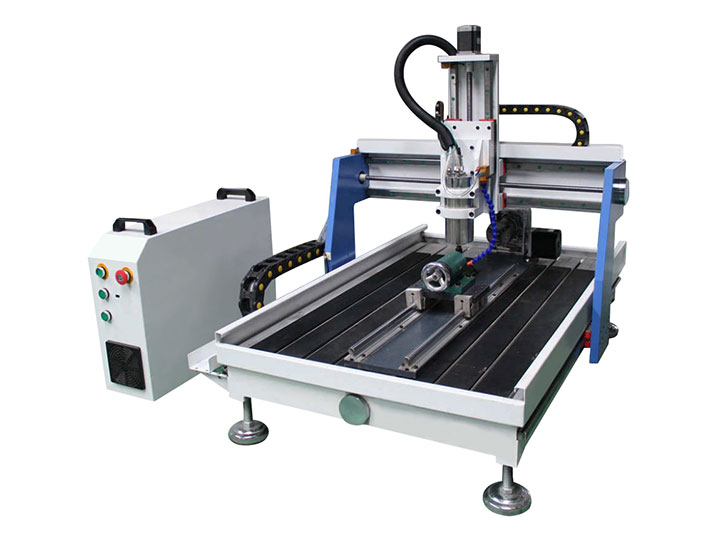
The 4-axis CNC milling machine cutting the sample parts with ball endmill tools. The 3-axis machining center attach the rotary table for cutting the sample parts.

The 4-axis CNC milling machine cutting the sample parts with ball endmill tools. The 3-axis machining center attach the rotary table for cutting the sample parts.

With this extension, your CNC milling machine gets the 4th axis. That allows you, for example, to mill round parts or create engravings on rounded surfaces.
This rotary axis is made to order for us by a German precision mechanic. In this price segment, this rotation axis for CNC milling machines is unrivalled in Europe!
There are many rotary tables on the market. If possible, they have to be inexpensive. You can get a lot of them! Usefulness? That is where the wheat is separated from the chaff. For example, there are many CNC turntables with the cheapest belt transmission. The disadvantages are obvious: slippage due to the belt. If not in the belt drive itself, then on the load or idle side of the belt. Perhaps useful for engraving work. For milling, however, usually not or limited in the choice of material (aluminium 3D milling not possible).

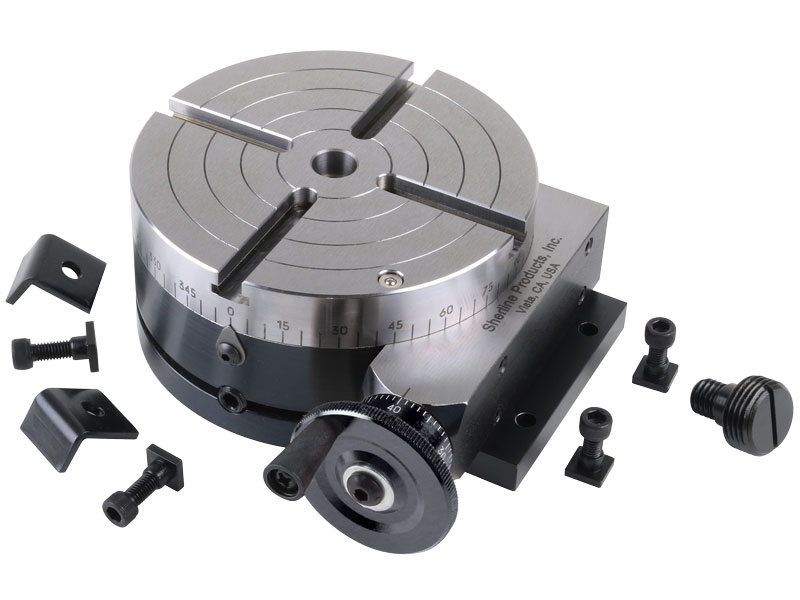
Sherline’s CNC driver box comes equipped with an A-axis output cable ready to drive a 4th rotary axis. This rotary table is all you need to turn your Sherline CNC mill into a 4-axis machine. Just plug the A-axis cable from the external driver box or the built-in driver box in your Sherline computer into the matching plug on the stepper motor. The EMC2 software is already set up to handle G-code for the A-axis, and numbers entered after the letter “A” in your code are interpreted in degrees.
The same end result can be obtained by ordering a CNC ready rotary table and a stepper motor and attaching the motor, but this single part number does the same thing, making it easier to order and saving you the trouble of installing the motor on the rotary table.
1MTA offers a large range of 4th axis rotary tables supplied by Kitagawa, specialists in high-quality machining equipment. 4 axis CNC rotary tables add an additional, rotary axis to your indexing table allowing for greater precision and versatility.

The robust geared rotary tables of the 500 series are extremely flexible to use and, thanks to the combiFLEX® modular system, can be converted or extended at any time to meet new machining tasks. The rotary tables are not only suitable for positioning operation, but can also be used for short simultaneous machining operations. The preloaded gear and the powerful bearings allow high long-term accuracies as well as large spindle loads. The maximum clamping force of up to 7,000 Nm leaves hardly anything to be desired.

Our product range includes single and multiple axes, tilt/rotating tables, and indexing and high-speed spindles. Additionally, we offer customized solution tables for customer requests or OEM projects.
Even for EDM machines that have been in use for decades, we will work with you to determine the ideal rotary indexing table and/or rotating/indexing spindle solution.
Our state-of-the-art rotary indexing tables and customizable reference and clamping systems provide endless application possibilities and highly efficient solutions.
Years ago, before I learned CNC, I owned a Phase II 8″ horizontal/vertical rotary table that I purchased from Kap Pullen’s Getmachinetools.com store. He has them at a good price, BTW, and he’s a darned nice fellow to deal with as well as being a frequent HSM contributor. Anyway, its a nice little table, but I hadn’t done a whole lot with it for quite a while after purchasing it. As is so often the case, one day, a project landed on my doorstep and I was glad to have it.
Before I could get started, however, I had to make some accessories for it. Basically, I needed some T-Nuts to fit the table, as well as a little fixture that makes it easy to hold a plate up off the table through a hole in the center so you can machine it. The latter, what I call a “plate machining fixture”, was inspired by something similar I saw the Widgitmaster of CNCZone fame using to make Dremel clamps for his mini-router:
The Plate Maching Fixture and 3 Homemade T-Nuts. T-Nuts are easy to make: square a block to the proper dimensions, mill the side reliefs, drill, and tap. These are much smaller than the mill’s Bridgeport standard T-slots, so I made them myself and I’m using 1/4-20 bolts with them. They’re made of mild steel.
I turned the round spigot using the 4-jaw on the lathe. I’m making the fixture out of MIC-6 aluminum plate, which is pre-ground very flat on the sides. This is a 5 inch by 3 inch piece. I’ve clamped it to the rotab using my T-nuts and the regular mill clamps and step blocks. It is sitting on parallels to make sure I don’t cut into the table. You can also see how I’ve clamped the rotary table to the mill table using a big cast iron V-block I have. You can never have to many blocks with precision faces hanging around!
Having a 4-jaw chuck on your rotary table is mighty handy! Because it’s a 4-jaw, you can dial in the workpiece by adjusting the jaws until it is perfectly concentric with the table’s axis of rotation. The best way is to make an adapter plate that attaches to the back of the chuck in the same way that your lathe does so you can exchange lathe tooling with the rotab. Here is an example:
For the example, the chuck is threaded onto the adaptor plate, and then the holes in the adapter plate’s flange are used to bolt down to T-nuts on the table.
In my case, I bought a 4-jaw from Shars brand new, and simply drilled some through-holes in the chuck to mount to the table directly without an adapter plate:
First, you want to make sure your part is properly centered on the table. To do that, I clamp the table down on the mill table (no special place is needed), put my Indicol indicator holder on the mill spindle, and find some round feature on the part to indicate on. For example, on the plate milling fixture above, indicate on the round boss, or on the center hole. Spin the table and bump the part in until spinning the table doesn’t move the indicator.
Second, locate the center of rotation directly under the mill spindle. You can simply use the X and Y table handwheels to do this. Use that Indicol to indicate off of a circular feature you want centered under the spindle. Turn the indicol around on the spindle and adjust the handwheels until the indicator stays put relative to the spindle position. A Blake Coaxial indicator will make this last even simpler.
When you’re rounding partially by cranking a part around on the rotary table, it’s really easy to go a little too far and screw things up. The answer is to drill the end points to make the exact stopping point on the rotab a lot less sensitive:
Centering with a Blake indicator is really fast, but what if you don’t have a Blake, or worse, what if your mill is too small to accomodate one? Here is a nice solution I found on a German site. This fellow has made an ER collect fixture for his rotary table, and has taken care that when installed on the table, the axis of the collet is aligned with the table’s axis. He can then place a dowel or other straight pin in the collet and line up until it will go into a similarly sized collet on the spindle. Nice trick! It’s similar to how Widgitmaster showed me to align a drill chuck on a QCTP to the lathe centerline with a dowel pin held in the lathe chuck.

In this three-part series, we’ll cover three key tools the Fusion 360 Machining Extension brings to the table that will make your process more efficient than ever. Next up is rotary strategy.
Business owners in the manufacturing industry face a plethora of decisions daily. Which new machine should I purchase? How can I produce this part? Who’s going to train our new hire? The Fusion 360 Machining Extension is designed to help you grow your business and hopefully take the decision of which CAD/CAM tool to use off your plate. This three-part series covers three essential tools the Fusion 360 Machining Extension brings to the table. Each tool will save you time, energy, and money. In this article, we’ll dive into Rotary Strategy and how, for those without 5-axis machine budgets or capabilities, this tool can achieve more complexity without the cost of a new machine.
When investing in new machines isn’t in the cards for your business, the next best thing is investing in rotaries for your existing machines. A rotary or 4th axis is a bolt-on piece of equipment that allows you to spin material along (most often) the X-axis so that you can reach multiple sides without repositioning or part flipping your stock material. Rotary Strategy plays a crucial role in honing your process to be as efficient as possible, and it allows you to use tombstone practices to help with batch manufacturing.
The Fusion 360 Machining Extension has built-in Rotary tools that give you access to additional functionality to maximize the efficiency of your machine. As a result, you gain more potential for revenue generation, part production, and batch processes.
The Rotary tools in the Fusion 360 Machining Extension allow complete 4-axis simultaneous machining of freeform shapes, with multiple pass options to best suit your geometry. They also give you the ability to set angular limits and offset the tool to improve cutting conditions.
The value add here, though, isn’t just in the 4th axis bolt-on rotaries. For folks who have grown past bolt-on rotaries and moved to the big-timers, the Rotary tools in the Fusion 360 Machining Extension are also powerful for multi-axis and turn-mill machines.
Finding a process that works for your business takes time, energy, and money. We get that it can be tough to invest in a new tool you haven’t tried yet. Your ultimate goal is for your workflow to be perfect, repeatable, and profitable, and we believe you shouldn’t have to make concessions to reach your goal. That’s why we offer a free 7-day trial of the Fusion 360 Machining Extension.


 8613371530291