
diy 4th axis rotary table factory

When there"s backlash or slop between the driver and the feedback device, the situation is made worse instead of better because the system will typically be unstable, particularly during times when cutting forces make the table move. The encoder moves a couple counts, and the motor tries to move it back to position. But, it may have to move thru some of the backlash before the encoder moves. Now the backlash zone has moved from its original position, the force direction from the cutter changes, and the table moves again. This time its changed the encoder by 4 counts. The motor moves the screw, and the backlash zone has moved again. This happens continually during the cut, and the motor is always trying to keep the encoder in the commanded position. It can"t do it, but it hunts back and forth in a never ending cycle of trying to keep it in the right place. It hasn"t helped or compensated for the backlash in any useful way, and generally serves to make the backlash more evident and the process less controllable than if the encoder was mounted directly to the motor shaft.
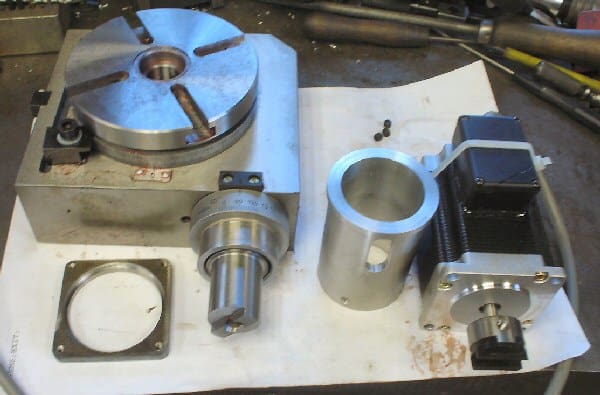
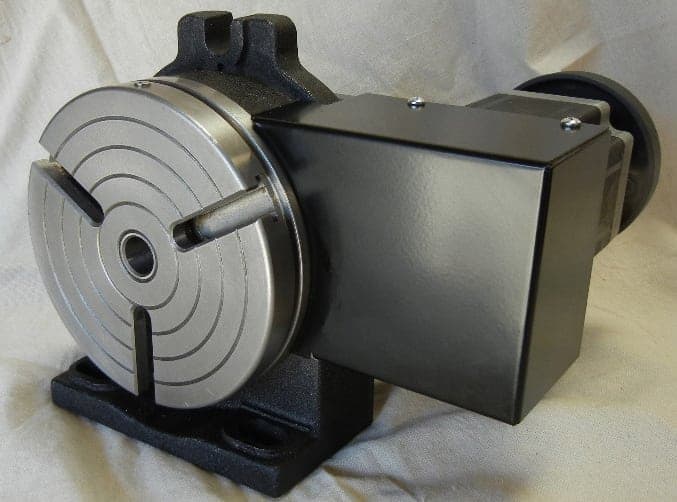
About 3 years ago I bought a cheap rotary table that I converted by taking off the handle and replacing with stepper motor. I used thrust bearings and whatever I could think of to minimize the backlash but it was a big FAIL. The internal worm gear mechanism was so sloppy that backlash was measured in degrees. Its been sitting on the shelf collecting dust. Since then I found out about Harmonic Drives and what high end CNC/Robotic systems use for rotational axis. A new harmonic drive is big $$$$ so eBay to the rescue. The gear head I used is planetary but made by Harmonic Drive Systems so it is very precise. It’s simple and just the right size for my small cnc. Since the stepper motor, gecko drive and gearhead was bought off eBay, it wasn’t that expensive. Under $150. I had upgraded my mini lathe to a bigger 5″ 3 jaw chuck. The 3″ chuck wasn’t being used anymore so I put it on the gearhead.
Here"s a great CNC hack that adds a ton of functionality, a DIY rotary 4th axis! [Jim] had started this project over a year ago when he originally ordered the gearhead off eBay,...
Tombstones correspond to Fixture Plates on a mill. There are many different shapes and sizes of Tombstones available for 4th Axes. Here’s one I’ve shown before from a big horizontal milling setup:
I was reading an article about Tombstones in the Tormach blog recently and it got me to thinking about how Tombstones on VMC’s can make a job more profitable.
Tombstones are par for the course on Horizontal Machine Centers, but they’re seen a lot less often on Vertical Machining Centers. Perhaps it’s because they’re just built into a lot of HMC’s at the factory whereas you have to set one up using a 4th Axis on the a VMC. The question for this article is how to get a handle on their value?
There’s an old saying that you’re not getting the most return out of your CNC Machine until you have fixtured a job up so that every square inch of the table’s accessible area is being used to make parts. Put as many parts as possible down for each setup, in other words. Relying on just a single machining vise, for example, can mean a lot of available table area is wasted versus putting two vises on the table (so you get 2 parts per setup), or two double station vises (so you get 4 parts per setup). It’s all about how many parts the machine can “chew” on for each setup. The more the merrier because your setup time divided among all the parts will invariably be less on a per part basis.
Now consider a tombstone like the one pictured above. It’s like having 4 smaller tables available. In fact the width of the tombstone is 4″and the length is 13″, so counting all 4 sides, you get 4 x 4 x 13 = 208 square inches. That’s actually 22% more area than the travels suggest would be available on the table. So, for about every 4 parts we can fit 1 part gets a free ride. That’s not bad!
In addition, we can machine 3 faces on each part. Ordinarily, that would take 3 setups which would be a lot more time consuming. Pretty cool, eh? Depending on how much additional setup time is required for this arrangement versus just using the table, we’ve probably made our job more profitable. Perhaps by quite a bit.
Suppose we had a tombstone that was a full 18″ long to match the Tormach’s travel. Yes, we might need a big fixture plate so the 4th axis and tailstock have room on the table, but that’s doable. With the same math, we’d get 4″ x 18″ x 4 sides = 288 square inches. Dang, now we’ve got 68% more available area and we’re really starting to cook with fire. 68% more parts each time we press the green button get finished.
Suppose we create our own “Tombstone” with a piece of 1″ thick cast iron. We can go 2″ if we want it to be more rigid. Now, let’s further assume it is the width of the table’s diameter, which for the 8″ 4th axis is 7.9″. We’ll mount it dead center of the axis, make it a full 18″ long, and use the two sides. Our total area is now 7.9 inches x 18 inches x 2 sides = 284 square inches. That’s almost as good as the earlier tombstone example, and gives us 66% more area.
What if we have a triangular tombstone that just fits in the inscribed circle of the table? No problem. The math says each of the 3 faces of the triangular tombstone will be 6.84 inches, so we have 6.84 x 18 x 3 = 369 sq inches. That’s 116% more area than on our table–twice as many parts per run. Winner, winner, chicken dinner!
When you look at it this way, it’s not hard to see how a 4th axis with tombstone can increase the available area for parts in each setup and make available more faces of the part to be machined.
For round parts, and for many things that go ’round, lathe tooling is where its at. After all, it’s optimized to do workholding along a rotating axis. Hence, it’s very common to mount lathe chucks on your 4th Axis:
All the same ideas that apply to which chuck to use in a lathe work for 4th Axes on mills. Years ago, I put together a chart that has been useful to me in turning work and we can refer to it here too:
“Repeatability” applies to the ease with which you can remove a part and put it right back into the chuck in exactly the same position so you can continue machining. It’s a big factor to consider, but typically isn’t as important for 4th Axis work as it is for turning. When turning, for example, you often have to swap a part end for end, or you may have to take an existing part and put it in the lathe to rework some aspect. With a 4th Axis, you will often just stick in a piece of raw material, in which case Repeatability is not a factor. Hence the ubiquity of the relatively non-repeatable 3-jaw chuck for 4th Axis work.
Turning between centers happens fairly often with a 4th Axis just because you have to make sure you’re supporting any part with significant overhang out at the end too. How much is significant? I was taught 3 or 4 diameters was about a much as you want to hang off the chuck on a lathe before you start looking for more support.
Collets are really nice for turning work (hence the ubiquity of the old Hardinge Lathes and their 5C collet system). They get high marks on just about every aspect. It’s no coincidence that the original Haas 4th Axis had a 5C indexer:
I never would have guessed it, but Geof on CNCZone says the following 4-axis mill set up was able to machine these aluminum bars to length, ensure the faces were square, and drill and tap a hole faster than he could do it in a lathe. You can imagine each of those 4 parts being a 5C spin indexer and suddenly you fit quite a few more parts on your 4th Axis.
I’ve written at more length on Stallion’s Trunnion fixtures in another post. They’re very slick, but you need to make sure they solve the problem you need solved for your 4th Axis. In particular, the access to the part is going to be limited to the access you can get form a vise. As such, you’d be looking to use a Vise on your 4th Axis largely because it is super easy, familiar, and to gain access to 3 sides of the work rather than just the top in a single setup.
Workholding and Fixturing are always an art that it pays to learn well. I’m always on the lookup for clever setups and fixtures and you should be too. The 4th Axis opens whole new avenues for fixturing and setup.
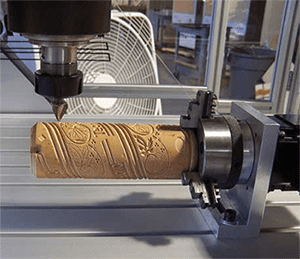
So I tried another blank, taking the opportunity to dial in the accuracy of my axis. For some reason, my Z was too low, so when the CNC roughed out the pen, it was already at or a hair below the finished diameter. For grins, I went ahead and engraved it, though the engraving was much thinner than I had planned. I packed it quickly with coffee and CA and turned it down. Yup, the engraving turned off here and there.


 8613371530291