
how to use pressure cooker without safety valve free sample
There’s more than one way to open a pressure cooker and each way has its own effect on what’s inside. What might work for a stovetop pressure cooker, might not work for an electric pressure cooker. We’re sharing the “how’s” for each of these pressure cooker opening methods to get beginners started and the “why’s” for expert cooks to sharpen their skills.
10-Minute NaturalSlowCount 10 minutes, and then release remaining pressure by opening the valve. If the pressure dissipates sooner than 10 minutes do not remove lid until time is up.1010
Using the wrong opening method can give you limp veggies, bean mush or rock-hard dry meats – here are a three principles that you must know to choose the right opening method for your pressure cooker recipe:
When the pressure cooker is both building and releasing pressure, the temperature inside is near or above the boiling point, which means the food is actually cooking during this time, too. This is generally fine for meats, legumes and desserts. It is not fine for vegetables that you may want to have more al dente as they continue to cook during this time- choose the fastest release method for veggies while more robust foods will benefit from a longer opening method.
The speed at which pressure is released is directly related to how much movement is inside the pressure cooker – more speed gives the food more movement. When pressure is released, the equilibrium that suppressed the bubbles of the boil during pressure cooking is broken and they begin breaking to the surface again. A fast release will violently release these bubbles, forcefully flinging bits of food and foam onto the underside of the lid and safety valves, while slow opening method, such as Natural release, delicately allows the bubbles to rise into a slow lazy simmer. For foods which you intend to keep whole (like beans) or clear (like stock) use the slowest opening method to get the least amount of movement.
The difference in temperature between the food that comes out of the pressure cooker and the environment can affect the speed of evaporation. The faster opening methods will yield the hottest food with an accelerated evaporation of the food’s cooking liquids and juices. While the slowest opening method will have given the food a chance to cool down and the liquids will evaporate at the speed of conventional boiling. So for foods which you intend to keep juicy (like roasts) use a slow opening method; while, foods which need reduction after pressure cooking (like a sauce), use a fast opening method.
If this is starting to sound complicated, don’t worry: all of the recipes on this website (and my cookbook) already call for the appropriate opening method. Let’s get into the “how’s”.
This list includes an opening method I came up with (Slow Normal) and another that has been unofficially around for many years (10-minute Natural) – they add more options to your pressure cookery. We start the list with the fastest opening method and conclude with the slowest. Further down, there’s an opening method we no longer recommend and one that used to be OK for older cookers but should not be used on modern stainless steel pressure cookers.
Sometimes this method is called Quick, Manual and, confusingly, Automatic. This is a fast opening method that can take 2 to 3 minutes. Normal pressure release means that the cook should use the valve, or pressure releasing mechanism particular to their cooker (such as a button to push, a lever to twist, or a slide to pull), to release pressure. For thick recipes such as a chili or a risotto the still unopened pressure cooker should be given a few small jolts to release any super-heated seam pockets in the food after pressure is released. This release method is used for quick-cooking foods and vegetables. It should not be used for most legume, rice and fruit-based recipes. It can be used for meat stew-type recipes (where the meat is completely covered with liquid) – but not ones where tossing the other ingredients around would mush them.
Weighted or jiggle-type pressure cookers may not have this kind of release – we recommend either using Natural Release (see below) or simply using a fork tines to gently lift the weight and release pressure.
This is a relatively fast opening method and can take from 5 to 6 minutes depending on the pressure cooker type (the element in electrics still retains heat after turning off) and fill level (more food will retain more heat). Similar to Normal release, this method releases pressure using the cooker’s valve, or the pressure releasing mechanism, but pressure should be released very slowly. If the valve only allows for pressure to release full-throttle, the cook should release it in very short bursts- if anything other than steam sprays out of the valve (like foam), the valve should be closed for 10 seconds before the next slow release or short burst. The Slow Normal release is for occasions where it’s just not practical or convenient to wait for the full Natural or 10-Minute Natural release or for tricky foods (grains, legumes and fruits).
This is a slow and somewhat delicate pressure release, and as the name suggests, takes only 10 minutes – a little more if there is still pressure in the cooker that needs to be released (usually with electrics). The 10-Minute Natural release allows for pressure to release naturally for 10 minutes and then, if there is any remaining pressure, it is released using the Slow Normal method. Conversely, if the pressure in the cooker goes down beforethe10 minutes are up, the lid must remain closed and the cooker undisturbed for the full 10 minutes. This method is recommended for grains which continue to cook in the residual steam locked inside the cooker without any additional heat. The 10-Minute Natural can also be used in place of Natural Release.
This is the slowest and most delicate pressure release method, it can take anywhere from 10 to 30 minutes depending on the pressure cooker type (electrics take longer due to their thermos-like construction) and fill level (fuller pressure cookers will take longer). The Natural release lets pressure release slowly from the cooker once the heat (or cooking program) is turned off . It’s most recommended opening for tricky foods that tend to foam or expand like grains, legumes and fruits to prevent the food or its foam from spraying out of the valve; foods that need to cool down slowly such as braised and steamed meats and desserts to prevent their moisture from evaporating too quickly; and, stocks to keep the food from tossing the ingredients around in a way that would cloud it.
Some opening methods can fall out of fashion because they are either too problematic or the materials used to make the cookers (such as 100% aluminum) are no longer popular.
Using the right opening method can help a recipe end on the right note but it’s also a question of safety. The wrong opening method could clog the safety valves or even damage the pressure cooker.

This website is using a security service to protect itself from online attacks. The action you just performed triggered the security solution. There are several actions that could trigger this block including submitting a certain word or phrase, a SQL command or malformed data.
Pressure cookers are the cheetahs of the cooking world--they"re just so darn fast. Pressure cookers are great for cooking food quickly while also retaining the vitamins and minerals that can be lost when food is cooked using other methods. There"s still a little bit of a learning curve, though, so if you"re using a pressure cooker for the first time, it"s important to know how to get started safely. Knowing the basic mechanisms of pressure cooking being able to recognize an unsafe system will make all the difference when you start using your pressure cooker.
:max_bytes(150000):strip_icc()/all-about-pressure-cookers-474755_color-a647ac170de04c8cbbb5962afbc095a9.png)
Quick pressure release or natural pressure release?It’s one of the most common questions I get. Electric pressure cookers and multi-cookers like the Instant Pot, Ninja Foodi, and Crockpot Express have the ability to release pressure two ways. Instant Pot Natural Release is a frequent search term. Let me explain the difference!
Releasing the pressure can be a little intimidating to people who are new to pressure cooking—especially the quick release with the noise and jet of steam. But don’t let a little noise get between you and fabulous meals cooked in your pressure cooker!
Those are often the first questions new pressure cooker users ask. So I thought it would be a perfect time for a post explaining it for all those who have an electric pressure cooker or multi-cooker like the Instant Pot waiting for them under the tree.
When the cook time ends, your pressure cooker will beep. At this point, the recipe will direct you to release the pressure in the cooking pot. You can release the pressure two ways: a quick pressure release or a natural pressure release.
A quick pressure release is when you turn the pressure release switch to the Venting position and let the steam to release quickly when the cook time ends. This will result in a strong jet of steam coming from the pressure release valve. This is normal.If drops of liquid or foam start to emerge from the pressure release valve, simply switch the valve back to the Sealed position and use an Intermittent Pressure Release (more on that below).
Other pressure cookers may have different labels, but it’s the same basic principle. Turn the valve to allow the steam to escape / pressure to release.
When the pressure is fully released, the float valve will drop and the lid will unlock to open. For safety reasons, the pressure cooker will not open until the pressure is released and the float valve has dropped.
Using a quick pressure release stops the pressure cooking quickly. Therefore, you should use a quick pressure release when you are cooking ingredients, like vegetables, that you want to avoid overcooking.
A natural pressure release is when you leave the pressure release switch in the Sealed position when the cook time ends. This lets the pressure release slowly, without you doing anything. When the pressure is fully released, the float valve will drop and the lid will unlock and open.
A natural pressure release is a bit anticlimactic in comparison to a quick pressure release. There is no jet of steam when the natural pressure release starts. There’s also no clear way to tell when the pressure is fully released, and no beep or signal when the lid unlocks. Sometimes you can hear the float valve drop if you’re close by.
The time it takes for the pressure to release naturally will vary depending on the ingredients and amount of liquid in the pressure cooker. A natural pressure release can take from 5 to 30 minutes in the electric pressure cooker.
Using a natural pressure release allows the cooking to stop gradually. You don’t want to open the valve quickly when the ingredients inside could be foaming. You’ll get foam shooting out through the valve, so use a natural pressure release when making steel cut oats, a large pot of soup or pasta.
You also want to use a natural release for large cuts of meat. Just like you’d let meat rest after grilling it, a slow natural release is said to let the meat relax and be more tender.
During a natural release, the cooking continues so you need to take that in to account when determining your cook time. If a recipe calls for a Quick Release, you can use a Natural Release if you prefer, but reduce the cook time.
The different types of pressure releases can also be combined. You don’t have to wait for all the pressure to release to get the benefit of a natural pressure release.
I almost always only wait 10 minutes before I release the remaining pressure. Combining the two release options reduces waiting time yet gives you many of the benefits of a natural pressure release, such as reducing foam and tenderizing meats.
An intermittent pressure release is the best of both worlds. It’s a way to quickly release pressure for foods such as pastas, soups, and certain grains, which are prone to foaming or spitting if you try to release pressure with a quick release but would be overcooked with a natural pressure release.
With this method, you open and close the pressure release valve in short intervals. This allows the pressure to escape more quickly than a natural pressure release and also prevents foam from coming out of the pressure release valve.
With some foods, one or two closed intervals is all I need before I can leave the valve in the Venting position; with other foods, if the foaming is particularly bad, I will close the valve and wait a minute or two, then slide the valve to Venting again and continue opening and closing the valve as needed.
No you do not need to turn the pressure cooker off for a quick or natural pressure release. The pressure will release on the Keep Warm setting. The benefit of not turning it off is that the time will count up so you can see how long it’s been since the pressure cooking time ended.
There is some debate about whether or not the pressure releases more slowly if it’s on the Keep Warm Setting. The Instant Pot Company’s official position is that it does not release more slowly on the Keep Warm Setting because the Keep Warm heat does not turn on until the pressure has been released.
I prefer to turn off or unplug the pressure cooker before I do a quick pressure release or natural pressure release. I seem to always forget to turn off the pressure cooker if I don’t turn it off when the pressure cooking ends. I also prefer to set a timer to remind me 10 minutes has passed and it’s time to release the pressure when I’m doing a natural pressure release.
If you’re in a hurry to get cooking, you can always skip to our Make Your First Meal post and come back to this information while you’re waiting for the chicken to cook.
Once you have your first meal under your belt, move on to some easy pressure cooking recipes. Before you know it, you’ll be making fabulous pressure cooker meals and wondering how you ever cooked without it.
We are a participant in the Amazon Services LLC Associates Program, an affiliate advertising program designed to provide a means for us to earn fees by linking to Amazon.com and affiliated sites.

After a long day of work, the last thing you want to deal with is cooking a giant pot roast in the oven for hours. Or what if you forgot to soak those beans for dinner? Dishes like beef roast and home-cooked beans are usually weekend-only endeavors, requiring hours of free time to prepare. Or so you thought. You can save valuable time and streamline dinner prep with the help of a pressure cooker, turning weekend meals into weeknight solutions.
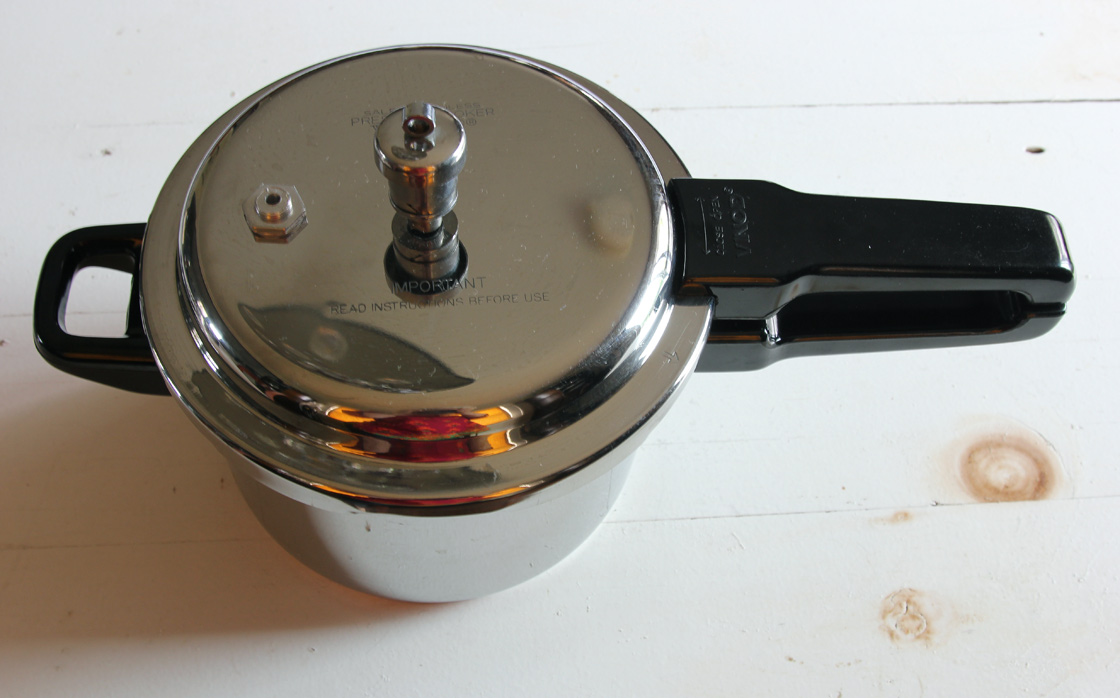
Pressure cookers have come a long way since their heyday in the 1940s and "50s. Modern stovetop pressure cookers are equipped with multiple safety features-the design of the lid-locking system makes it impossible for the lid to be removed when the pot is under pressure. New-generation pressure cookers, equipped with spring-valve pressure regulators, are quiet, streamlined and safe.
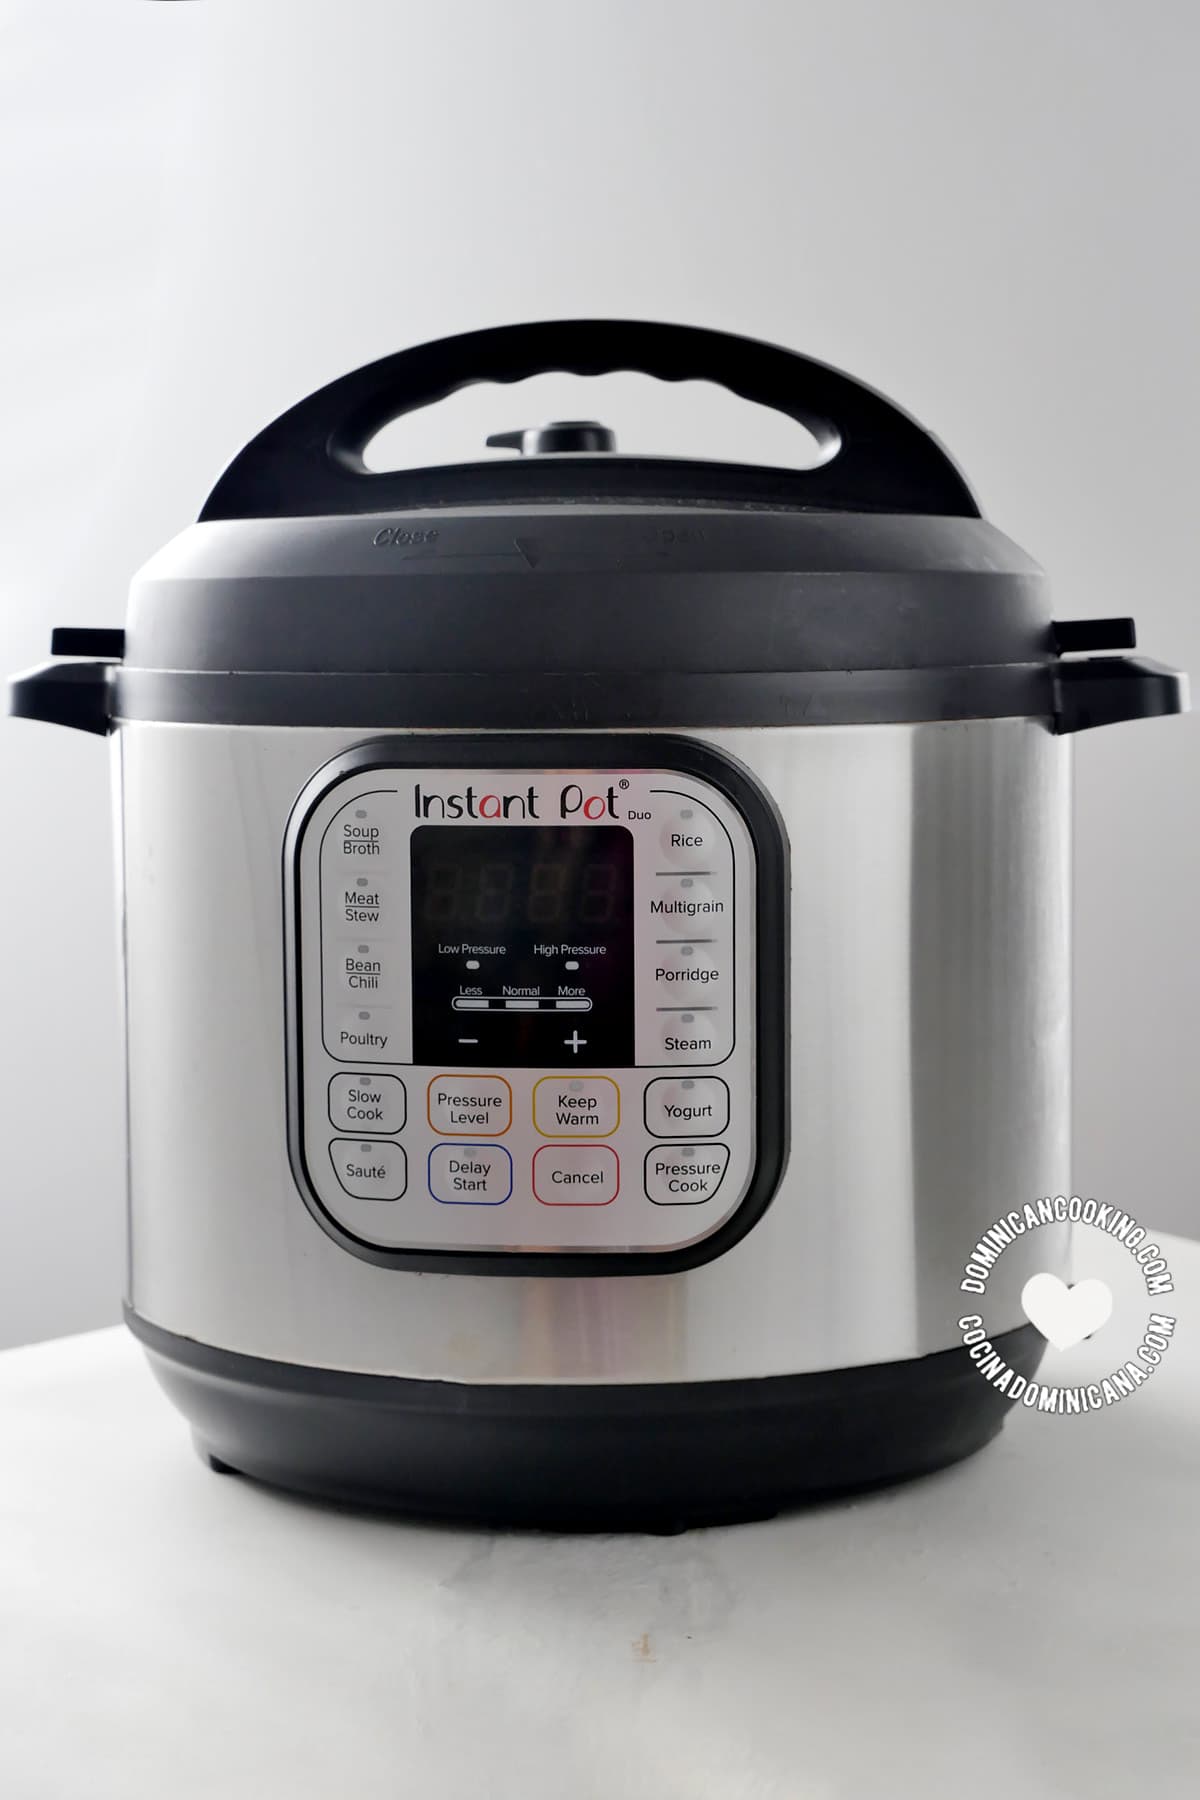
A real game-changer in recent years is the electric pressure cooker and multicooker. Popular devices like the Instant Pot have introduced pressure-cooking to the mainstream with easy, safe operation and hands-off cooking. Simply snap on the lid and press a few buttons. The cooker does the rest. Note that electric cookers operate at a slightly lower level of pressure, so cook times are a little longer than for their stovetop counterparts.
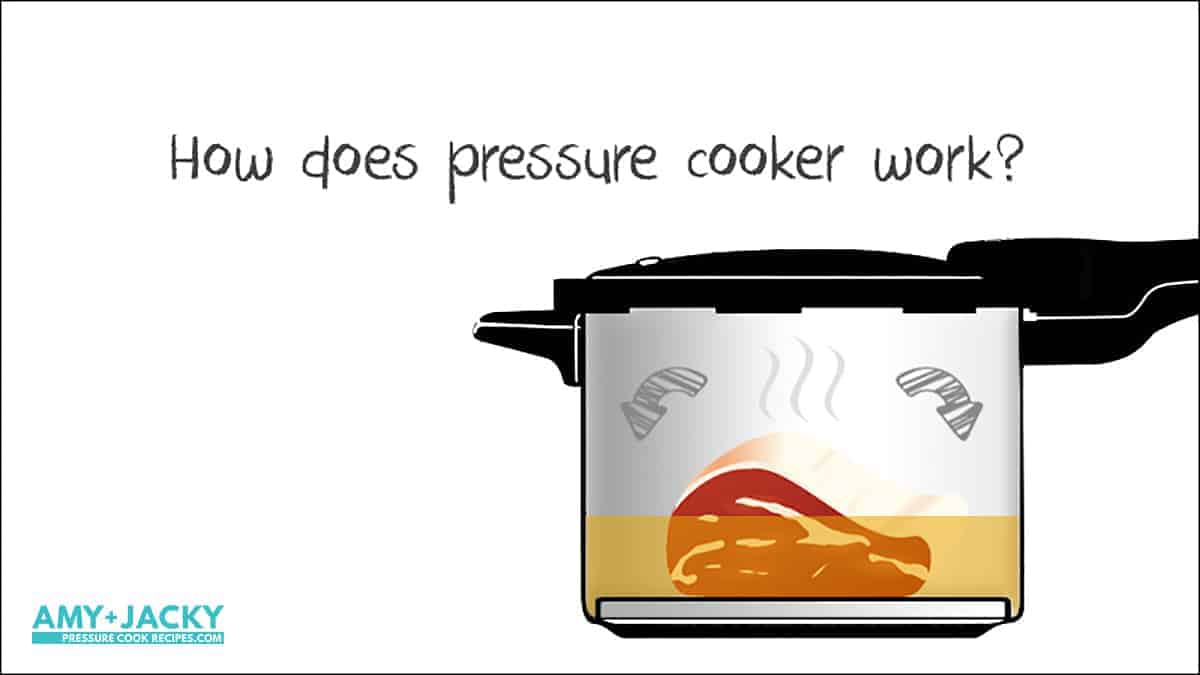
A pressure cooker works by trapping steam inside the sealed pot. This causes the atmospheric pressure to rise, which increases the boiling temperature of water. So, instead of cooking food at 212°F (if you are at sea level), you cook it at 250°F, resulting in dramatically faster cooking times without harsh boiling.
This also translates into major energy savings. Depending on the type of food and the type of cooker, a pressure cooker can help you green up your kitchen with an energy savings of up to 50 to 80 percent, according to manufacturers.
Modern pressure cooking is safer than ever, energy-efficient and will save you time and effort with hands-free cooking. But the cookers do require a bit of a learning curve for best use. Below are the basic steps for how to use your pressure cooker (electric or stovetop).
Check to make sure everything is in place before cooking. For electric pressure cookers, a clean and dry inner pot sits inside of the cooker, and food should only be added to the inner pot. The gasket, a silicone ring that snaps into the lid, should be clean and properly fitted into the lid. For stovetop pressure cookers, check that the inner part of the lid rim, outer rim of the pot and the valve are clean. Check that the gasket is flexible and not dried out; replace it if necessary.
Add the ingredients to your pressure cooker. Do not fill the cooker more than two-thirds full (or half full for foods that may froth, e.g., beans and grains, or dishes that are mostly liquid and require a quick release).
Program your pressure level and cook time into your electric pressure cooker,and skip to step 6. For stovetop pressure cookers, bring the pot to high pressure. Once the cooker reaches high pressure, it is important to lower the heat immediately. If left over high heat, the food may become overcooked. If using an electric stove, use the two-burner system: While the cooker comes to high pressure over high heat, heat a second burner to medium-low or low heat. When the cooker reaches high pressure, move it to the second burner and keep it just hot enough to maintain high pressure.
Release the pressure. Once cooking has finished, you must release the pressure before you can remove the lid. You have a few options: Natural Release: This method is recommended for frothy and high-liquid foods, as well as big pieces of meats and other foods that aren"t at risk of overcooking. You simply leave the cooker alone and let the pressure come down naturally. This process can take anywhere from 5 to 20 or more minutes depending on your cook time and how full your cooker is.
Quick Release: This method is recommended for ingredients with short cook times, like some vegetables and seafood, or for staggering ingredients, such as adding a vegetable partway through a stew. For both types of cookers, press or turn the steam release valve once cooking is complete to release the steam. Be careful to immediately move your hand and other body parts out of the way of the steam, and don"t position the cooker under cabinets or other obstacles. Do not use a quick release when cooking foods that tend to froth or for liquidy foods that fill the cooker halfway or more. These foods can clog the valve or spray hot liquid.
Cold-Water Release: This is the fastest method for stovetop pressure cookers and a good option when you want to stop the cooking quickly. DO NOT use this method with electric pressure cookers, or you risk electrocution. For stovetop models, place the pressure cooker in the sink. Hold the cooker at a slight angle and run cold water over the outer edge of the lid so that it flows over the lid and down the sides. Do not let water run directly over the vent or valve.
If you live at an altitude of 2,000 feet or higher, a pressure cooker may be your best friend in the kitchen. The lower atmospheric pressure at high altitudes allows water to boil at lower temperatures than at sea level. By increasing the pressure, a pressure cooker raises the temperature at which water boils, thus helping to compensate for the longer cooking times caused by high altitude. Adjust pressure-cooking times according to the following formula: for every 1,000 feet above 2,000 feet elevation, increase the cooking time by 5 percent.
There"s a good reason canned beans are so popular: they don"t take hours to cook. Dried beans are superior in texture, flavor, price and nutrition, but they can be a real pain to prepare since they take lots of forethought. Dried beans are typically soaked overnight before cooking for at least an hour (sometimes two or three hours), making them less than ideal for a last-minute meal. In comes the pressure cooker. It can turn beans from dried to creamy in 45 minutes or less, and the whole process is hands-off. Dried black beans take about 40 minutes to pressure-cook from start to finish, and free you up to assemble tacos or make Spanish rice. Rather than settle for canned, cook up a pot of beans and store any leftovers in their cooking liquid for meals throughout the week. Cooked beans will keep for about 3 days in the fridge.
How many times have you arrived home ready to make dinner when you realize you forgot to defrost a key ingredient? Frozen food is a great way to have fresh, healthy food on hand, but cooking frozen chicken thighs, for example, takes some thinking ahead. If you"re pressure-cooking those chicken thighs, then you"ve got nothing to worry about. You can safely pressure-cook a number of frozen ingredients and it will only add a few minutes to your cook time. The general rule with frozen meat is to add 50 percent more cook time (if an ingredient normally takes 10 minutes to cook, cook it for 15 minutes) and allow more time for the cooker to build pressure. Frozen pieces of chicken, ground beef, cubed beef or thin pork are good for this method, and work well in stews and soups. Avoid using frozen giant roasts or other big hunks of meat-it"s best to defrost these items before cooking.
Speaking of big hunks of meat, Sunday pot roast isn"t just for Sunday anymore. Big pieces of beef or pork require long braises or stews using conventional methods, meaning hours of cook time. This is fine as a weekend project, but what if you want to serve pork shoulder on a Tuesday night and you don"t want to load up your slow cooker before work? The pressure cooker simulates long braises and turns tough meat perfectly tender after about an hour of high pressure. This means you can have your showstopping main dish on the table, start to finish, in less than two hours. While the meat cooks, prepare your side dishes, set the table and open a bottle of wine. No sweat.
And speaking of multitasking, a pressure cooker gives you freedom to utilize the rest of your kitchen. This may sound like a riddle, but the hands-off nature of pressure-cooking means that you don"t have to babysit the dish. Once you"ve clamped on the lid and started the timer, you"re free to ignore the cooker until the cook time is up. This leaves you free to toss a salad and sear a steak on the stovetop, or steam a cheesecake while you eat dinner. Even though you can make whole meals in the pressure cooker (stew, for example), you don"t have to. The cooker will cook your chosen dish perfectly without your help, letting you easily churn out a whole spread on a weeknight.
Why cook one dish in your pressure cooker when you can cook two? Using a steamer rack, basket or trivet, you can create layers within the pot and cook two dishes at once. Steam fish up top while a sauce or grain cooks below. Cook a vegetable stew or curry in the bottom of the pot and steam rice in a bowl or ramekin above. Steam "hard-boiled" eggs while oats, rice or grits cook below. The possibilities are endless, as long as your cook times match up. For example, if both items cook for 5 minutes at high pressure, and one is steamed on a rack or cooked pot-in-pot (meaning the dish cooks in a ramekin, bowl or other dish inside the cooker pot), then you can make both dishes at once. Pressure-cooking two dishes at once is kitchen multitasking at its finest.

Over the last decade the Instant Pot has elbowed its way onto many a kitchen counter. The multifunctional appliance earns its place with slow cooker, pressure cooker, and saute capabilities (just to name a few). So you can either set-it-and-forget-it before leaving for work or pressure cook a whole chicken in a fraction of the time it takes in the oven.
That’s all great, but when the Instant Pot’s many buttons and menacing-looking steam valve are staring you in the face, the appliance ($99.95, Amazon) can be intimidating. I promise it’s easy to use once you get started.
They’re not quite as user-friendly as a simple Crock-Pot, but it’s worth learning how to use the multicooker just for the time you’ll save in the kitchen. There are a few basic steps for most easy Instant Pot recipes, but you’ll get the hang of it. Here’s what you need to know about using an Instant Pot.
The Instant Pot is a pressure cooker that works by using steam to build pressure. As the pressure builds forcefully inside the pot, it produces temperatures high enough to quickly heat and cook the food inside.
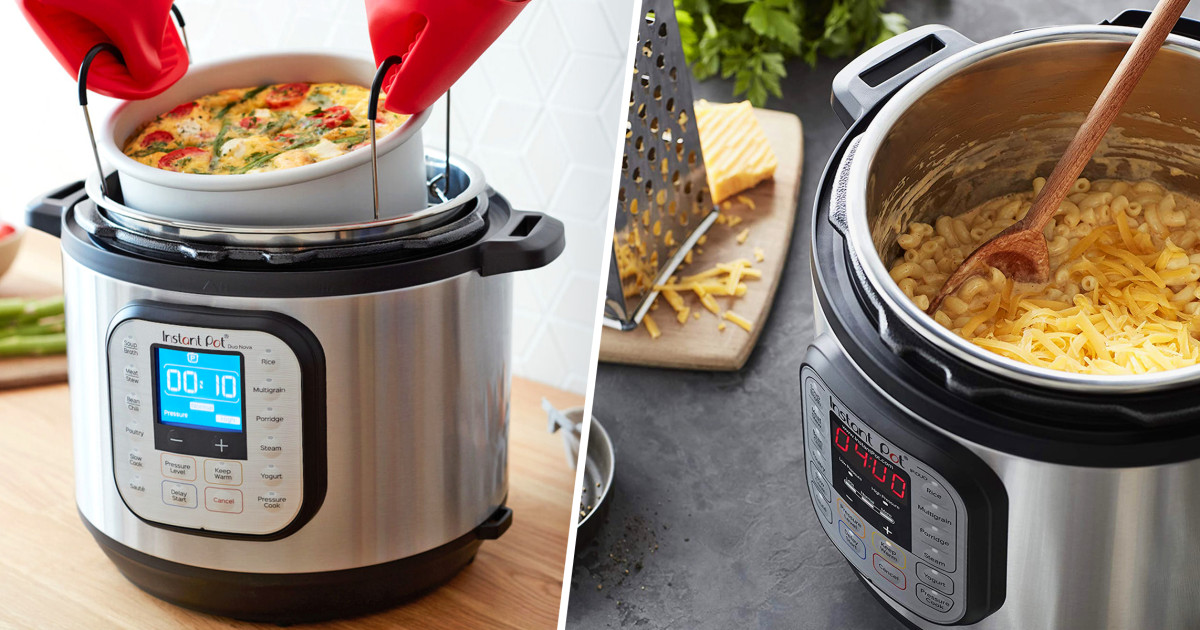
Instant Pots have other built-in cooking programs, too. It can act as a, yogurt maker, rice maker, steamer, orsautepan — making it one of the most versatile smallon the market.
For starters, wash the pot and inside the lid with soap and water before using for the first time (and of course, between uses). When it’s plugged in and ready to go, here’s how to get going:
The Instant Pot comes with a few accessories, most of which you won’t use a lot. Your go-to accessory is the plastic condensation catcher. Snap it onto the back of the Instant Pot to collect condensation from the steam; otherwise, you’ll end up with water all over the counter.
Place the lid on top of the pot and push down as you turn it clockwise (in the direction of the arrows printed on the lid). This will seal the lid to the pot so that the Instant Pot can pressure cook the food inside. Turn the valve (the little knob on top of the lid) to the sealing position.
Once you’re ready to cook, set the time and pressure controls according to your recipe instructions. Select “pressure cook” and use the + and – buttons on the control panel to set the time. Almost every Instant Pot recipe involves the pressure cook option, but note that other modes may differ. The “saute” mode should always be used with the lid off, and if you’re using the “slow cook” setting, make sure the valve is set to venting rather than sealing.
When your food is cooked, move the pressure release valve from the “sealing” position to the “venting” position. When you do this, all the hot steam from inside the pot will come out of the valve, so be careful not to burn yourself. It’s easiest to do this while wearing an oven mitt or by using a long-handled spatula to turn the knob so your arm is never directly over the steam. When all the steam has been released, you can open the lid.
When you hit “pressure cook,” your Instant Pot will default to the amount of time last used. Simply use the + and – buttons to adjust the time according to the recipe you’re making.
The Instant Pot takes a few minutes to reach the proper pressure to cook. If you set it at 10 minutes, it won’t actually be done in 10 minutes. Allow 3 – 4 extra minutes per recipe for the appliance to heat. The machine is smart enough to know how long you set it for, so even with the added minutes, after exactly 10 minutes of cook time, it’ll turn off and your food is done.
To start the Instant Pot Duo, plug it in and add the food you want to cook. Then use the control panel to set the pressure (high or low), and set it to the appropriate time. The confusing thing about the Instant Pot Duo is that it doesn’t actually have a start button — as soon as you set a time, it’ll start heating.
Since your Instant Pot works by using steam to create pressure, you’ll need to add at least one cup of liquid to your Instant Pot for any meal you cook.
Also, some foods carry more water than others, so you’ll probably need to add less water with veggies (like tomatoes or spinach) than you would with denser foods like meats.
Inside your inner pot, you’ll see it says “PC MAX,” with a 2/3 line and a 1/2 line. It’s important to never fill your inner pot past than the 2/3 max line.
The steam valve sits on top of your Instant Pot lid and has two settings:sealingandventing.The steam release handle allows you to move from one setting to the other.
Make sure the steam release handle is in thesealingposition before using any of the pressure cooking programs. This will prevent steam from escaping the Instant Pot and allow pressure to build inside.
To vent the steam valve,you’ll need to have the steam release handle in theventingposition — either by pushing it back yourself (also known as a manual or “quick release”) or on its own via a “natural release.”
Natural Release:Your Instant Pot releases pressure on its own until the float valve (next to the steam valve on top of your lid) drops down. A natural release takes a bit longer, but it’s best for recipes with meats, soups, broths, beans, starchy foods, and foods with lots of liquid.
Quick Release:You manually release pressure from your Instant Pot by pushing the steam release handle back to the venting position until the float valve drops down. A quick release is much faster and is best for recipes with vegetables, fish, and fragile or fast-cooking foods.
The sealing ringis an Instant Pot accessory and safeguard that keeps your lid locked tight during pressure cooking. It helps your machine withstand the high forces of pressure needed to cook the food inside.
That’s why it’s always good to have a spare sealing ring to use for different types of Instant Pot recipes. I recommend using one sealing ring for sweets and another sealing ring for savory dishes.
TheKeep Warmsetting automatically turns on when your food is done cooking, so it’s easy to get distracted and forget that it’s on. If you don’t manually shut off the machine, the Keep Warm setting will keep it on for 10 hours before the machine shuts off itself.
If you’d rather NOT use the Keep Warm setting on your Instant Pot, you can switch it off on the control panel and avoid the risk of overcooked food altogether.
Depending on the recipe and the amount of food you’re cooking, it can take up to 40 minutes for your Instant Pot to fully build pressure. But remember, releasing that pressure from your Instant Pot takes time, too.
Before starting your Instant Pot recipe, don’t forget to factor in the time it takes to build and release pressure. A 15-minute recipe can quickly turn into a 35-minute recipe when you account for the whole process.
The cooking programs are located on the left and right sides of your control panel. Press the button for the cooking program you want to use; then press the “+” and “-” buttons to add or subtract time.
Instant Pots are best known for their pressure cooking abilities, but that doesn’t mean its other programs (like slow cooking andsauteeing) aren’t as good.
Thesauteprogram works the same as a stovetop pot or pan, but it’s definitely a game-changer. You can stir-fry veggies, thicken sauces, and brown meats without adding another pot to your pile of dishes.
This website is using a security service to protect itself from online attacks. The action you just performed triggered the security solution. There are several actions that could trigger this block including submitting a certain word or phrase, a SQL command or malformed data.
This website is using a security service to protect itself from online attacks. The action you just performed triggered the security solution. There are several actions that could trigger this block including submitting a certain word or phrase, a SQL command or malformed data.
Modern pressure cookers have a number of safety features and this is for good reason. The heat generated by the steam could easily scold if not handled properly. Follow the instructions for your specific model and you won’t need to worry about this.
It’s important to keep your pressure cooker clean and in good working order. Replacements for worn out parts are usually readily available from suppliers. For example you might find yourself needing to replace the rubber gasket that ensures a good seal. Making sure the valves are free from debris is key too.
Pressure cooked food doesn’t brown so it’s worth doing this at the start of cooking before adding liquid and putting the lid on. Meat looks and tastes more appetising with a little browning. Onions, garlic and spices also benefit in the flavour stakes from pre-cooking. However if you’re rushed, and time is more important to you than these nuances, dispensing with this step is possible.
Pressure cookers cook with steam. No liquid = no steam. You can’t and shouldn’t use your pressure cooker unless you’ve added sufficient liquid. Instructions will let you know the minimum amount and some even tell you how much to use for different items. If you’re using a conventional recipe you can often reduce liquid content that would otherwise have evaporated but don’t go below the recommended amount.
Most, if not all, pressure cookers have a minimum and maximum mark on the inside of the pot. Do not exceed these. A pressure cooker shouldn’t be more than 2/3rds full. With liquids, avoid filling more than half full. Overfilling leads to food being ejected from the pressure release valve – a messy business. If this does happen, you’ll need to take apart and clean the parts thoroughly. You also need room in the pot for the steam to build up to facilitate cooking.
Turn your hob up to full power so that the pressure cooking process can begin as soon as possible. If you take too long heating foods up, they can end up being overcooked and suggested timings will be incorrect. Recipes will tell you to start cooking from when the correct pressure has been reached. When you get to this point, turn the heat right down to the minimum temperature you can while still maintaining pressure. All pressure cookers have a simple indicator and your instructions will tell you how to read yours.
Gas and induction make it easy to turn the heat down. Electric tend to retain heat so it can be worth having two hobs on – one on the high heat and one on the lower heat and then switching when pressure is reached.
Cooking times in standard recipes are a good indicator for estimating time needed in a pressure cooker. Meats that take time to tenderise and large pieces of meat are going to take longer. Whole pulses will need longer than split peas, brown rice longer than white. Vegetables and fish take very little time at all. Cooking time may be as much as halved.
Cutting similar types of ingredients to similar sizes will help them to cook evenly. Add items that will need a longer cooking time at the beginning and those that need less later on (making sure steam has been safely released in the process). For example, for a beef stew add the beef at the beginning and potatoes half way through to avoid them crumbling.
If you’re not sure on cooking times, undercook rather than overcook. You can always bring the food back under pressure and continue but once it’s spoilt it’s spoilt! Add more liquid if necessary.
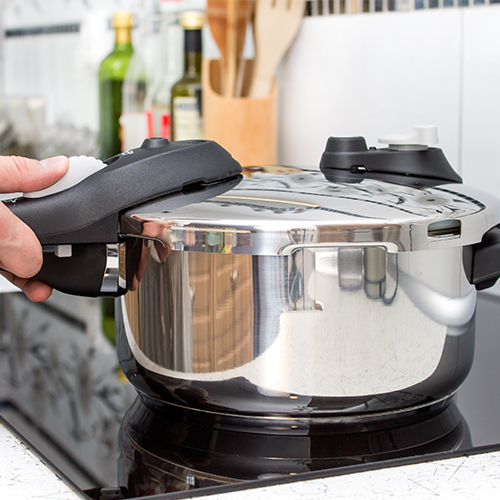
There are usually three ways to release steam in your pressure cooker: a) taking it off the heat and allowing it to release in its own time b) turning a pressure release valve – use oven gloves for this as hot steam will rush out, and c) running the pressure cooker under a cold tap. The first option is ideal for dishes like casseroles where long cooking times would be involved. The second option is suitable for any dishes that aren’t delicate and the third those that are, like fish and vegetables where overcooking may occur. These last two options save time.
Never force the lid open, modern cookers have a safety feature which stops you opening the lid, don’t tamper with this to get the pot open or you may get burnt. If you’re in a hurry, run the cooker under the cold tap, until the pressure indicator drops and the lid comes off easily.
Go eco, by selecting option a).This can allow you to turn the food off a few minutes before the end of cooking time. The food will continue to cook in the residual heat.
Moisture is retained during pressure cooking which means sauces don’t thicken. You can thicken afterwards by leaving your pressure cooker on the heat once the lid is removed and reducing. A mixture of cornflour and water added at this point will help it along.
This goes for the food and the equipment. The materials that most pressure cookers are made out of are not designed for food storage. Once you’ve cooked your dish, decant it to something else for storage to avoid erosion or marking.
Pressure cooker lids are not designed for the dishwasheror for immersion in water. Wash them under a running tap and clean with washing up liquid, taking off the rubber gasket (lid seal) for a proper clean. Some pots are suitable for dishwashers, others not. Check the instructions. Otherwise wash in the sink. Other parts don’t need to be taken apart and cleaned individually every time but will do if they become blocked. Instructions will explain how to do this.
Dry your pressure cooker thoroughly. Leaving it out on a tea towel, rather than popping it straight in the cupboard will allow air to circulate. Rest the lid upside down on top when storing rather than fitting it on the pot.
Pressure cooking is a wonderful way to prepare food that cooks thoroughly and quickly at a high temperature. Some are worried about the dangers of using a pressure cooker, so it is helpful to find out how to check your pressure cooker safety valve for safe operation.
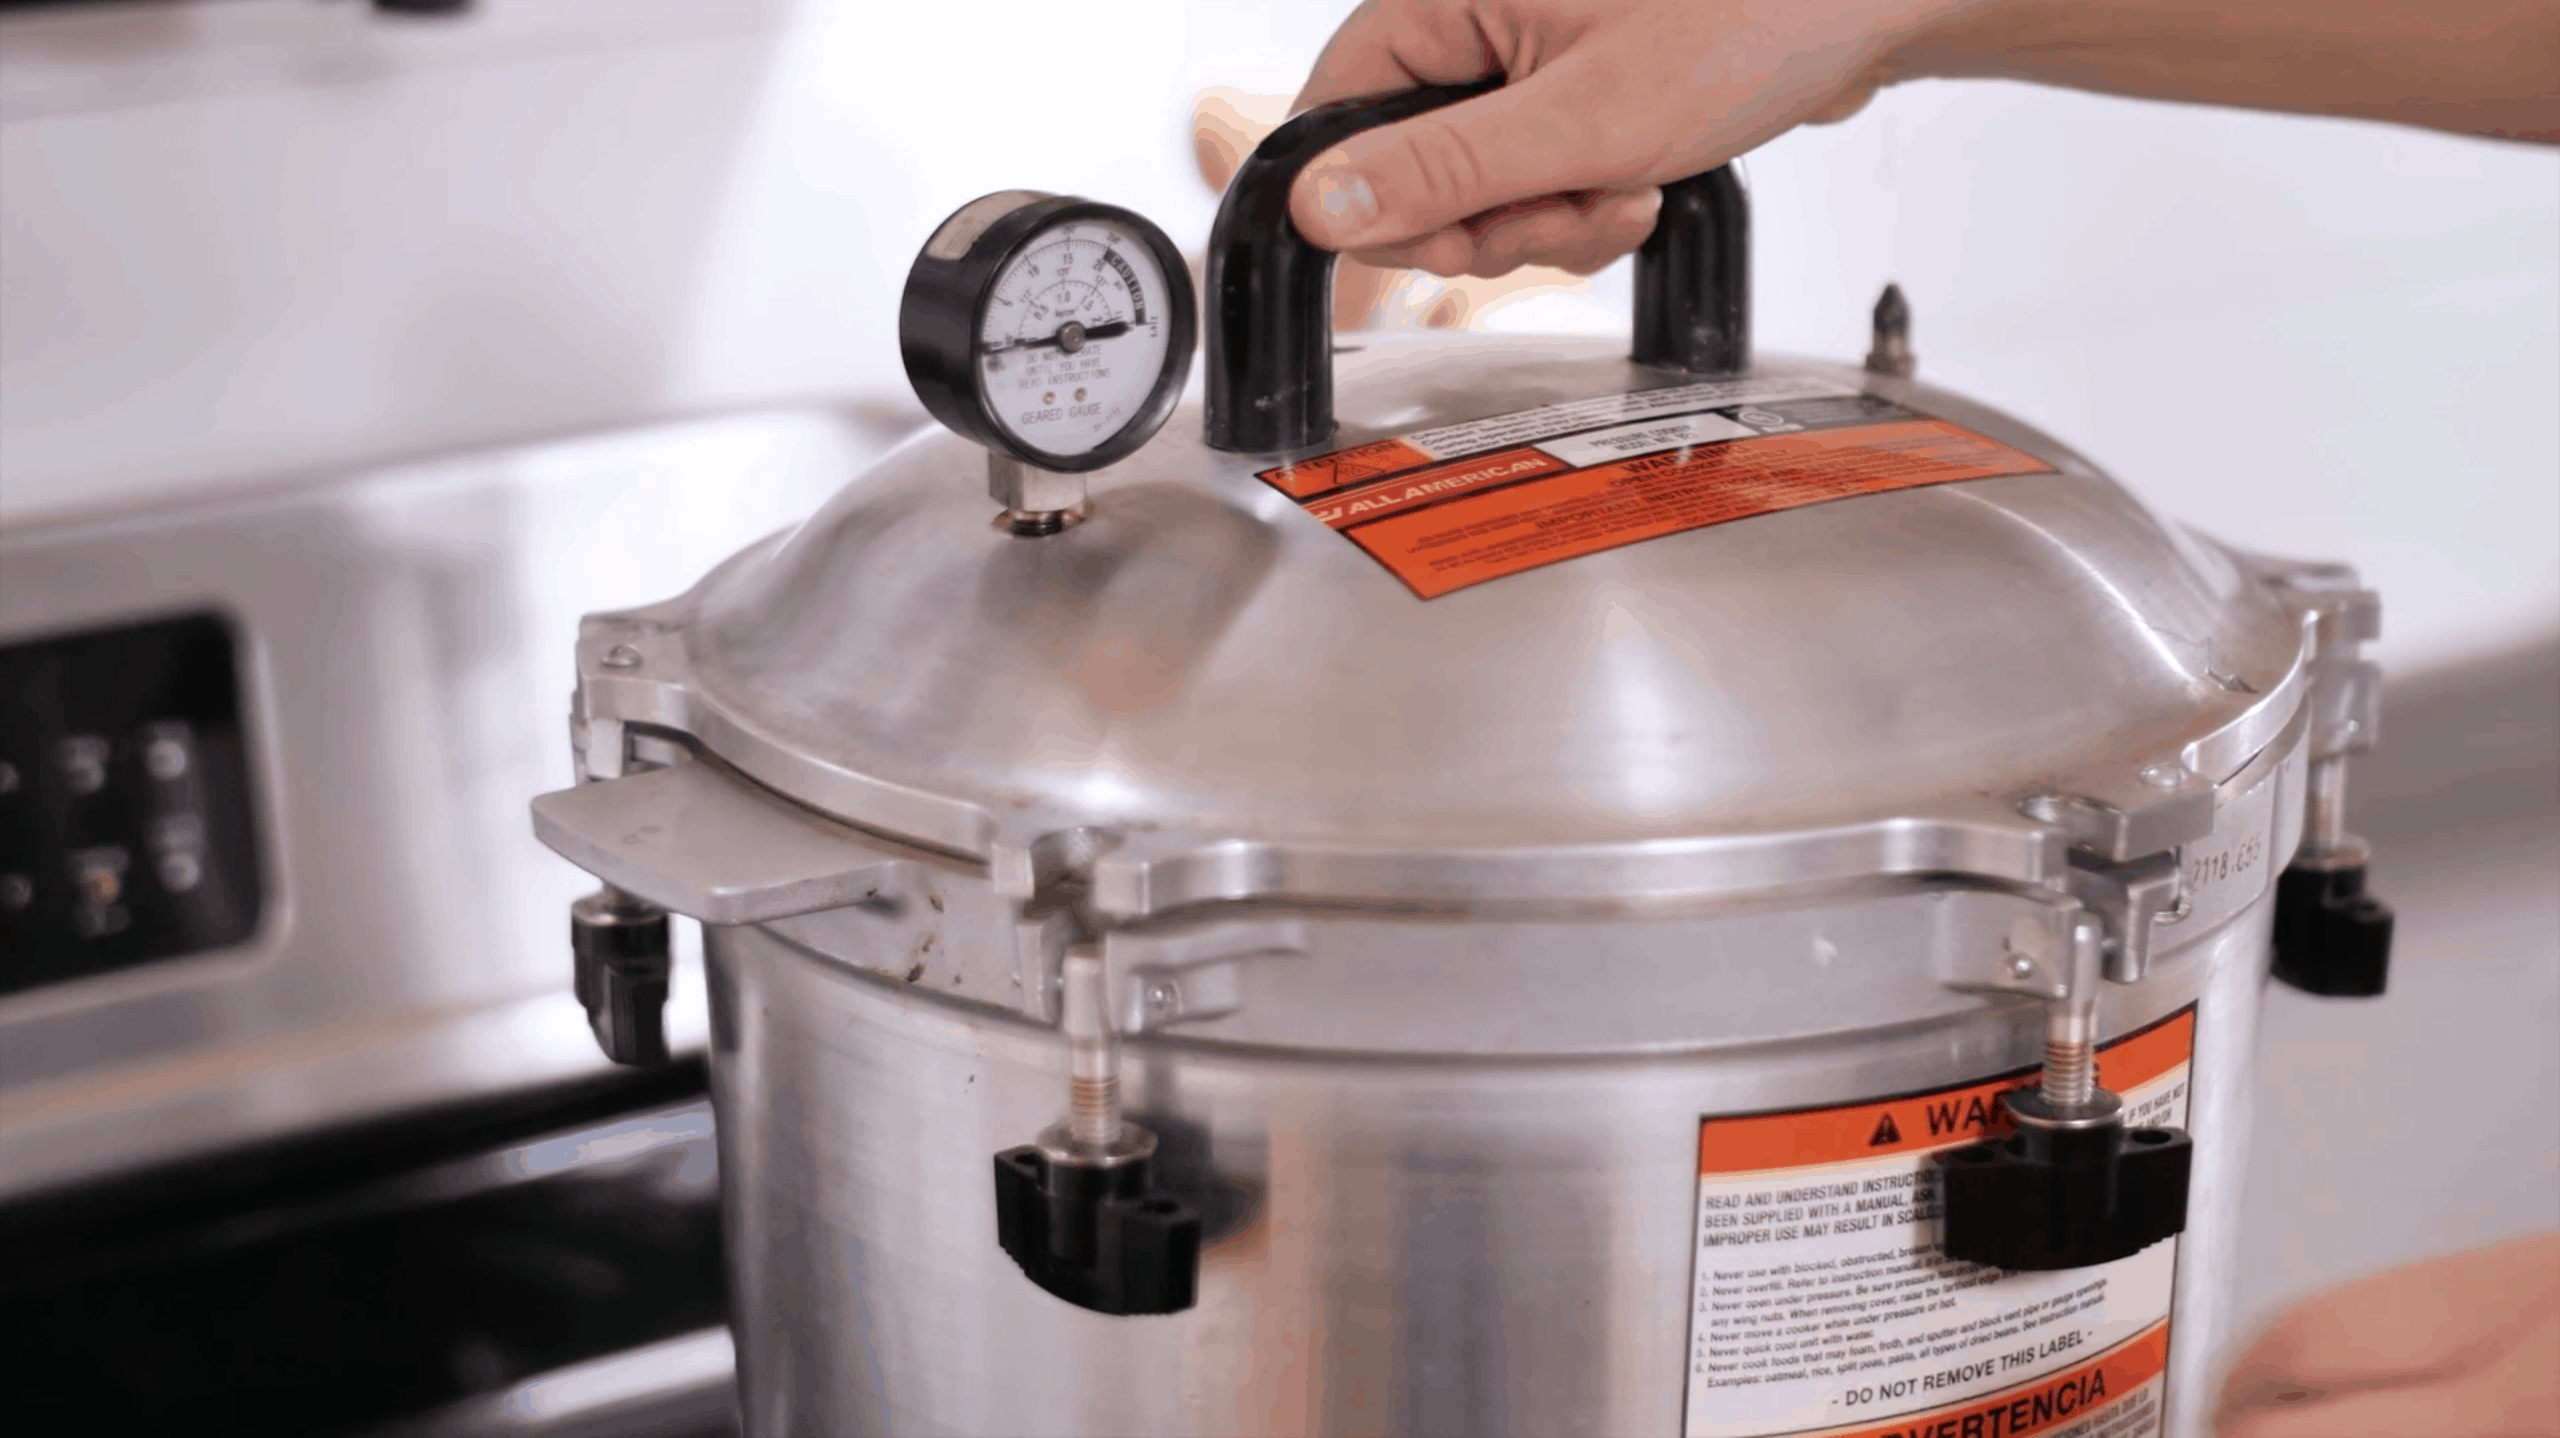
For those worried that a pressure cooker might explode, the safety valve is the design feature that prevents this from happening. If the cooker has a safety valve, you can see it installed on the cooker’s lid.
A pressure cooker is designed to trap the steam inside to increase the pressure. However, too much pressure is not safe. The valve must release pressure if it gets too high.
The blog of pressure cooking today has many recipes that are delicious. There are 25 recipes for pasta so you can try a new one every day for nearly a month.
There is a weight inside many of the safety valves that is lifted by the internal steam pressure when it reaches a certain amount. When the pressure lifts the weight inside the valve, this allows some steam to escape.
Jeffrey Eisner who says “he is a nice Jewish boy from Long Island.” He started with pressure cooking by making a simple mac and cheese dish with a recipe that he shared on YouTube. The video was an immediate success and led to his making new recipes for pressure cooking.
In a sealed cooker, as the pressure builds up, the boiling point of water rises. This phenomenon is the cause of the increased heat that cooks the food more thoroughly and faster.
The science that explains this is fascinating. The normal boiling point of water under standard atmospheric pressure of 15 pounds per square inch (psi) is 212°F (100°C). In a pressure cooker, the atmospheric pressure doubles from 15 psi to 30 psi. This added pressure raises the boiling point of water from 212°F (100°C) to 250°F (121°C).
If you see steam escaping from the safely valve do not worry. The steam escaping from the safety valve is its normal function, which means the valve is working properly.
If the internal pressure within the cooker gets high enough, this lifts a weight in the safety valve that allows steam to escape. The escaping vapor lowers the pressure. You can hear the steam escaping, making a whistling sound, or rattling the valve.
The first pressure cooking devices were used in the 17th century. They were useful to remove fat and collagen from bones so that the bones could then be ground down to make a pure bone meal.
The inventor of the device, Denis Papin, called it a “steam digester” or “bone digester.” His invention was the precursor to both pressure cookers and the steam engine. Surprisingly, the early designs did not have any safety features, and this caused some of the first ones to explode while being used.
The legacy of those early pressure-cooking devices may be why some still fear this problem even today. Papin, to his credit, came up with a design improvement that is what we call a safety valve to avoid the dangers of these explosions.
By the 1930s, the modern pressure cooker design became useful in a home kitchen. The Flex-Seal Speed Cooker, invented by Alfred Vischer, came out in 1938.
These home cookers became even more popular in 1939 with the release of the design by the National Pressure Cooker Company (now called National Presto Industries), which is still manufacturing these cookers today.
The first-generation cookers had a safety valve that worked with a weight. When the internal pressure rises high enough to lift the weight, some steam escapes, and the valve makes a distinctive rattling sound.
Second-generation cookers use a spring-loaded valve that makes less noise and is adjustable for pressure sensitivity by using a dial, which is on the cooker.
Third-generation models are the most recent versions. They use an electric heating source that is regulated by the internal pressure. These devices do not need a safety valve because the heat source automatically shuts off before the pressure gets too high.
Suppose you are thinking about getting a new cooker. In that case, there is another device that you might consider called a food dehydrator, which I describe in the article entitled, “How Much Electricity Does a Dehydrator Use?” here.
For the styles of cookers with a safety valve, it may not be obvious when the valve is not working if it is blocked. You may notice the lack of steam while the cooker is heated. The valve could rarely be blocked, but if not cleaned properly, it is possible.
Alternatively, the valve may be broken, missing, or the pot may not seal properly. These problems might allow too much steam to escape. This leakage may cause the cooker not to heat up properly and not allow the internal pressure to build up to the proper level.
One of the signs of a problem with a lack of pressure is that the food takes much longer to cook than you normally expect when using a cooker of this type.
One tip in the video is not to open the cooker after finishing cooking and take the lid to run it under cold water. This sudden temperature change can make the safety valve work less well and may cause the need to change the valve more frequently.
If you use a cooker that needs a valve to work properly and the valve is broken or missing, you can replace it with a new valve. Be sure to get the manufacturer’s specifications to ensure you use the correct replacement part.
Some of these problems include the ventilation knob being open or not enough liquid is in the cooker (requires at least one cup). Another cause is the sealing ring is missing, damaged, covered with food particles, or not in the proper position.
The video narrator shows how she cleans her float valve for her instant pot that she uses as a cooker. If you use too little liquid or too much, the cooker may not pressurize.
For the type with screws, hold the valve from the bottom of the lid with the pliers and use the screwdriver to remove the screws from the top to remove the broken part. Replace it with the new one and tighten the screws that hold it in place by holding it with the pliers from the bottom of the lid again and tightening the screws from the top.
For the type with a nut, use the wrench to loosen it for removal and perhaps a socket when you put on the new valve to tighten it with enough torque to hold it securely in the proper position.
Modern pressure cookers that are in good repair are quite safe. The one caution to remember is not to overfill the cooker so that the food might block the safety valve. This overfilling with food would be very difficult to do and not something to worry about for normal use.
Be careful where you keep your cooker on the countertop because it is important to know how hot a stovetop can get. Even when turned off, a stovetop may still be very hot, which I discuss in this article.
Now you know everything you need to know about a pressure cooker safety valve. You know what they do, how they work, and how to replace one if it needs repair. Enjoy your pressure-cooking recipes without worrying about the safety valve.
If having a safety valve on your cooker still bothers you, consider buying an electric cooker without a valve that instead has a built-in safety feature that automatically shuts off power if the pressure gets too high.
If you’ve never had a pressure cooker in your home before, you may not know what kind of sounds or statuses to expect from your new tool. Hissing, for example, can seem unexpected and even indicative of pressure cooker failure when you first hear it.
In reality, your pressure cooker is supposed to hiss. The noise indicates the successful release of steam from the cooking unit either at the end of its cook time or when pressure gets too high. Let’s break down the basics of your pressure cooker’s quirks so that you can confidently put your unit to use.
Pressure cookers work by using a combination of steam and the aforementioned pressure to raise your food to a certain temperature. The high heat of your average pressure cooker allows your food to cook faster than it might otherwise. Similarly, the seal created by the pressure cooker helps keep the flavor in your food.
To work, then, your pressure cooker needs to safely generate, trap, and eventually release the steam and pressure that cooks your food. Ideally, manufacturers will test their products and ensure that each is not only efficient but also safe to use. However, because pressure cookers generate so much pressure and heat, they can often imbalance and explode or malfunction.
If you’re not careful when using a pressure cooker, you could suffer from steam burns, contact burns, or extensive spills. Pressure cooker explosions resulting from a poorly-made product can do significant damage to both your health and your home.
Pressure cookers trap their liquid courtesy of an internal seal. This seal needs to bind the lid of a pressure cooker as tightly as possible to prevent steam and pressure from escaping. If you have a pressure cooker that does not seal efficiently, the meals you cook won’t turn out like they’re supposed to.
Pressure cookers use an impressive amount of heat to cook your food in a short period of time. As a result, the whole of your unit may become warm. It’s in your best interest to avoid interacting with the lid of your pressure cooker while your meal is cooking, as you could risk burning yourself.
With that in mind, only touch the steam release or protected handle of a pressure cooker once your food is done cooking. Even then, make sure you keep exposed skin away from the steam that escapes from the pressure cooker.
If you want to take a steam injury or burn injury to civil court, you’ll need to display evidence that you engaged in due diligence when operating your unit. Our team can help you elaborate on your experience should the opportunity arise.
So long as the rest of your pressure cooker’s parts are working as they should, your pressure cooker should only hiss when it’s venting pressure. There are times when the pressure inside your cooker may get too high during the cooking process. In turn, the unit will vent that pressure, resulting in a low hissing sound.
If your pressure cooker is hissing, keep your hands and exposed skin away from the steam valve and vents. The steam that your cooker is releasing has the capacity to burn you if you’re not careful.
Both stovetop and electric pressure cookers hiss when they release pressure. This sound is not indicative of anything wrong with your unit. However, you’ll want to practice due diligence if you do hear your pressure cooker making a hissing sound. By taking measures to protect your skin from steam burns, you can limit your personal injuries and enjoy a good meal.
The food inside of your pressure cooker can start to bubble or foam for several different reasons. Adding too much salt to your food, for example, can increase its starch content and make the cooking process more dynamic. Similarly, overfilling a pressure cooker can see your ingredients struggle to find the space they need to cook.
While all foaming and bubbling is cause for concern, there are only some occasions on which it indicates something at fault with your unit. If your pressure cooker’s value or opening procedures aren’t properly configured, bubbles, steam, and foam may all escape from your unit.
If you see this kind of foam cropping up on a regular basis, talk to a representative with your unit’s manufacturer. If the manufacturer tries to keep you from returning your unit or requesting a replacement, our team can step in.
Your pressure cooker cooks its food by compressing heat and liquid in a confined space. If your pressure cooker isn’t able to retain that force, your food isn’t going to cook in the way that you’d like it to.
Most of the time, you can blame your pressure cooker’s lack of pressure on a failed seal. If you’re struggling to cook some of your favorite dishes, inspect that seal and determine whether or not your pressure cooker shuts effectively.
If you’ve never used your pressure cooker before, its manufacturer may allow you to return a unit with a broken seal. Anyone who’s tried to use their pressure cooker, however, may have to invest in a replacement part. Our team can go over your product warranty with you to determine what repairs your purchase may entitle you to.
A defective pressure cooker poses a threat to more than your evening meals. Pressure cookers that have been falsely advertised or improperly put together put your health at risk. Fortunately, you can contact a product liability attorney about a faulty pressure cooker within hours of a pressure cooker accident.
Zanes Law’s product liability lawyers know that pressure cooker accidents can result in both injuries and significant property damage. In turn, we bring together your product liability case while you focus on recovering. We’ll stand with you whether you choose to pursue settlement negotiations or compensation via trial. Contact us today to learn more about our services.

Pressure cooking gives you time, energy, and preserves vitamins. In a pressure cooker, you can prepare food gently under pressure in just a few minutes. Some Fissler pressure cookers also have a pressureless steam cooking stage. With steam cooking, food is cooked delicately, preserving almost all its flavor and nutritional value. With pressure cooking, you use less energy due to shorter cooking times: This means you cook in an environmentally conscious way and save money.
Pressure cooking gives you time, saves energy, and preserves the best of your ingredients. In pressure cooking, ingredients are cooked quickly and gently. Vitamins and flavor are largely preserved compared to conventional cooking.
After heating up, the pressure cookers develop their full performance even at medium stove power. This means that energy consumption during cooking can be reduced by up to 50%.
The Vitavit® Premium also features the German-made CookStar® base. This has a high thermal conductivity and is particularly energy-efficient. It is suitable for all types of stoves and optimized for induction. The Vitaquick® pressure cooker is equipped with the Superthermic® base, which is also suitable for all types of stoves.
The proven Fissler CookStar® base (Vitavit® Premium) is extra thick and solid, enabling optimal absorption, distribution, and storage of heat. Another advantage is provided by the integrated star-shaped expansion joints in the CookStar® base. The joints ensure exceptional bottom stability, so that the quick frying pan always lies flat on the stove when heated and the ingredients are cooked evenly.
Little liquid and high boiling temperatures ensure that the oxygen is almost completely displaced from the pressure cooker by the resulting water vapor during heating.
When the valve closes and the cooking time begins, there is hardly any oxygen left inside the pot, which would decompose the vitamins and nutrients contained in the food.
Especially for sensitive vitamins, this fast method of preparation is gentler than cooking in a conventional pot. Valuable vitamin C, for example, is retained by up to 90% during pressure cooking.
In addition, the ingredients retain their natural color. That"s why dishes cooked under pressure are a real treat not only in terms of taste, but also visually.
The boiling temperature of the liquid is increased from 212°F to up to 240°F with the help of pressure. The lid with the safety system with patented technology and the Fissler sealing ring closes the pot securely and airtight.
Fill the pressure cooker with the minimum amount of liquid. How much liquid you need depends on the recipe. Use the level indicator in the pot to dose your liquids correctly. Adhere to the maximum filling level according to the instructions for use.
At the end of the cooking time, you can release the steam by using the cooking crown or handle. The steam escapes safely from the pressure cooker. Releasing steam function differs by series type, so make sure to check the product manual.
In 1953, Fissler invented the first multi-stage safety cooking valve, made the pressure cooker safe and "tamed" it for home use. The three-stage safety system with patented technology ensures that the pot is safe to use. Today, thanks to Fissler, you can use pressure cookers easily, conveniently, and safely on the stove at home.
All Fissler pressure cookers have a safety system with patented technology and meet strict quality and safety guidelines. For example, they regulate themselves if the pressure inside should be too high. You cannot open the pressure cooker until there is no more pressure inside. In addition, the pressure cannot be built up until the pot is properly closed.
Fissler pressure cookers enable easy handling and safe operation. This is ensured, among other things, by the multi-stage safety system with patented technology that is continuously being further developed. To guarantee the safety and high quality of our pressure cookers, every Fissler pressure cooker undergoes a manual "100% check" before it leaves our factory in Rhineland-Palatinate.
Depending on the model, several cooking levels are possible with the pressure cookers. These have an influence on the cooking time. Cooking time in the Vitavit® Premium(also for previous models) is as follows:
To ensure that your pressure cooker lasts a long time, it is important to clean it properly. Since the potbody and lid (apart from the attachments) are dishwasher-safe, cleaning requires only a few simple steps.
To loosen the lid handle, turn the fastening screw on the inside counterclockwise. To loosen the cooking crown, turn the bell nut on the inside counterclockwise.
After cleaning, firmly reattach all attachments to the pot. Make sure the cook valve gasket is seated in the notch provided and is tight against the cook crown. The sealing ring must also be reinserted in the notch provided in the rim of the lid.
With the Vitaquick® pressure cooker, you cook food easily and safely under pressure. Two cooking levels provide the necessary flexibility for gentle and fast preparation
The Vitaquick® pressure cooker sets consist of a pressure skillet (2.6 qt.) and a large pressure cooker (4.5 qt.or 6.3 qt., depending on the set). This means you are optimally prepared for both smaller portions for 1-2 people and larger portions for 2-4 people.
The Vitavit® Premium set is available in various combinations. These consist of a Vitavit® Premium pressure cooker with a capacity of 6.3 qt or 4.8qt and are also equipped with a pressure skillet. With the glass lid, the pot can be used like a conventional cooking pot.
Our cookware is made with the best technology and craftsmanship. Our materials are of the highest quality, so your cookware will last for years. Thank you for the chef, the ingredients, and the people who we cook for. This is how we say thank you.
Pressure cookers cook food under pressure with steam in a hermetically sealed pot. This allows food to be cooked at temperatures of up to 240°F. This saves time, energy, and preserves the vitamins and flavor.
Fissler pressure cookers have a multi-stage safety system with patented technology that is continuously being developed. To guarantee the safety and high quality of our pressure cookers, every Fissler pressure cooker goes through a manual "100% check" before it leaves our factory in Rhineland-Palatinate. Fissler pressure cookers regulate themselves if the pressure inside should be too high. For safety reasons, the pressure cooker cannot be opened until pressure has been released. Also, pressure cannot build up within the pot unless it’s properly locked. In addition, the locking indicator shows with the change from red to green and an audible "click" that the pot is securely closed.
Whether passionate cooks, discerning gourmets, or epicures: a pressure cooker is worthwhile for anyone who wants to save time and energy when cooking. Pressure cookers are suitable for any household size.
The higher temperature in the pot shortens cooking times by up to 70% compared to conventional cooking. This can save up to 50% energy. By excluding atmospheric oxygen and thanks to the short cooking times, the food is also cooked particularly gently. Vitamin, mineral, and aroma substances are better preserved, colors remain fresh and the intrinsic flavor intense.
Pot and lid (without cooking crown, handle and sealing ring) can be cleaned in the dishwasher. The cooking crown, handle and sealing ring must be cleaned by hand. We recommend treating the pot and lid with stainless steel care if necessary. This will make the stainless steel more resistant to salts and acidic foods. Residues of the care products should always be washed off thoroughly.
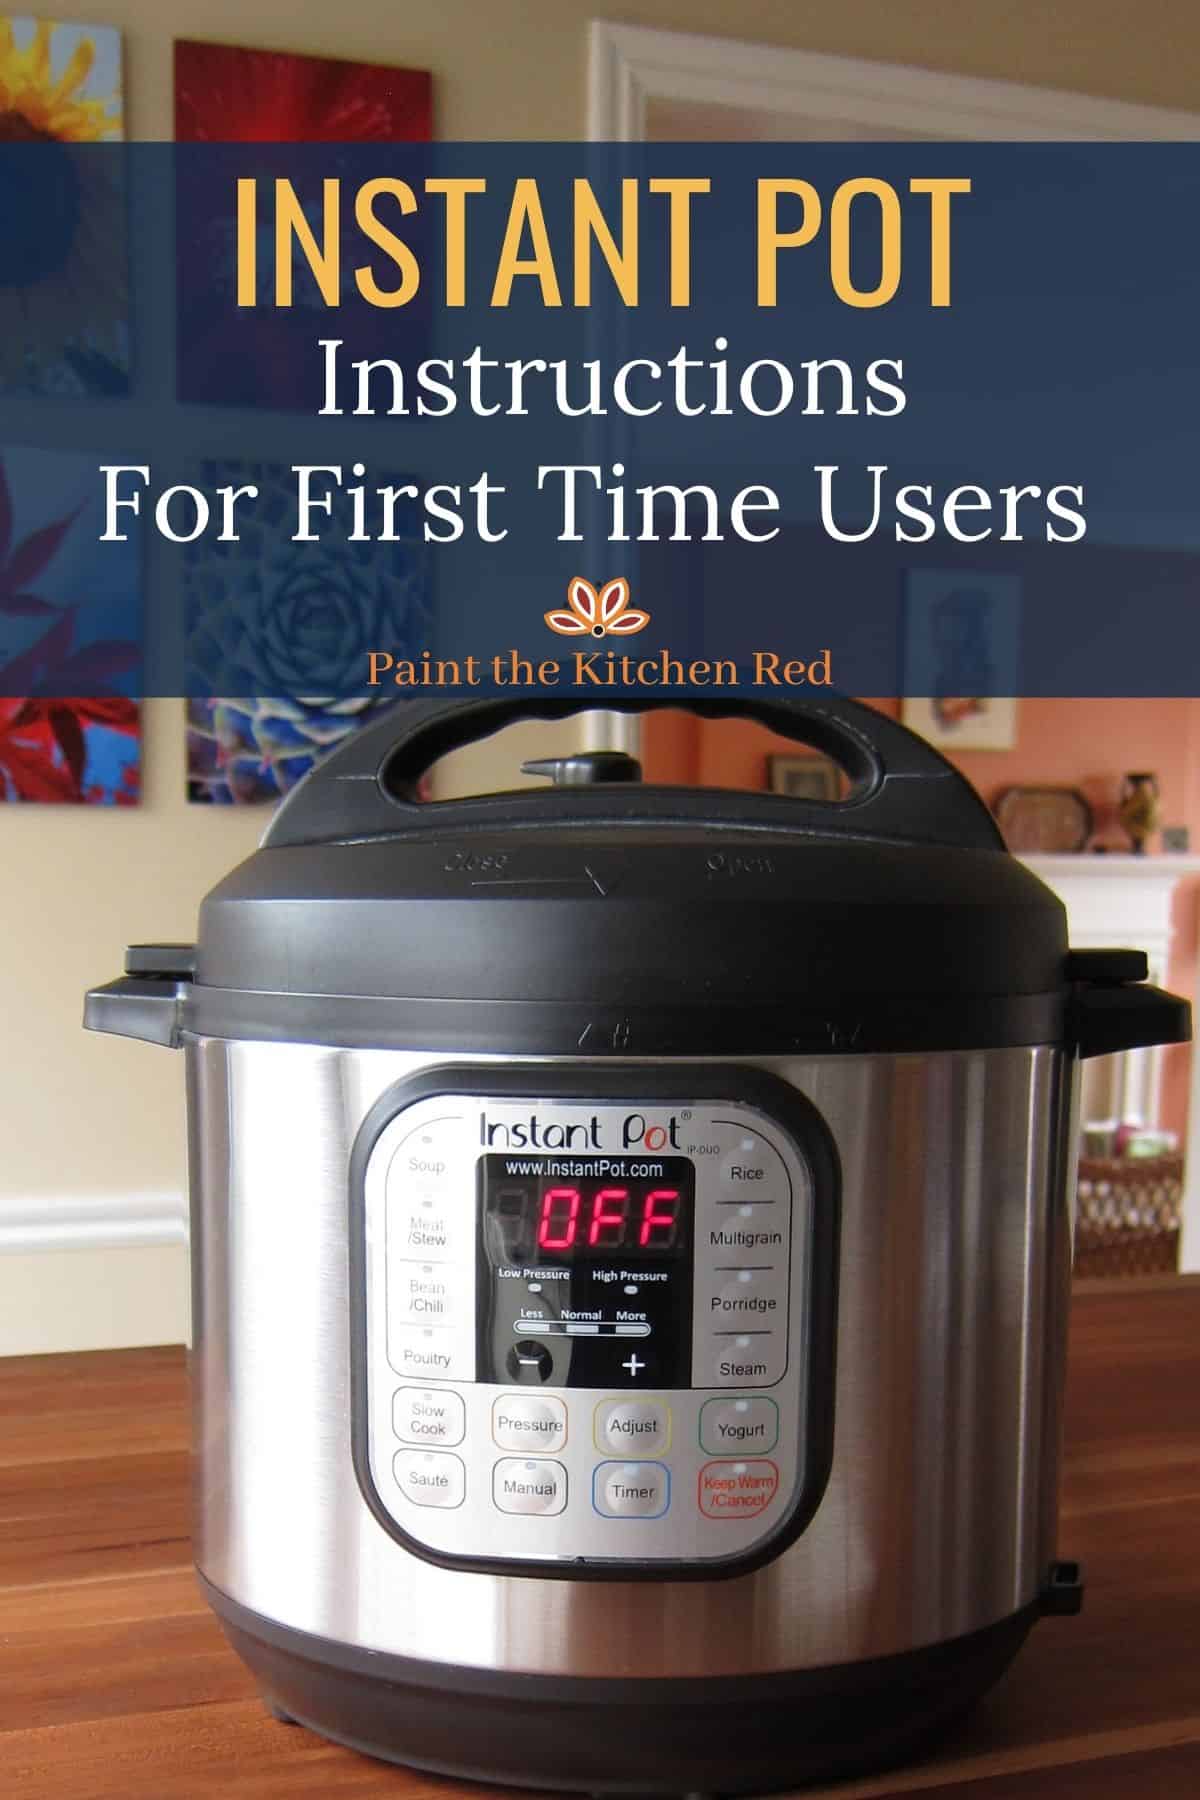
Wondering how to use your new Instant Pot? In this Instant Pot Guide, I’ll walk you through what you need to know to start cooking with your Instant Pot today. Safety features, how to do an Instant Pot water test, what’s the difference between a natural pressure release and a quick release, and what will happen step by step through the cooking process.
I’ll be honest – the first time I used my Instant Pot, I was overwhelmed and a bit scared. An Instant Pot can be intimidating for a new user. There are so many buttons and safety warnings.
However, I guarantee that once you get started, you’ll wonder what you ever did without your Instant Pot. I love mine so much that I now own two Instant Pots!
I’m going to help you get started with all of the tips and tricks that I have learned through trial, error and research. This Instant Pot manual will tell you everything you need to know to use your Instant Pot for the first time.
An Instant Pot is an electric pressure cooker. It is a multi-use appliance that can cook foods quickly at high pressure. Steam pressure builds up inside the pot, which creates a higher temperature environment that cooks foods faster. Unlike old fashioned pressure cookers, the Instant Pot has many safety features that make it safe and easy to use.
An Instant Pot is a pressure cooker, sauté pot, slow cooker, steamer, rice cooker, yogurt maker and warmer all in one. I’ve been amazed at the versatility of my Instant Pot and the flavor and texture of the foods that I am able to cook in it. The high pressure inside the Instant Pot can tenderize even tough cuts of meat. It creates rich, complex flavors – seriously, I’ve never had better chili than Instant Pot chili!
If you are not sure which Instant Pot to buy, check out my guide to the Best Instant Pots. I’ve also tested out many Instant Pot accessories so that I can share my favorites with you.
If you haven’t taken your Instant Pot out of the box, now would be a good time to do so. To open your Instant Pot, turn the lid counter clockwise and lift. To close turn clockwise. Remove any plastic wrap from the inner pot and the accessories.
The first thing you’ll want to do is wash the parts of your Instant Pot. The Instant Pot lid, steam release valve and stainless steel inner pot are dishwasher safe; however, I wash mine by hand. The base unit is not dishwasher safe – never immerse the base unit in water.
First, never put your face near the steam release valve or float valve while the Instant Pot is on. When I toggle the steam release valve, I use a long handled wooden spoon so my hand and arm are not near the valve opening. Any kitchen utensil with a long handle will do. Alternatively, you can use an oven mitt to carefully turn the steam release valve to the “venting” position when you are ready to release the pressure in your Instant Pot.
Second, never open the Instant Pot lid until the pressure has been released through the steam release valve. You will know that all the pressure has been released when the float valve (pin)


 8613371530291