
air compressor safety valve leaking brands
If the tank is over pressurized, the pressure switch isn"t shutting off the motor when the air tank fills to the cut-out pressure. Move the pressure switch lever to the off position. If the compressor continues to run, replace the pressure switch, because the switch isn"t shutting off the compressor motor.
If the compressor shuts off when you move the pressure switch lever to the off position, pull the safety valve ring and release all air from the tank. Switch the pressure switch lever to the on position and allow the tank to fill. If the compressor doesn"t shut off when the air tank fills to the cut-out pressure, replace the pressure switch, because the switch isn"t shutting off the compressor motor when tank pressure reaches the cut-out pressure.
George, if all (how many?) PRV’s you have put on your air compressor leak air (that means it blows off) just before your air compressor reaches the set point to cut out of that air compressor, then consider that your new PRV’s have a too low cracking pressure?
Please tell us the make and model of your air compressor, and a photo of it and the PRV to which you refer in your post and we’ll see if we can dig deeper into this for you.

If leaking seals and service bills are distressing your compressor, it"s time to face the fix. While air compressors can be as diverse as the individuals that use them, most models share some general characteristics and components. Whether you are inflating your tires or creating empires, eReplacementParts.com provides the parts, procedures and facts you need to fearlessly fix what fails you.
The safety valve is designed to keep the air compressor pump from over-pressurizing the tank. Over time, the spring inside this valve can deteriorate, allowing air to escape at too low of a pressure. Safety valves are preset to very specific pressure tolerances, so it is important to match the specifications of your specific compressor model when replacing the safety valve.
Less than impressed with your compressor? Replacing the safety valve may be the solution. This article will show you how to complete the repair like an expert technician.
Always depressurize the tank before servicing an air compressor. To do this, open the drain valve and wait until all of the air (and pressure) has escaped.
A well-maintained air compressor can mean the difference between performance under pressure, and under-pressured performance. But you don"t have to empty your pockets to keep your air tank full. As you just learned, repairing your air compressor is simpler than you think, especially when you follow our step-by-step guides. Not only did you refresh compression at a fraction of the cost of replacement; you have inflated your ability to fearlessly face the next fix, regardless of the pressure involved.
Well, if air continuously leaks out of the unloader valve, then the compressor tank is emptying, and the compressor needs to restart to replenish the air in the tank to get back up to cut out pressure so it can stop on its own. But then, before you get to use any air, it’s all leaked out again, and the compressor restarts to fill the tank again.
Or, in some cases, compressed air can be bleeding out as fast as the compressor can pump it, and this leads to overheating of the compressor motor and other issues you would rather not have to deal with.
Let’s identify where the unloader valve is on a typical reciprocating air compressor. The unloader valve might be inside of, or attached to the outside of, the compressor pressure switch.
In the photo above are two popular compressor pressures switches. You cannot see the unloader valve on the Condor switch on the left as it is internal, and the air line to it is plumbed into the bottom of the switch.
You can see where the unloader valve and air line from the pump head connects to the Lefoo switch on the right in the photo above. The brass fitting on the left side of the Lefoo switch is the air line connection, and under it is the unloader valve.
If you have read the page providing detailed information about the unloader valve workings found under Air Compressor Information in the right navigation bar, you will know how the unloader valve functions. No need to repeat all that information here, except to say that if the unloader valve is working properly there will be a burst of air from it (1-2 seconds at most) when the air compressor reaches cut out and stops. After that air should stop blowing out of the unloader valve or pressure switch.
If air continuously leaks out of the unloader valve when the air compressor is running, that indicates that it is the unloader valve itself that has failed, and it needs cleaning and / or replacing. If you cannot resolve the leak by cleaning the unloader valve (which may be more trouble than it’s worth to attempt) then replace the pressure switch and that should include a new unloader valve too.
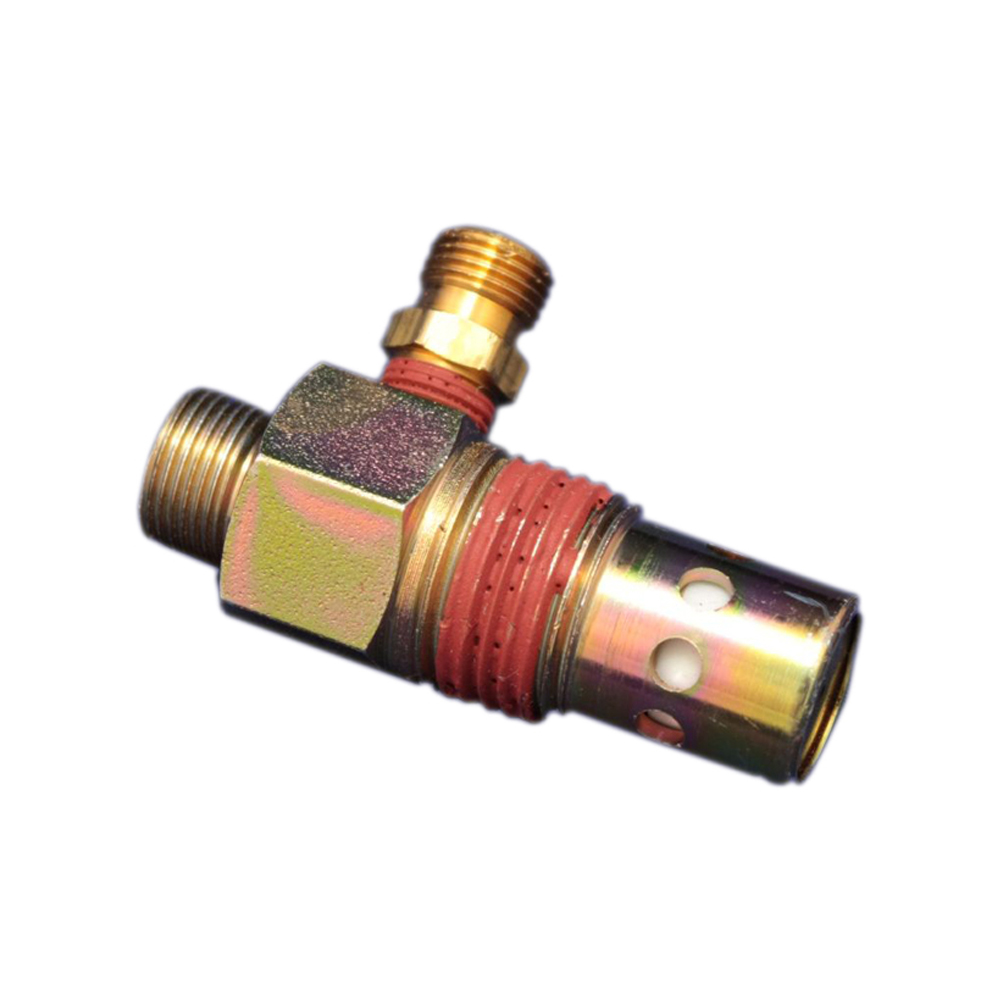
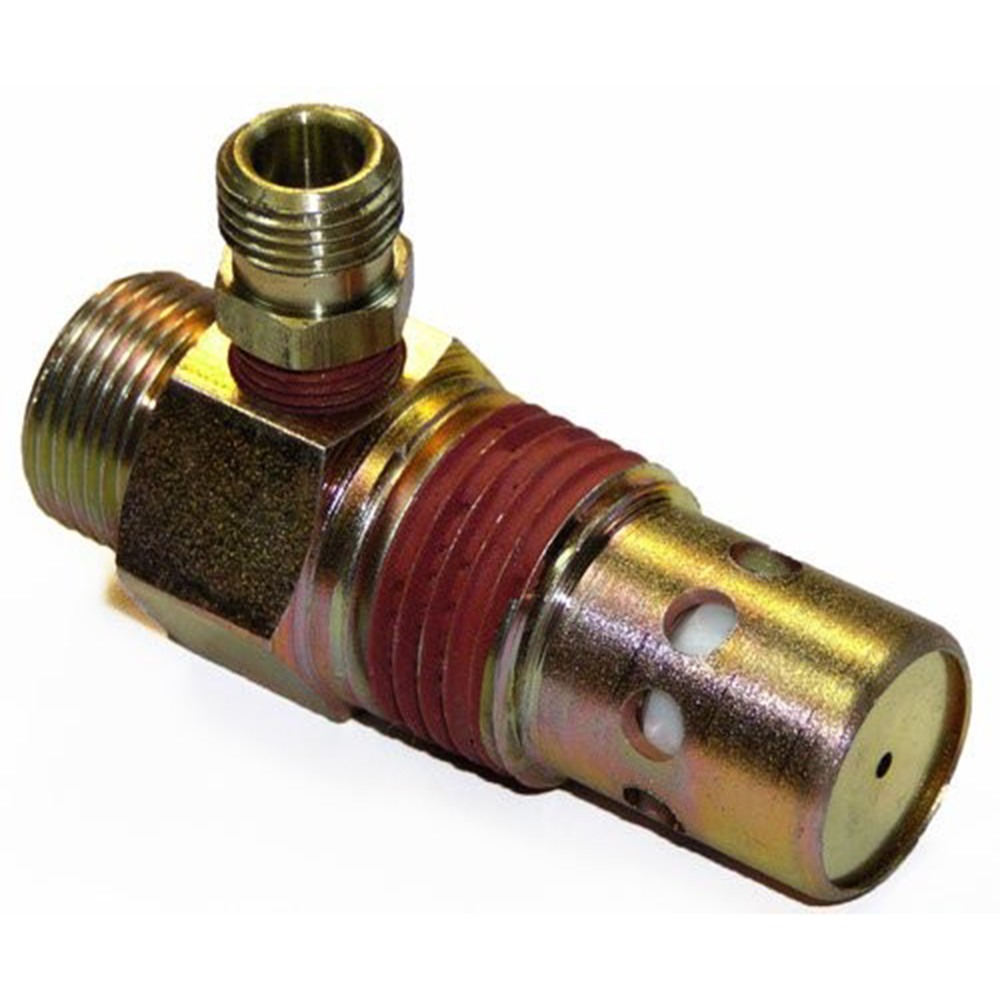
When the air compressor shuts down and unloads, then all the air that may have been trapped over the piston is now vented by the unloader valve. It’s gone. That means that if compressed air continuously leaks out of the unloader valve, the only other place where that compressed air might be coming from is the air tank itself.
What is supposed to keep the air in the compressor tank when the unloader valve is open? The tank check valve. (Detailed information on the tank check valve is found under Air Compressor Information in the right navigation bar).
If air continuously leaks out of the unloader valve when the compressor is not running, then your compressor tank check valve has either failed completely, or the internal seal has not seated properly and this is allowing air from the tank to blow by that seat and escape out the unloader valve which, when the compressor is stopped, is open to atmosphere.
5) Reassemble and test the compressor operation. If the check valve is now working, once the compressor unloads at high pressure cut out, air should stop leaking from the unloader valve.
Even though parts supply for the typical home or small workshop air compressor is always a problem – not too many people that sell this type of air compressor stock parts – you can replace your tank check valve with any vendors tank check valve that fits the thread in the tank and to which you can attach the line to the unloader valve.

What happens when you pressurize an air tank beyond its rated pressure? It fails catastrophically and ruptures in a spectacular way that you wouldn’t want to witness firsthand.
Most air compressors have a number of precautions built in to avoid the risk of a tank rupture. The compressor itself will probably have an automatic shut-off control that turns off the motor once the maximum tank pressure is reached.
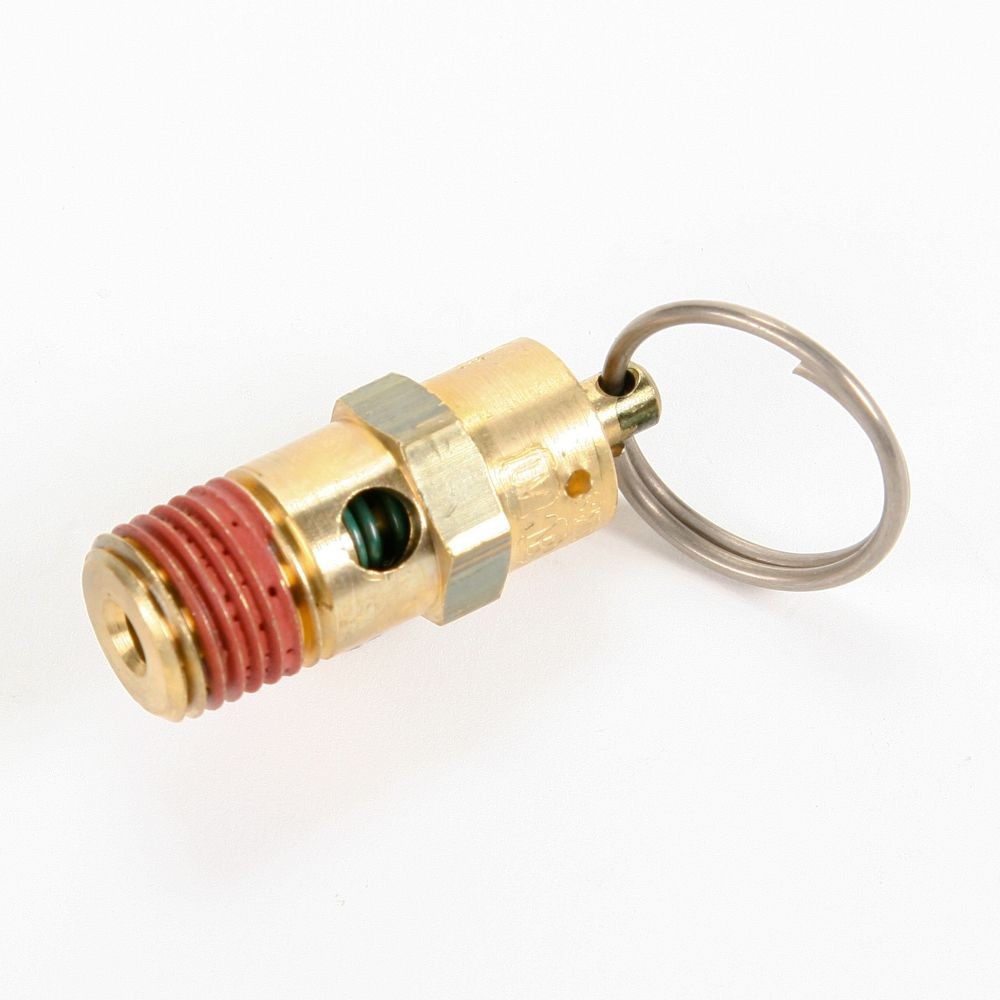
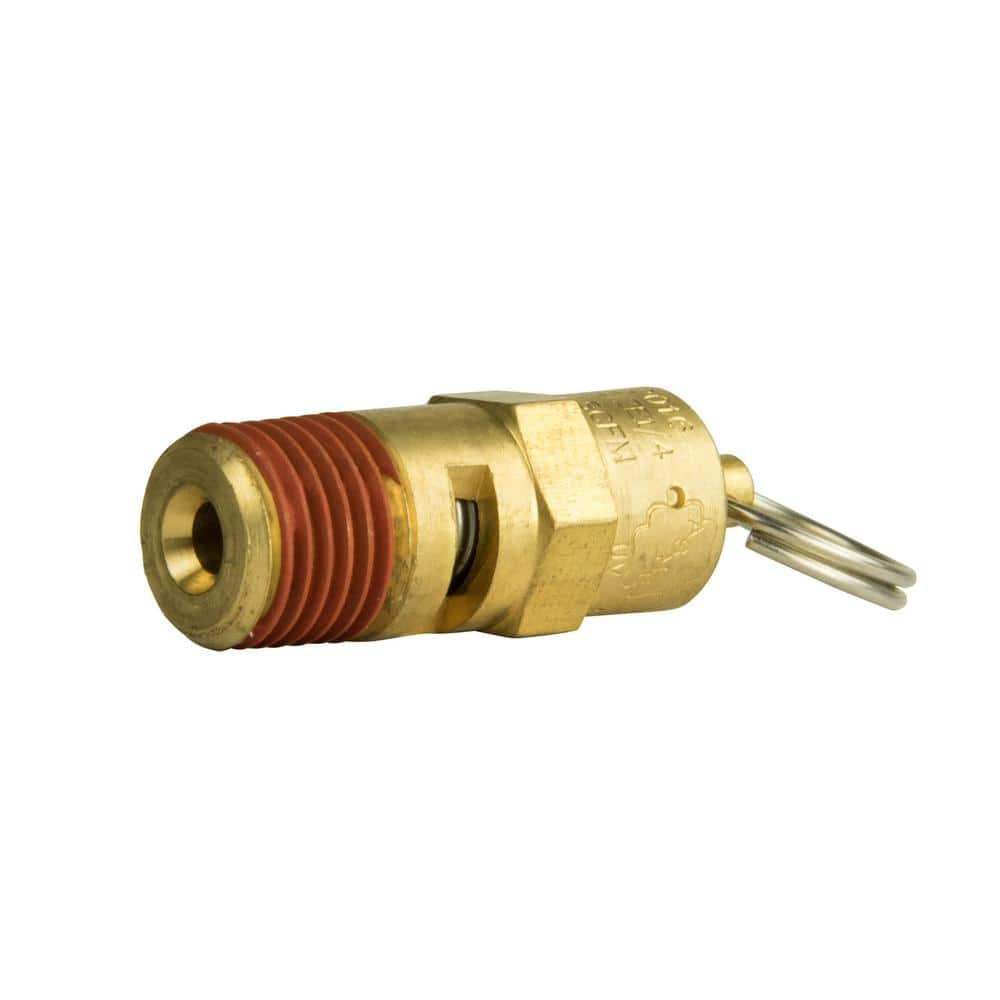
In case the auto-shutoff switch fails, there will typically also be a safety valve built into the tank. Such safety valves, such as the Conrader hard seat valve shown above, are rated to specific pressures. A 100 PSI valve will open up at ~100 PSI in order to vent excess air to keep the pressure at or below 100 PSI.
Essentially, safety valves have spring-loaded pistons. Below their factory-set pressures, internal springs hold the pistons downward, creating a seal. But once the pressure inside a tank or device overcomes the built-in pressure limit of a safety valve, the piston is pushed upwards, opening the valve seal to lower and equalized the air pressure.
Safety valves typically also have loops attached to the pistons so that you can manually rapidly depressurize a device or air tank. You should check safety valves every now and then to ensure they can open freely.
There are two main types of safety valves – hard seat and soft seat valves. Hard seat valves are rugged and inexpensive, but typically leak a little bit. Soft seat valves are a little less rugged and more expensive, but they are built with better seals that aren’t as prone to leaking.
I went with Conrader hard seat valve for a recent project, but there are other good brands as well. Safety valves are available in a wide range of pressures and in different styles.
Amazon carries a couple of valves directly and through 3rd party vendors, but your best bet is to check with Grainger, Zoro, McMaster Carr, or another industrial suppliers that have wider selections.

Pressure relief valves ensure efficiency and safety in many chemical, oil, and gas plants, but they’re susceptible to leaks. If a pressure relief valve is leaking, systems can become overpressurized and even fail, especially if the valve isn’t addressed or repaired quickly.
When you shut down the system, carefully examine the pipelines and the valve itself to determine the cause of the leak. This will help you figure out exactly what you need to do to repair it.
Pressure relief valve leaks usually occur when the valve isn’t properly seated or when the seal is broken or damaged. Leaks can also happen when the pressure relief valve is operating too closely to the set point.
For the first repair, you should tighten or replace the bonnet bolts and tighten the packing gland nuts. You want to make sure that you follow manufacturer repair guidelines for the first repair.
If the valve isn’t completely repaired after your first attempt, you have up to 15 days to perform any additional repairs according to the EPA. If the valve still isn’t fixed, then you can either replace the pressure relief valve or wait until the next shutdown cycle to do more repairs.
When the pressure relief valve has been fixed or replaced, it’s important to take the necessary steps to avoid leaks in the future. To do that, consider implementing a leak detection and repair (LDAR) program for your company.
An LDAR program will help to train workers on everything they need to know about detecting and repairing a leak before system damage can occur. It will also help you monitor valves more efficiently so you can spot leaks faster and spend less money on overall valve repair and maintenance costs.
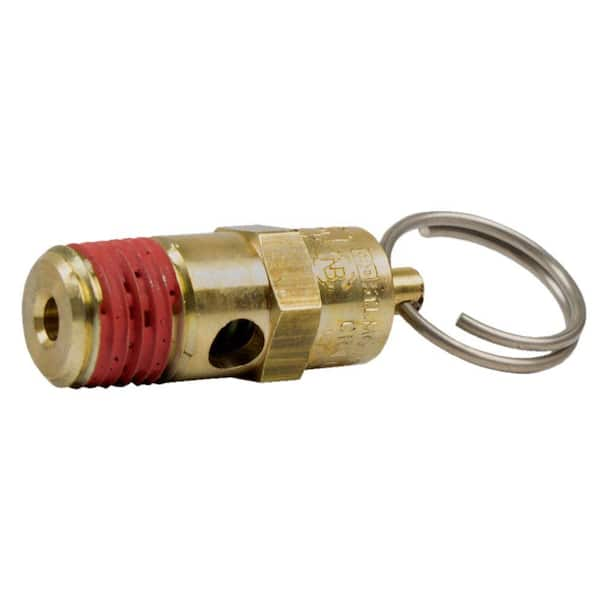
1/4" male NPT 150 PSI Industrial air compressor / tank pressure safety relief valve. Also known as a "Pop Off" or "Blow Off" valve. This relief valve is manufactured in the United States and is stamped with "UV" & "NB" symbols. The relief pressure of this valve is set at 150 PSI and is accurate within + or - 3% of the set pressure. Specifications: This valve will relieve 132 SCFM Valve Inlet Threads: 1/4" Male NPT (measure about 1/2" in diameter) Total Valve Length: 1-3/4" Installation Wrench Size: 11/16" Features a silicone rubber soft seat relief valve to prevent leaks Max temperature: 250° F Solid Brass Construction Top quality made in the U.S.A Manufactured by Conrader

Brand new, certified 1/4" male NPT 90 PSI Industrial air compressor / tank pressure safety relief valve. Also known as a "Pop Off" or "Blow Off" valve. This relief valve is manufactured in the United States and is stamped with "UV" & "NB" symbols. The relief pressure of this valve is set at 90 PSI and is accurate within + or - 3% of the set pressure.
• This valve will relieve 84 SCFM• Valve Inlet Threads: 1/4" Male NPT (measure about 1/2" in diameter)• Total Valve Length: 1-3/4"• Installation Wrench Size: 11/16"• Features a silicone rubber soft seat relief valve to prevent leaks• Max temperature: 250° F• Solid Brass Construction• Top quality made in the U.S.A• Manufactured by Conrader
An air compressor problem could stem from one of many issues, such as an air leak, an oil leak or a broken part. In some cases, you might have insufficient pressurization or air flow. In other cases, the compressor might fail to start up or stop running as prompted. Whatever the cause of the problem, the symptoms can be frustrating, costly and time-consuming.
Thankfully, most such problems can be corrected with proper air compressor troubleshooting. The Titus Company has developed this troubleshooting guide for reference when your air compressor won’t work. Whether you’re hearing excessive noise from your portable air compressor or your system won’t build pressure, you’ll find the cause here — and, hopefully, a solution. If not, call us. We’ll be there quickly with our 24/7 emergency services.
Good air pressure is essential to a well-powered machine. When air is leaking from your tank or hoses, you’ll notice low pressure, which brings on extra time and energy costs that can leave your business behind. An air leak could be down to one of several factors. Fortunately, leaks can be sealed with the right kind of air compressor troubleshooting. The following symptoms are among the most common leak-related air compressor problems:
If you shut off the air compressor on full charge, yet the gauge drops while the compressor is deactivated, you definitely have an air leak. The compressor might even automatically restart just to counter the situation. What you need to do in this situation is pinpoint the source of the leak.
Apply soap to the connections: With the compressor unplugged, cover the connections with liquid soap, including all the couplers and the pressure switch. If bubbles form at any point, that is where the leak is located. Tighten up the coupler, if possible, where the bubbling occurs.
Inspect the tank check valve: Air leaks are sometimes caused by tank check valves that fail to close completely. If the pressure gauge continues to drop when the tank is off, access the tank valve and inspect its condition. The valve might need to be cleaned or replaced.
If the air leaks occur only when a hose is plugged into the compressor, disconnect the hose. If the pressure gauge stops dropping, the hose is the source of your leak.
If your compressor is losing pressure through the oil fill tube, check the piston seals. In most such cases, the piston seals will be badly worn and in need of immediate replacement. This is a problem that you should remedy immediately, as worn pistons can cause metal-on-metal friction that could swiftly lead to internal corrosion.
Air leaks from under the hood are sometimes encountered on smaller air compressors. To diagnose the problem, remove the hood, run the compressor for a few minutes, then shut it off and unplug the compressor. Feel around the motor parts for any sort of air draft. Chances are, the leak will originate from the tank valve, in which case you will need to remove and clean or possibly replace the valve.
If you notice an electrical issue, you need to take a look at it or have a professional come out as soon as possible. It could be anything from your motor capacitors to misfiring piston rings. If the power cuts out on your air compressor — or the power is insufficient and unreliable — the problem is most likely down to one of the following factors:
Extension cords: If your compressor is connected to an outlet via an extension cord, the motor could be deprived of sufficient energy, causing the motor to overheat. Compressors are not like home electronics, which can suffice on extension cords and power bars. An air compressor should only be powered through a direct connection to a power source.
An old motor: If your compressor has run on the same motor for many years, it could be time for a change-out. An older motor is liable to have worn windings, loose capacitor wires and other general wear that could easily result in blown fuses and breakers.
An air compressor consumes massive volumes of power at the time of startup. This is known as the inrush, which vastly exceeds the amount of power generally consumed throughout the rest of a usage cycle. To prevent fuses from breaking during this inrush, compressor motors are equipped with starter capacitors, which manage the incoming power. A dimming light is one of the tell-tale signs that the starter capacitor is worn and due for a replacement.
If your air compressor trips off the moment it powers on, the issue is likely caused by trapped air over the pistons. To test for this problem, shut off the tank, unplug it from the power supply and drain the tank of all air. This should relieve the pistons of undue air pressure and allow the tank to start without further issues. Trapped air over the pistons is usually caused by a faulty unloader valve, which should be inspected, cleaned and possibly replaced if the issue persists.
When an air compressor fails to start up, shut down or provide any degree of air pressure while active, the problem could be down to one of several issues. Each case should be taken on its own, as follows:
Aside from the obvious oversights such as a disconnected power cord or a deactivated power switch, a compressor will typically fail to start when it lacks sufficient air pressure. If the cut-in pressure is not proportional to the amount of air pressure stored in the tank, the compressor will often fail to start. Check the cut-in setting on the pressure switch and adjust the level accordingly.
The compressor should stop once the tank pressure drops to the cutoff point. If this fails to occur, the problem will generally be down to one of two issues:
Faulty pressure release valve: If the valve fails to release pressure, the tank will be too pressurized for the motor to stop running. In cases like these, you should cut the power and refrain from further use until the valve is replaced, as further use could seriously damage the compressor.
Faulty pump: If the motor is running and making noise yet no air comes out, you probably have a faulty air-intake pump that needs to be replaced. As long as the compressor is not too hot, you can feel for lack of pump pressure manually with a pair of protective gloves.
Faulty gasket: If the compressor only generates small amounts of pressure, there might be an issue with the gasket between the low-pressure and high-pressure compartments of the compressor, such as air flowing from one side to the other without sufficient pressurization.
Fortunately, pumps and gaskets can easily be changed out. With a simple parts replacement, you should be able to get many more years of performance from the compressor at hand.
If compressor oil works its way into the air lines, the effects could be detrimental elsewhere in the compressor because the pump uses a different kind of lubricant than other parts of the system. Once inside the air lines, that oil will be dispersed to other areas, potentially causing seals to crack or swell. Oily air lines are most troubling when the oil travels to plastic parts of the air valve.
The ill-effects of oil on plastic are due to the additives in the oil, which can cause plastic surfaces to become brittle and ultimately split. A plastic lubricator bowl, for example, could split under such circumstances if the air pressure crosses a certain threshold. You can protect the bowl — or contain the plastic in the event of a rupture — by affixing it with a metal shroud.
In a reciprocating air compressor, the oil must first travel past the piston seals to make its way to the tank. When this occurs, the seals should be replaced immediately. This would also be an opportune time to replace the valve and gasket.
As soon as you notice that oil has entered the air lines, check the sump to make sure that it still has a sufficient quantity of oil. If the problem persists, the sump could be depleted of its oil supply.
When removing the oil, take a look at it and ensure it appears clear and consistent. Sometimes, you may notice your oil has a milky look to it — this happens when your air compressor is exposed to excessive humidity and condensation has gotten into the oil reservoir. In this case, you should drain and replace the oil and move your air intake pipe to a less humid environment.
If you experience these problems, remove the filter housing from the intake pump and run the compressor again. If the problems cease and the compressor runs normally, the issue is rooted in the air intake media. From here, you have two options — cleaning or replacing. To clean a compressor filter, run water through it until you don’t see any dirt particles.
You can replace the media with various types of filter elements sold at supply stores and car parts shops. The best options are media that resemble the kinds used in air conditioners. Cut the media to the dimensions of the intake filter and switch out the old for the new.
The discharge coupler is fitted with the wrong hose connector, thus blocking the flow of air. This could be the case if you recently replaced one of the parts without checking OEM specifications.
If your tank has sufficient air quantity, yet generates very little air pressure, check the gauge readings. If the gauge is too low, you will not get sufficient air pressure from the tank. If your tank gauge is 100 psi, the gauge should be set to somewhere around 90 psi.
If an air compressor seems to have stopped working due to a broken part, you first need to test the part to verify the root of the problem. A compressor will not work if the following parts are broken. Fortunately, all can be replaced:
The intake filter is a crucial part of the air compressor because it strains impure particulates from the incoming air. Since it physically sticks out from the rest of the unit, an intake filter is one of the more easily broken parts to an air compressor. Fortunately, it is also one of the easier parts to replace. As long as you find a filter with the same thread size and roughly the same portal size and diameter, it should work for your machine.
If you break the pressure switch on an air compressor, you might be surprised by the underlying complexities. Fact is, any old replacement switch will not solve the problem due to all the connecting points of the manifold. To fix the problem, you will need to find a switch that accommodates each of the four or five connecting points, which will generally include sockets for the pressure relief valve, the air tank gauge, the compressor tank and the quick coupling.
Before you buy a new pressure switch and manifold, take note of the following details on the old switch, each of which must be matched on any new switch you attach to the compressor:
Many newer air compressors — particularly those on the lower-cost end of the spectrum — blow air with fans made of plastic, which is less expensive than metal but is also more easily prone to wear and tear. Fortunately, a replacement fan made of either material will work in almost any compressor. Therefore, if you have a fan with broken plastic blades, you could turn this into an opportunity to upgrade to metal.
Before you pick a replacement fan, check the compressor manual for a listing of the part number and corresponding dimensions. If not found, measure the dimensions and the hole diameter of the original fan. Take note of the number of blades and the direction of airflow, as both details are consequential to the performance and make of the compressor.
If the motor of your air compressor fails to power on when you flip the switch, it could be a matter of the switch itself, though you should run some tests before you draw any conclusions. Check the power cord to ensure that it is plugged into a functioning socket. If the power switch still fails to activate the compressor, plug a light or electronic device into the outlet to see if that powers on.
If the outlet works for other devices but not your compressor, pull back the housing that confines the switch, remove it from the socket and check the compressor owner’s manual for specs on the switch. Make sure that your replacement switch will match the specs and fit the socket.
Air compressors serve all kinds of purposes on a professional as well as personal scale. From pressing plants and factories to repair shops and studios, pressurized air is used to assemble everything from automobiles and aircraft to appliances and home furnishings. Today’s compressors are designed to deliver optimal power with sleek designs through many usage cycles.
At The Titus Company, we offer maintenance on a variety of air compressor types and brands. Contact us today to learn more about our products and services and how we can help you fix an air compressor that won’t work as intended.

Upon further investigation, if you find the water is being discharged from a small tube that comes out of the top or side of the unit, runs down the side of the tank, and ends near the ground, then the source is likely the temperature pressure relief valve, or relief valve, for short.
The relief valve is an important safety feature on the water heater. If the water inside the unit gets too hot (usually above 210 degrees) or pressure builds up too high (above 150 psi), the water heater can become damaged or even explore.
A good solution to this risk is the relief valve. If at any point the temperature or pressure reaches an unsafe level, the water heater triggers the relief valve to open and release water out of the tank until the temperature and pressure return to normal.
Both circumstances should be taken very seriously. If the relief valve is needed frequently, that means there’s an issue with your water heater that is causing unsafe temperatures or pressure.
On the other hand, if the relief valve is stuck or has another problem, it needs to be fixed or replaced right away so it can do its job properly when necessary.
If water is coming out of the relief valve of your water heater, don’t ignore it. Bring in the expert team at Pratt Plumbing to inspect your water heater to make sure you don’t have a potentially dangerous situation in your home. To schedule an appointment, call (806) 373-7866 today.


 8613371530291