
how does a gas oven safety valve work manufacturer

Most modern appliances have safety features built in, but your gas oven safety valve is arguably the most important. If an electrical appliance malfunctions, it can cause a fire, but a misfiring gas oven could potentially blow up your house. You don"t really need to know how the safety mechanism works to use your oven, but you may find that it gives you some extra peace of mind.
Broadly speaking, there are two ways a built-in safety mechanism can work. One option is that it remains "open" by default and to shut off if certain conditions are met. That"s how fuses and circuit breakers work in an electrical circuit: Ordinarily, the electricity is free to flow, but if the current grows too large, the fuse or breaker will blow and cut off the circulation of electricity.
The other option is for your safety mechanism to be "closed" by default and allow a device to operate only when the correct conditions are met. That"s how a gas oven safety valve works. Gas ordinarily is prevented from flowing, and if the valve is working correctly, it opens only when you want to light your oven.
Many gas stoves use what"s called a "hot surface igniter," a bar or element (similar to the ones on your stovetop) that gets hot enough to ignite the gas on contact. Gas oven safety valves on stoves with this type of ignition system take a couple of different approaches.
In one approach, a bimetallic strip operates the valve. It harnesses a simple scientific principle: Metals expand and contract at different rates when they"re heated and cooled. If you bond two suitable metals together in one strip, that strip will flex to a predictable degree as the temperature goes up and down. Wall-mount thermostats often use this principle, as do analog oven thermometers and the thermometer in the lid of your gas grill.
As appliance-repair website PartSelect explains, turning on your gas oven causes electricity to flow into the heating element of your hot surface igniter. As the igniter heats up, it warms a bimetallic strip inside your gas oven safety valve. When the igniter reaches its operating temperature, the bimetallic strip opens the valve and allows the gas to flow, igniting as it crosses the heated surface.
One intriguing thing about electricity is that a change in temperature can affect how well it passes through certain materials. For example, a lot of research revolves around superconductors – materials that offer very little resistance to an electrical current – but superconductors typically must be heavily chilled to work.
According to heating-equipment vendor Anglo Nordic, gas oven safety valves use a variation of that principle to operate. In these stoves, the flow of electrical current through the hot surface igniter becomes the control mechanism. The igniter"s bar is made of a material that offers less and less resistance to electricity as it heats. When it reaches the temperature required to ignite the gas, its resistance becomes low enough to trip the safety valve and open the flow of gas.
More modern ranges use an electrical igniter. When you turn on your oven, the gas begins flowing immediately, and it sends an electrical current to a piezo electric igniter. The current makes the igniter spark (like the manual igniter on your gas grill) and lights the oven"s burner. In this case, the safety valve works in the opposite way: An electronic sensor checks for the heat caused by ignition after a few seconds, and if it"s absent, it will close the valve and shut off the flow of gas.
It"s worth pointing out that not all gas ovens have a safety valve in the conventional sense. Older stoves simply use a pilot light, a small but constant flow of gas, which, in turn, feeds a small, candle-like flame. You essentially are the safety mechanism in this system: It"s up to you to check that the pilot is lit. When you turn on the gas manually, the small pilot flame ignites the main flame. It"s a mechanically simple system, which makes it durable, and for that reason, you"ll still see it used on commercial restaurant ranges, which must stand up to decades of heavy use.

First developed for use on early steam boilers as operating without them would cause an explosion unless carefully operated. Modern burner ovens now feature a gas safety valve to prevent an explosion when unlit. Unless ignited by an electric glow bar, pilot flame or electric spark with a gas supply, the valve will remain closed.
Safety should be you’re top priority when you’re working with gas. If you’re not careful, its extremely easy to cause a lot of damage. To prevent this modern day gas safety valves have been fitted around the world, to ensure an efficiently working system.
When your gas safety valves are on their last legs, making a repair or finding a replacement is the best thing to do. Keeping a spare in your kit is highly recommended.
The glow bar igniter and safety valve are wired in series within a glow bar system. This means that electricity can only pass through the valve after it has first passed through the glow bar. Electrical resistance from the glow bar blocks current to the gas valve, making sure that the valve closes. This decreases as the temperature increases. When the bar reaches a particular heat, enough to ignite the gas, it allows sufficient electricity through to open the gas valve.
The gas ignition source on Pilot light ignition system uses a low flame, fed by a line from the thermostat. The pilot flame will either burn constantly or be ignited electronically when the oven is switched on. More gas is fed to the pilot flame when the oven thermostat wants heat. Either excess pressure or an electric current will open the gas valve.
With some ovens the burner is directly ignited with an electric spark. An electric spark is sent to ignite the burner when the gas valve opens, this is due to the thermostat wanting heat. A sensor on the burner detects the flame and confirms ignition. The oven burner will lock out if there is no ignition after two attempts.
Pressure relief valves are usually installed in multi appliance, oil pumped ringmain systems. They are used to maintain a constant pressure on the positive side of the pump whether all appliances are in use or not.
Safety relief discharge pressurised gases and vapours to protect against overpressure. This is done by discharging pressurised gases and vapours from pipelines, this includes pressure vessels and plant components. Safety relief valves are the last line of defence and prevent explosion which could be fatal.
These spring-loaded and direct-acting. When the opening pressure is reached, valve gives way and opens, releasing the pressure. The pressures then equalised and the automatically closes.
Relief valves can either discharge into atmosphere, or via a connected blow-off line. The opening pressure of the boiler relief valve valve is preset usually at the factory according to the customer’s requirements.
Anglo Nordic have just what you need! If you have any questions for need more information, simply call us on 0208 979 0988 or email us at sales@anglo-nordic.com

Older stoves like the popular antique Wedgewoods, O"Keef and Merrits and Magic Chefs have a mechanical device that works with the standing pilot to ensure that unburned gas never flows freely. The pilot ignites the gas that flows when a chef dials the thermostat and releases gas to the burner. A device called a thermocouple makes this possible. The pilot heats the copper wire of the thermocouple, which creates a milivolt charge. This charge travels down the wire to the safety valve where it attracts a small electromagnet. The magnet holds the valve open so long as a charge is present. If the pilot blows out, it fails to heat the thermocouple, resulting in no electrical charge to draw the magnet, and the safety valve stays closed. Therefore, unburned gas cannot be released accidentally.
Modern stoves save gas because they don"t have a standing pilot. Instead, a high voltage electric spark ignites a pilot only when needed, which in turn lights the burner. It"s a common misunderstanding to think that the spark simply lights the burner. That free flow of gas and spark ignition would be a step backward in terms of safety. Instead, much like a standing pilot, the spark-ignited pilot heats an element, in this case a capillary tube. The tube heats liquid in a bulb. The liquid expands with heat and puts pressure on a diaphragm which forces the safety valve open.

Gas ovens came into usage in the mid-1800s and remain popular to this day. Early-model gas ovens had to be fired up with a match, and this functionality eventually evolved into the pilot light. In those early model ovens, sometimes user or mechanical error could cause the gas in the oven to explode. Fortunately, gas oven manufacturers have since developed electric-powered oven igniters that eliminated the need for matches and pilot lights, thereby improving safety.
Powering on a gas oven today causes the oven igniter inside to produce a spark that safely ignites the gas for the burner. Thermostats and timers built into modern gas ovens monitor the internal temperature, turning off the gas to prevent overheating, then automatically switching on the gas and reigniting to maintain correct heat levels.
Gas oven igniters today are made from silicon carbide, which enables them to deal with intensely high heat levels. As the name suggests, the gas oven igniter literally produces the heat that lights the gas so the cooking process may proceed at the desired temperature. As the user turns on the oven, electric current flows to the igniter, heating it to a very high temperature.
Once the igniter reaches the desired temperature, the oven safety valve opens the gas valve so the igniter can light gas burners inside the oven. Electric current continues to flow through the igniter even after the gas is lit. The igniter in modern gas ovens performs in series along with the oven safety valve.
A time delay relay can resolve issues with gas oven igniter controls by staggering the various gas oven functions. Using a time delay reduces the amount of energy used to power up the gas burners in the oven to ensure the different parts of the oven start at specifically defined, separate times for efficiency, longevity, safety, and proper oven function.
For instance, when switching on the gas oven power, a normally open time delay relay timer will begin a timing sequence to ensure fail-safe startup of the electrical gas oven igniter. With the time delay relay and the oven igniter hooked up in series, the relay contacts only close after the correct time has passed for the igniter to reach the correct temperature. This will trigger the solenoid on the gas valve to open the gas. If the igniter fails, however, then the safety valve remains closed, and the gas will not be released.
The normally open time delay relay can help prevent gas oven igniter problems, improving safety in oven operation. Amperite Co. time delay relays are the industry standard for today’s gas oven igniters. We provide appliance OEMs with customized time delay relays that will lead to consistent, reliable gas oven function for years.

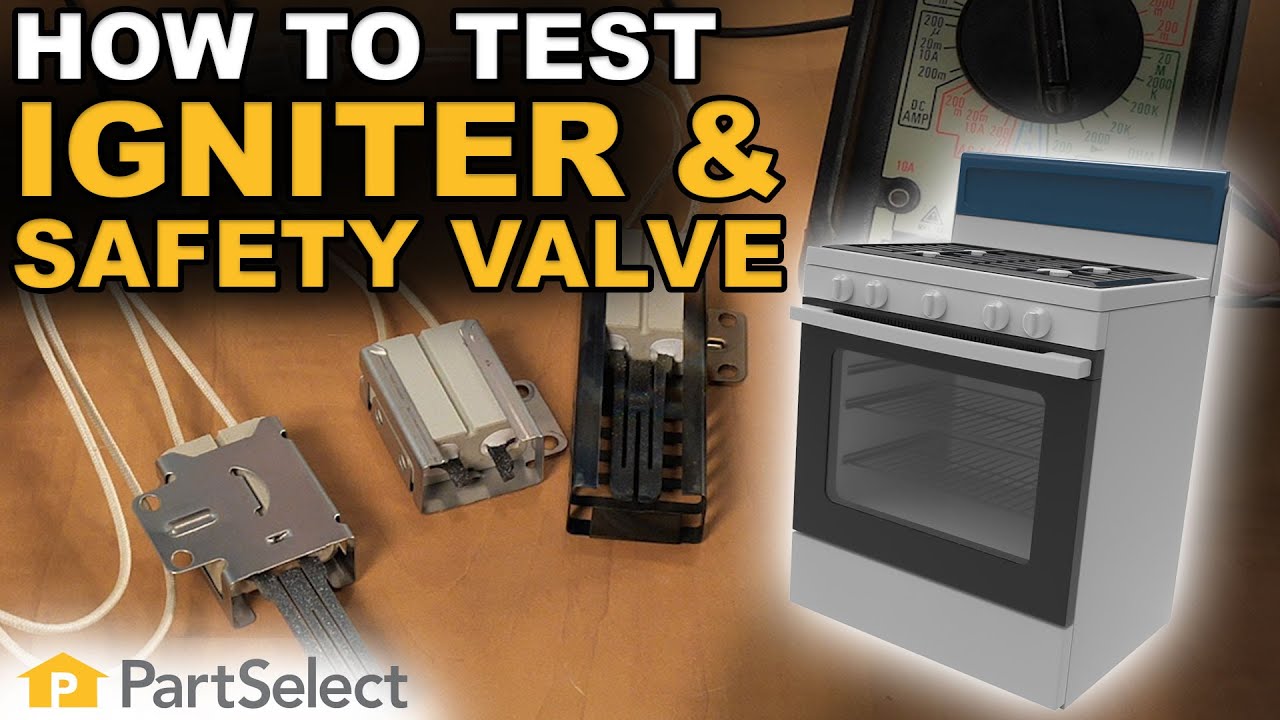
Trouble turning on your gas stove? If your igniter is glowing but there is no flame, then one of two components in your range are at fault. These components are the “safety valve” and the igniter itself.
Take a clamp-on type ammeter, and attach it to the circuit to determine whether the igniter is working efficiently enough to open the safety valve. Clamp your meter onto the wire that either goes to the bake burner igniter or the bake burner safety valve. Turn on the bake function, and see what current is drawn. Typically your meter will show 2.8 – 3.0 amps for a normal current draw for a working igniter. If your meter is showing 2.7 or lower then you can assume that the igniter is not drawing enough current to actually ignite the flame, and therefore it won’t open the oven safety valve to allow the gas to enter the burner chamber. If this happens, it’s time to replace the oven burner igniter.
For a “hot surface” or “glow bar igniter” you can test their power continuity using a multimeter. Simply insert both leads onto the terminals for the igniter and measure the resistance. If it shows resistance, it has continuity. No resistance? No continuity. Typically these will be somewhere between 80 and 175 ohms of resistance for a working igniter.
To test the oven safety valve, measure between the two terminals, on the valve and look for continuity. The resistance here is low, but you should be able to detect 1 to 1.5 ohms. If your model uses a dual valve, one for the broil burner and one for the bake burner, then you will have two bi-metals and again you can test them for continuity using a multimeter. They also should be very low resistance and those would indicate that they"re normal working oven safety valves.
If after performing these tests, you"ve determined that you need to replace your gas range"s oven safety valves, oven igniter, burn igniter, or safety valves? Take a look at our large selection of oven parts.

Sorry, we couldn"t find any existing answers that matched.Try using some different or simpler keywords, or submit your new question by using the "Ask a Question" button above!
Thank you for your inquiry. The oven safety valve is one part that may fix the issue, but there are some other parts that you will need to check to see which one is causing the issue. You will need to check the igniter, the electronic control board and the temperature sensor. I hope this helps. Thank you and have a great day!
Can this oven valve work on my range? The range was plugged into the wrong outlet and it shorted out, the igniter glows when the stove is turned on however the burner isn"t lighting. I was told the the valve needs to be replaced.
Thank you for your question. This is not the correct safety valve for your appliance. I have listed the correct valve below for you. I hope that helps. Good luck with your repair.
Thank you for your question. Yes, this part will work for propane. Please consult your owner"s manual for further information. I hope this helps. Thank you and have a great day!
Oven doesn"t heat. Igniter glows when gas is turned on, voltage on value starts near zero and slowly ramps up to just under 3 volts, but gas never ignites. The slow ramp seems normal to allow igniter to get hot, but not sure what the valve"s voltage should be to have it open. Valve coil is not open per ohm meter. Sounds like a bad valve? Thanks.
Hello Curt, Thank you for your inquiry. It sounds like it could be either this part or the pressure regulator. When the ignitor heats up to a certain temperature, it is supposed to trigger the valve to open and let the gas in to ignite and the regulator cuts it off at a certain pressure. Hope this helps!
Hello Sal, thank you for your question. You can test the gas valve to see if it has gone bad. You will need to test this with a multimeter. Here is a video that will show you how to test that valve.
Hello Steve, thank you for your question. The oven safety valve part number WB19K31 will work with either NAT or LP gas. The part itself can be switched over without any additional parts. Please check your owners manual on steps to change that over. I hope this helps!
In the oven a wire from the igniter shorted (had to pry the wire off the wall) to the frame. Would the control valve or the thermostat also be damaged. Where is the thermostat located on the stove. I noticed that the plastic on one of the knife connection on the control valve was missing
Hello Robert, thank you for writing. It is doubtful that the Oven Safety Valve or Oven Thermostat were also damaged when this occurred. The Oven Thermostat (part PS235170 on your model) is located behind the Manifold Panel (control panel). We hope this helps.
Hi there, i have a GE gas range (model jgbp28sem1ss) and need to replace the safety valve for the part of the oven that bakes. Is this the correct part? Thanks
Hello Morgan, Thank you for contacting us. I have researched the model you have provided and have found the part you are looking for is PartSelect Number: PS2370035. Hope this helps!

Pilot ignition systems use a flame sensing element to sense whether the pilot is lit and the safety valve can open. The sensing element sits right in the pilot flame.
Just exactly where the sensor sits in the pilot flame is important. (See figure 6-A) If the sensing bulb is not in the right part of the flame, or if the pilot is adjusted too low or too high, it will not get hot enough and the safety valve will not open.
When two dissimilar metals (for example, copper and steel) are bonded together electrically, and then heated, they generate a tiny electrical current between them. The voltage is very small, measured in millivolts. This is the basis for a millivolt oven ignitor system. All that"s needed is a safety valve that will sense this tiny voltage and open the valve if it is present. If the pilot is out, there is no millivoltage and the safety valve will not open. See figure 6-B.
If the burner in a millivolt system will not start, typically the problem is the gas valve. Occasionally the problem might be the pilot generator or thermostat. The thermostat in these is just a temperature-sensitive on/off switch. To test, turn it on and test for continuity.
If that doesn"t work, we have a minor dilemma in determining whether the problem is the pilot generator or the safety valve. The dilemma here is that the voltages are too small to be measured with standard equipment. VOM millivolt adaptors cost nearly as much as the pilot generator itself. And the safety valve, which is usually the problem, costs twice as much as the pilot generator. So usually you just replace either or both of them. But don"t forget they are electrical parts, which are non-returnable. What I recommend is just to replace the gas valve first; that usually will solve the problem. If not, replace the pilot generator. You just ate a gas valve, but trust me, you"d have bought one sooner or later anyway.
When installing the pilot generator, screw it into the safety valve finger tight, plus 1/4 turn. Any tighter than that and you can damage the electrical contacts on the valve.
In some systems the sensor is a liquid-filled bulb, with a capillary to the safety valve or flame switch. When the liquid inside heats up, it expands and exerts pressure on a diaphragm, which opens the valve or closes the switch.
It is important to know that these sensor bulbs do not cycle the burner on and off to maintain oven temperature. That is the thermostat"s function. It has a sensor bulb too, but it senses oven temperature, not pilot flame. The only function of these pilot sensing elements is to prevent gas flow to the burner if the bulb does not get hot enough to assure burner ignition.
In flame switch systems, hydraulic pressure from the capillary physically closes the switch, which completes an electrical circuit to the safety valve. The safety valve is electrical and operates on 110 volts. See Figure 6-D. If the pilot is out, the flame switch does not close and the 110 volt heating circuit is not complete, so the safety valve will not open.
Some of these direct-pressure (hydraulic) systems use a two-level pilot. The pilot stays at a very low level; not even high enough to activate the safety valve. This is called the constant pilot, or primary pilot. Gas for the primary pilot may come from either the thermostat or directly from the gas manifold.
When the thermostat valve is turned on, the pilot flame gets bigger, heating the sensor bulb, which activates the safety valve (hydraulically) and the burner ignites. This is called the heater pilot, or secondary pilot. Gas for the secondary pilot comes from the oven thermostat itself.
When the gas oven reaches the correct temperature setting, the thermostat drops the pilot flame back to the lower level, the safety valve closes and the burner shuts off. See figure 6-E.
The sensing bulb needs to be sitting right in the hottest part of the flame as described in section 6-2. If you don"t have a good strong pilot (secondary pilot, in two-level systems) that engulfs the pilot sensing bulb with flame, try cleaning the pilot assembly and sensor bulb as described in section 6-5. If that doesn"t work, replace the pilot assembly.
If you do have a good strong pilot that engulfs the pilot sensing bulb with flame, then odds are that the sensing element and/or whatever it is attached to are defective. If it is a flame switch, replace the flame switch. If it is a safety valve replace that.
In a two-level pilot system, remember that the main oven thermostat supplies the secondary pilot with gas. So if you cannot get a good secondary pilot the problem may be the pilot assembly, or it may be the thermostat. If you do get a good secondary pilot, you"re back to the sensing bulb and safety valve.
Spark ignition systems use a spark module to generate a pulsing, high-voltage spark to ignite the gas. The spark module is an electronic device that produces 2-4 high-voltage electrical pulses per second. These pulses are at very low amperage, measured in milliamps, so the risk of shock is virtually nil. But the voltage is high enough to jump an air gap and ignite gas. The spark ignition module is usually located either under the cooktop or inside the back of the stove. The same module is used for both the surface burner ignition and the oven burner ignition.
However, the spark is not certain enough to light the oven burner, and the gas flow is too high, to rely on the spark alone. Remember, in an oven, before the safety valve opens, you need to be assured of ignition. So the spark ignites a low-gasflow pilot, and then the safety valve opens only when the pilot is lit.
This is the same two-level pilot system described in section 6-2(b), with a few important exceptions. The constant or primary pilot does not stay lit when the oven thermostat is turned off. It does, however, stay lit the whole time the oven thermostat is turned on.
When the gas oven is turned on, a switch mounted to the oven thermostat stem signals the spark module. These are the same switches as shown in section 5-3.
The flame is positioned between the spark electrode and its target. The pilot flame actually conducts electricity. So when the pilot flame is burning, electricity from the spark electrode is drained off to ground, and sparking stops. If the pilot quits, sparking resumes.
When the thermostat calls for more heat in the oven, the heater or secondary pilot increases the size of the pilot flame, which heats the sensing bulb, which opens the safety valve and kicks on the burner.
Yup, this ol" boy"s got it all. Spark ignition, a pilot, a flame switch and TWO - count "em - TWO safety valves; one for the pilot and one for the burner. (Figure 6-H)
The operation is actually simpler than the diagram looks. When you turn on the oven thermostat, a cam on the thermostat hub closes the pilot valve switch. This opens the 110 volt pilot safety valve and energizes the spark module, igniting the pilot. As in the other spark system, the pilot flame provides a path that drains off the spark current, so the ignitor stops sparking while the pilot is lit. As long as the oven thermostat is turned on, the pilot valve switch stays closed, so the pilot valve stays open and the pilot stays lit.
When the pilot heats the pilot sensing element of the flame switch, the flame switch closes. This completes the 110 volt circuit to the oven safety valve, so the valve opens and the burner ignites.
When the oven temperature reaches the set point of the thermostat, the thermostat switch opens, breaking the circuit and closing the oven safety valve, and shutting off the burner.
Now that you know how the system works, first look to see what is not working. When the oven thermostat is on, and there isn"t a pilot flame, is the electrode sparking? Is there spark, but no primary pilot? Is the primary pilot igniting, but not the secondary? Is there sparking after the thermostat is shut off?
(The pilot may or may not light, but the main burner is not lighting) Remember that the thermostat supplies the pilot with gas in these ovens, and only when the thermostat is on. So if you don"t have a primary and secondary pilot flame, odds are the problem is the pilot orifice or oven thermostat. Try cleaning the pilot assembly and sensor bulb as described in section 6-5. If that doesn"t work, adjust the secondary flame a little higher. If that doesn"t work, replace the pilot assembly.
If you do have a good strong secondary pilot that engulfs the pilot sensing bulb with flame, then odds are that the oven safety valve (or flame switch, whichever is attached to the pilot sensing bulb in your system) is defective. Replace the defective component.
Something is wrong with the high-voltage sparking system. If you are in a hurry to use your oven, you can turn on the oven thermostat, carefully ignite the primary pilot with a match and use the oven for now; but remember that the minute you turn off the thermostat, the pilot goes out.
Are the cooktop ignitors sparking? If so, the spark module is probably OK. What typically goes wrong with the sparking system is that the rotary switch on the valve stops working. Test continuity as described in section 5-3(a). If that isn"t the problem, check the electrode for damage and proper adjustment. The spark target (the nearest metal to the electrode) should be about 1/8″ to 3/16″ away from it, (about the thickness of 2-3 dimes) and directly across the primary pilot orifice. Replace or adjust the electrode as appropriate. When replacing, make sure you get the right kind of electrode (there are several) and do not cut the electrode lead; follow it all the way back to the spark module and plug the new lead into the proper spark module terminal.
Usually the ignition switch has gotten some moisture in it and it is shorting. To test, pull the lead off the switch and see if the sparking stops. If so, the switch is bad. Replace it.
Remember that these switches are on 110 volt circuits. If you get too fast and loose with pulling these leads off to test them, you might zap yourself.

These valves do not fail very often. Normally the problem is with the ignitor not drawing enough amperage to open the valve. Even if the ignitor is glowing orange it is likely still the cause of the burner not igniting. Technicians refer to this as a "weak" igniter.
Dual gas safety valve assembly. The gas oven safety valve works with the oven igniter to provide gas to the burner. If the safety valve fails, the oven won’t heat. Since safety valves rarely fail, be sure to check more commonly defective parts before replacing the safety valve.
These valves do not fail very often. Normally the problem is with the ignitor not drawing enough amperage to open the valve. Even if the ignitor is glowing orange it is likely still the cause of the burner not igniting. Technicians refer to this as a "weak" igniter.
These valves do not fail very often. Normally the problem is with the ignitor not drawing enough amperage to open the valve. Even if the ignitor is glowing orange it is likely still the cause of the burner not igniting. Technicians refer to this as a "weak" igniter.
These valves do not fail very often. Normally the problem is with the ignitor not drawing enough amperage to open the valve. Even if the ignitor is glowing orange it is likely still the cause of the burner not igniting. Technicians refer to this as a "weak" igniter.
These valves do not fail very often. Normally the problem is with the ignitor not drawing enough amperage to open the valve. Even if the ignitor is glowing orange it is likely still the cause of the burner not igniting. Technicians refer to this as a "weak" igniter.
These valves do not fail very often. Normally the problem is with the ignitor not drawing enough amperage to open the valve. Even if the ignitor is glowing orange it is likely still the cause of the burner not igniting. Technicians refer to this as a "weak" igniter.

The kitchen is the heart of the home. It’s where families share dinner, gather together and pass down recipes. One of the worst things that can happen when preparing to cook an amazing meal for your family is to find out that your gas oven won’t light. Do you call a repairman or resort to the microwave?
A handy homeowner can troubleshoot the problem when a gas oven doesn’t light. A handful of common problems can plague gas ovens. Many are as simple as a loose connection, while others involve replacing important components. However, those simple repairs are less likely to cost you an arm and a leg. Before worrying about replacing your oven, see if one of these common issues is the cause of your oven problems.
You can check a handful of issues if your gas oven doesn’t light. From a simple power issue to a faulty gas igniter, here are a few common reasons your gas oven won’t work.
If your oven won’t heat and your gas burners won’t light, the problem might be as simple as a tripped circuit breaker. Even though you have a gas oven, it still needs electricity to run. Electricity powers the control board, igniter and temperature sensor, among other parts.
The oven should connect to a standard 15- or 20-amp switch inside your circuit breaker box. These are the single switches. Your oven may also have its own dedicated breaker switch. If not, you can check the power by testing the secondary outlet. The problem lies elsewhere if the outlet works but your gas oven does not.
While a rare occurrence, your gas oven may not heat because your gas supply is off — usually a result of maintenance repairs or replacements in the system. For example, if your oven or other gas-reliant appliance was recently repaired, the gas line is likely still turned off.
Like a thermostat, the temperature sensor regulates the oven temperature of your gas oven. It connects to the igniter switch. If the temperature sensor breaks, the oven will not light for safety reasons.
Troubleshooting and replacing this sensor is a fairly easy fix for a homeowner who is comfortable working on a gas oven. Unplug the oven from the wall.
Set the multimeter to the RX1 setting and touch the sensor terminals with the tool to ensure the sensor resistance reading is within the correct parameters.
The igniter controls the oven safety valve, also known as the gas valve. This oven component ensures only gas enters the oven when the igniter is hot enough to ignite it. This component stops working if there is not enough power to either the valve or the igniter. A handy homeowner can use a multimeter tool to test that the valve is working. Unplug your oven.
Use a multimeter tool on the RX1 setting and test the valve. Some brands use valves with terminals for both the broiler and the baking elements. Test both sets of terminals.
The igniter is the key component of a gas oven. If you have a faulty igniter, many of the other components will not work and the oven will not turn on. Oven igniters glow hot to ignite the natural gas released by the oven safety valve. However, if the heating element is not working, the gas valve will not trigger and the oven will not ignite.
To check the gas igniter: Turn off the circuit to the oven and confirm the power is off by checking that the oven light, clock and control board are all off.
If nothing looks wrong with the part, plug the oven back in and watch to see if the igniter glows after turning on the oven. If it does not glow orange, replace it.
Replacing a faulty gas oven igniter is a moderately easy DIY appliance repair. Estimated costs are between $40 and $80, depending on the cost of a replacement igniter. If you have a newer oven, check any manufacturer warranties before making any repairs.
While a homeowner can do this project, ensure you take every safety precaution before attempting. Turn off the oven’s gas supply and disconnect the appliance from the outlet. Remember to take precautions if you smell gas (even after you have turned off the supply to the oven). Turn off the main gas supply to your home, open windows for ventilation, and call an appliance technician for assistance.
To ensure you have the correct replacement igniter, have your oven model number and serial number. A Kenmore oven might not use the same part as a Whirlpool oven. These numbers are often found inside the oven door or drawer, depending on the brand of oven.
Turn off all power to your oven. Ensure the power is off by checking that the light, control board and clock are off. Then remove the oven racks. Next, unscrew the base plate and remove it from the oven. You will find the igniter underneath.
Take a reference photo before removing the old gas igniter. Install the new igniter in the same way. Be very careful with the new igniter because it is very fragile. Unplug the two wires or the wire harness from the igniter.
While your gas stove and gas oven are part of the same appliance, they do not use the same parts and components. This is why your gas burners can work while your gas oven won’t light. Your gas range has its own set of igniters, gas valves and safety features. If everything is in working order, your range can work independently of your gas oven.
Appliance repairs are always a big inconvenience and can sometimes cost an arm and a leg. Don’t get stuck without your most important appliances. Check out the Cinch Home Services warranty plan that cover appliances, including both gas and electric ovens. With three different options to choose from, you can find the right plan for your home.
Cinch serves nearly 1 million customers and includes a 180-day workmanship guarantee on covered repairs. Get a quote on a Cinch home protection plan today.

This website uses cookies so that we can provide you with the best user experience possible. Cookie information is stored in your browser and performs functions such as recognising you when you return to our website and helping our team to understand which sections of the website you find most interesting and useful.

Sometimes your electric appliances will fail to work when you least expect it. One of these machines is the oven, and its repair could cost you between $100 and $200. If you’re the DIY type of person, the first thing to do is to find out where the problem lies.
If the igniter can’t draw a current to the safety valve, it won’t heat the gas burner. To troubleshoot the igniter, remove the gas covers and check if it glows. If it does, it could mean that it has become weak and cannot draw enough current.
Check if the igniter or electrode power supply wire has burnt at the source of heat. A burnt wire will appear visibly damaged or out of shape. If this is the case, the cable will be unable to pass heat from the source.
Burnt wires have no remedy but to replace them to prevent further damage. Ensure you also check the probable reason for the burning. One of the main reasons is having a loose electrical connection, also known as backstabbing.
The safety valve is the section that controls the passage of gas to the burners. It works by responding to heat generated by the igniter. Upon sensing the amps, the valve opens up to allow gas to pass through.
If your gas range fails to heat, you might be able to identify the problem on your own. For a long-lasting solution, consider engaging a professional in fixing the problem. At Appliance Repair Specialist, we’ll give you repair solutions tailored to the model of your oven. Just contact us to schedule a service or ask any question.

This oven gas valve (part number MJX62571701) is for ranges. Oven gas valve MJX62571701 controls gas flow to the bake and broil burners in the oven. Unplug the range and shut off the gas supply before installing this part. Gas line connections must be properly leak checked after this repair. Wear work gloves to protect your hands.Oven gas valve MJX62571701 controls gas flow to the bake and broil burners in the oven
These valves do not fail very often. Normally the problem is with the ignitor not drawing enough amperage to open the valve. Even if the ignitor is glowing orange it is likely still the cause of the burner not igniting. Technicians refer to this as a "weak" igniter.
These valves do not fail very often. Normally the problem is with the ignitor not drawing enough amperage to open the valve. Even if the ignitor is glowing orange it is likely still the cause of the burner not igniting. Technicians refer to this as a "weak" igniter.
These valves do not fail very often. Normally the problem is with the ignitor not drawing enough amperage to open the valve. Even if the ignitor is glowing orange it is likely still the cause of the burner not igniting. Technicians refer to this as a "weak" igniter.
These valves do not fail very often. Normally the problem is with the ignitor not drawing enough amperage to open the valve. Even if the ignitor is glowing orange it is likely still the cause of the burner not igniting. Technicians refer to this as a "weak" igniter.
These valves do not fail very often. Normally the problem is with the ignitor not drawing enough amperage to open the valve. Even if the ignitor is glowing orange it is likely still the cause of the burner not igniting. Technicians refer to this as a "weak" igniter.
These valves do not fail very often. Normally the problem is with the ignitor not drawing enough amperage to open the valve. Even if the ignitor is glowing orange it is likely still the cause of the burner not igniting. Technicians refer to this as a "weak" igniter.
These valves do not fail very often. Normally the problem is with the ignitor not drawing enough amperage to open the valve. Even if the ignitor is glowing orange it is likely still the cause of the burner not igniting. Technicians refer to this as a "weak" igniter.
These valves do not fail very often. Normally the problem is with the ignitor not drawing enough amperage to open the valve. Even if the ignitor is glowing orange it is likely still the cause of the burner not igniting. Technicians refer to this as a "weak" igniter.

My vintage gas stove has safety systems for the oven and broiler. I thought it was of one of the things that CP (Certified Performance *) trademark of the Gas Appliance Manufacturers Association is about. “CP” stoves have a long list of safety and performance features which evolved over time. (see page bottom)
As far as I could tell, it meant, for any reason, if the gas flow to the stove stops while the oven or broiler was on, when the gas flow is re-established, raw gas does not quickly fill up the oven or broiler cavities. Lots of raw gas in an enclosed space can cause an explosion if it is suddenly ignited.
OK. Duly noted. The problem is sometimes the entire safety system fails, the oven doesn’t turn on or doesn’t stay on. Many people don’t understand why or how to fix it. They just know their oven or broiler won’t light. Very frustrating. Playing with gas stove problems is not for the faint of heart. Playing it totally safe means locating a vintage stove expert, which in most circumstances is NOT your standard appliance tech. But these stoves are not that complex. If you’re confident in understanding a few basic concepts and respect with gas can do when you are too sloppy, you might be able to either fix the problem or explain enough to a plumber or gas technician that they can fix things.
At the page end is a set of drawings that might help you understand what is involved in a working and non-working safety system. There are several separate components that have to be working. If the oven or broiler won’t light or the oven is not keeping the right temperature, , a conversion between NG and LP, one of more of those components might have failed.
The problem may be simple. Greasy or ashy buildup could be causing a problem. The standing pilot and thermocouple that sits right next to it, can over time, accumulate gunk. After all, they’re sitting inside the oven near the oven’s main burner. Who knows what gremlin dirt may have been deposited when the door is closed?


 8613371530291