
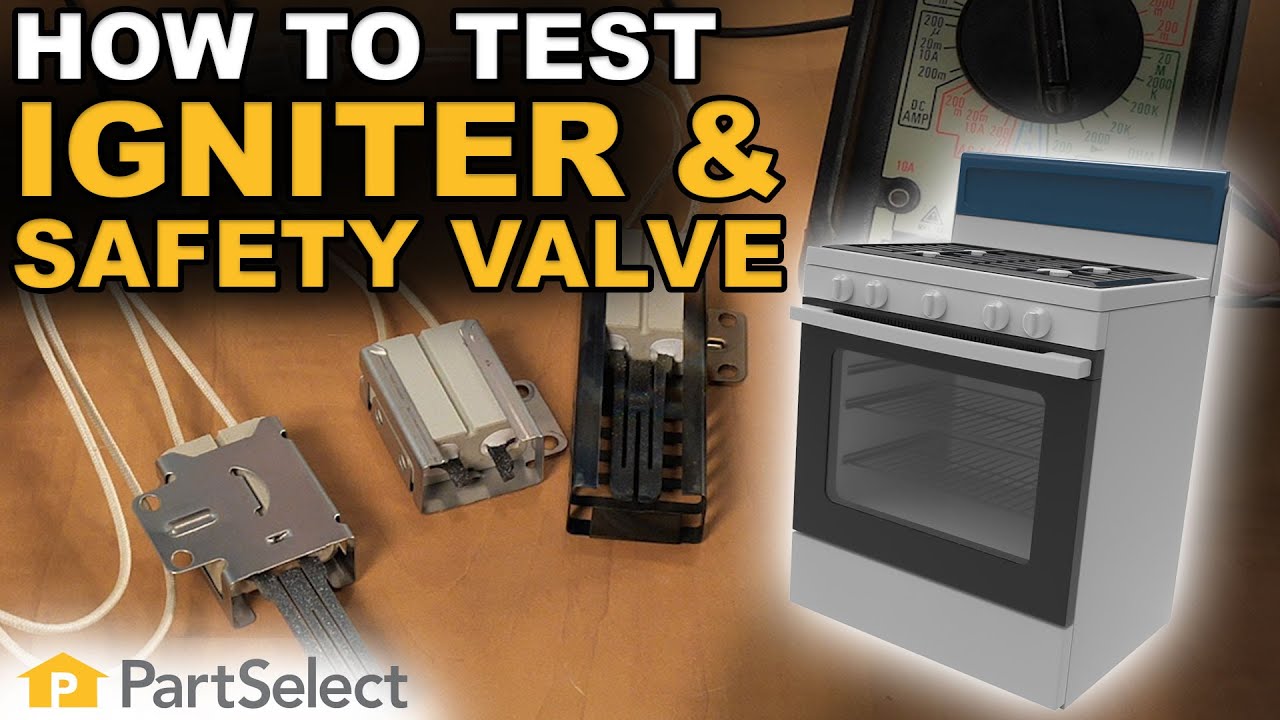
how to test a gas oven safety valve quotation

This week’s Product Pick of the Week is the safety valve in your oven. The reason this product has been picked is because it is very important to understand how your range works to avoid hazardous situations such as open gas valves but no flame to burn said gas. This situation is the biggest concern with ovens, so it is crucial that you know how to test the safety valve so that you can continue using your range!

Their are several different gas safety valves. On ovens with ignitors, if the ignitor is weak then the oven will not light off, but what if the igniter is new and the oven will not come on?
NOTE:Never put 120 volts to the safety valve in an attempt to make it come on. All you will do is kill that valve"s bi-metal. It has to be hooked in line with the igniter to work properly. Why? The ignitor takes up most of the power. The power goes through the safety valve as 120 volts but because the amperage is all being hogged by the ignitor, the gas valve opens up and allows gas to flow out into the burner and ignite. Unless it is leaking most of the time the gas safety valve is NOT the problem.
On ovens with pilot lights or standing pilots most of the time it IS the safety valve because the little thermocouple that mounts on the pilot goes bad and won"t open the safety valve.
Some ovens offer a seperate safety feature called a flame switch. What it amounts to is the thermocouple mounted on the pilot light goes to the flame switch which will have continuity as long as it is heated by the pilot light.
NOTE: If you do have to replace the gas valve remember this: It will not come preset. You will have to adjust the flame height with a wrench. It is a good idea to set the 2 valves side by side, adjust the orifice height on the new valve to the same height as the old one and then you need only to tweak it a tad. If the flame is too low it will take 2 hours to bake a pie shell. too high and the bottom will be cooked before the rest. It is best to adjust the flame to about half way up the flame spreader.
You can check if the shut-off valve if you are able to slide the range out from the cabinet. If you are unable to slide the range out, we recommend consultation with a local certified technician.
Verify the main gas shut-off valve is in the open position. Most service valves are single-lever ball valves; the handle parallel to the line means gas is flowing, perpendicular means it"s cut off. (See Illustration below)
NOTE: If the range is hard piped you will not be able to slide it out from the cabinet, if it connected with a flexible supply line take care not to over-extend the supply line. The main gas valve will usually be at the end of a fixed pipe and connect to the pressure regulator with a flexible supply line. Take care not to kink or pinch this flexible pipe.

If your gas range is not working correctly, you should check the gas pressure regulator shut-off valve. The factory default setting for the gas pressure regulator is in the "ON" position but may have been turned to the "OFF" position during handling or transportation. When the shut-off valve is on the "OFF" position, gas will flow to the cooktop burners but will not provide a gas supply to the oven.
You can check if the shut-off valve if you can slide the range out from the cabinet. If you are unable to slide the range out, we recommend consultation with a local certified technician.
Verify the pressure regulator shut-off valve is in the open position. The pressure regulator is located at the back of the range. Make sure that the shut-off valve lever is in the "On" position (see illustration below).
NOTE: If the range is hard piped, you will not be able to slide it out from the cabinet if it connected with a flexible supply line, take care not to over-extend the supply line. The main gas valve will usually be at the end of a fixed pipe and connect to the pressure regulator with a flexible supply line. Take care not to kink or pinch this flexible pipe.

Trouble turning on your gas stove? If your igniter is glowing but there is no flame, then one of two components in your range are at fault. These components are the “safety valve” and the igniter itself.
Take a clamp-on type ammeter, and attach it to the circuit to determine whether the igniter is working efficiently enough to open the safety valve. Clamp your meter onto the wire that either goes to the bake burner igniter or the bake burner safety valve. Turn on the bake function, and see what current is drawn. Typically your meter will show 2.8 – 3.0 amps for a normal current draw for a working igniter. If your meter is showing 2.7 or lower then you can assume that the igniter is not drawing enough current to actually ignite the flame, and therefore it won’t open the oven safety valve to allow the gas to enter the burner chamber. If this happens, it’s time to replace the oven burner igniter.
For a “hot surface” or “glow bar igniter” you can test their power continuity using a multimeter. Simply insert both leads onto the terminals for the igniter and measure the resistance. If it shows resistance, it has continuity. No resistance? No continuity. Typically these will be somewhere between 80 and 175 ohms of resistance for a working igniter.
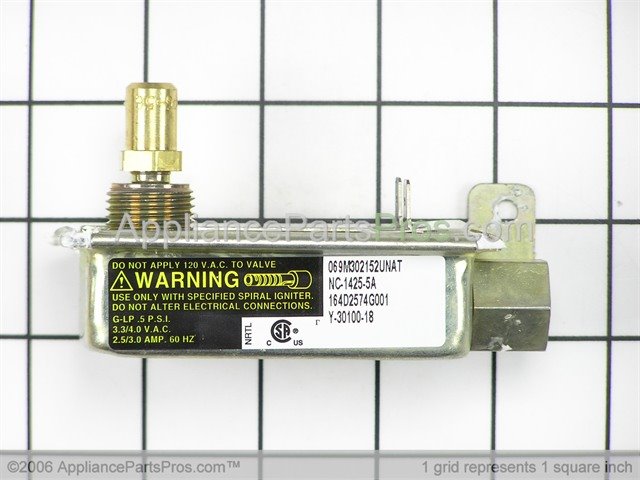
To test the oven safety valve, measure between the two terminals, on the valve and look for continuity. The resistance here is low, but you should be able to detect 1 to 1.5 ohms. If your model uses a dual valve, one for the broil burner and one for the bake burner, then you will have two bi-metals and again you can test them for continuity using a multimeter. They also should be very low resistance and those would indicate that they"re normal working oven safety valves.
If after performing these tests, you"ve determined that you need to replace your gas range"s oven safety valves, oven igniter, burn igniter, or safety valves? Take a look at our large selection of oven parts.

On a newer gas oven, the burners release and set fire to the gas via an igniter called the hot surface igniter. The ignitor is a very fragile thing, whether it’s the round or the flat type. It works like a chain reaction: turning on the oven sends electricity to the igniter, causing it to heat red-hot. This makes the two metals in the oven safety valve contort enough to open the valve and set the gas aflame. This chain reaction takes about 60 seconds in a working oven. And a persistently cold oven could be the result of any break along the chain. A burner that won’t light could be connected to an igniter with no power coming into its circuit. Have a repairperson check the circuit for electricity, since this is a live voltage check. If there is indeed power coming to the igniter, and it is open circuit, a multi-meter can be used to run a continuity check. It may be that, while the igniter is glowing, it’s still insufficiently hot to open the valve: this can be checked by your repairperson with an amp meter. A defective igniter can’t be repaired: replacement is the only option.

Safety is of the utmost importance when dealing with pressure relief valves. The valve is designed to limit system pressure, and it is critical that they remain in working order to prevent an explosion. Explosions have caused far too much damage in companies over the years, and though pressurized tanks and vessels are equipped with pressure relief vales to enhance safety, they can fail and result in disaster.
That’s also why knowing the correct way to test the valves is important. Ongoing maintenance and periodic testing of pressurized tanks and vessels and their pressure relief valves keeps them in working order and keep employees and their work environments safe. Pressure relief valves must be in good condition in order to automatically lower tank and vessel pressure; working valves open slowly when the pressure gets high enough to exceed the pressure threshold and then closes slowly until the unit reaches the low, safe threshold. To ensure the pressure relief valve is in good working condition, employees must follow best practices for testing them including:
If you consider testing pressure relief valves a maintenance task, you’ll be more likely to carry out regular testing and ensure the safety of your organization and the longevity of your
It’s important to note, however, that the American Society of Mechanical Engineers (ASME) and National Board Inspection Code (NBIC), as well as state and local jurisdictions, may set requirements for testing frequency. Companies are responsible for checking with these organizations to become familiar with the testing requirements. Consider the following NBIC recommendations on the frequency for testing relief valves:
High-pressure steam boilers greater than 15 psi and less than 400 psi – perform manual check every six months and pressure test annually to verify nameplate set pressure
High-pressure steam boilers 400 psi and greater – pressure test to verify nameplate set pressure every three years or as determined by operating experience as verified by testing history
High-temperature hot water boilers (greater than 160 psi and/or 250 degrees Fahrenheit) – pressure test annually to verify nameplate set pressure. For safety reasons, removal and testing on a test bench is recommended
When testing the pressure relief valve, raise and lower the test lever several times. The lever will come away from the brass stem and allow hot water to come out of the end of the drainpipe. The water should flow through the pipe, and then you should turn down the pressure to stop the leak, replace the lever, and then increase the pressure.
One of the most common problems you can address with regular testing is the buildup of mineral salt, rust, and corrosion. When buildup occurs, the valve will become non-operational; the result can be an explosion. Regular testing helps you discover these issues sooner so you can combat them and keep your boiler and valve functioning properly. If no water flows through the pipe, or if there is a trickle instead of a rush of water, look for debris that is preventing the valve from seating properly. You may be able to operate the test lever a few times to correct the issue. You will need to replace the valve if this test fails.
When testing relief valves, keep in mind that they have two basic functions. First, they will pop off when the pressure exceeds its safety threshold. The valve will pop off and open to exhaust the excess pressure until the tank’s pressure decreases to reach the set minimum pressure. After this blowdown process occurs, the valve should reset and automatically close. One important testing safety measure is to use a pressure indicator with a full-scale range higher than the pop-off pressure.
Thus, you need to be aware of the pop-off pressure point of whatever tank or vessel you test. You always should remain within the pressure limits of the test stand and ensure the test stand is assembled properly and proof pressure tested. Then, take steps to ensure the escaping pressure from the valve is directed away from the operator and that everyone involved in the test uses safety shields and wears safety eye protection.
After discharge – Because pressure relief valves are designed to open automatically to relieve pressure in your system and then close, they may be able to open and close multiple times during normal operation and testing. However, when a valve opens, debris may get into the valve seat and prevent the valve from closing properly. After discharge, check the valve for leakage. If the leakage exceeds the original settings, you need to repair the valve.
According to local jurisdictional requirements – Regulations are in place for various locations and industries that stipulate how long valves may operate before needing to be repair or replaced. State inspectors may require valves to be disassembled, inspected, repaired, and tested every five years, for instance. If you have smaller valves and applications, you can test the valve by lifting the test lever. However, you should do this approximately once a year. It’s important to note that ASME UG136A Section 3 requires valves to have a minimum of 75% operating pressure versus the set pressure of the valve for hand lifting to be performed for these types of tests.
Depending on their service and application– The service and application of a valve affect its lifespan. Valves used for clean service like steam typically last at least 20 years if they are not operated too close to the set point and are part of a preventive maintenance program. Conversely, valves used for services such as acid service, those that are operated too close to the set point, and those exposed to dirt or debris need to be replaced more often.
Pressure relief valves serve a critical role in protecting organizations and employees from explosions. Knowing how and when to test and repair or replace them is essential.

The kitchen is the heart of the home. It’s where families share dinner, gather together and pass down recipes. One of the worst things that can happen when preparing to cook an amazing meal for your family is to find out that your gas oven won’t light. Do you call a repairman or resort to the microwave?
A handy homeowner can troubleshoot the problem when a gas oven doesn’t light. A handful of common problems can plague gas ovens. Many are as simple as a loose connection, while others involve replacing important components. However, those simple repairs are less likely to cost you an arm and a leg. Before worrying about replacing your oven, see if one of these common issues is the cause of your oven problems.
You can check a handful of issues if your gas oven doesn’t light. From a simple power issue to a faulty gas igniter, here are a few common reasons your gas oven won’t work.
If your oven won’t heat and your gas burners won’t light, the problem might be as simple as a tripped circuit breaker. Even though you have a gas oven, it still needs electricity to run. Electricity powers the control board, igniter and temperature sensor, among other parts.
The oven should connect to a standard 15- or 20-amp switch inside your circuit breaker box. These are the single switches. Your oven may also have its own dedicated breaker switch. If not, you can check the power by testing the secondary outlet. The problem lies elsewhere if the outlet works but your gas oven does not.
While a rare occurrence, your gas oven may not heat because your gas supply is off — usually a result of maintenance repairs or replacements in the system. For example, if your oven or other gas-reliant appliance was recently repaired, the gas line is likely still turned off.
Like a thermostat, the temperature sensor regulates the oven temperature of your gas oven. It connects to the igniter switch. If the temperature sensor breaks, the oven will not light for safety reasons.
Troubleshooting and replacing this sensor is a fairly easy fix for a homeowner who is comfortable working on a gas oven. Unplug the oven from the wall.
Set the multimeter to the RX1 setting and touch the sensor terminals with the tool to ensure the sensor resistance reading is within the correct parameters.
The igniter controls the oven safety valve, also known as the gas valve. This oven component ensures only gas enters the oven when the igniter is hot enough to ignite it. This component stops working if there is not enough power to either the valve or the igniter. A handy homeowner can use a multimeter tool to test that the valve is working. Unplug your oven.
Use a multimeter tool on the RX1 setting and test the valve. Some brands use valves with terminals for both the broiler and the baking elements. Test both sets of terminals.
The igniter is the key component of a gas oven. If you have a faulty igniter, many of the other components will not work and the oven will not turn on. Oven igniters glow hot to ignite the natural gas released by the oven safety valve. However, if the heating element is not working, the gas valve will not trigger and the oven will not ignite.
To check the gas igniter: Turn off the circuit to the oven and confirm the power is off by checking that the oven light, clock and control board are all off.
If nothing looks wrong with the part, plug the oven back in and watch to see if the igniter glows after turning on the oven. If it does not glow orange, replace it.
Replacing a faulty gas oven igniter is a moderately easy DIY appliance repair. Estimated costs are between $40 and $80, depending on the cost of a replacement igniter. If you have a newer oven, check any manufacturer warranties before making any repairs.
While a homeowner can do this project, ensure you take every safety precaution before attempting. Turn off the oven’s gas supply and disconnect the appliance from the outlet. Remember to take precautions if you smell gas (even after you have turned off the supply to the oven). Turn off the main gas supply to your home, open windows for ventilation, and call an appliance technician for assistance.
To ensure you have the correct replacement igniter, have your oven model number and serial number. A Kenmore oven might not use the same part as a Whirlpool oven. These numbers are often found inside the oven door or drawer, depending on the brand of oven.
Turn off all power to your oven. Ensure the power is off by checking that the light, control board and clock are off. Then remove the oven racks. Next, unscrew the base plate and remove it from the oven. You will find the igniter underneath.
Take a reference photo before removing the old gas igniter. Install the new igniter in the same way. Be very careful with the new igniter because it is very fragile. Unplug the two wires or the wire harness from the igniter.
While your gas stove and gas oven are part of the same appliance, they do not use the same parts and components. This is why your gas burners can work while your gas oven won’t light. Your gas range has its own set of igniters, gas valves and safety features. If everything is in working order, your range can work independently of your gas oven.
Appliance repairs are always a big inconvenience and can sometimes cost an arm and a leg. Don’t get stuck without your most important appliances. Check out the Cinch Home Services warranty plan that cover appliances, including both gas and electric ovens. With three different options to choose from, you can find the right plan for your home.
Cinch serves nearly 1 million customers and includes a 180-day workmanship guarantee on covered repairs. Get a quote on a Cinch home protection plan today.
When you turn the dial on your gas stovetop, it opens a valve that lets gas through. This gas is released and mixes with air. It is ignited by a continuous spark which comes from the spark module, and a blue flame is created.
When the electrode on your gas oven burner continues sparking after the gas has been lit, it usually is a sign of a short in the spark module. This usually happens when liquid (like water from an overflowing pot) gets into the spark module. To fix this, unplug your appliance and let the burner dry out. Turn it on again and test it to see if drying has fixed the problem.
If the module continues to spark, call a service technician to come and replace the module, or call your home warranty company, who can send out a technician to diagnose your appliance.
If your spark module sends out a spark intermittently instead of sparking at a continuous pulse, it has probably worn out and most likely needs to be replaced. You can call a service technician or your home warranty company to get this repaired. This is not something that you should attempt to repair or replace yourself. Although the cost of the spark module really depends on the oven model the part can be found for anywhere between $30 to $250it"s a better deal to replace one spark module rather than replacing an entire oven. This is especially true if you have a home warranty plan, as the repair will generally only cost a small service call fee.
If you turn on your burner and you don’t hear the telltale sign of the electrode sending out a spark, it may be because the electrode is damaged. You can check to see if there is any visible damage by removing the burner and seeing if there are cracks on the top of the electrode.
If you see any damage, call a registered technician or your home warranty company in order to get the electrode replaced. Sometimes, your electrode"s spark is being blocked by the top of the burner being slightly off. Make sure the burner is in the correct place for the electrode to reach the gas and light it before calling a repairman or your home warranty technician.
If you don’t see any cracks on the actual electrode, you can also turn each burner dial to see if there’s one that doesn’t spark. If all of your burners spark but one, there’s probably a problem with the dial. There are times when the dials can become stripped and won’t turn on the electrode. It’s also possible that the dial has shorted out because food or water has spilled into the burner. You can try to dry out the burner, and if that doesn"t work, the igniter wiring harness will need to be replaced. Paying to repair this part is much more cost effective than purchasing a new oven, as the parts range between $30 and $100. With a home warranty, you only pay a small service call fee for parts and labor to repair the igniter wiring harness as long as it"s failed from normal wear and tear.
There’s a chance that food or grease has plugged up the tube that releases gas to be lit by the burner. Turn your oven off and remove the burner from the oven. Clean out thesmall tube inside of the burner with a toothpick or small brush.
When you turn on your oven to bake (or broil) the dial sends electricity to the igniter, which begins to warm up. As the igniter warms, the safety valve releases gas into the oven burner tube. Once the gas reaches the igniter (which can get up to 2,000 degrees Fahrenheit) the gas is lit by the extremely hot metal on the igniter, and warms the oven. When the oven reaches the temperature you selected, the burner and igniter will shut off, but will turn on and off while you’re cooking to keep the correct temperature in the oven.
First, remove the shields so you can see the igniter. If the igniter is glowing, but there’s no flame after the igniter has been glowing for a longer period of time, theigniter has probably grown too old and can’t open the safety valve to bring gas into the burner tube. Call your home warranty company for diagnosis for this problem.
If the igniter isn’t glowing, it probably has outright failed, and needs to be replaced. Call a technician or your home warranty company to repair or replace your igniter.
Oven problems can happen to any homeowner, but with some troubleshooting and a home warranty plan from Landmark Home Warranty, you can usually fix small issues or repair or replace the oven. If you"re interested in covering your oven with a home warranty plan, compare Landmark"s home warranty plans here, or download a brochure with our contract for your state here.

• Range of Capability: MVS is able to test and repair a wide range of pressure relief valves installed on smaller 1/2-inch and up to larger 6x8 flange connections.
• Identification & Traceability: Technicians utilize Class I Division II Field Tablets, along with Class I Division I Bluetooth barcode readers, accurate bar coding and tagging system.
• Documentation: Technicians complete detailedrecord keeping of testing and repair reports.All information is tracked and managed in an online database.
• NBIC VR Certified: Test and repair procedures areperformed using calibrated instruments.Technicians can test, repair, and re-certify asrequired. If a valve fails, then it is rebuilt, retested, and repeated until acceptable.
• Responsive & Timely: Mobile shop responds todemand, dispatched to site; capable of providingprompt services within a shorter window of opportunity, precisely where needed.
• Capacity: 53-foot climate-controlled trailer isdesigned and equipped to accommodate a widerange of valves with temperature-controlled testing and repair conditions.
• Fully Self-Sufficient: The completely independentunit is self-contained, equipped with onboarddiesel generator and fully equipped to providecompressed air, electricity, and water. Noadditional plant support is required.

All CategoriesAntiquesArtBabyBooks & MagazinesBusiness & IndustrialCameras & PhotoCell Phones & AccessoriesClothing, Shoes & AccessoriesCoins & Paper MoneyCollectiblesComputers/Tablets & NetworkingConsumer ElectronicsCraftsDolls & BearsMovies & TVEntertainment MemorabiliaGift Cards & CouponsHealth & BeautyHome & GardenJewelry & WatchesMusicMusical Instruments & GearPet SuppliesPottery & GlassReal EstateSpecialty ServicesSporting GoodsSports Mem, Cards & Fan ShopStampsTickets & ExperiencesToys & HobbiesTravelVideo Games & ConsolesEverything Else

For many years, ultrasound has been utilised by various vendors as an additional method to find the set point in cases the standard diagrams are hard to analyse. This can be the case when testing safety valves on liquid services.
Many system vendors today claim ultrasound to be the perfect solution to work around unclear standard diagram problems as the ultrasound diagrams show a significant diagram reaction where lift and force do not. Ultrasound „appears“ to solve those cases.
Within an extensive benchmark test, METRUS in co operation with Sweden‘s biggest nuclear power station Ringhals AB investigated the approach to use ultrasound as an additional indication for the set point on liquid service safety valves. The result of 55 tests on different valves is that the „Ultrasound point“ is completely depending on the seat condition. This result perfectly first the fact that ultrasound will detect the start to leak point and not the set point (start to lift point).
Only on a new or freshly serviced valve, the set point will be close to the ultrasound point. Even tiniest soiling or improper maintenance will cause the ultrasound to severely „drift away“ from the true set point. Within a typical online safety valve testing scenario where a valve has not bee serviced for a year or more, it is not at all recommended to use ultrasound to identify the set point.
There are still two useful applications for ultrasound within online safety valve testing. A very simple but effective use is to compare the sound level of the valve before and after the test. Comparing those sound levels will indicate if after the test (disk lift) the valve is left in a similar condition to its previous untested state. This could be first information if the valve did properly reseat and seal after it has been lifted. White Paper – Online safety valve testing METRUS Valve Test Bench Exellence
Knowing why safety valves should be tested online and how this is done in theory, it is most helpful to get an idea of the every day questions you will have to deal with. It will enable you to imagine how online safety valve testing appears in real life.
Plant operators are often surprised when being asked by online testing engineers whether it is a problem to open a valve. Considering the definition of the set point to be the initial moment when the disk starts to lift the safety valve disk must lift to find that point in a test diagram. It very much depends on the test equipment how long and high the valve will open, but it definitely has to open. geöffnet wird.
To test a safety valve, it must be possible to lift the disk and measure the force when doing so. If a safety valve has a spindle, it is possible in 95% of all cases to test it online. Some valves might require a simple spindle modification. This depends on the valve and the adapter solution how to „connect“ the test rig. Valves that do not have a spindle at all can not be tested.
Valves installed on extremely dirty fluids like bituminous crude oil should not be tested unless they are equipped with a rupture disk to keep the seat clean. Dirt could prevent the disk from sealing properly and the valve will remain leaking after the test. It the maintenance departments decision whether to agree with slightly lifting a valve or not.
Safety valves installed in EEx areas require special equipment to operate the test rig. If such equipment is available, it is important to check the specific EEx certificate for the approved EEx class and EEx area. As of now and to our best knowledge, there is no online safety valve testing system available that has an EEx approval for the whole machine. The test rigs are approved but the power unit usually has to stay outside the EEx area or have to be protected with special temporary solutions.
A frequent question to be found in industry is „what is the highest set point and the largest nominal diameter you can test?“. According to the online testing formula of fig. 1 the set pressure is calculated from line pressure, seat area and test force. Those parameters interact. The more line pressure is to be found under the safety vales disk the less force is required to lift (test) it. A final statement can never be made as it depends on seat area, set point and line pressure, whether or not the force capacity of specific equipment will be strong enough to test a valve.
Some suppliers claim that their equipment can test „any“ safety valve. Technically speaking it means raising the line pressure will lead to a remaining test force small enough to be covered by the test equipments force capacity. As online safety valve testing should not affect the plant operation this statement is not very respectable. Usually the line pressure can not be changed significantly just to test a valve.
Thinking about the largest valves, small and medium valves are often forgotten. But those ½“ and 1“ valves built the majority of valves to be found in industry. It is a technical fact, that each measurement task requires suitable sensor ranges. Large valves require large forces and small valves usually small forces. The operational range of online safety valve test equipment is therefore not only defined by its strongest force capacity. It is a question how accurate it can deal with a variety of forces and pressures – small and large.
Online safety valve testing offers major cost saving potential. In most cases it is cheaper than workshop testing after comparing direct testing costs. This of course requires the test equipment to be efficient in handling and operation.
Safety valves need to be tested at various locations within a plant. It is common to move the test equipment a few times during a test day. Different valve types to be tested require retooling of the test rig. In every day life the equipment will be packed and unpacked several times and it will require adaptation to fit the test rig on the safety valve. Valves will be located on top of tall reactors and on difficult to reach places under or behind pipelines.
The test equipments performance is significantly defined by its mechanical performance – weight and flexibility. The time for unpacking and rigging up as well as for wiring all sensors etc. determines, how fast the individual valve test will be. And in many cases the safety valve requires adjustment. Depending on how long it takes to take the rig off the safety valve, testing and re-testing will be fast and efficient or time consuming.
Within a typical online safety valve test scenario, a valve might need to be adjusted. To adjust a valve, it requires to remove the rig (RR) adjust the valve (VA) and reinstall (RI) the rig before you can carry out the next test to see, if the adjustment was successful. This is done usually two times until a satisfying set pressure is adjusted.
The relation between handling and testing time in average test equipment is about 1/5. It becomes obvious that total test time and efficiency are significantly depending on the test rig performance – weight, portability and speed of set up / dismantling.
As important as an efficient test rig handling is a clearly structured software or control system. The technician will have to deal with a lot of test data and to generate reports. With the TESON® system the technician controls the test completely from the software. The software should support the working process and enable the user to keep an eye on all relevant data without clicking through several hidden menu hierarchies. Data should be stored in databases and generating reports has to be flexible and easy. As most companies use individual test reports as well as overview lists, it is a must to have the software generating all those reports without additional work.
It may happen that safety valves stay open after the test. To make sure that such event does not affect the plant operation, a concept to remotely close the safety valve, using the test rig is absolutely necessary for safe online safety valve testing.
Testing safety valves online is not at all dangerous as long as the procedure is done properly and the system performs as it should. But there are rare scenarios in which a plant disturbance could appear, especially if a safety valve stays open or gets damaged.
Online safety valve test equipment today is either manually or electronically controlled. Electronic systems support the test process and monitor test limits, taking a lot of responsibility from the technician. TESON® e.g. automatically drives the complete lifting process, monitoring all sensor signals for pre calculated test limits. But electronic systems are sensitive to power black outs as well as to software malfunctions. To deal professionally with those, the online safety valve testing system must have an extensive safety system to guarantee the safety valve will never be blocked open or damaged – whatever might happen.
Manually controlled system are not sensitive to power black outs or system failures. They leave the full control over the test process to the technician. It is up to the technician to control the lifting force and whether or not to overload a valve. Especially with manually controlled system experience plays an important role as the safety issue is basically the human factor. Despite that even manually driven system must have some safety features to respond to hardware or hydraulic malfunction.
Considering the number of parameters to be considered and monitored during an online safety valve test, digital systems are definitely superior as the chance of malfunction and power black outs is considerably small if the systems are well designed and extensively tested. Even after intensive training and years experience it is barely possible for a technician to compete with the reliability and response time of a digital system. Considering the background of online safety valve testing it is a derived requirement of the system to be safely and correctly operated with minimum skill and experience.
When thinking of a first time investment, it is very often the purchase price that plays an important role. But if you consider the cost saving potential of online safety valve testing or the profit you could make with a service, it becomes obvious that there is more to be considered to get a real view on the cost of ownership.
From the very fist moment employees need to be trained on how to use the equipment. And in case a trained expert leaves the company others will have to substitute him. Besides purchasing good equipment it is valuable to have a comprehensive documentation and training material, making you independent from external trainers, enabling self training. Further more suppliers should be able to offer professional training courses.
Support from your supplier will be crucial for your business. If you are facing time sensitive testing sessions and your equipment gets damaged or you come across complex questions, delays of operations or loosing your customer to the competition can cause severe loss of profit. The system vendor should be able to minimize downtimes with an intelligent support strategy. This includes 24 h availability of technical support, access to most spare parts in local markets and availability of rental equipment to substitute yours during service and repair. The more a supplier is focused on the online safety valve testing business, the better resources he will offer to support your every day work.
Like all measuring equipment, online safety valve testing systems require calibration. Sensors and measuring electronic need calibration (typically every 2-3 years) to harmonize with ISO quality standards. Suppliers must be able to either offer you a calibration service or advice you where to get such service. To minimize transportation costs, the parts and modules that need calibration should be easy to isolate for shipping.
The variety of valves to be found in industry is huge. It is not at all practical to own every type of special equipment that might be required one day to test special applications. Your investment will be significantly lower if you can own core components that cover the majority of your every day online testing needs. Your supplier should offer you special extension for rent to cover the remaining applications once they are required.
We hope this white paper could draw a picture what online safety valve testing is about. If you have any further related question, please feel free to contact METRUS at any time. It will be our pleasure to support and consult you..


 8613371530291