
instant pot steam coming out of safety valve free sample

It is important to remember that the leakage of the safety valve isn’t any danger so long it continues to increase until it reaches that desired PSI. Once you’ve reached the desired PSI, it should cease completely leaking. If it persists in leaking, it is a sign of a failure in the pressure control.Make sure to check these things as this may fix it:Handle correctly seated and do not sit in the position that vents.
Slowly tighten them, and then check to see if this solves the problem.Safety Valves: What You Need to KnowPressure cookers can allow the safety valves to open enough to let the steam build-up within the cooker. The result is a hissing or a rattling sound. Do not be afraid, it’s normal. You’re looking for an easier pressure cooker with quieter electric pressure cookers that do not create as much noise.It is essential to maintain a consistent pressure level so that the cooker will cook your food throughout. Safety valves can be purchased and repaired if you’ve got broken bones. But, make sure you buy a high-quality safety valve from one of the well-known brands to ensure high quality.The Purpose of Safety ValvesManufacturers designed security valves to safeguard the consumers from explosions in pressure cookers. If you’ve got a deficient safety valve that isn’t leaky, then you can use it.
You can make use of it, but it’s not advisable to try it. Avoid this. Safety valves release risky excessive steam. If they leak, they release unnecessary moisture, so the cooker will not make the dish cook. However, if the valve is defective and shut, there is the chance of being ablaze. Don’t make use of a pressure cooker that is leaking or a damaged valve.The potential injuries that could result from an explosion of a pressure cooker could cause:Blindness
DeathHow Do You Handle Steam Coming out of the Safety Valve?You shouldn’t see steam escape from the safety valve since the leak can cause you to be in a dangerous situation. The steam that escapes can cause third and second-degree burns when exposed to the skin. If you detect an issue, you must immediately switch the cooking pressure away from its heat source and let out the steam. Even more minor leaks pose a danger.Why Does Steam Come out of the Safety Valve?Steam is released through the safety valve in the pressure cooker due to a damaged disc inside. That is why the valve produces too much steam, and the pressure cooker does not boil. If there is damage to the valve, you’ll find a hole within the valve.
Avert: Working on the safety valve by yourself can pose some risks. You are doing it at your discretion. If you aren’t willing to take the risk, take it to a licensed service center. An expert in repairing utensils could repair the problem, but it will depend on the amount of damage done to the pressure cooker.There are a few possible reasons for the reason why steam may flow out of the valve that is used to protect you, for instance:Too old for a pressure cookeing
The absence of regular maintenanceThe purchase of a poor quality pressure cooker may cause cookers don’t last for long. They are prone to problems. Also, you should keep clean the pressure cooker after every use since it may start to leak if it is not maintained correctly.How to Replace the Safety ValveIf pressure cooker steam coming out of safety valve. We’ve said that you have two options to repair the safety valve if there’s a leak. You can replace it on the interior of the lid or return it to the exterior part of the lid.
To replace the valve on the outside, employ a screwdriver from the outside of the screw. During this process, you hold the screw in place to stop it from turning in the interior. After it has been released, use a cotton swab to remove the dirt from the hole.
Examine the surface for damages and also ensure that there aren’t any structural issues. Also, examine the o-ring to ensure that it isn’t damaged. Change the valve for safety using the new one and tighten it.
Inside, employ a wrench for removing the safety. A screwdriver is used to hold the screw. After letting it go, you can do the same as you did in the previous method. Install the safety valve, and make sure you tighten it again.
Expert Tips:Don’t overtighten the screw as this could cause damage to the valve that protects you. The hand tight that is the minimum is sufficient for the safety valve you have.Can You Repair a Safety Valve?We discussed how to replace a safety valve, but we never discussed the possibility of repairing it.You cannot fix a safety pressure cooker valve!Although you could repair them using DIY methods, don’t try to repair a damaged security valve. It’s only $2-$17 to replace the safety valve. Choose a genuine brand to ensure that you will fix the issue.Should You Use a Damaged Safety Valve?Considering the low cost, you might want to buy a spare one since you can replace it with a single click. If the pressure is unsafe, the safety valve functions as a canary in the mine. It explodes and then explodes. The safety valve tries to bring the air pressure to normal levels.
Please do not use a damaged valve since it does not provide the same level of protection. There are similar issues similar to before, such as leakage from the valve or shutting completely. Both scenarios put you in a dangerous situation.When Should I Replace My Safety Valve?Leaks of the safety valve pose a risk at the first indication of damage. In this regard, leaks are only an example of what could occur with them. It would help if you repaired the safety valve when it gets cracked or becomes hard to handle. If you can see the defect, take it off and replace it.
Check the valve’s safety for wear signs before each use. Another reason manufacturers advise making sure that the pressure cooker is filled to two-thirds full is to ensure that food items don’t stop the valve that protects you. The pressure cooker can build up to dangerous pressure in the event of this happening.
Let’s say that food particles block the valve that releases pressure. The safety valve might melt and release steam. The valve is used to keep high pressures. Even if other options protect you, this one safeguards you.
Don’t make use of anypressure cooker that has a damaged safety valve. Replace it. Leaks do not always pose a risk, but you must determine the kind of leak you’re experiencing.How to Prevent LeaksThorough cleaning after using a Pressure cooker can make a huge difference in keeping it in top condition. Clean the lid using hot water and soap. Do not put pressure cookers in the dishwasher since it could damage the more delicate components, such as the rubber seal and gaskets.
Change the valve for safety or any other components as soon as you notice signs of wear and tear. In most cases, you’ll see cracks appear as the first indications of wear and tear.To Finish - Pressure Cooker Safety Valve LeakingA safety valve not working correctly doesn’t necessarily mean danger, but be sure to determine the source when it stops when you have reached an appropriate PSI. A minor steam leak is average, but you shouldn’t observe excessive amounts of it leaks. It could be the pressure cooker is operating at extreme pressure.
Do not attempt to fix the safety valve that has been damaged. It is possible to replace the valve, but you should hire an expert if you don’t feel confident making it yourself. Please pay attention to leaks since they can prevent the pressure cooker from generating pressure.

A. While it’s not unusual for a little steam to come out around the edges when the pot is first warming up, if there’s steam coming out after the pot has come to pressure, or if the pot just won’t come to pressure at all, you may have a problem. Read more below to find out the best answers from our culinary experts!
During the pressurization time, you may see steam coming from under the edges of the lid or through the black pressure valve on the top of the lid. This is perfectly normal! Factors affecting the pressurization time include how full the pot is and how cold the ingredients are.
Some Instant Pot models automatically set the pressure valve to “Sealing” when they close, and some need to be set manually. If you forget to set the pressure valve to “Sealing,” you will continue to see steam coming from the pressure valve and possibly from under the edges of the lid as well.
If there’s steam coming out after the pot has come to pressure, or if the pot just won’t come to pressure at all and you’re sure the pressure valve is set to “Sealing”–then it probably means your seal is either missing or not seated correctly.
If your pot has already come to pressure and there are just a few minutes remaining, then let your food finish cooking. Follow the directions below once the program is complete. If there are more than 5-10 minutes left in the cooking cycle, then release the pressure, follow the instructions below and resume the cycle where it left off.
First, check that the silicone seal inside the edge of the pot is there. Putting on a lid without having replaced the seal is a rite of passage for most Instant Pot cooks, so if it happens to you, consider it a badge of honor!
Second, check that the sealing ring is evenly seated under the wire all the way around the edge of the lid. An unevenly set ring can create a partial seal that allows steam to come from the edges of the lid. This can happen even when the pot is pressurized.If you continue to have the same problem, then you may need a new ring, or you may be trying to use an off-brand ring that just isn’t working properly.
Generally speaking, if you catch it early, the answer is yes. After replacing or reseating the seal, rinse the inside of the lid with cold water–this will help it come back to pressure more quickly–and reset the lid. Resume the cooking cycle where you left off. And always be sure to use a good quality food thermometer to ensure you’ve reached a food-safe temperature before serving.
If you didn’t catch this issue early on, you may have boiled off a lot of the liquid in your pot. If you’re cooking a soup, this probably isn’t an issue, but if you’re cooking a relatively low-liquid dish, you’ll need to replace that liquid before you resume cooking in order to avoid a burn notice. Check your pot and add ½ – 1 cup of additional liquid to the pot before resealing, being sure to scrape any accumulated bits off the bottom of the pot.

I have heard so many times, “My Instant Pot is not coming to pressure.” It seems everything is done right, the valve is in sealing position and the instant pot just says on but the Instant Pot is just blowing out steam. What in the world is going on? Why won’t my Instant Pot come to pressure?
Remember, your Instant Pot will not immediately come to pressure. It can take anywhere from 5 to 30 minutes for your Instant Pot to come to pressure before it shows the cooking time. How long it takes depends on how full your Instant Pot is and how much liquid you have in the pot.
Your electric pressure cooker is all the rage right now, but you may be wondering what it’s all about if you haven’t gotten it to come to pressure. Trust me, even though I am writing this, I have experienced the many reasons why it won’t, so before you toss it out the window in anger, let me help you figure out what the problem is.
The very first thing you need to do is make sure you put enough liquid in your pressure cooker. Instant Pots use steam to cook your food, and steam is created from liquid. As the liquid circulates in your Instant Pot and steam is created, it begins to create pressure. Thus, if there is not enough liquid, you will not have pressure.
As a rule of thumb, you should always put at least 1-cup of water into your pressure cooker. However, I have found that after putting in at least 2-cups of water, I rarely have a pressure problem or burn notice. So, if your pot won’t pressurize, try adding ½ to 1 cups of water.
If you are using a recipe that does not call for a lot of liquid, then you will need to add more water so that your instant pot has the required amount to pressurize. If you find this makes your recipe too watery or thin – near the end of cooking, try saute mode to see if the dish has thickened up.
Another reason why your Instant Pot may not pressurize is because there might be some bits of food on the bottom of the crock pot. When this happens, steam cannot escape and you will end up with a burn message.
If you were sauteing meat or veggies in your inner pot, you may have food stuck to the bottom. If there is food stuck to the bottom, it may make your pressure cooker think that the food is already burnt and as a result, it will not come to pressure. Additionally, the ingredients stuck to the bottom restrict the circulation of liquid.
To fix this issue, you will want to open your Instant Pot, stir your food, and make sure nothing is stuck to the bottom. If you do notice food is stuck to the bottom, add ½ cup more liquid and use a spatula to break the food off the bottom. Then, begin to again.
In order for your liquid to produce steam, it has to be thin enough to produce steam. Many times you will get a burn error before your Instant Pot even begins when sauce is too thick. This has happened to me with spaghetti sauces and even stews and soups.
If you have a thicker liquid in your pot, you are going to want to thin it down. You can do this by adding 1 cup of broth or water to the sauce. Then, try to cook it again.
If you have added too much thickener or a high starch ingredient to your recipe, then it can prevent the Instant Pot from coming up to pressure. Because of this, if your pot won’t pressurize. You will need to add more cold water to thin down your liquid.
Example of starchy foods are brown rice and legumes. If you wish to cook your black beans or chickpeas in the Instant Pot, you will need to thin down their cooking liquid before adding them to the pressure cooker. This can be done simply by adding more water until it has reached desired consistency.
If you notice steam coming out from around the sides of the pot and around the lid, you may have an issue with your sealing ring. The rubber ring that fits snugly around your Instant Pot lid is called the sealing ring. When the sealing ring is not fitted around the edge of your lid correctly or it has been used too much it loses its shape, your Instant Pot will not pressurize.
Examine your lid and make sure that the sealing ring is fitting around the edge snugly. If you notice that the sealing ring has a yellowed color and shapes into an oval instead of a round circle, you will need tobuy a replacement sealing ring.
Sometimes, even when the sealing valve is in the “sealing” position, it can still need a little adjusting. If you see steam coming from your steam release valve, you may need to just adjust the valve a little. Just give it a little wiggle up and down and push it more into the sealing position. Sometimes it just doesn’t go into the right place when we turn it.
Another reason why your Instant Pot may not pressurize is because you might have filled it too much. If there isn’t enough space for the steam to circulate, then the pot won’t create pressure and burn notice will be displayed on your display screen. You can avoid this problem by following the “max line” on your pot.
The max line is located on the inner pot and it tells you how much liquid to put in your pressure cooker. When you are using a recipe, make sure to measure the ingredients and only fill your Instant Pot to the max line. If you have already filled it too full, try taking out some liquid to make more space.
The rule of thumb is to never fill your inner pot over ⅔ full. There is a silver line that is hard to see in your inner pot. That line tells you how full you can fill it. If your pot is two full, it can either make sure your Instant Pot won’t come to pressure, or it will end up spewing your food all over the place when you do a quick release. Always make sure you don’t overfill your Instant Pot.
If you have recently cleaned your Instant Pot with an abrasive substance, such as a brillo pad or steel wool, it might be the reason why your pot is not pressurized. When you clean your Instant Pot, you should only use a soft cloth and non-abrasive cleaner.
Frozen foods take longer to cook in an Instant Pot, and the device must be pressurized more slowly. If you are cooking frozen meat or mixed vegetables, wait a little longer or be sure to defrost them first. When cooking frozen foods, be prepared to extend the cook time.
Sometimes food particles can get stuck in places we just didn’t notice. You may need to clean your silicone sealing ring, as it may have debris on the inside. You may need to clean the Instant Pot lid area so the lid can lock into place. Or you may need to clean the float valve or anti-block shield. If you have any debris where it shouldn’t be, your Instant Pot will not come to pressure. This is a safety feature to ensure thatyour Instant Pot will not blow up!Clean your slow cooker with soapy water, and dry it well before using.
This is probably one of the most common reasons an Instant Pot won’t come to pressure. People often think that because their Instant Pot is electric, there are no rules to follow. This could not be further from the truth. In fact, because your Instant Pot is electric, it’s even more important that you follow the manufacturer’s instructions to a tee.
The first thing you need to do is read your Instant Pot’s manual. It will specifically state the amount of liquid, and what type of accessories are needed for pressure cooking in a specific model. Then follow these rules accordingly while using that pot.
If you have not followed the instructions, then your Instant Pot will not come to pressure. Therefore, it is so important to read your manual and to follow the specific guidelines for your pot.
If you have tried all of these solutions and nothing seems to work, you may need to contact Instant Pot Customer Care. They are extremely helpful and will be able to help you troubleshoot your problem.
Angela Milnes is a Qualified Early Years Teacher who has specialised in teaching. She has a wealth of experience teaching young children and adults. Angela has also taught cooking classes and loves to share both family recipes and easy instant pot recipes here on The Instant Pot Table. Follow her on
The safety valve inside a pressure cooker is a safety backup mechanism that comes into effect when the pressure inside the cooker turns uncontrollably high and finds no path to escape.
To release steam, the cooker has pressure regulating valves that Jiggle or extend outwards with the help of spring. Some release steam with the help of a computer chip!
If for any reason, the pressure regulating valve fails to release steam, the excessive pressure causes the safety valve to open up and release steam in a controlled way.
The other valve is located a little away from the pressure regulating valve. It is screwed on the lid of the cooker and is made up of synthetic rubbers like neoprene or hardened Viton.
If you see pressure steam coming out of the safety valve, it does not signify danger. It only points to some possible dysfunctions that need to be taken care of.
Damaged Gasket. A gasket is a rubber ring that helps to seal the cooker. A damaged or uneven placement of the gasket could lead compromise the seal of the cooker leading to pressure escaping from the safety valve.
Cheap quality pressure cookers made from an unknown brand are a safety hazard as they compromise on health and protection of the consumer. Low-quality safety valves malfunction easily causing steam to escape.
If the quantity of food and water is too less and water boils away, it can result in a burnt and empty cooker. Since the temperature and time duration is not controlled, the temperature inside the cooker becomes excessively high quickly leading to the safety valve breaking down.
If the pressure cooker is placed on a large flame, the flame starts licking the side walls leading to excessive temperature building and safety valve destruction
If the pressure cooker is not regularly cleaned and maintained, it can clog the pressure regulating valve forcing the safety valve to emit steam out of the cooker.
Some models come with a sealing feature that needs to be set manually. Forgetting to turn them on can cause the steam to escape from the safety valve.
For traditional pressure cookers, failure to manually adjust the temperature and pressure causes excessive pressure build-ups causing the safety valve to break or melt.
You can replace the safety valve from the outside by holding firmly the inside part so it doesn’t move. Use a screwdriver to rotate and twist the screw on the outside until it comes off.
Always buy from trusted brands as they ensure quality checks when it comes to material and usage. No amount of budgeting should compromise your safety and good health.
Make sure the rubber rings and the lid of the cooker are closed properly and in correct alignment. If the rubber ring has become loose, it is best to replace it.
Follow the tips above to avoid steam coming out from your safety valve. If, despite all precautions, the safety valve opens up, replace it with a new one.
General wear and tear are bound to happen in any cooking vessel over the years so don’t worry about it much. Fix the cause and all the best cooking scrumptious and healthy food!

Over the last decade the Instant Pot has elbowed its way onto many a kitchen counter. The multifunctional appliance earns its place with slow cooker, pressure cooker, and saute capabilities (just to name a few). So you can either set-it-and-forget-it before leaving for work or pressure cook a whole chicken in a fraction of the time it takes in the oven.
That’s all great, but when the Instant Pot’s many buttons and menacing-looking steam valve are staring you in the face, the appliance ($99.95, Amazon) can be intimidating. I promise it’s easy to use once you get started.
They’re not quite as user-friendly as a simple Crock-Pot, but it’s worth learning how to use the multicooker just for the time you’ll save in the kitchen. There are a few basic steps for most easy Instant Pot recipes, but you’ll get the hang of it. Here’s what you need to know about using an Instant Pot.
The Instant Pot is a pressure cooker that works by using steam to build pressure. As the pressure builds forcefully inside the pot, it produces temperatures high enough to quickly heat and cook the food inside.
Instant Pots have other built-in cooking programs, too. It can act as a, yogurt maker, rice maker, steamer, orsautepan — making it one of the most versatile smallon the market.
For starters, wash the pot and inside the lid with soap and water before using for the first time (and of course, between uses). When it’s plugged in and ready to go, here’s how to get going:
The Instant Pot comes with a few accessories, most of which you won’t use a lot. Your go-to accessory is the plastic condensation catcher. Snap it onto the back of the Instant Pot to collect condensation from the steam; otherwise, you’ll end up with water all over the counter.
Place the lid on top of the pot and push down as you turn it clockwise (in the direction of the arrows printed on the lid). This will seal the lid to the pot so that the Instant Pot can pressure cook the food inside. Turn the valve (the little knob on top of the lid) to the sealing position.
Once you’re ready to cook, set the time and pressure controls according to your recipe instructions. Select “pressure cook” and use the + and – buttons on the control panel to set the time. Almost every Instant Pot recipe involves the pressure cook option, but note that other modes may differ. The “saute” mode should always be used with the lid off, and if you’re using the “slow cook” setting, make sure the valve is set to venting rather than sealing.
When your food is cooked, move the pressure release valve from the “sealing” position to the “venting” position. When you do this, all the hot steam from inside the pot will come out of the valve, so be careful not to burn yourself. It’s easiest to do this while wearing an oven mitt or by using a long-handled spatula to turn the knob so your arm is never directly over the steam. When all the steam has been released, you can open the lid.
When you hit “pressure cook,” your Instant Pot will default to the amount of time last used. Simply use the + and – buttons to adjust the time according to the recipe you’re making.
The Instant Pot takes a few minutes to reach the proper pressure to cook. If you set it at 10 minutes, it won’t actually be done in 10 minutes. Allow 3 – 4 extra minutes per recipe for the appliance to heat. The machine is smart enough to know how long you set it for, so even with the added minutes, after exactly 10 minutes of cook time, it’ll turn off and your food is done.
To start the Instant Pot Duo, plug it in and add the food you want to cook. Then use the control panel to set the pressure (high or low), and set it to the appropriate time. The confusing thing about the Instant Pot Duo is that it doesn’t actually have a start button — as soon as you set a time, it’ll start heating.
Since your Instant Pot works by using steam to create pressure, you’ll need to add at least one cup of liquid to your Instant Pot for any meal you cook.
Inside your inner pot, you’ll see it says “PC MAX,” with a 2/3 line and a 1/2 line. It’s important to never fill your inner pot past than the 2/3 max line.
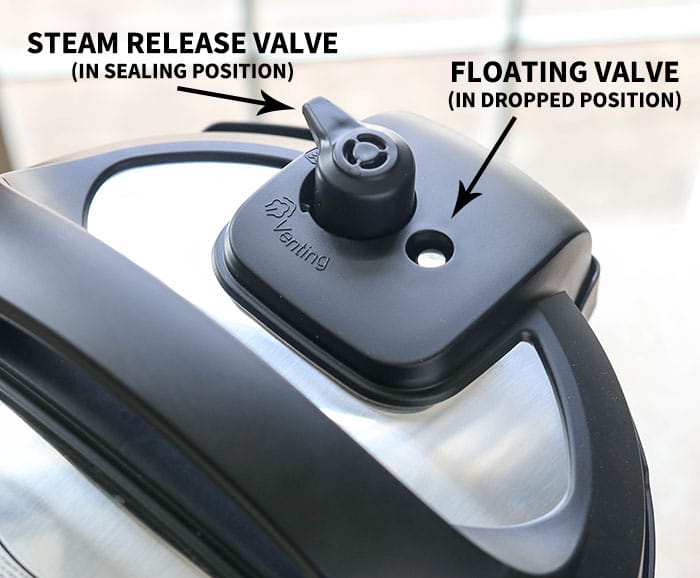
The steam valve sits on top of your Instant Pot lid and has two settings:sealingandventing.The steam release handle allows you to move from one setting to the other.
Make sure the steam release handle is in thesealingposition before using any of the pressure cooking programs. This will prevent steam from escaping the Instant Pot and allow pressure to build inside.
To vent the steam valve,you’ll need to have the steam release handle in theventingposition — either by pushing it back yourself (also known as a manual or “quick release”) or on its own via a “natural release.”
Natural Release:Your Instant Pot releases pressure on its own until the float valve (next to the steam valve on top of your lid) drops down. A natural release takes a bit longer, but it’s best for recipes with meats, soups, broths, beans, starchy foods, and foods with lots of liquid.
Quick Release:You manually release pressure from your Instant Pot by pushing the steam release handle back to the venting position until the float valve drops down. A quick release is much faster and is best for recipes with vegetables, fish, and fragile or fast-cooking foods.
The sealing ringis an Instant Pot accessory and safeguard that keeps your lid locked tight during pressure cooking. It helps your machine withstand the high forces of pressure needed to cook the food inside.
That’s why it’s always good to have a spare sealing ring to use for different types of Instant Pot recipes. I recommend using one sealing ring for sweets and another sealing ring for savory dishes.
TheKeep Warmsetting automatically turns on when your food is done cooking, so it’s easy to get distracted and forget that it’s on. If you don’t manually shut off the machine, the Keep Warm setting will keep it on for 10 hours before the machine shuts off itself.
If you’d rather NOT use the Keep Warm setting on your Instant Pot, you can switch it off on the control panel and avoid the risk of overcooked food altogether.
Depending on the recipe and the amount of food you’re cooking, it can take up to 40 minutes for your Instant Pot to fully build pressure. But remember, releasing that pressure from your Instant Pot takes time, too.
Before starting your Instant Pot recipe, don’t forget to factor in the time it takes to build and release pressure. A 15-minute recipe can quickly turn into a 35-minute recipe when you account for the whole process.
The cooking programs are located on the left and right sides of your control panel. Press the button for the cooking program you want to use; then press the “+” and “-” buttons to add or subtract time.
Instant Pots are best known for their pressure cooking abilities, but that doesn’t mean its other programs (like slow cooking andsauteeing) aren’t as good.
Thesauteprogram works the same as a stovetop pot or pan, but it’s definitely a game-changer. You can stir-fry veggies, thicken sauces, and brown meats without adding another pot to your pile of dishes.

Instant pots are often an appliance you might not think needs a lot of fixing and they frequently don’t but there is the odd time, especially if you have had yours for a number of years you might find certain parts need replacing or come loose.
There are a number of ways to fix your instant pot valve if it falls out from replacing the valve altogether, cleaning it and replacing it back on or checking that the valve has not been misshapen in any way.
In this article, I am going to talk about what to do if your instant pot valve falls out, breaks or comes loose. I will also talk about what can cause this for future reference along with how to fix it.
While an instant pot float valve can come off the instant pot itself, it’s quite rare indeed. The float valve works by connecting a cap on the inside of the instant pot to the float valve, which comes out of the instant pot entirely. When pressure builds within the instant pot, the internal cap is pushed up and the float valve closes.
There are two ways that a float valve could ‘fall out’. One way would be if just the internal cap of the float valve has come free of the instant pot, and is within the pot. This is dangerous for obvious reasons – nobody wants a small piece of silicone in their food.
Another way that a float valve could come out is if the entire valve (cap included) simply comes free of the machine. It is designed to come out so that you can clean it. The reason for this is that sometimes small pieces of food (such as rice or beans) can get stuck to or within the valve.
If this happens, the valve needs to be properly cleaned before it can be used again. At the end of the day, the valve is a safety feature, and it’s always worth taking great care of safety features.
This can happen if you’ve been cooking something in your instant pot which has small parts within it. For example, a rice dish, or even porridge is at risk of this happening. If a small piece of food is trapped within the silicone cap on the inside of the instant pot, then the valve will start to function poorly.
If this poor functioning is allowed to continue, the pin of the valve may fall out, or even get pushed out, by small pieces of food or the inherent pressure in an instant pot.
Whenever silicone is seen in a kitchen appliance, it is considered to be a serviceable part. This means that over time, any silicone parts may need to be replaced. This can be seen in instant pots as the silicone cap on the inside of the pot will age and start to become hard over time.
If the silicone cap gets sufficiently stiff, then it may simply fall off or break. This will lead to the pin of the valve coming loose, and potentially coming out of the lid.
In very rare circumstances the pin portion of the float valve could become misshapen and therefore not work as it is supposed to. These cases are very rare as the metal pin is very resilient, but they are worth bearing in mind nonetheless.
To clean the float valve, as you should regularly, you must remove the internal silicone cap, and then pull out the metal pin. These two components make up the float valve and must be washed in hot soapy water before being replaced.
The problem with cleaning the float valve in this way is that it is quite easy to replace the components incorrectly. For example, you could replace the silicone cap upside down, which would result in the mechanism working incorrectly.
Making sure that the valve in your instant pot’s lid is completely clean will mean that it is much less likely to fall out at any point. If the mechanism itself is unobstructed by any food debris or liquid from cooking, then it will work much more efficiently.
Regularly removing the float valve from your instant pot and making sure that it is spotless will make sure that it works just as it should every time that you use it.
Over time, the components in the valve may become worn and, thusly, the valve will stop working. Both and valve pin and the silicone cap are serviceable, replaceable parts – simply get a new one and your instant pot will be working as it should!
While you could, in theory, replace just the pin or the silicone cap, we’d recommend actually replacing the entire valve all at once. A brand new valve will work much better than a new cap and an old pin, for example.
The number one reason that your valve is most likely to fall out of the instant pot is that it has been assembled incorrectly. Whether by you or by someone else, it is an easy mistake to make!
If the valve falls out, make sure to get the lid off your pot, and take a close look at the valve and lid. Making sure that everything is completely clean (the best way to clean them is to wash them with hot, soapy water), first insert the pin. Insert the pin from the top of the lid, pushing it down into the lid itself.
When the pin emerges on the other side of the lid, place the silicone cap onto the pin, and the pin will be locked in place, ready for use. Make sure that the silicone cap can fit snugly against the silicone ring within the lid, as that is where the seal is made.
As we’ve said before: the valve is designed to be removable for cleaning, so if you do assemble it incorrectly, you can always take it off and try again.
You certainly can! The instant pot valve is designed to be removed and cleaned at regular intervals. Because the parts that you’re removing are both small and of vital importance, Instant Pot makes sure to sell replacement parts.
When buying a replacement, ensure that you buy a full set of pin and cap, so that you can completely replace the entire valve all in one go. Replacing just the pin, for example, will be a little pointless if the silicone cap is going to fail in a couple of months.
If the valve is replaceable and you can secure it back within the instant pot, then you’re good to go. Alternatively, you’re playing a dangerous game.
The float valve is pushed up by pressure building within the instant pot. When the valve is completely pushed up the lock on the lid is engaged, and your food cooks over time. This means that the float valve is an integral safety feature as if it isn’t in place, the seal won’t form, and the lid won’t lock.
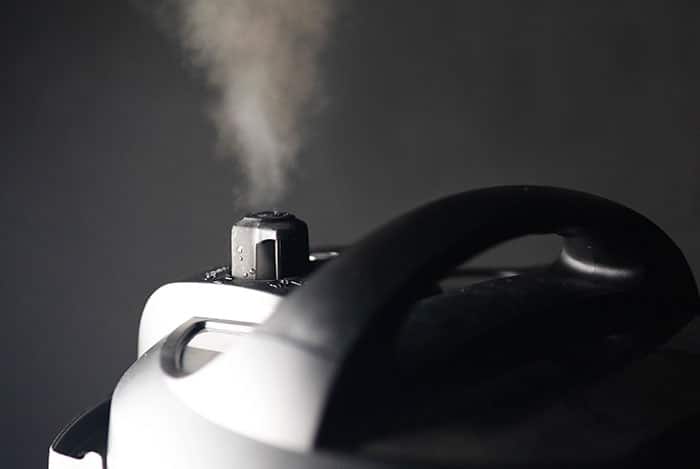
Seeing steam coming out of your pressure cooker may be scary, and you may be wondering if this is a normal thing. You may have heard stories about pressure cookers exploding and wonder if they are dangerous. We are here to explain how it all works and hopefully set your mind at ease.
Firstly, it is normal for the pressure cooker to release steam out of the safety valve on the lid. However, it is not normal for it to leak steam from anywhere else, such as the edges of the lid.
An electric pressure cooker will take around 5-15 minutes to get up to pressure before cooking the food. Factors affecting the pressurization time include how full the pot is and how cold the ingredients are.
Once the pot reaches the required pressure, the float valve will come up, the pressure cooker will beep once, and the cooking time will begin to count down.
At this time, you may notice hissing sounds and some steam coming out of the steam release valve or float valve hole on the lid while the pressure builds – this is entirely normal.
Some Instant Pot models automatically set the pressure valve to “Sealing” when they close, while some need to be set manually. If you forget to set the pressure valve to “Sealing,” you will continue to see steam coming from the pressure valve and possibly from under the edges of the lid as well.
If there is still steam coming out after the pot has come to pressure, or if the pot just won’t come to pressure at all and you’re sure the pressure valve is set to “Sealing,” then this is not normal. It may mean that your seal is either missing or has not been seated correctly around the rim of the lid.
The first thing to do is make sure that the silicone seal inside the edge of the pot is there. It is easy to forget to put it back after washing it. However, putting on a lid without replacing the seal is something that most pressure cooker owners do at some point, so don’t feel foolish!
The second thing to do is check that the sealing ring is evenly seated under the wire around the edge of the lid. An unevenly installed seal can create a partial seal that allows steam to leak out from the edges of the lid. This can happen even when the pot is pressurized and is not supposed to happen.
If you continue to have the same problem even after reseating the ring, then your ring may be damaged, and you probably need a new ring. Alternatively, you may be trying to use an off-brand ring that isn’t right for your pressure cooker.
Generally speaking, if you catch the problem in time, you can continue cooking after you’ve fixed the sealing issue. After replacing or reseating the seal, put the lid back on and resume the cooking cycle where you left off.
If you didn’t catch this problem early on, you might have lost a lot of the liquid in your pot as the steam escaped. If you’re cooking something with a lot of liquid, such as soup, this probably won’t be a problem, but if you’re cooking a low-liquid meal, you will need to replace that liquid before you resume cooking.
Keep in mind that the pressure cooker relies on a lot of pressure to cook your food. All pressure cookers are made to vent the excess pressure in steam to prevent too great a build-up. So, venting steam is normal.
As pressure builds up inside the pressure cooker, the safety valves will start operating, and they will release the unnecessary steam that has formed inside the unit as it heats the liquid inside. You will see the steam come out as that happens, and a hissing sound will accompany this.
When the steam build-up reaches a certain point, some of that steam needs to come out to eliminate any dangerous high-pressure situations. That means that the pressure cooker has reached the desired pressure level, and any steam released is an excess and not something needed for the cooking process.
However, you shouldn’t think that the pressure cooker steam coming out of the safety valve signifies that your food is ready. It simply shows that the cooking process reached a point where too much steam was inside the pot. The food will only be ready once the set time has elapsed.
Usually, a pressure cooker releases steam out of its safety valve when the contents reach around 250 degrees Fahrenheit. Normally, the cooking temperature stays under 212 degrees, but we see some pressure releasing via the safety valve when it goes past that.
You do not need to do anything because the steam will be released gradually by the unit itself. Every pressure cooker is created with the idea of being as hands-off as possible, so once you have set the cooking time and mode, you can leave it to do its thing.
All you have to do is to double-check the valves and seal as we detailed above and ensure that they are working correctly before you start cooking. This way, the pressure cooker will use those safety valves automatically and release pressure as needed.
While that hiss might scare you at times, it’s normal and a part of the pressure-cooking process! So be safe, and we hope you enjoy using your pressure cooker.
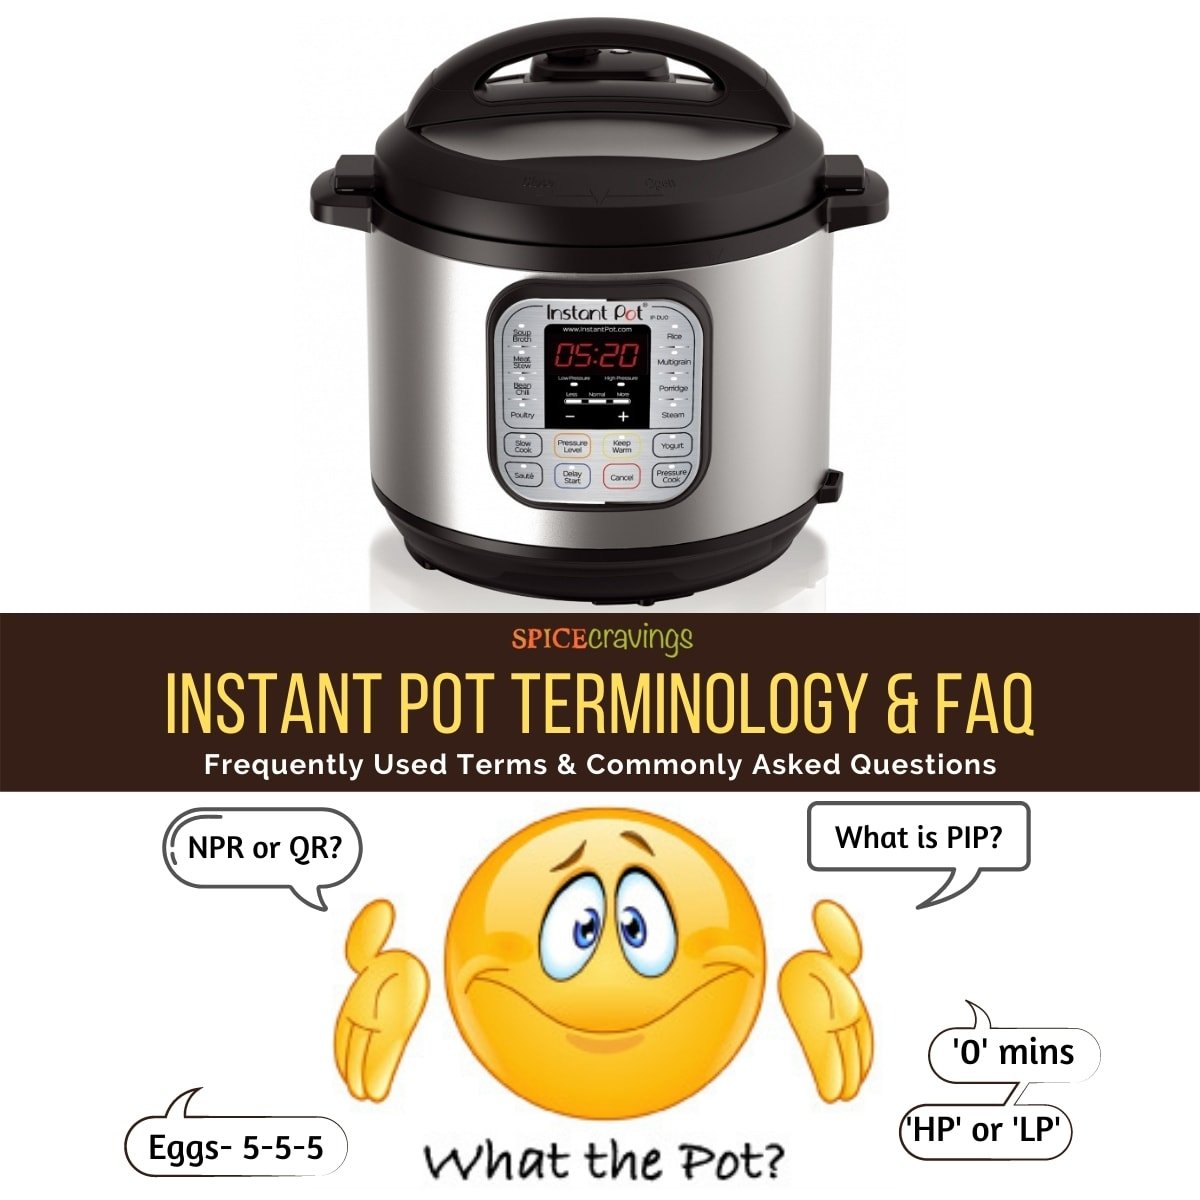
Quick pressure release or natural pressure release?It’s one of the most common questions I get. Electric pressure cookers and multi-cookers like the Instant Pot, Ninja Foodi, and Crockpot Express have the ability to release pressure two ways. Instant Pot Natural Release is a frequent search term. Let me explain the difference!
Releasing the pressure can be a little intimidating to people who are new to pressure cooking—especially the quick release with the noise and jet of steam. But don’t let a little noise get between you and fabulous meals cooked in your pressure cooker!
Those are often the first questions new pressure cooker users ask. So I thought it would be a perfect time for a post explaining it for all those who have an electric pressure cooker or multi-cooker like the Instant Pot waiting for them under the tree.
When the cook time ends, your pressure cooker will beep. At this point, the recipe will direct you to release the pressure in the cooking pot. You can release the pressure two ways: a quick pressure release or a natural pressure release.
A quick pressure release is when you turn the pressure release switch to the Venting position and let the steam to release quickly when the cook time ends. This will result in a strong jet of steam coming from the pressure release valve. This is normal.If drops of liquid or foam start to emerge from the pressure release valve, simply switch the valve back to the Sealed position and use an Intermittent Pressure Release (more on that below).
Other pressure cookers may have different labels, but it’s the same basic principle. Turn the valve to allow the steam to escape / pressure to release.
When the pressure is fully released, the float valve will drop and the lid will unlock to open. For safety reasons, the pressure cooker will not open until the pressure is released and the float valve has dropped.
A natural pressure release is when you leave the pressure release switch in the Sealed position when the cook time ends. This lets the pressure release slowly, without you doing anything. When the pressure is fully released, the float valve will drop and the lid will unlock and open.
A natural pressure release is a bit anticlimactic in comparison to a quick pressure release. There is no jet of steam when the natural pressure release starts. There’s also no clear way to tell when the pressure is fully released, and no beep or signal when the lid unlocks. Sometimes you can hear the float valve drop if you’re close by.
The time it takes for the pressure to release naturally will vary depending on the ingredients and amount of liquid in the pressure cooker. A natural pressure release can take from 5 to 30 minutes in the electric pressure cooker.
Using a natural pressure release allows the cooking to stop gradually. You don’t want to open the valve quickly when the ingredients inside could be foaming. You’ll get foam shooting out through the valve, so use a natural pressure release when making steel cut oats, a large pot of soup or pasta.
You also want to use a natural release for large cuts of meat. Just like you’d let meat rest after grilling it, a slow natural release is said to let the meat relax and be more tender.
The different types of pressure releases can also be combined. You don’t have to wait for all the pressure to release to get the benefit of a natural pressure release.
I almost always only wait 10 minutes before I release the remaining pressure. Combining the two release options reduces waiting time yet gives you many of the benefits of a natural pressure release, such as reducing foam and tenderizing meats.
An intermittent pressure release is the best of both worlds. It’s a way to quickly release pressure for foods such as pastas, soups, and certain grains, which are prone to foaming or spitting if you try to release pressure with a quick release but would be overcooked with a natural pressure release.
With this method, you open and close the pressure release valve in short intervals. This allows the pressure to escape more quickly than a natural pressure release and also prevents foam from coming out of the pressure release valve.
With some foods, one or two closed intervals is all I need before I can leave the valve in the Venting position; with other foods, if the foaming is particularly bad, I will close the valve and wait a minute or two, then slide the valve to Venting again and continue opening and closing the valve as needed.
No you do not need to turn the pressure cooker off for a quick or natural pressure release. The pressure will release on the Keep Warm setting. The benefit of not turning it off is that the time will count up so you can see how long it’s been since the pressure cooking time ended.
There is some debate about whether or not the pressure releases more slowly if it’s on the Keep Warm Setting. The Instant Pot Company’s official position is that it does not release more slowly on the Keep Warm Setting because the Keep Warm heat does not turn on until the pressure has been released.
I prefer to turn off or unplug the pressure cooker before I do a quick pressure release or natural pressure release. I seem to always forget to turn off the pressure cooker if I don’t turn it off when the pressure cooking ends. I also prefer to set a timer to remind me 10 minutes has passed and it’s time to release the pressure when I’m doing a natural pressure release.
Once you have your first meal under your belt, move on to some easy pressure cooking recipes. Before you know it, you’ll be making fabulous pressure cooker meals and wondering how you ever cooked without it.
Again, no. the overall pressure is determined by the pressure regulating mechanism. Not by what is inside. That is a (nominal) 15 psi. Regardless of whether it is air, steam, a combination or something else. Once the gauge indicates 15psi, then the overall pressure is 15psi. Not something lower. Temperature is another question. At the start of this, I would have said it remains the same as for a given volume, pressure is proportional to temperature (Avogadro’s Law), but I haven’t seen anything that clearly backs me (or you) up, so now I am not so sure. Hopefully when I get a chance to read further I will get it clarified. Ideally I will find experimental evidence. It’s a shame I no longer know people who would be able to set up an experiment for me.
5. the pot does not heat up properly in the shortened time to pressure so heat that would otherwise go into the food is diverted into heating the container.
Anyway, This is getting way too far off topic (PC trouble shooting) so I won’t go any further here. If you want to continue the discussion perhaps we should move it to its own thread in the forum.
If you’ve never had a pressure cooker in your home before, you may not know what kind of sounds or statuses to expect from your new tool. Hissing, for example, can seem unexpected and even indicative of pressure cooker failure when you first hear it.
In reality, your pressure cooker is supposed to hiss. The noise indicates the successful release of steam from the cooking unit either at the end of its cook time or when pressure gets too high. Let’s break down the basics of your pressure cooker’s quirks so that you can confidently put your unit to use.
Pressure cookers work by using a combination of steam and the aforementioned pressure to raise your food to a certain temperature. The high heat of your average pressure cooker allows your food to cook faster than it might otherwise. Similarly, the seal created by the pressure cooker helps keep the flavor in your food.
To work, then, your pressure cooker needs to safely generate, trap, and eventually release the steam and pressure that cooks your food. Ideally, manufacturers will test their products and ensure that each is not only efficient but also safe to use. However, because pressure cookers generate so much pressure and heat, they can often imbalance and explode or malfunction.
If you’re not careful when using a pressure cooker, you could suffer from steam burns, contact burns, or extensive spills. Pressure cooker explosions resulting from a poorly-made product can do significant damage to both your health and your home.
Pressure cookers trap their liquid courtesy of an internal seal. This seal needs to bind the lid of a pressure cooker as tightly as possible to prevent steam and pressure from escaping. If you have a pressure cooker that does not seal efficiently, the meals you cook won’t turn out like they’re supposed to.
Pressure cookers use an impressive amount of heat to cook your food in a short period of time. As a result, the whole of your unit may become warm. It’s in your best interest to avoid interacting with the lid of your pressure cooker while your meal is cooking, as you could risk burning yourself.
With that in mind, only touch the steam release or protected handle of a pressure cooker once your food is done cooking. Even then, make sure you keep exposed skin away from the steam that escapes from the pressure cooker.
If you want to take a steam injury or burn injury to civil court, you’ll need to display evidence that you engaged in due diligence when operating your unit. Our team can help you elaborate on your experience should the opportunity arise.
So long as the rest of your pressure cooker’s parts are working as they should, your pressure cooker should only hiss when it’s venting pressure. There are times when the pressure inside your cooker may get too high during the cooking process. In turn, the unit will vent that pressure, resulting in a low hissing sound.
If your pressure cooker is hissing, keep your hands and exposed skin away from the steam valve and vents. The steam that your cooker is releasing has the capacity to burn you if you’re not careful.
Both stovetop and electric pressure cookers hiss when they release pressure. This sound is not indicative of anything wrong with your unit. However, you’ll want to practice due diligence if you do hear your pressure cooker making a hissing sound. By taking measures to protect your skin from steam burns, you can limit your personal injuries and enjoy a good meal.
The food inside of your pressure cooker can start to bubble or foam for several different reasons. Adding too much salt to your food, for example, can increase its starch content and make the cooking process more dynamic. Similarly, overfilling a pressure cooker can see your ingredients struggle to find the space they need to cook.
While all foaming and bubbling is cause for concern, there are only some occasions on which it indicates something at fault with your unit. If your pressure cooker’s value or opening procedures aren’t properly configured, bubbles, steam, and foam may all escape from your unit.
If you see this kind of foam cropping up on a regular basis, talk to a representative with your unit’s manufacturer. If the manufacturer tries to keep you from returning your unit or requesting a replacement, our team can step in.
Most of the time, you can blame your pressure cooker’s lack of pressure on a failed seal. If you’re struggling to cook some of your favorite dishes, inspect that seal and determine whether or not your pressure cooker shuts effectively.
A defective pressure cooker poses a threat to more than your evening meals. Pressure cookers that have been falsely advertised or improperly put together put your health at risk. Fortunately, you can contact a product liability attorney about a faulty pressure cooker within hours of a pressure cooker accident.
Zanes Law’s product liability lawyers know that pressure cooker accidents can result in both injuries and significant property damage. In turn, we bring together your product liability case while you focus on recovering. We’ll stand with you whether you choose to pursue settlement negotiations or compensation via trial. Contact us today to learn more about our services.

The big sell here is pressure cooking is up to 70 percent faster than other ways of cooking. Pressure cookers reach higher temperatures because their lids lock into place without steam escaping, which creates a pressurized environment inside the pot. In this environment, the cooker reaches 250°F (as opposed to boiling water, which is only 212°F).
With pressure cooking on a stove, you have to keep a close eye on the cooker because you regulate the heat source. But with an electric Instant Pot, the cooker regulates its own heat via sensors. That’s the other win. Program the Instant Pot and once it’s going, you’re free to go for a walk, vacuum the living room—you get the idea.
Instant Pots can do other things besides pressure cook, too. With the lid off, you can sauté ingredients before pressure cooking. You can also use it as a slow cooker or for making yogurt. We’re not going to worry about doing those things here, though. This guide is all about pressure cooking.
Instant Pots are safer than stovetop pressure cooking. Everyone has heard stories about old-time pressure cookers exploding. Your Instant Pot won’t do that because the temperature and pressure inside the pot is carefully monitored and regulated through its programming.
But anything boiled (beans, soups, pasta, grains, stocks and broths) or steamed (vegetables, seafood, custards) or simmered (meaty stews) is ace in a pressure cooker.
If a pot roast cooks for 30 minutes at pressure, the total time from start to finish might be more like 45 minutes or more. An Instant Pot’s heating element has less juice than the burners on your range, so it takes longer to heat food enough to get to pressure.
BUT! The ease of use frees you up to do other things. With most recipes, Instant Pots truly are “set it and forget it.”Let’s say you’re making a stir-fry, and you’d like brown rice to go with it. Before you start prepping the stir-fry, put the rice and water in the Instant Pot, program it to cook for 22 minutes at pressure, then go about your business.
On the back of the cooker, you’ll see a spot where the drip catcher goes. Slide it right in. It’s made to remove easily, so you can empty it. Without the catcher, you’d wind up with small puddles on your counter. (Note: Not all models have this drip catcher.)
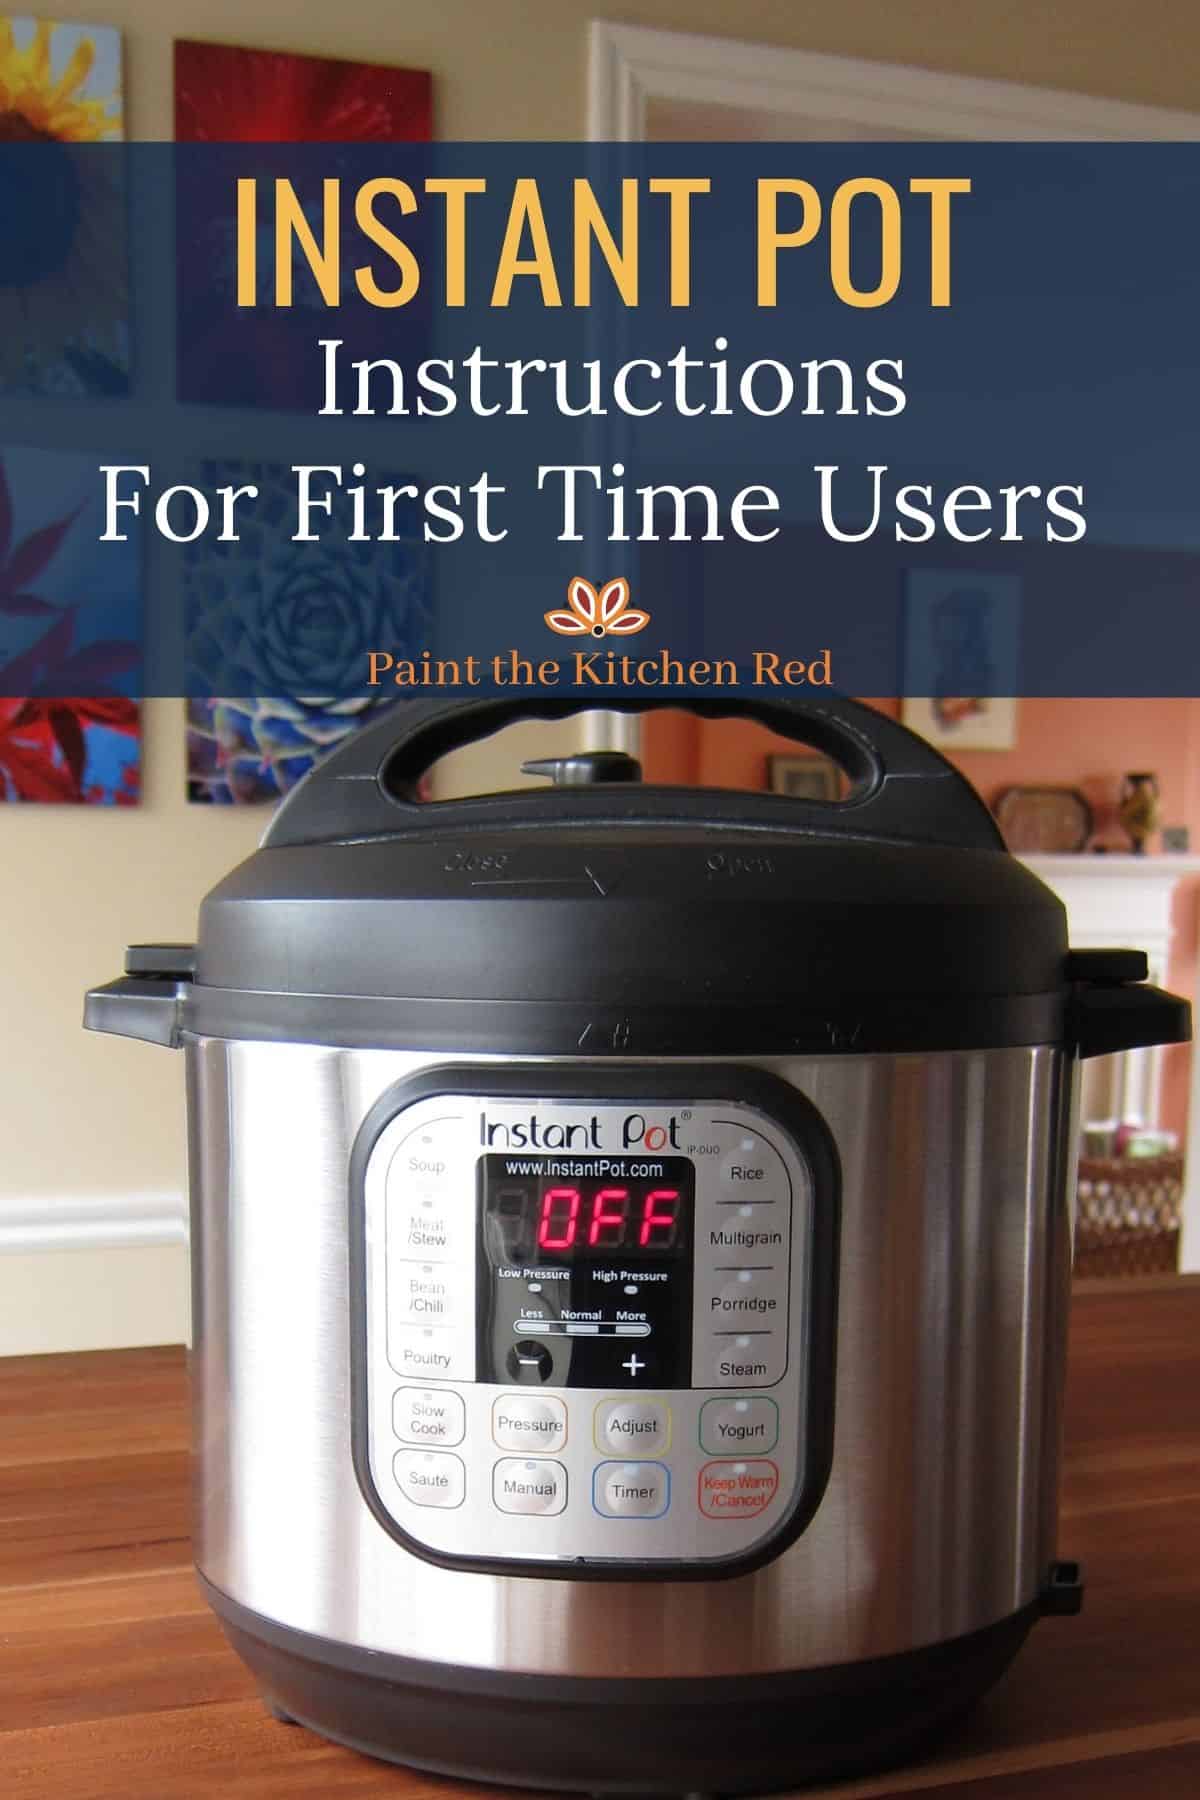
Pop the insert in the cooker. Now put the power cord into the cooker’s socket. Plug it in. The digital display on the front should now read “OFF.” Your cooker is now in standby mode.
Slide the rubbery gasket ring under the lid; there"s a bracket where it will snap into place. The gasket helps seal the pot, allowing it to come to pressure.
On the underside of the lid is also a small metal cage. It helps keep the valve from getting clogged with bits of food. It’s removable so you can clean it out if necessary, but you probably won"t need to do this very often.
Look for arrows on the top of the lid and side of the cooker. Line these up to get the lid on and off. The first dozen or so times you use your IP, this whole “getting-the-lid-on-and-off” will feel unnatural, because your cooker is new and so are you. It’ll eventually become second nature. If the cooker is plugged in, it bleeps cheerfully when you open and close it.
On the lid, there’s a little black knob sticking up. This is the steam release valve. It comes on and off for cleaning purposes, but you’ll have it on your cooker 99.9 percent of the time. This is what you use to release the pressure. This knob feels a little loose, but don"t worry; that"s correct how it"s supposed to be.
Next to the steam release is the pressure indicator. This is a little metal cylinder that the steam pushes up; it’s a manual indicator that the unit has attained pressure.
I know, there are so many. Good news! You can ignore most of them. I use my Instant Pot nearly every day, and I’ve never touched the Rice, Porridge, or Soup buttons. I do, however, make rice, porridge and soup in my IP all the time, just by programming it manually—which you need to know in any case.
The first time you use your Instant Pot, make water—not food. This way, you can familiarize yourself with simply operating it—no anxiety over ruining dinner. I’ve been pressure cooking for over a decade, and I still do the water test every time I try out a new cooker.
Make sure it’s snug; 99 percent of the time, if your Instant Pot isn’t coming to pressure, it’s a simple issue of the gasket not sitting in the ring quite right.
It should be in the “Sealing” position. A lot of models are set to seal automatically, but if the valve is in “Venting” position, the cooker won’t come to pressure.
The display will automatically show the time of the last thing you cooked...but since this is the first thing you"ve cooked, it"ll show a default time. Use the +/- buttons (or dial) to set the time to 10 minutes. It should default to High pressure, but if not, select High pressure. Press Start.
A watched pot never boils, right? It will seem like it takes forever for your cooker to come to pressure. When I timed mine with its 3 cups of water, it took 10 minutes to get there. This in-between time passes a lot faster if you are doing other things, like prepping other foods or washing dishes.
Eventually you’ll hear the cooker hissing, interspersed with some clicking. Don’t freak—this is normal. Like a pet dog, your Instant Pot sometimes makes snorting or wheezing noises for short periods.
Once the time is up, the cooker will beep and the readout will switch to “LO:00.” This means that the Instant Pot has switched to its “Keep Warm” setting, which it does automatically at the end of the cook time. This is useful if you"re not right there when the cook time ends and you want your food to stay warm for dinner. On “Keep Warm,” the timer counts up.
Natural release: That means you do nothing but wait. The more food in the Instant Pot, the longer it takes for the pressure to come down—as long as 30 minutes if you have, say, a big batch of chili. In a lot of recipes, this time is actually part of the cooking time, and the recipe will specify “natural release” in the instructions. Think of it as carryover cooking. You’ll use natural release with dried beans, a lot of soups and stews, most meats, steamed desserts, and long-cooking vegetables.
Quick release: With this method, you use the quick release valve (the knob on the top of the lid) and steam shoots up out of it. Once again, the more food in your Instant Pot, the longer it takes for the steam to release. You’ll use quick release for quick-cooking foods like tender vegetables and seafoods.
Steam is hotter than boiling water, and it can burn you badly. Keep your hands and face clear of the steam release valve when you do a quick release. Current Instant Pot models have a button that triggers the valve for you, keeping your hands at a safe distance from the valve.
If you have your Instant Pot near cabinets, be mindful when you do a quick release—it can get a lot of condensation on your cabinets, which can damage them over time. To keep the steam at bay somewhat, you can tent the valve with a kitchen towel during a quick release. Foods like oatmeal, beans, and porridges can sputter goop through the steam valve—the towel trick is handy for those times, too.
ALWAYS open the cooker with the lid facing away from you and other people. Once you see the steam that comes roiling from the open cooker, you’ll know why!
Low pressure is good to use for delicate foods like eggs and custards. Low pressure is also useful for steaming soft and tender vegetables, fruits, and, seafoods because it minimizes the risk of overcooking.
This method allows for lots of air circulation. It’s not so pretty on a countertop, I know. If nothing else, make sure you at least never store your cooker sealed with a damp lid.
Here’s the scope of what’s possible in your Instant Pot.Eventually you’ll hone in on what makes sense for you. You’re the boss of this thing, so have fun!
Steel-cut oats are an everyday luxury if you program it to cook right when you wake up. Your oatmeal is ready once your coffee’s brewed and you’re dressed!
Duo:The classic basic Instant Pot. You really can"t go wrong with a Duo. I"ve been using my Duo for nearly 8 years, and it"s still my go-to. There"s an air fryer lid available separately.
Pro Plus: Author and longtime Simply Recipes contributor Coco Morante is fond of this model. "If you’re looking to purchase a higher-end model with more bells and whistles, the 6-quart Pro Plus is my favorite. The inner pot has a flat bottom and handles, improvements from earlier models. The lid automatically seals when you put it on, and the pressure release function is automated. As far as the tech side of things goes, it has every extra feature you could possibly want or use. In addition to the typical basic Instant Pot cooking programs, this pot will do sous vide, canning, and even has a "Nutriboost" function for extracting the maximum amount of flavor out of bone broths. And beyond all of that, it connects to the Instant Brands app via wi-fi, so you can operate it from your mobile phone when you follow along with the app’s recipes."
Max: This has a touch screen, a sous-vide function, and offers an altitude adjustment option. Instant Pot expert and Simply Recipes contributor Laurel Randolph is a fan. "The Max has completely automated pressure release. It offers quick release, no release, as well as a controlled released, which spits out bits of steam every few seconds, slowly bringing down the pressure. In addition to high and low pressur


 8613371530291