
moka pot safety valve replacement free sample

The devil is in the details. It is often the smallest things, the particularities, that make all the difference. This is also the case in regards to the preparation of a good coffee, a ritual in which all the steps and every single component play a fundamental role. Among all, one of the most important elements is the Moka valve. Often ignored, it is vital not only for the quality of the coffee, but also for the safety of those who prepare it.
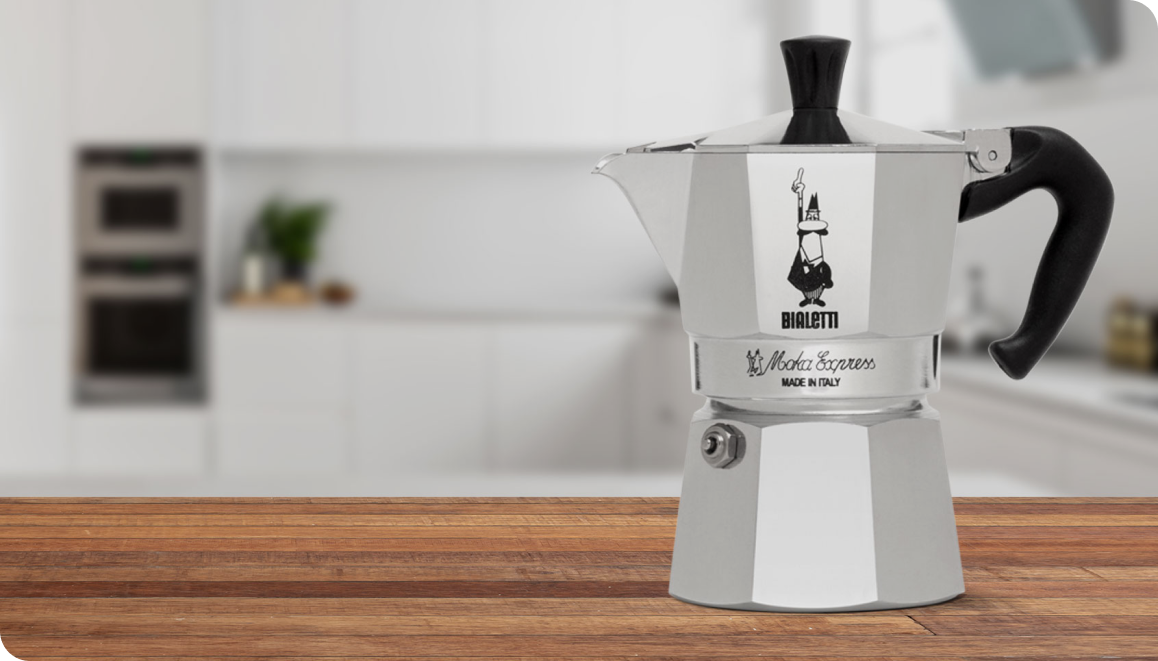
The valve was born with the invention of the Moka Express in 1933. It is a safety valve positioned on the bottom chamber. To better understand the importance of the valve and its use, we need to take a step back and illustrate step by step
This is where the valve of the Moka comes into play. It must open when the pressure is too high. By doing so, it allows the steam to escape regularly, without causing any damage. In short, the Moka’s safety valve provides security. Hence, it should only intervene when the coffee maker is used under abnormal operating conditions.
A long-standing and debated question: how far can you fill the bottom chamber for a state-of-the-art coffee? The Moka valve can come in handy to answer this dilemma. Another important role of the valve is that it acts as a "measuring cup". Its position on the bottom chamber is not accidental. Rather, it indicates to those who prepare the coffee the correct amount of water to use. The only exception is for some special coffee pots that are already equipped with a measuring cup. Ideally the water should reach just below the safety valve.
The Moka valve, therefore, is not a decoration or a mere design element. Rather, it is a very important component for the correct functioning of the coffee maker. It guarantees safety and plays a part in the making of an excellent coffee.
Consequently, it is necessary to keep it clean and maintain it regularly. For example, using tap water to make coffee brings with it the risk of limescale deposits obstructing the hole in the valve. The resulting danger is that it could get clogged.
We have seen that one can simply use hot water to clean the Moka valve. To avoid limescale obstructions, simply move the piston that comes out of the valve along its axis when washing it. To ensure the Moka functions correctly, it is recommended to repeat this checkup periodically.

Brewing your morning moka pot coffee can be tricky at times, but every coffee lover agrees that once you learn the ways of stovetop espresso, its very rewarding.
Nothing compares to the rich flavours that a stovetop espresso maker, like the GROSCHE moka pot bring out. The strong moka espresso coffee can be enjoyed alone or can also be used to make lattes, cappuccinos and other specialty coffee drinks.
But you don’t need to navigate stovetop espresso alone. We’ve gathered some of the most common moka pot coffee problems, and questions that arise when brewing stovetop espresso coffee.
The middle of your moka pot is where the upper chamber screws back on to the bottom. This will leak if the top and bottom are not tightly or properly screwed back together.
If you do not properly clean your moka pot after every use ground coffee can fall into the chamber, or water residue can build up in the valve. This leads to a blockage which stops the valve from relieving pressure buildup.
To fix this you must take apart the entire moka pot, including the filter and gasket, and give everything a thorough rinse. You can take a toothbrush an clean around the safety valve. Don’t try to disassemble the safety valve, its not designed to be taken apart. For a guaranteed clean, you can descale your moka pot with vinegar and lemon juice. Learn how here.
When adding water to the bottom chamber of your moka pot, you must always fill to just below the safety valve. If you cover the safety valve in water it will malfunction. Its also normal for some water to be left over after brewing.
Unlike electric espresso machines and other coffee makers, stovetop espresso maker moka pots do not require you to pack or tamp (compress) in the coffee grounds. Compressing the coffee grounds can create unsafe pressure in a moka pot. Also make sure you’re using fine grind coffee.
Turn down the heat! The only instance where this could occur is when the moka pot is left on the burner for too long and the heat is turned up too high so the coffee reaches a boiling point. When making stovetop espresso you only need to turn the burner on low to medium depending on your stove.
Do not worry, the aesthetic may be a tad tarnished but after a quick cleaning or descale your moka pot is still safe to use. However, burn marks are preventable and usually only appear due to two reasons.
If you’re using your moka pot on a camp fire, gas stovetop or propane stove top, you must ensure that the flames are not higher than the base of the espresso maker. If the flames are too high, they will burn the sides of your moka pot as your coffee brews and tarnish the finish.
It’s easy to get distracted and leave your stovetop espresso maker on for a little too long. We’re all human, we do it. But it may leave behind a few burn marks. Start on a low heat setting and as soon as you hear coffee bubbling up from the filter funnel turn down the heat even more. When the gurgling sound stops, your moka espresso coffee is done and should be taken off the heat.
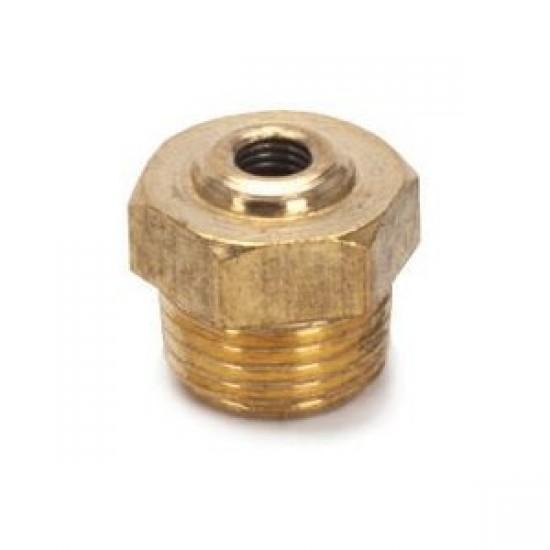
Your funnel filter must fit neatly into the bottom chamber. If it is bent or worn around the edges it will need to be replaced. Moka pot replacements can be purchased here.
Unlike electric espresso machines or drip coffee makers, stovetop espresso maker moka pots do not require you to pack in the coffee grounds. If they are packed down, they will hinder the flow of the water as it percolates.
If the coffee grounds are too fine (like Turkish coffee), then they can plug up the moka pot as well. That can also give you grounds in your brewed coffee.
Aluminum moka pots are not dishwasher safe. They are made of anodized aluminum, and when placed in a dishwasher lose the anodization and oxidize. If that happens do not use the moka pot any more. Its best to just lightly hand wash them with water and a soft sponge. Check the filter screen whenever you wash it to make sure its free flowing without any blockage.
Its normal to have some water left over in a moka pot after brewing. They are designed that way. The steam pressure pushes water up the funnel, in the gap between the funnel and the base of the boiler chamber. That leftover water also helps protect your moka pot from being heated in a dry state, which could become a safety concern if left unattended.
The handle should not get hot when brewing coffee in a stovetop espresso maker. If you set the heat too high, it will lead to the handle getting hot. Always use the smaller burner on your stove whose size matches the size of your moka pot. Reduce the heat, and you will brew a tastier cup and the handle will not get hot from excessive heat.
How to clean a moka pot, is a common question were often asked. Traditionalists will tell you that a moka pot conditions over time, and best way to wash it is to just rinse it with water and use a light brush or very soft non abrasive sponge without soap to clean it. Wipe it dry with a clean cloth. That’s it!
That allows it to condition over time and will give you the best tasting coffee without any leaks or wear. So if you want to know how to clean a moka pot, just use water!
Moka pots are a type of stove top coffee maker that make a specific type of coffee. The heat from your stove creates pressure in the boiler chamber, pushing hot water (not boiling water) up through the coffee grounds into the coffee collector on top.
This brewing at less than a boil extracts the flavor of the coffee without the burnt flavor from using boiling water. Coffee lovers describe moka coffee flavor as chcolatey and smooth.
Although they are often called stove top espresso makers, and brew under pressure, technically they dont brew espresso coffee like you would find from a high pressure electric espresso machine. An electric espresso machine will typically brew at between 7 and 10 bars of pressure creating foam, but extracting bitterness. Moka coffee brews between 1 and 3 bard bring out rich and deep flavors with less bitterness.
GROSCHE moka pots, both the MILANO and MILANO Steel will work over a camp fire, on wood stoves and propane or other gas stoves. To prevent damage and ensure a delicious brew, make sure any flames are not higher than the moka pot itself.
Aluminum moka pots also cannot go in the dishwasher, while stainless steel can. Due to a difference in material, stainless steel moka pots tend to last longer and in better condition than aluminum, but both brew great tasting coffee.
An aluminum moka pot, like the Milano, cannot go in the dishwasher. If placed in the dishwasher the aluminum will tarnish and turn black. However, all stainless steel stovetop espresso makers, like the MILANO Steel or Stella Aroma, are dishwasher safe.
Leftover water is perfectly normal when brewing moka coffee. Not all of the water will make its way to the top because the funnel does not touch the bottom of the moka pot. If designed otherwise, the coffee maker would utilize the pressure properly. Discard any extra water after you’ve poured your brew and the pot has cooled.
Every 3-6 months consider changing the gasket and silicone seal that maintains the pressure in the boiler section. Once you begin to have problems with your brew that’s usually a sign that it’s time for a new gasket or seal. Replacements can be purchased here.
When you first get the moka pot, carry out a few practice moka coffee brews and throw out the coffee. This will let you learn how strong your stove is, what heat setting works best, and also how long it takes on your stove. Also, the coffee oils also coat the inside of the moka pot conditioning it for a tasty and consistent brew.

Exploding coffee makers—especially when they’re pressurized—tend to be day-ruiners. Yeah, cleaning isn’t that fun, but trust me…. it’s necessary, especially when it comes to moka pots. Safety and cleaning are actually interconnected with this brewer.
In this quick guide, I’ll show you how you can keep your moka pot in tip-top shapeandhow to stay safe so you never have to worry about a surprise kitchen explosion. Don’t worry—it’s all actually pretty simple.
Moka pots don’t just immerse coffee grounds in water. They create a ton of pressure that generates steam—and this pressure can be troublesome if your brewer’s not in good shape.
Now, moka pots do have asafety valvethat’s designed to keep too much pressure from building up in the device. Once more pressure than is necessary is generated, it starts to shoot out of the valve in the form of steam.
The valve is clogged with coffee grounds. If grounds happen to fall into the valve, they’re probably going to get stuck there. Over time, this can cause blockage in the valve and compromise its safety.
The valve is clogged with water gunk. If your local water source is ‘hard’ (has a high level of calcium and magnesium), you’re bound to see white gunk build up inside your moka pot over time. This gunk can be pretty stubborn and can clog the safety valve.
You tamped the grounds. Moka pots, unlike espresso machines, do not require you to tamp the grounds to get a balanced extraction. Tamping the grounds down into the filter basket can cause excess pressure to be generated. Just don’t tamp—you don’t need to.
You covered the safety valve with water. Over-adding water can cover the safety valve, which keeps it from being able to let out steam. Always leave a small amount of space between the water level and the safety valve.
Thankfully, cleaning your moka pot is a very simple process. It only takes a few minutes of your time, but it keeps your moka pot from destroying your kitchen—or worse—destroying your coffee’s flavor.
Over time, coffee oils and micro-grounds build up all over the insides of the moka pot. These are harmless when it comes to your health (unless those grounds are in the safety valve), but they do impact your brew’s flavor. Those old oils can go rancid and the grounds continually impart bitter flavors into later brews.
Once your moka pot cools, disassemble it and remove the filter basket. Toss the spent grounds into the garbage and thoroughly rinse and dry the filter basket. Now give the other pieces a good rinse and dry too. You can use a paper towel to wipe away and stubborn grounds from the basket or seal.
Don’t put the moka pot in the dishwasher. Don’t scrub the moka pot with an abrasive material. There’s a coating on aluminum moka pots that keeps your coffee from taking on a metallic taste, and you don’t want to accidentally scrub that off.
This basic process is really the key to a clean moka pot, but may not be enough if your water source is pretty hard. If it is, you’re going to want to give your moka pot a deeper clean twice a year or so if you use it regularly.
These two acids are strong enough to break down hardened calcium deposits but are generally considered safe for use with moka pots, both stainless steel and aluminum models. You can also use a dedicated coffee machine descaler, but chances are you already have these two acids available.
Add lots of water. Fill the lower chamber, cover the safety valve, and keep adding until the water line hits the coffee filter basket (that way the oils can be cleaned from there at the same time).
Pour out some of the water. Make sure the safety valve is no longer covered—you’re about to do a plain water brew cycle and want the valve to work if needed.
While the process takes a few hours overall, there’s really only 5-10 minutes of hands-on cleaning—and it goes a long way. Now your brew will be untainted by old grounds, your moka pot won’t have a faulty valve, and you can brew will complete confidence.
My main favorite way of making coffee before I bought this awesome little moka pot was to employ a pour over for the coffee beans. I loved pour overs because that method made considerably better coffee than drip; drip only seemed to water down the coffee while making it distastefully bitter. If you wanted a metaphor, almost any other coffee preparation method can compare to the finest caviar; whereas drip coffee compares to a McDonald’s happy meal that may or may not have maggots festering under the bun. Doesn’t that just make your mouth water?
What makes the moka pot special is that it uses about 1.5 bars of pressure to squeeze out the coffee from the grounds, siphoned into the upper chamber from the push of steam. You can get more of the crema into your cup since the coffee is pushed off the top of the grounds, in contrast to a pour over or drip that takes the coffee out from the bottom.
The first step to making a fine cup of coffee with a Bialetti Moka Pot is of course acquiring one. I got mine from Amazon, but I’ll let you decide where you get yours.
When brand new, you are supposed to make a weak coffee in the pot & throw it away. This serves the purpose of cleaning the pot and applying a protective coating of coffee oil to the aluminum. This protective coating prevents the metallic taste of aluminum from entering your cup and protecting the aluminum from rusting.
Fill the boiler or bottom chamber with water. People advocate not to go above the safety valve, but I often do because I purchased the smallest (single cup, 1oz) moka Pot, which does not develop as much pressure as the larger moka Pots do. The water shouldn’t be super-pure, but also shouldn’t be extremely chlorinated. If you are using water that is highly chlorinated, I recommend setting the water open for a couple of hours to let the chlorine evaporate. Otherwise, the chlorine would react with the aluminum and cause dark discolorations.
Note that you should not overfilling or tamp down the permafilter basket with coffee grounds. The moka pot is not an espresso machine; the moka pot can only properly brew coffee at 1.5 bars of pressure, whereas espresso machines use 8 to 9 bars of pressure. So overfilling or tamping impedes the flow of water through the coffee grounds and out of the spout. This causes an increase in pressure, therefore temperature that burns the coffee grounds before it can be properly brewed. The safety valve may release from an increased pressure, and the coffee may either not siphon out from jamming or explode out of the top with force. I find that filling the basket with 4/4 coffee grounds is optimal and allows the water to pass through. Filling all the way is actually prevents the coffee from burning, since more pressure is used instead of more temperature. But be careful when filling all the way, because coffee grounds in the rubber gasket will ruin the rubber.
After lowering the filled basket into the water chamber, you screw on the top of the moka pot to the bottom, making sure that the coffee grounds don’t spill outside. If coffee grounds spills out you may get them stuck to the rubber gasket, which weakens the seal and therefore lowers the pressure that forms inside. Similarly, if you screw in the moka pot’s top and bottom too lightly, the moka pot won’t form enough pressure inside. Signs that there isn’t enough pressure inside the moka pot include the water not having enough force to reach the upper chamber or the water seeping out from the weak points of contact for the rubber gasket.
Another cause of decreased pressure inside the moka pot is that overtime, the rubber gasket degrades and weakens the seal; therefore causing the problems aforementioned.
You then set the Moka Pot on a gas stove & set the fire to medium-low; the heat shouldn’t be on so high that the fire creeps up past the bottom. That’s how you get a melted plastic handle. On the other hand the heat should not be too low; otherwise the brew time is extended and the coffee becomes over-extracted. I also noticed that if you leave the cover open, the moka pot won’t get hot enough to push the water to the upper chamber. Again causing over-extracted coffee. If you want to use extremely low heat for extracting a less acidic brew try using a pour-over instead. (I want to add that a finer grind requires more heat for the coffee to exit into the upper chamber than a coarser grind.)
Typically the brew is finished within 4 minutes, but 2 minutes if you pre-heat the water. This is my experience from a single cup (1oz) Moka Pot, the smallest one. Bigger sizes may vary in brewing time. It’s best to keep an eye on it while making your first few pots of coffee until you get an idea of how long it takes to brew the coffee; the coffee fills the upper chamber of the pot in a matter of seconds to finish brewing. If you forget to turn off the heat after the moka pot is finished brewing, you will end up with a melted rubber gasket that ruins the moka pot and it’s contents with a burnt rubber smell that doesn’t go away easily… I’ve learned this the hard way.
Another way to prevent acrid coffee foam from entering your cup is to quickly transfer the Moka Pot into a small container filled with water. The water quickly cools the pot, abruptly stopping the brewing process.
Edit: Just recently I adopted a technique where I put the heat as high as possible without melting the plastic handle, and abruptly lowering the heat to absolute minimum when the coffee starts rising. This is a fine way to reduce the amount of time it takes to brew the Moka coffee, just as long as you don’t allow the coffee to burn. The coffee starts burning when there isn’t enough water in the bottom chamber, producing burnt foam that is highly irritating to the stomach. I adopted this brewing method because the problem is that this acrid-foam is made even at low heat if there isn’t enough water.
And for clean up, I either leave my moka pot in a container with room temperature water to cool it down quickly or hose it down under the sink with water while taking apart the pot for cleaning. You shouldn’t rub excessively or use soap, which would remove the protective oily coating that comes from the coffee. Instead, I just gently rise with regular water and rub away the excess with my fingers.
For sure the Bialleti Moka Pot is an improvement over standard the coffee, if the standard is defined to be drip. Obvious improvements include a decreased volume of coffee a person has to drink. I bought the 1 cup version, which is comparable to a single shot of espresso. On top of that, the full flavor is extracted without over-extraction that is experienced with a drip machine. Signs of Over-extraction is a bitter-rancid taste.
Note that the freshness of the coffee beans dictates how the coffee tastes. Otherwise, let me re-iterate that the beauty of the Moka Pot is that it pushes the delicious coffee crema to the top first. Compare this to a drip or a pour-over extraction that leaves the coffee crema floating on top, so much of does not reach the drinker’s cup.
Finally, if you are new to moka pots be prepared to for the learning curve that comes with this pot! It took me quite a bit of research and practice to finally produce a cup of moka that tastes so good that I’d say it’s a good competitor to espressos.

Set your grinder to a setting coarser than espresso but finer than a normal drip brewer or pour over would use. Remove the top half of the moka pot and remove the coffee grounds container. Fill loosely with ground coffee without over filling or compacting grounds.
Once your water has begun to boil, remove from heat and pour into the water reservoir to just under the steam release valve. Replace the filled coffee grounds container and screw top and bottom of moka pot back together and place on your stove top on med - high heat.
Stay present and alert while coffee is brewing. You"ll need to listen for the gurgling sound. When you hear the moka pot"s song of it"s people, remove from heat and serve
For fans of a rich, bold cup of coffee, it’s hard to go past the Moka pot. These humble coffee makers have been a staple of the Italian kitchen for decades, brewing espresso style coffee without the expense and hassle of a large machine.
Whether you want a designer model or something you can take on the road, there’s a Moka pot for you. Here’s what you need to know before you buy, and some of the best stovetop espresso makers around.
This stovetop coffee maker garnered plenty of good remarks from happy customers, and it’s no wonder why. Designed in Italy, this high-quality ‘moka express’ comes in a variety of sizes, so you can choose according to preference. It also makes coffee fast without sacrificing quality or style.
You should already know that Moka pots won’t brew espresso like an espresso machine will. But they still make a damn fine, strong cup of Joe (1). If you want to get it right the first time, consider the following points when choosing a stovetop espresso maker:
While some claim that the highest quality percolators are made in Italy – which is no wonder, they are often simply called Italian espresso pots or ‘Bialetti’s’ – we don’t find this necessarily to be the case. On average, it’s fair to say that whenever it says ‘Made in Italy’ you can be rest assured the quality will be great, while China is more of a mixed bag. To boot, having an authentic Italian stovetop espresso maker does add to the charm a bit, doesn’t it?
For the solo coffee connoisseurs among us, the brew-a-cup-at-a-time Moka pots are the perfect fit. But, if you plan to share a cup with your partner or friend, choose one that can make more than 1 brew per use – there is nothing more annoying than having to repeat the process multiple times for multiple coffees.
Stovetop coffee makers or Moka pots come in various sizes. Here’s a useful size chart to follow when deciding on the amount of liquid you need from your Moka pot:
Remember that not all Moka pots will work with an electric stove. Be sure to check whether the one you’re considering is electric or induction stovetop friendly. We’ve found that glass-topped electric stoves typically work beautifully, and very quickly, with Moka pots.
The traditional moka pot is made from aluminum – the material is light, cheap and great at conducting heat or, to keep it real for us caffeine fiends, brewing coffee. But, you’ll find that many manufacturers now include percolators made from stainless steel. And for good reason. A stainless steel moka pot looks much sexier in your kitchen plus the material racks up some major advantages when compared to aluminum (2).
Although aluminum is highly resistant to oxidation and corrosion, stainless steel is completely non-corrosive and non-porous making it considerably more durable (3). Yes, it’s a bit more pricey than its contestant but it’ll give you fewer headaches over cleaning-drying regimes to prevent it from rusting and has the potential to brew your coffee for decades to come.
Until recently, Moka pots were the only way to get an ‘almost espresso’ without a machine. Today, there are plenty of other options for making an espresso-like coffee or an actual espresso without a machine. For instance, various portable espresso makers are available for everyone’s pocket. So why do people still use stovetop coffee makers?
Moka pot is hipsterish, retro, and, honestly, very convenient to use. Like the Aeropress, the Moka pot doesn’t produce an actual espresso. But moka coffee is still rich, thick, and creamy. Basically, it’s an affordable way to enjoy beautiful coffee and feel like part of Italy’s long tradition of coffee drinking.
Based on customer reviews in the US and our own experience with the cowboy method, Home Grounds searched for the best Moka pot on the market. The table summarizes features, and below you’ll find more detailed reviews of the best ones we’ve found in the market:
Bialetti is the number one player in the stovetop espresso maker market, which is not a surprise once you see the thousands of happy customer reviews on their Moka pots. Due to its features, the Bialetti Moka Express has long been dubbed as one of the best coffee makers. The octagonal shape of the coffee maker allows the heat to distribute perfectly while your coffee brews, resulting in a strong Moka pot coffeein under 5 minutes (4).
Once you’re done, clean-up is easy thanks to the compartment design; just unscrew it, wash it, and get on with your day. The Italian-made ‘Moka express’ range is so popular that they made it available in 1, 3, 6, and 9 cup options – so choose the right size for your preference and you’ll start your day with the perfect amount of coffee.
I personally only use this Moka pot nowadays – I’ve been through other models and the consistency you get is unbeatable. Read my Bialetti Moka Express review if you wish to learn more. The Bialetti Brikka, a modern alternative to the Moka Express is also worth checking out.
The pot itself is a durable food grade aluminum that makes it just as suitable for outdoor use as is for the kitchen. The colored models have an enamel coating that provides extra durability (as well as looking pretty cool). The gasket seal is made from silicone, which has a higher heat resistance and longevity than the rubber you find in some other brands (5).
This moka pot is available in the biggest range of sizes, with 1, 3, 6, 9 and 12 cup versions available – in a choice of black, chrome, white, red and blue.
As with the French press, percolator coffee tends to have a few grounds, especially as you near the bottom of the pot. But again, fans of percolators like the way it doesn’t filter out the oils as it brews coffee. If the grounds bother you (they’re not everyone’s cup of tea – pardon the expression), 3.5″ disc filters help solve that problem. Just slide one down into the brew basket before adding your coffee.
The bulbous design, which is supposed to represent a baby bird, helps to stop filtration at precisely the right moment. Even if the moka pot is left on the heat, the coffee won’t develop the burnt taste that is often problematic with stovetop coffee makers. The unique v-shaped spout (the chick’s beak) provides more accurate pouring and fewer drips.
Moka pot users tend to time their brew by ear. When you hear a rumbling or gurgling noise, this is a signal that the last of the coffee is making its way up through the tube and it’s time to turn off the heat.
The glass does mean it’s not going to withstand a drop to the floor, but apart from that, the Geesta functions as any other moka pot would. The filter basket, base and lid are made from stainless steel, so it’s both dishwasher safe and suitable for induction stove tops.
One of the appealing things about buying a Moka pot is that there is a model to suit almost any need or budget. For Home Grounds, the Cuisinox Roma stands out for its build quality, elegant design, and the fact it works with a wide range of stove tops. It’s not cheap, but with a 25-year guarantee, you might never need to buy another.
You can use your favorite kind of coffee blend (beans) in a stovetop espresso maker. It’s recommended that you grind your coffee fresh at home and use a grind size slightly finer than you would for drip coffee and a little more coarse than that for an espresso machine. Don’t use extracts, instant coffee, or infusions in your stovetop maker. Here’s a guide on the best coffee for moka pots.
Stovetop espresso is good but not as good as a connoisseurs-like espresso. Though the results don’t quite live up to the real deal, Moka pots are a convenient home-brewing alternative producing a thick, strong, and delicious cup of coffee. It’s easy to over or under extract your grounds using a stovetop maker but, you should know, practice makes close-to-perfect (espresso).
You can clean a stainless steel Moka pot using one part white vinegar and two parts cold water. Pour the water and vinegar into the basin of the pot and turn it on. Brew a full pot and let the solution sit for 15 minutes. Then, empty the pot and rinse with cold water. Or, use a combination of baking soda and cold water for a simple clean (no brewing here!).
How to Brew in a Moka Pot: Stumptown Coffee Roasters Blog. (n.d.). Retrieved from https://www.stumptowncoffee.com/blogs/news/how-to-brew-in-a-moka-pot
The first version of this guide expanded on what the moka pot can’t do — focusing on espresso, in particular. Recently, though, my attitude has changed a bit, and you guys are not entirely without blame for that.
In this review, I’ll give you an overview of manufacturers and variants for different types of stoves. I’ll compare stainless steel and aluminum moka pots, as well as look at whether the original Bialetti still comes out on top.
The stovetop espresso maker mimics this principle. Here, too, finely ground coffee in a filter insert forms a barrier against hot water. However, the stovetop pot relies on physics instead of pumps.
Water is heated in the stovetop pot’s lower chamber until it reaches the boiling point. It then wafts through the coffee grounds, cools to a liquid and thus, ends up coffee in the pot’s upper chamber.
Depending on the moka pot model, the liquid still has to pass through a more or less resistant valve. In some cases, it’s called a “crema valve” intended to produce the coffee foam that we appreciate so much in espresso.
Still, even with a super valve, a stovetop espresso pot doesn’t get close to the 9 bars of pressure needed for an optimal espresso — or any espresso, for that matter. On average, it only reaches 1.5 bars.
That said, the linguistic and visual similarity of the two forms of preparation can’t be denied. The fact that coffee from a mocha pot is comparable, in many respects, to a classic Italian espresso is due to the circumstances surrounding its preparation: The coffee beans are ground (almost) as finely.
Let’s not forget: the moka pot’s basic principle has never changed — why should it when it’s so easy to achieve such clear results? Plus, good espresso makers from Bialetti and others are practically indestructible and can be (thoroughly) cleaned in seconds. An espresso machine, on the other hand, will have a hard time keeping up with that!
However, the pot boiler has always been a clumsy copy of the espresso principle and isn’t entirely free from controversy. Let’s take a look at the pros and cons.
I wanted to test my claim about the low price and sorted the search results list on Amazon for “moka pot” from expensive to cheap. I almost tipped the coffee out of the pot in amazement: there are actually stovetop coffee makers available for over $800!
Disadvantages The grind for a stovetop espresso pot is very specific, so you’ll need a coffee grinder. Pre-ground espresso is too fine and pre-ground coffee powder is too coarse.
It’s important to keep an eye on the mocha pot throughout the preparation process. Otherwise, you run the risk of burnt coffee, burnt equipment and maybe a few other kitchen accidents.
Unlike a stovetop espresso maker (moka pot), a traditional mocha pot (also called ibrikor cezve) is used to prepare a completely different type of coffee beverage.
Nevertheless, a stovetop espresso maker is much closer to a traditional mocha pot than any espresso machine. Here, the differences don’t relate to pressure but rather to the optimal type of coffee and the degree of grinding.
The traditional mocha pot has no strainer insert, and coffee powder is boiled directly in the water on the stove — often twice. The powder must be as fine as dust, and the coffee grounds are an integral part of the taste experience in the cup.
As the mother of all stovetop espresso makers, the Bialetti Moka Express isn’t suitable for use with an induction cooktop due to its material, nor does it keep the coffee at temperature for particularly long.
On top of that, the pot (for 6 cups) got very hot during my review, and the handle wasn’t quite as easy to use as other models. These are minor issues, but they also show that even classics can be improved.
Equally important, from my point of view, the Bialetti Moka Express is also available in colorful covered versions, ranging from Italian names to trendy pastels — for example, Bialetti Rainbow. Even though these moka pots aren’t coated on the inside, I would advise against buying one. In my experience, color coatings have a tendency to peel off over time.
Despite all reservations, the Bialetti Moka Express has rightly earned its classic status. However, on the subject of aluminum as a health risk, I’ll refrain from giving my personal opinion. You can decide for yourselves whether it’s right for you or not.
The current version is called the New Venus,and the price on Amazon ranges from $32 (for 4 cups) to around $50 (for 10 cups). If you already have a Venus espresso maker, you definitely don’t need to buy a newer version. Either way, I consider the Venus to be the best moka pot in my review — even though my review selection is very limited.
It has the previously mentioned crema valve built-in, which offers more resistance to the bubbling coffee, making for a drink that’s supposed to approach espresso both visually and taste-wise.
Still, my reservation hasn’t changed: coffee prepared in a moka pot is already at a higher-than-optimal temperature. The crema valve builds up additional pressure, which, in turn, shifts the boiling point of the water. This shortens the preparation time (good), but increases the risk of over-extraction (bad).
I’m well aware that many of you love your Brikka unconditionally. So, in this case, I’ll just abstain from any final opinion and trust your experience. For a New Brikka, the 2-cup model will cost you just over $40, and the 4-cup pot will run you about $50 on Amazon.
That said, I tend to believe that a sense of tradition plays a certain role here, as well as pricing. For example, if the ultra-affordable Primula aluminum moka pot is available for as little as $9.50 for 3 cups, why should you buy a stainless steel model?
The only problem is that stainless steel is not fundamentally the better choice. Much depends on the alloy and even more on the design. Take the widely used Cillio moka pot, for example. Some criticize the Cilio moka pot for being too thin, with a finish too sharp.
If you take away the espresso, moka pots work just like kettles. So, it stands to reason that both appliance worlds would evolve in similar ways: the kettle became a water boiler, and the espresso pot became an electric espresso maker with a built-in heating element.
A long time ago, I reviewed the Cloer espresso maker, which is still readily available on Amazon. (Note: This product isn’t available in the U.S.) As a representative of the entire electric subcategory, this moka pot had me pretty excited.
A good example is the Kamira espresso maker: this thing looks a lot like a handheld lever machine but goes on the stove just like a traditional moka pot.
However, the manufacturer admits that this moka pot doesn’t work well on a ceramic stove. What’s more, many reviewers have found that the result in the espresso cup is not so tasty after all.
The beauty of using a moka pot is that you can be pretty relaxed with the preparation. So, we don’t have to be too strict with the instructions, either — right?
Fill the lower part of the moka pot with water — preferably warm or hot to shorten the brewing process. If there’s no fill line indicated, always stay below the safety valve.
Another tip from the community (from David): “The safety valve is used to relieve excess pressure if the funnel is clogged — e.g. by coffee that’s too finely ground! So, if steam escapes from the valve, remove the moka pot from the stove immediately.” Amen.
Before getting into the appropriate espresso beans for a moka pot, I’d like to note that many of you don’t make your fake stovetop espresso to drink straight but consider it the perfect base for all coffee drinks with milk foam.
That may not matter for a quick caffeine kick. Still, if you want flavor in your cup, you’ll have to be almost as careful when brewing stovetop espresso with these beans as you would when using them with an espresso machine. As I said earlier, that’s not the point of using a moka pot.
The beverage from a stovetop pot will be very strong and aromatic when prepared correctly, but it will have less body than coffee from a French press. Incidentally, both of these preparation methods are two sides of the same coin for me.
The roast level should be belowItalian. For example, medium to medium-dark espresso beans (which can also compensate for the inaccuracies of a super-automatic machine) inherently provide better results in a moka pot.
Use 100% Arabica instead of a Robusta blend. Robusta or canephora is notorious for producing bitter attributes and crema buzz. This is difficult to achieve in a moka pot. That’s why, for your own sake, you should choose 100% Arabica if you can.
If your coffee from a Cilio, Tchibo, or Gräwe moka pot still doesn’t taste good, despite careful bean selection, it’s not the fault of the machine at all (for once). Rather, it’s the accompanying circumstances: If the coffee is sour, you should adjust the grind to a coarser setting.
Some roasters indiscriminately lump super-automatic coffee makers, espresso machines and moka pots together in the preparation recommendations for their beans. It’s often the case that the AeroPress is in there, too.
On the other hand, this “all-in-one espresso promise” works smoothly when the espresso pot isn’t explicitly mentioned, and filter methods are given equal footing with espresso in the preparation tips. In this case, we’re dealing with an omni roast that doesn’t carry this name for nothing.
We’ve already touched on the differences between aluminum and stainless steel when it comes to the dishwasher. Aluminum espresso pots should notgo in, while stainless steel pots have no problems (as long as the gasket is removable!).
However, the question remains as to whether a moka pot really needs to go in the dishwasher. With a few simple steps, some water and detergent, you can get all the components clean in seconds and then just let them dry.
Each community comment contains an important question or point of view to which I want to provide answers and assessments. This FAQ section will be gradually expanded if you continue to have such a burning interest in the subject of moka pots.
According to my research, a moka pot "cup" refers to a fill volume of around 60 milliliters (2 fluid ounces) -- at least for a Bialetti. Theoretically, a "cup" is, therefore, a double espresso. Still, the exact milliliters don"t matter. It"s much more important to buy an espresso maker that matches your actual consumption per brew. Generally, the smaller the maker, the better the results, and that"s only if you fill it to the brim every time -- especially with regard to the ground espresso. So, a two-person household certainly doesn"t need an 18-cup stovetop espresso maker.
In most cases, you only need to replace the rubber gasket, which is available as a spare part for around $4 (or less). This is worthwhile even for low-priced espresso makers. However, if the safety valve in the lower chamber is defective or the crema valve no longer wants to work properly, it’s usually necessary to replace the entire moka pot.
This is a difficult, loaded question and a sensitive issue, in general, as many have complained of upset stomachs or other problems when drinking coffee from an espresso coffee maker. That said, I"m not going to make a generalization about the compatibility of coffee from any preparation method because there are far too many individual factors involved. The only thing that is clear is that moka pot preparation favors certain reactions. I delve deeper into the reasons for this in the following article:
If the safety valve is immersed in water, the rapid rise in temperature on a gas, electric or induction stove will cause espresso boilers to quickly overflow. Using less water should solve the problem.
If you don"t want to or shouldn"t use citric acid, try denture cleaning tabs or acetic acid. Sometimes, people even use "real" descalers. I’m of the opinion that you can basically use any agent that is food-grade approved. Either way, in any case and with any material, you must rinse well afterward before making and discarding one or two pots of coffee.
We’ve mentioned several times that you should use neither normal ground coffee nor normal ground espresso in a moka pot. If you add the maximum of freshly ground coffee beans, that makes sense you can"t get along without a coffee grinder. In that case, it doesn"t have to grind as finely as would be important for an espresso machine, but it does need more precision than an ultra-cheap, entry-level model. I recommend you take a look at my coffee grinder review. That said, one thing you won’t need is a coffee scale.
Before even a drop of coffee ends up in your cup, you should clean the espresso maker thoroughly. This is best with hot water and even better achieved through several boiling processes. At the same time, check whether the safety valve works and the rubber gasket seals.
I continue to see no reason for relying on the stovetop espresso maker. At home, I have enough super-automatic espresso machines and portafilters, all of which excel in producing what a moka pot can only approximate in the cup. Even when traveling, I bring my trusty pour-over filter.
However, after this review and comparison, I think I’m doing the espresso maker an injustice, despite everything. Particularly when it’s made of stainless steel, the $20 moka pot is virtually indestructible, uncomplicated and so beautifully unpretentious. So, the question is: how much fuss do you really have to make about espresso (or a version of it) in everyday life?

Stovetop espresso makers are popular in Europe, and especially in Italy. They were first created by the Italian company Bialetti, and commonly go by the name of a Moka Pot. They use steam pressure to force the water through the ground coffee, which is then percolated into the top chamber. Stovetop espresso makers are fairly inexpensive, small to store, easy to use and produce a good strong cup of coffee in just a few minutes.
Set the stovetop espresso maker on the stove over a medium to low flame with the lid closed. You want to be sure that the flame is not larger than the pot itself.
After a few minutes, you will hear the coffee start to percolate into the top half of the pot. If you’re using a gas stove, allow the coffee to percolate until the top pot is half full, and then turn off the heat and allow the coffee to finish brewing. If you’re using an electric stove, once you hear the coffee percolating, turn off the heat and the residual heat will continue to brew the coffee.

Stove-top espresso makers (also referred to as espresso orMoka pots) are a simple and affordable way to brewespresso-stylecoffee at home or on your travels. Use Moka Pot; it’s easy to use and produces delicious results!
A study done by the University of Newcastle shows that a 30 ml shot of moka pot espresso averages 65-73 mg of caffeine per 30 ml.In contrast, the USDA’s average amount of caffeine for a 30 ml shot of espresso is 64 mg.
A serving of moka pot espresso can potentially have more caffeine than standard espresso. This is because of the longer brewing time from a moka pot allows for more caffeine extraction from the coffee.
Starting at an affordable £20, the Moka Express comes in multiple sizes (ranging from 1 to 9-cup) and works with any stovetop. It has an easy-grip handle and makes great tasting coffee comparable to more expensive moka pots.
Some moka pots are made of aluminium while others are stainless steel. Aluminium pots are usually cheaperand more lightweight, but the metal will slightly discolour with continuous use. Stainless steel pots are more durable and the metal does not discolour.
The Moka Express, for example, is made of aluminium and has the traditional octagonal design. This was originated by Bialetti, a pioneer in the design and manufacturing of moka pots.
Size is another important factor to consider. If you’re brewing for one person, a 2-cup moka pot will work (1 cup = 45 ml, or half a serving of espresso). For 2 or more people, you’ll want 2 cups or higher.
Before you use your brand new moka pot, you should season it. This cleaning process helpswash away manufacturing residue and tightens the seal between the upper and lower chambers.
While espresso machines create pressure using a pump mechanism, a moka pot relies on a vacuum to generate pressure. This vacuum occurs naturally from the air trapped inside the water tank, combined with heat from the stove.
Keep in mind that a moka pot can only generate around 1 bar of pressure. In contrast, standard espresso makers brew using 7-9 bars of pressure. The pressure generated in a Moka pot is still enough to create espresso, which is great in flavour and texture.
All you coffee lovers out there, all you joe aficionados, listen up because we have found the best of the bestmocha pot. Nothing is better than the strong, chocolatey taste of freshly brewed coffee.
When you see one of those lovely silver pots sitting on somebody’s stove, you just know you are in the home of a true coffee lover who can appreciate beans the way they should be.
I myself am something of a coffee nut, so I wanted to pass on my findings to you. I had the chance to test out all these cool pots, and it was easy for me to narrow it down to four for the best moka pot.Believe me, they are not all created equal, and you definitely have some imitators out there trying to make you fall for inferior products.
We will examine the pros and cons of each different pot, talk about how it performed during testing, and tell you about the taste of each drink brewed. It was fun to test, and every consumer deserves to be in the know. Get a bag of your favorite grinds ready.
The moka pot is one of those appliances you didn’t know you needed until you did! It is a stove top or electric coffee maker that produces the drink by passing boiling water pressurized by steam through ground up coffee.
It is named after the city of Mocha and was invented by the famous Italian engineer Alfonso Bialetti in the year 1933. Today, moka pots are produced—the same model in fact—under the name Moka Express by Bialetti Industrie.
You find themoka pot most often in Europe and Latin America. The design is unique and iconic, displayed in art museums around the world for its appealing shape and design. (Honestly, the more you look at it, the more friendly it looks).
You use a moka pot over a flame or anelectric range. Traditionally, these pots are made from aluminum, but some variants have been found made of stainless steel and other alloys.
The Brikka model by Bialetti is a modified moka pot that incorporates a valve that is weighted on top of the nozzle to allow pressure to build inside the water tank in a way that is similar to how a pressure cooker works.
The weighted valve serves as a pressure regulator. As the pressure builds, compared to the standard moka pot it reaches the level required for water to go through the ground coffee in a shorter period of time.
The catch is this, though: the weighted valve allows the pressure to build and the temp to rise higher before the liquid comes through the nozzle. In this manner, you get coffee brewed at a higher temp and pressure which results in a brew that is more like espresso and features more visible crema.
There are loads ofstainless steel moka potsout there for your consideration, but these are just two of the ones we will discuss. You can check out sources like Wikipedia to learn more about the history of the moka pot. It is a lot more interesting than you think, and really amazing to think that such a small appliance had such a big impact on the world and coffee culture as a whole.
You absolutely can! Fill with boiled water nearly to the safety release valve, and then install the funnel-shaped filter. You then add finely ground coffee to the filter and tightly screw on the lid to the base. You then put it on your stove—gas or electric—and bring the water up to its boiling point. Steam is created in the boiler.
A gasket makes sure that the unit is closed tightly and allows for pressure to build up in the lower section in a safe manner, and a safety valve will provide release in the event that the pressure becomes too great.
After this step, pour the hot water into the bottom pot and fill it to the bottom of the safety valve, regardless of how many cups you want to make. Spare a bit for the bottom of your espresso cup as warm cups make a difference in how we enjoy our coffee and the experience overall.
After this fill up the basket with an amount of coffee, and then flatten it out with your finger. Do not tamp it into the base of the basket, as the grounds should actually be loosely packed. The extraction is powered by the pressure created by the evaporation in the lower pot so compressing these grounds just gets you an over extracted and bitter tasting brew.
It is critical that you do not use soap as this will dilute the coffee oils from the coffee grinds that are inside your italian moka pot.Also make sure that you remove the gasket and the filter, running them under water and loosening any debris. Let it dry completely before you reassemble it.
Okay, this electric moka pot is really futuristic and cool looking. It is an efficient and fun way to make espresso the way it was intended, using the Moka process.
After that I attached the coffee container to the base and then simply plugged it in, pressed on, and waited for that sweet, sweet nectar to be ready for my mouth. Even though this is an authentic Italian product, those of you in North America will be happy to know it is 120 volts so you don’t need to buy an adapter to use this great moka pot.
You will need to replace the gasket on this and every other moka pot you get every now and again. You can get one of these in an Italian home supply store, on the internet, or even in a hardware store. Gaskets are pretty standard sizes that are measured by the number of cups the moka pot can make. Just check online if you do not live in a place featuring an Italian store.
This Bialetti Moka Express boasts more than 80 years of classic, elegant design and simplicity in technology. Remember, this is the king of all the moka pots still being made today! From the early 50s to the present, over 200 million moka pots have been made.
The process of making the coffee is a lot like the others, and I will outline it here. You simply add water, filling up the lower chamber with cold water right below the valve.
Next up, just add the coffee in there. You can insert the funnel and fill it with ground espresso.Do not tamp it, though. Remove any coffee grounds that may be remaining on the edge of your funnel. Then tightly screw the upper part of the pot onto the base. And be sure that you avoid using the handle for leverage.
Afterward, apply to heat. I put mine right on my stovetop, as you are supposed to. Make sure you choose the right burner for the bottom of the pot. Your flame should NOT come around the sides of the pot if you are using a gas stove. Heat it up until the water boils and the coffee comes out of the center post. Bear in mind you might hear a gurgling sound during this process.
When the top of the pot is full, just remove it from the stove. Before you pour the coffee, stir it in the upper chamber with a little spoon so that you equalize the different coffee layers for the most epic flavor you can imagine.
Be sure to grind coffee for moka use and make it slightly coarser than espresso. Did you know that smooth versus coarse grind really makes a difference? Look it up if you don’t believe me! This coffee business is no joke…and don’t get me started on conical vs. burr grinders. Just do your best to make it coarse.
One thing I would like to clarify is that the appliance is in fact called an Espresso maker, but remember, you are getting moka from this machine. The pressure applied is not enough for it to actually be espresso. Now this should not sway you from taking part in this amazing little product, but just keep that in mind if you’re buying it for a huge coffee nerd.
This review examines the ten-cup model. However, you can enjoy this lovely moka pot in 4, 6 or 10 cup sizes depending on your lifestyle needs. If you want to make less coffee just fill the base halfway to the safety valve with filtered water.
I realized Cuisinox advises that if you have a gas stovetop the flames should not come around the sides of the pot. My apartment has an electric range, so I didn’t have to worry, but do keep that in mind if you own a gas stove.
Extra gaskets and reducers come with these coffee pots, which is nice added value. It definitely keeps true to the real Italian way of making espresso. The stainless steel is tough and easy to clean. Any coffee lover would be delighted to have this great pot in their home.
Here we have a neat little Italian moka potthat can hold up to 12 cups of espresso…now these guys are talking my language! It looks absolutely super sitting there on your range top. When I unpacked the box for testing, I was delighted to see how nice it looked.
You can count on this particular moka pot being easier to use than some of the electric moka pots you might have heard of or seen. This is the authentic Italian way of making moka, using your stovetop. It takes only minutes and you can enjoy the amazing bold taste of espresso and moka right in the comfort of home. Can you imagine getting up and looking forward to this delicious treat each and every day?
The Primula design is eight-sided and features the design all great moka lovers have come to expect when it comes to a pot like this—that is, one that allows heat to diffuse perfectly and simultaneously optimizes flavors of espresso or even Cuban coffee.
Making the best brew you ever had is so easy with this great moka pot. The steps here are pretty easy—start by adding water to the base of the espresso maker, add the coffee, put it over medium heat, and then enjoy! Of course, it is a little more complicated than that, but it’s only four small steps to a world of amazing flavor.
I surely enjoyed my cups, and it just so happened that my mom and sister were over while I was testing it. They too enjoyed the rich taste that this Italian moka pot provided.
I think what I liked most about this is that it eliminates the hassle that sometimes comes with electric pots. I also found that it performed just as well as the Bialetti model, but at less of a price and with more moka made at the end of the day. Of course, you can get a Bialetti 12 cup model, but this one truly offers great quality that is on par with Bialetti.
The key is using the correct amount of heat, filling the water up just a wee bit under the valve, and screwing the two halves of the pot together very tightly. I highly recommend some silicone grippers if you have trouble doing this.
All in all, this is a really stellar moka pot that gives you a TON of great espresso to drink, the authentic Italian coffee experience, and lends your kitchen really great aesthetic. This pot is beautiful in so many ways!
Moka, moka everywhere! Finding the best moka pot is not so hard once you have an idea of what you want. If you love to have friends over, go with the last option and get the Primula 12-cup pot. If you just need to have that little bit of luxury in your life when you sip, go for the Cuisinox.
And if you just want the convenience factor, go for the Delonghi, which is the best moka poton the market. For the true, authentic way of Italian coffee, go for the Bialetti. No matter which of these great pots you end up with, you will get great value for your money and plenty of great drinks ahead of you for years to come. Go get some tiny cups and your favorite beans and get to work!
Making a great cup of moka pot coffee at home is a very simple and straightforward method of brewing strong, delicious coffee. This guide is meant as a base recipe for a 6-cup moka pot. Make sure to experiment with the strength of your coffee brew to get it tasting just how you like it.
Coffee brewed with this traditional method is concentrated and you can prepare a cappuccino or latte with the espresso style coffee brewed with a moka pot, however it can be very easy to under or over extract. How can you tell if your coffee is over or under extracted?
You’ll know it’s done when you hear some sweet bubbling sounds coming from your Moka Pot letting you know it’s ready to take off the heat and allow it to finish brewing while you get your coffee cup ready.
Keep trying out different variations on how to make your Moka Pot coffee even better by experimenting with different coffee’s , ratios and even water temperatures. All in the search for that balanced and delicious cup of comfort.
You probably already knew how to make your old trusty ‘Grecca’ aka Moka pot coffee but we want to know: how did your Moka Pot coffee turn out ? Tag us on social media , IG & FB and let us know in the comments how you drink your coffee and wether or not you were able to try this recipe out at home!
The great debate on wether to use Cold or Boiling water to preheat and brew your Moka Pot. The short answer is: There’s no wrong way just know that you will need to adjust your brewing time, as cold water tends to take longer brew. We use warm water to preheat and make the extraction flow quicker.
Honestly, the humble Moka Pot is so versatile that you can use it to make pretty much anything from lattes to cappuccinos and anything in between. Just always start with fresh coffee and fresh water and you’re good to go.
The short answer, no. You don’t want to tamp your coffee because these pots don’t like excessive pressure, which tamping would produce due to increased density.
One of the sweetest perks of a Moka Pot, it tells you when it’s ready. You’ll notice bubbling sounds and steam ( and not to mention the aroma! ) coming from the pot’s spout signaling it’s ready to remove from the heat, as it finishes percolating.
Note: You can only brew the amount of cups the Moka Pot is designed to brew at any given moment. For example you can’t brew a 3 cups recipe for a 6 cup Moka Pot.

Have you ever placed your Moka Pot on the stove and as time went by, and you were waiting for your coffee to brew, you started to wonder if your Moka Pot could explode?
Moka Pots are designed to withstand high temperatures and pressure, so it is very unlikely for them to explode. However, if the Moka Pot is not used properly, there is a small chance that it could blow up.
Thankfully, we are here to help. In this article, we will go over some of the things you should avoid doing with your Moka Pot to prevent it from exploding.
A Moka Pot can explode under the right (or in this case wrong) circumstances. If you take a minute to think about how a Moka Pot works everything will start making sense.
A Moka Pot is designed to be placed on a stovetop where the heat will eventually build up enough pressure to force the water from the bottom chamber all the way up to the filter basket and eventually the top chamber where your coffee will be waiting.
It is an espresso machine, without the fancy price tag, that uses steam and pressure to brew coffee. Espresso machines though, use around 9 bars o


 8613371530291