
wire rope 3d model free sample

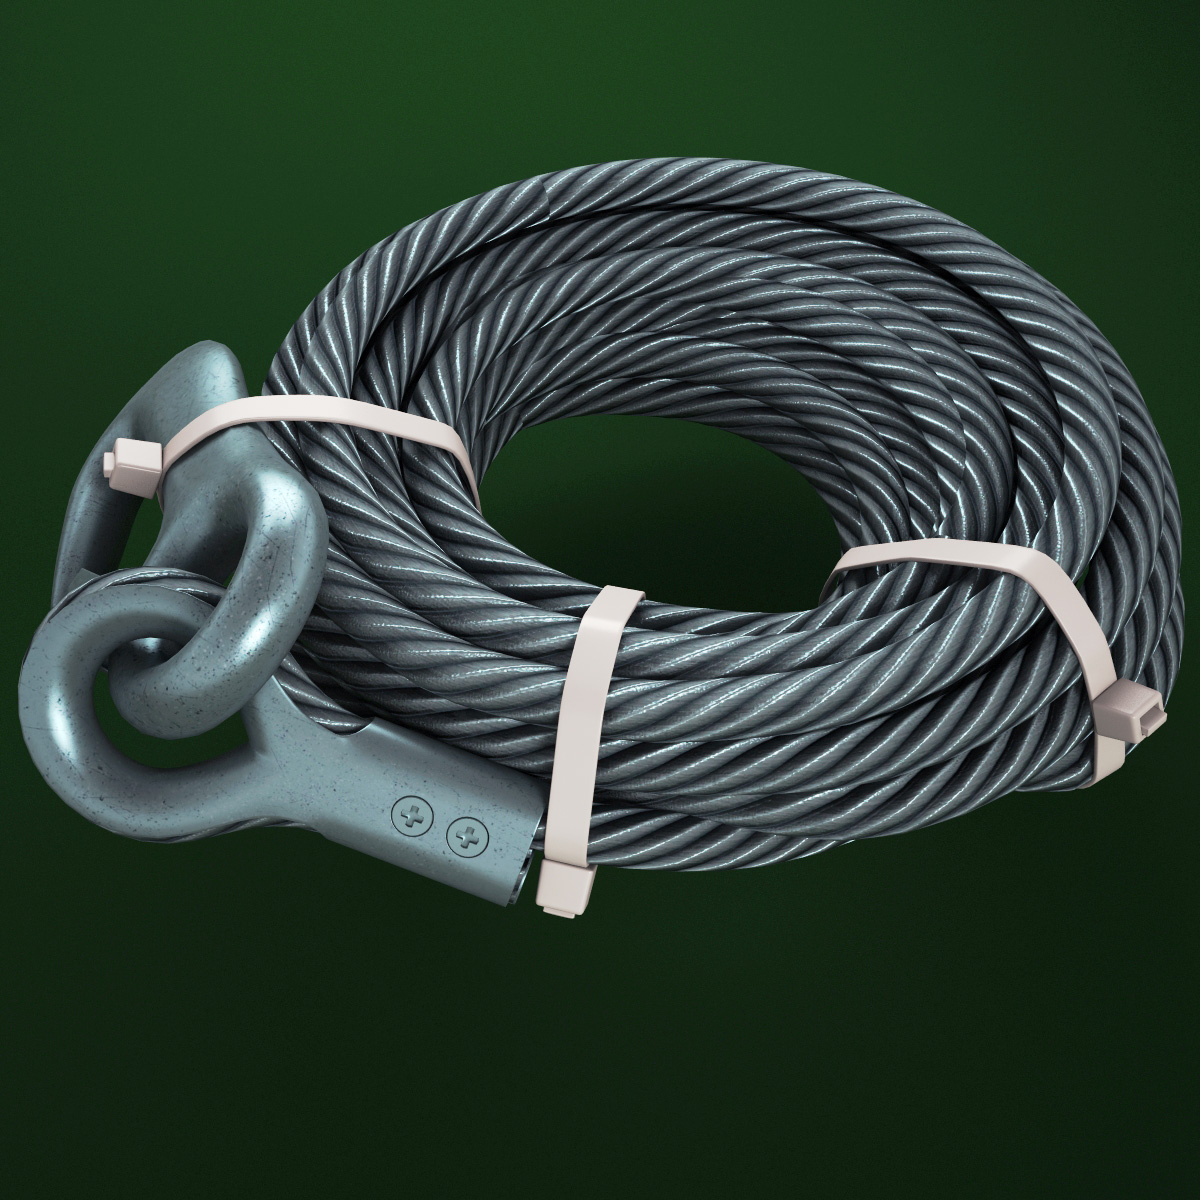
Wire ropes are used dynamically for lifting and hoisting in cranes and elevators, and for transmission of mechanical power. ...Wire rope is also used to transmit force in mechanisms. ...The rope is designed in Solidworks 2020
Two sizes for wire rope. One is 1/8in and the other is 1/4in. The three holes in the middle are for attaching it to a drive rod from a servo motor to lift things up. ...I used 3mm metal rods to attach it to the drive rod.

Not seeing the model you need? We know how important 3D models are for your projects. If you do not see the file you need, email us at 3D@lukelampco.com and we will ensure that we get it to you ASAP. Our standard turnaround time is two weeks.
Need a different file type?All of our models are offered in STEP, 3D DWG, and SketchUp formats. If you need another file type or you are having issues opening a model, feel free to contact us at 3D@lukelampco.com so that we can assist.
Working on a custom project?When required, we are happy to assist in developing a model for a custom fixture once the project has been initiated. Please inquire for more information.
Need a model for a Tracer Loop installation?Due to the custom nature of Tracer Loop Installations, we regularly assist with model development. If you’re interested in a Tracer Loop install and would like assistance with modeling, please feel free to contact us! To get started, we will ask for the following details:The desired mounting width and drop height for each loop, or
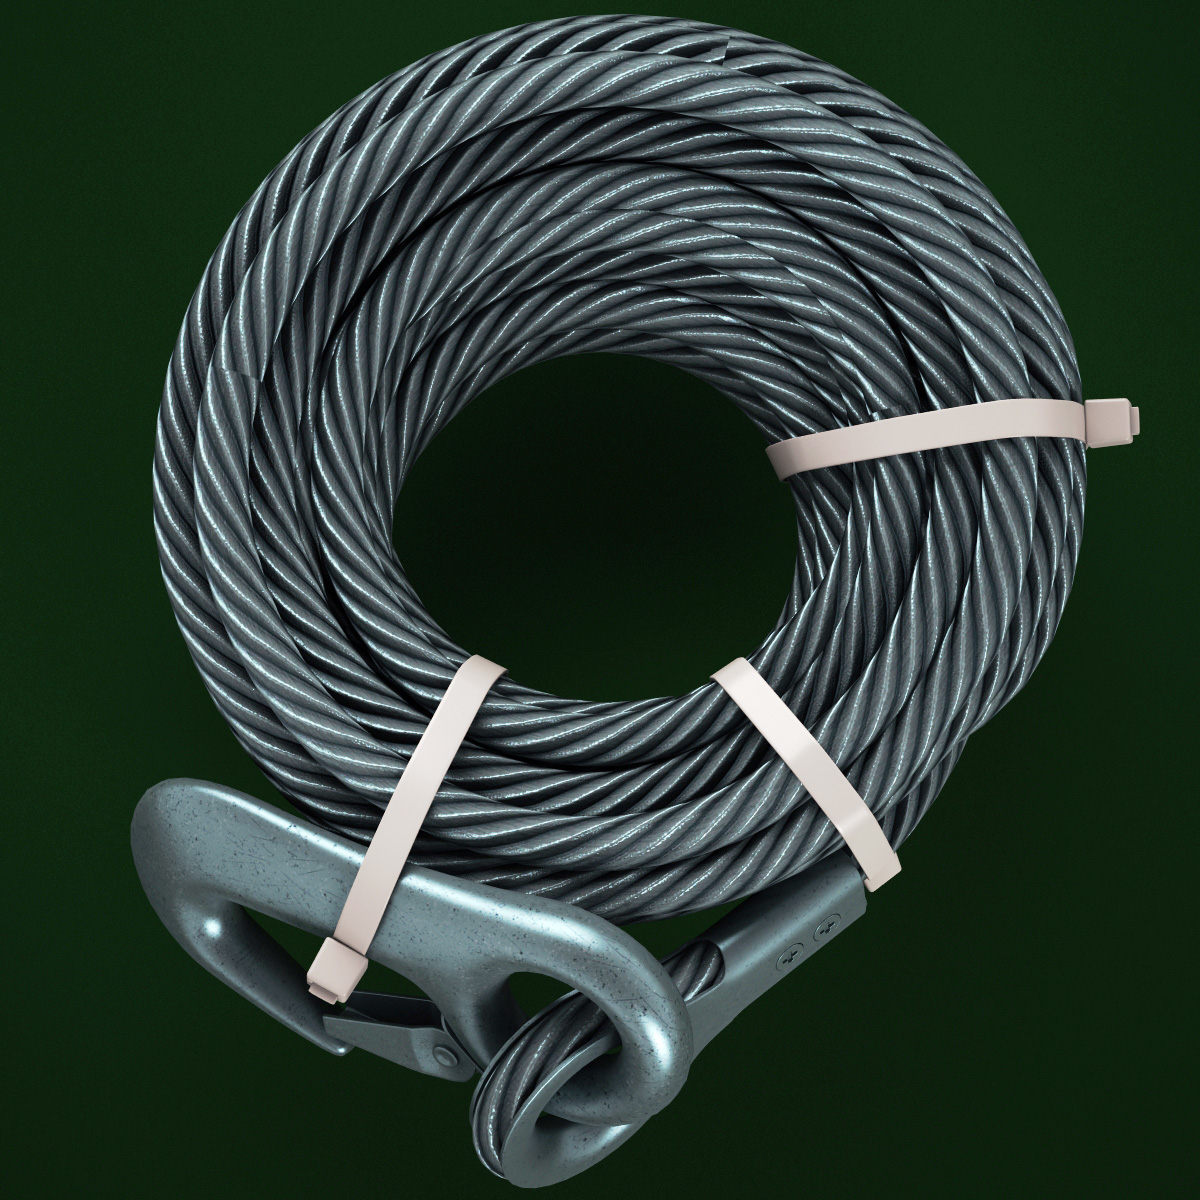
3D model: Steel Wire Rope is a high quality model to add more details and realism to your projects. Detailed enough for close-up renders. Comes with detailed textures(4096x4096)…

it looks like you managed to make a length of rope about 2-3 feet long using your machine on that table. If you wanted to make a longer rope using this device in the same amount of space is that possible, or would your ends of the machine simply need to be farther apart?0
As a final comment, I also make machines and automation components with my 3D printer, and wanted to make sure you knew about the performance polymers available for printing things like gears. PEEK is on the extreme end of things, pricey and not user friendly, but tough enough for a Mars mission. There"s also glass filled nylon (glass microshpheres or silica fume, I think), carbon fiber dust filled nylon (better properties than the carbon filled PLA), also either POM or polycarbonate make excellent gears even down to 0.5 modulus with reliable results, these have teeth about 1/5 the size of your black ones.
After more printing experience, I look back on the comment I made to you with a little shame, it looks perfect on second and more competent analysis. I also want to offer you a HUGE thanks! Your machine is amazing for a niche application of audiophile wires, patch cables, anything carrying a signal from here to there... What do I mean? Well, if you open your Ethernet cable, you will see 4 twisted pairs. Why do this? Electricity and magnetism are inseparable, and a straight line carrying an electrical signal, generates a magnetic field on the normal (90º) to the vector of electrical signal travel. OK, so? this magnetism also can pair up with other random fields floating about, beamed from radio towers, your microwave, wifi router, speakers, etc. basically, if we could see all of it, it would be a Timothy Leary lolapalloza of kaleidoscopic chaos, moving at crazy speeds. OK, we can call all that a source of noise. Twisting the pairs of wires sort of balances it out. sending the signal down multiple wires, and twisting them in a more complex manner, like 5 lines interbraided to carry 1 signal on 2 and ground on 3 or vice versa, on silver filament wire, in thin teflon tubes, each shielded with braided copper mesh, then sleeved stylishly in braided wire wrap, and, wait for it.... fed into your machine! I know how to sell this, in other words. I would like to invite you to join me on this, since you are the source of tech, I can either offer you some royalties or a partnership. Don"t get too excited, I can see this as a good easy sideline, but not a trophy real estate buyer. If this is interesting, please contact me directly at mark at consultchem dot info. This isn"t a polite shakedown for venture capital, I plan to ask for that together with you from any number of third parties that do this for a living.
Impressive! I"ve printed this and am beginning to use it to make miniature bell ropes, complete with woolly sallies. A bit rough at the moment - but I"m learning!
5: When buying aluminium angle, they came in 1m lengths. I decided to get two, rather than cut one. Just as well I did. The traveller ("rope tower") needs a great deal further to move than the 370mm length quoted. Laying up a rope from fibres (not simply cable-laying as in the example), you get at leat 20% shrink. So a 3m. finished cord is going to need to start at 4m and the traveller will move at least a metre.
Having said all of that, it"s a great bit of kit. I suspect I"ll need to make a new top (what you call a "Rope Seperator" qv) to accommodate the thicker woven sally bits - and I think that, though I have more than doubled the counterweight to account for the pulley system, I think it could go heavier.
As you use it, if you don"t know, do some research on rope making. Find out the history of it all and, above all, try to source materials to really make a rope, rather than just re-lay string! In particular, look at the difference between left- and right-hand lay. At the components of a rope and see how a filament becomes a yarn and a yarn becomes a strand - and how "S" twist alternates with "Z" twist. All fascinating stuff!
Hmmm... I"d be careful with that. If you use the cable as one of the strands, I think you"d be stressing it too much. With uneven strands, it"ll look a rather odd rope anyway.
If you were to drill a suitable size hole in the cord slider (called a "top", I believe), you could probably wrap three rope strands around a central electric wire. That will still put quite a twist into the wire. It would be worth experimenting with a light electric cable that is, itself, twisted and then to arrange your rope maker to give a left-handed (anticlockwise) twist by running your drill in reverse. That will then UNtwist the cable, which will stress it a little less. All you can do is to experiment - but be gentle with the electrics!ReplyUpvote
I have seen some rope making in different places but having a how to along with files all in one instructable is a game changer for someone like me, who is interested, but the barriers of making, finding etc would mean a proper investigation wouldn"t happen. .
Very interesting indestructible! What is your 3d printer? I do not have a 3d printer, but am looking at getting one some day as I see more and more uses for it. Good job building this instuction and the video.. seeing helps a lot I think.
All the patterns are positioned in a way that a linear pattern will provide a longer element without messing up the braid and rope patterns, if not please contact us for personalized measurements or a sample of the 3d model.


 8613371530291