
build your own power tools free sample
The corded drill is ideal for jobs that require high power and electrical autonomy that battery drills cannot provide. For cordless drills, they can be charged with portable batteries and are generally intended for routine work or jobs that require high mobility. They are easy to maneuver since you need no wires, which offers you an unlimited working range. The rotary hammer drill is versatile and allows you to perform drilling work on different materials such as concrete or stone.
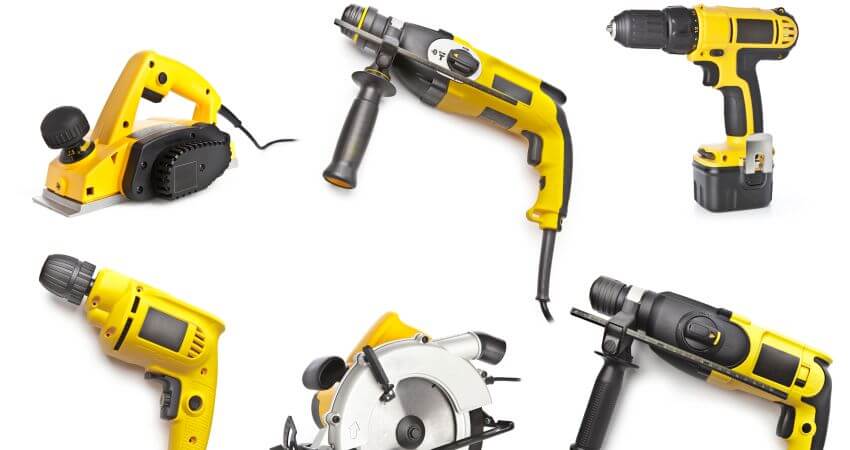
If you are a handyman and you look for power drills to add to your toolbox, then you are at the right place. We present you a complete selection of trending wholesale free sample power tools. You can choose your drill from a wide range of electric drills. These tools are functional and versatile for a multitude of jobs. You will explore different categories of free samples power tools: electric drains, hand drills, hammer drills and a lot more! The power drains are essential to have for any DIY enthusiast or professional. And they are intended for jobs requiring autonomy and power.
Alibaba.com features a large collection of sturdy and efficient free sample power tools for all types of drilling purposes. These reliable and economically priced free sample power tools are ideal for all types of residential as well as commercial purposes. These powerful free sample power tools are impact drills that are lightweight and can drill all types of surfaces including but not limited to steel, wood, and concrete walls. Buy these incredible products from the leading suppliers and wholesalers on the site for unbelievable prices. The superior quality free sample power tools on the site are made from sturdy materials that enhance the sustainability and durability of the products. The sturdy body of these free sample power tools provides value for money on the variety of impact drilling works they perform.

This has become standard “influencer marketing” type language, and I greatly dislike it. Wow, I can keep the tools this brand wants exposure on? Gee golly, my good luck!
That’s why “digital marketing,” “social media marketing,” and “influencer marketing” contacts’ offers, where I can “keep the tool for free in exchange for content,” always trigger an eye-roll from me. “Free tools?!” stopped being a novelty for me well more than a decade ago.
In this case, things didn’t work out, as the brand is entirely focused on sending predetermined tools to trade-specific social media influencers. But if that wasn’t the case, there are too many conditions that I couldn’t agree to.
I’m simply unaccustomed and unwilling to treat tool samples as a form of compensation. I can’t sell tools, and I have all the tools I need for project or ToolGuyd use.
I have outright declined “tools for exposure” offers over the years, but more and more brands of interest have been framing sample opportunities with similar terms and conditions. What’s the alternative, for times when I am interested in a review opportunity, but not under conditions or requirements?
I could also buy the tools myself, and in some cases I have, but most of the time the tools or brands are interesting but not enough to win an allocation from my sample budget.
I also don’t treat or accept tools as a form of compensation. Maybe I can forgive the language if there are no conditions or requirements, but there are almost always conditions.
I don’t know how to work with marketers who think they’re paying for exposure with tools. While many tool brands might hope for exposure, and maybe even expect it, that’s very different than outright requiring content in exchange for tools.
So, by requiring a certain number of posts or by a certain time, and treating tools as “you can keep it after you post a review” compensation, brands can increase the actual short-term exposure for a given number of review samples.
But what about channels like ToolGuyd that are willing to provide free exposure? Or seasoned influencers who recognize content requirements as typically being part of paid/sponsored arrangements that involve a check instead of “tools as compensation”?
Conditional review opportunities, with posting requirements and tools treated or leveraged as compensation is not a good middle ground strategy. Its motivations make sense, and some content creators might be okay with it, but it’s still unfavorable practice.
To put it bluntly, earned media reviews shouldn’t have any conditions or requirements tied to them, and if going the paid media route, tool samples aren’t a valid form of compensation. There are exceptions to this, but I’m talking about $10-50 hand tools, not $1000+ shop equipment samples.
My cordless drills are finally organized! My tools used to be in a disorganized pile in the corner of my shop. But not anymore! I just used these free plans to build a drill storage rack. Now my drills are on display, organized and easy to find. So glad I made this! #drill #tools #organization #storage #workshop #workshopideas #smallworkshopideas #sawsonskates
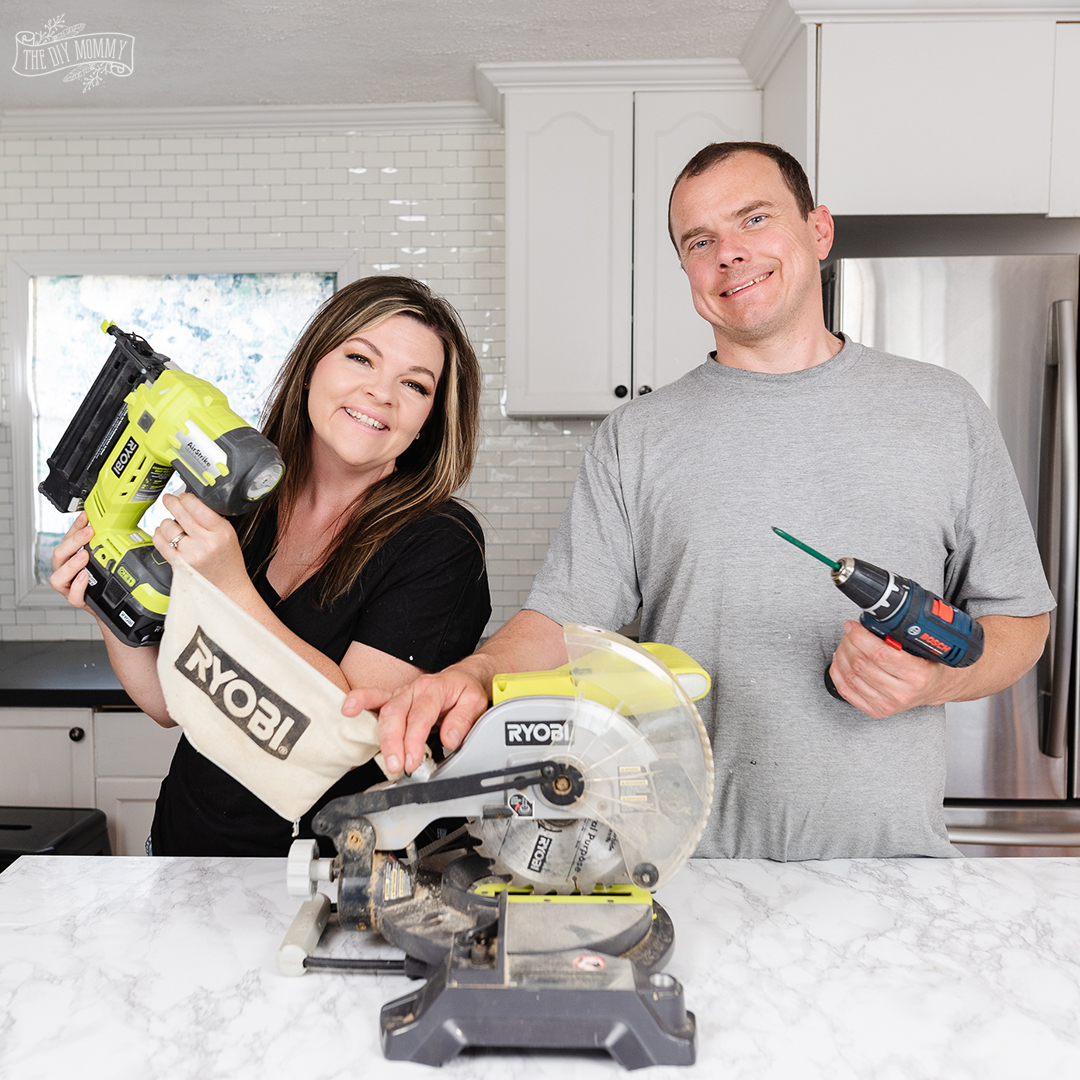
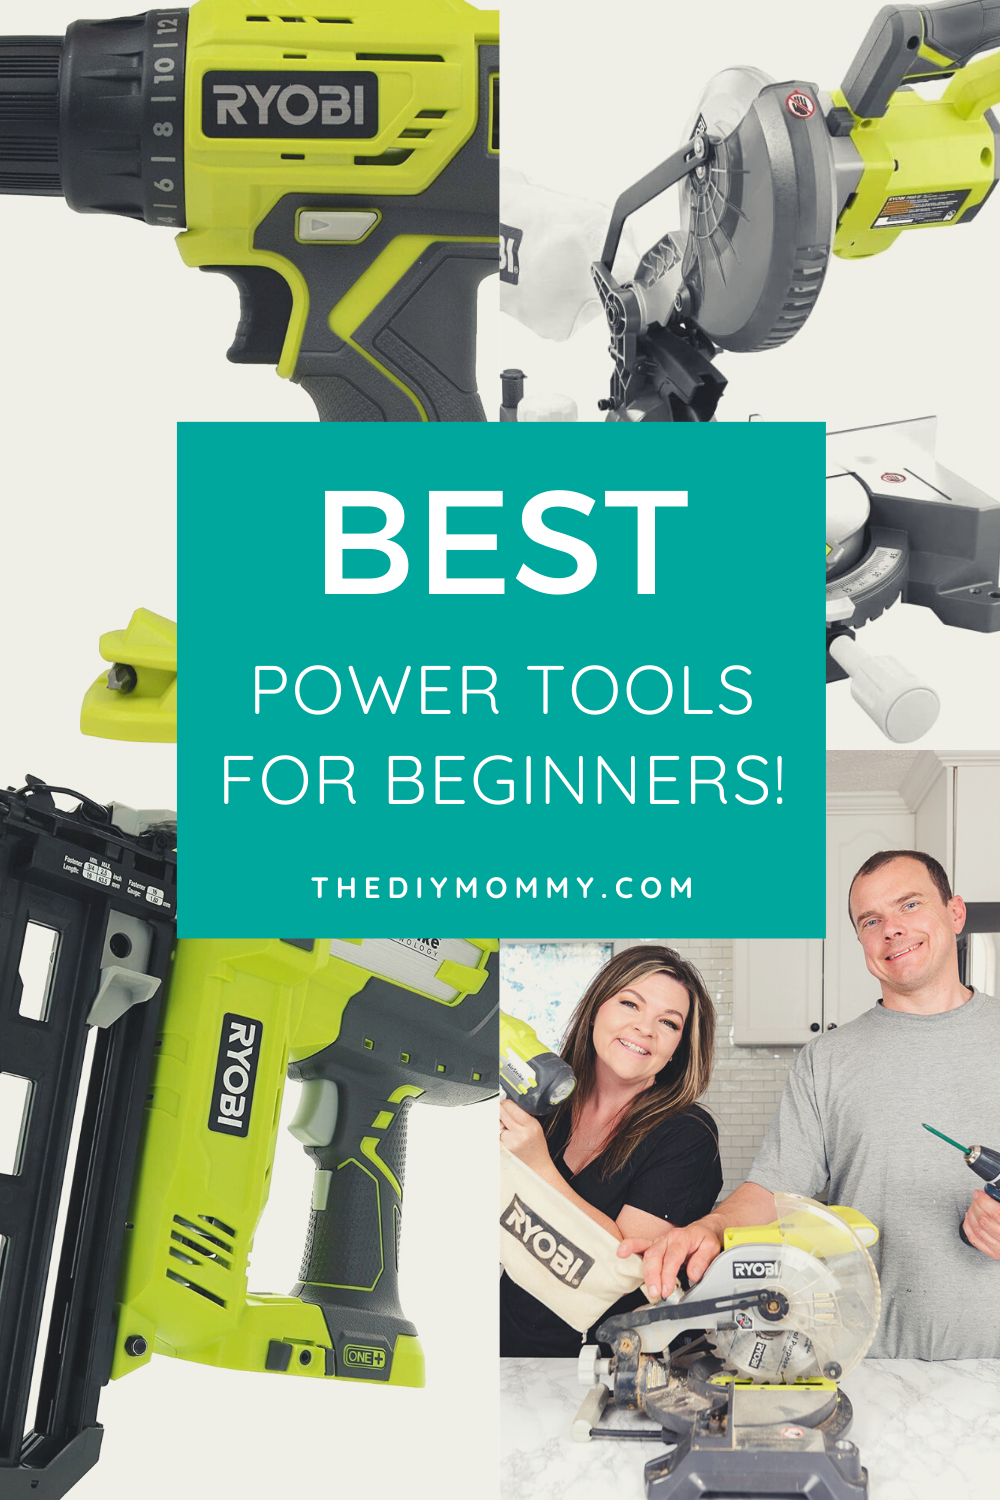
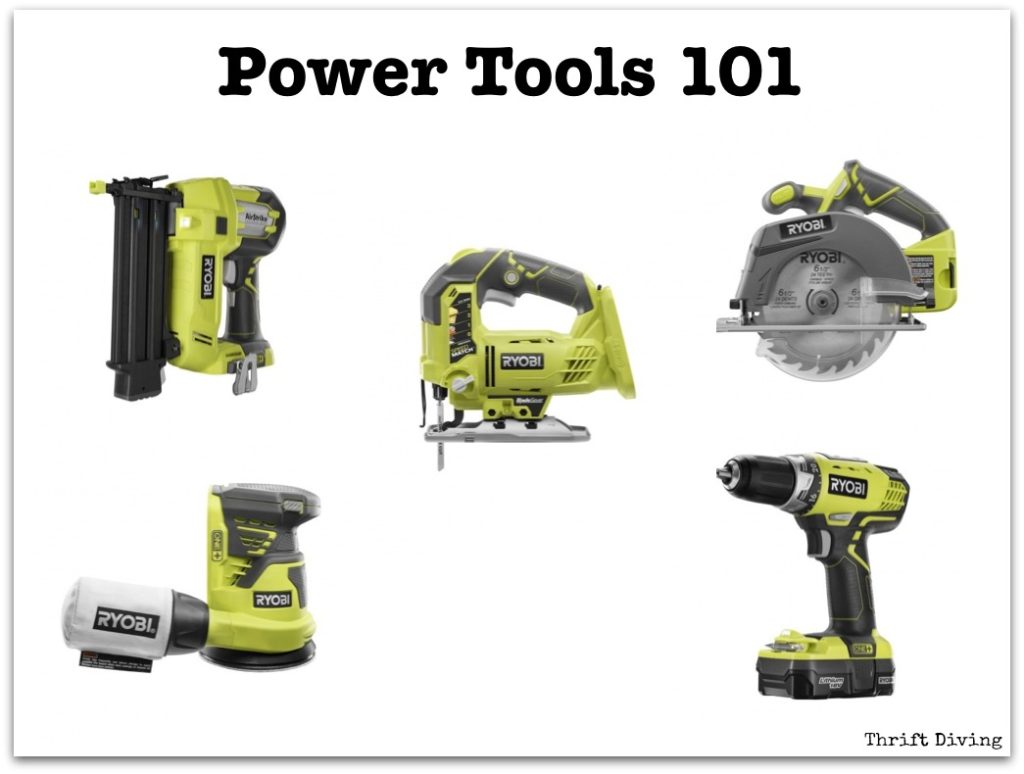
It’s been more than a year since I started DIY projects in my home. I remember when I purchased my first Ryobi power tool, a 18-Volt Cordless Ryobi brad nail gun and used it to fix an area of our kitchen range hood. I was nervous up to the point when I triggered the first nail. It wasn’t long before I felt comfortable using it.
There are many brands of power tools and it can be intimidating figuring out which brand or model of a particular tool is the best bang for your buck.
I’ve received questions on must have power tools for your home to buy as a DIY beginner looking to take on home improvement projects. Let me be honest with you: Power tools are EXPENSIVE and not knowing which ones are worth buying can be frustrating. I get it!
There is the option to rent power tools at Home Depot, for DIY projects if you don’t see yourself constantly working on new things around the house. However, you need to analyze the cost savings of owning versus renting.
Investing in high performance power tools comes with trial and error and I’m still growing with my own tool collection.For example, I have purchased some tools that didn’t function as I had expected and I had to purchase the same type of tool but from a different brand.
I hope that by sharing some must have power tools with you today, you’ll have less uncertainty about which power tools you should invest in as a new DIYer.
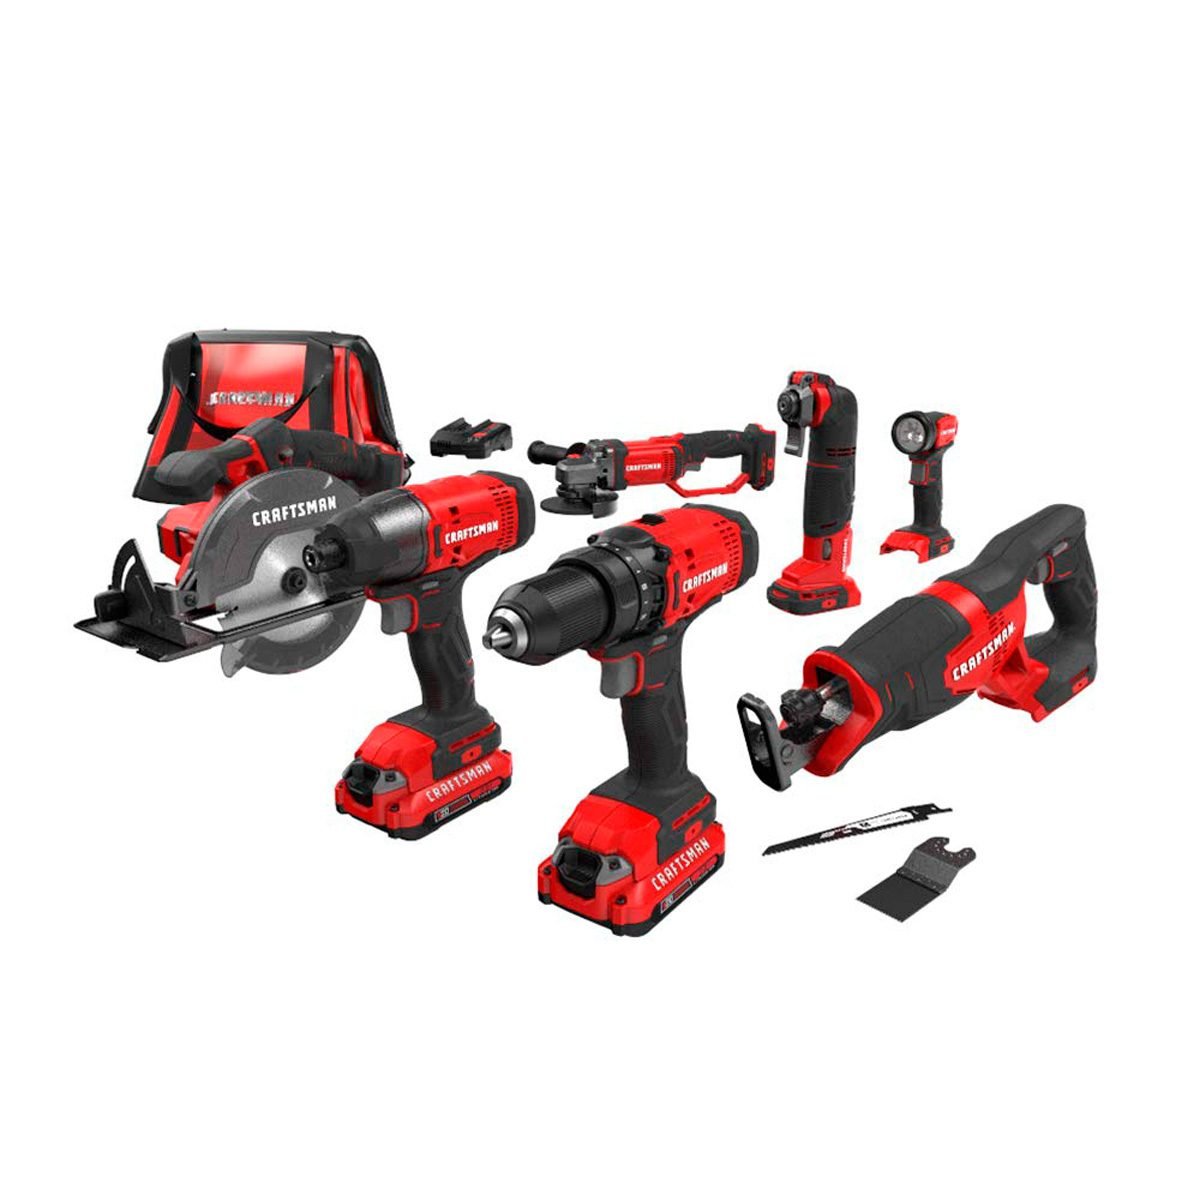
I own three power drills by different brands – one Ryobi Power Drill and two Black + Decker Power Drills. I suggest a cordless option with a battery charger and bag, as it allows for mobility and storage.
This is an essential tool for many DIY projects as it is needed to drill holes and allows you to fasten screws more tightly and efficiently than by doing it by hand. Another great tool to own is an impact driver. They are available as a combo kit with power drills. Check out this set!
A cordless Ryobi Brad Nail Gun was one of the first must-have power tools I purchased, as I mentioned earlier. I decided on a cordless model to avoid getting an air compressor. This tool is amazing!
I recommend you to take your time to purchase these power tools for DIY as your budget allows. You can look out for great deals, and if you can swing it, you can purchase these tools in sets to further help with affordability.
The next time you are at a home improvement store trying to figure out which power tools to buy, I hope this guide will make your decision easier as a DIY beginner.

Hands down, this is the power tool I use the most in my life — both professionally and at home. For everyday tasks, such as installing shelves or hanging a baby gate, to building an entire deck, a cordless drill is invaluable.
The best cordless drills are powered by lithium-ion batteries, so even small drills carry a big punch. I use a large, powerful model that can handle a half-inch bit for larger construction projects, as well as a petite model for hard-to-reach spots.
If you have no power tools, this should be your first purchase. If you’re thinking about gifting one, be sure to include a set of drill bits for pilot holes, along with an assortment of driving bits. Screws have evolved way beyond the Phillips-head style, and you’ll want a set with a variety of star-shape drivers.
This lightweight power tool is an oldie but a goodie. Its circular blade allows you to rip long lumber lengthwise or cut big panels such as plywood. An adjustable blade height allows you to score wood or cut all the way through. In the last few weeks, I used mine to build a rustic table using huge timbers and notch a post for a deck railing.
The worm drive version is an upgrade in higher-end models that gives more power and torque. But for occasional use, a simple model like the classic Skilsaw remains a good choice. The brand is so ubiquitous that circular saws are often generically called “skilsaws.”
The thin disks designed for cutting are super useful for trimming metal pipe, rebar, hog wire or tile, or clipping off rusty nail heads. The fat disks designed for grinding are useful for jobs such as smoothing rough spots in concrete, removing rust and sharpening tools.
The construction industry has made a dramatic shift to larger engineered fasteners that are installed with an impact driver. Instead of lots of small screws and nails, pieces now are frequently joined with larger screws that have hex-shaped heads. They’ve also replaced large lag screws — because why hand crank something for 10 minutes when your power tool can do the work in 10 seconds?
Impact drivers work like a torque wrench, applying a series of short powerful bursts to make something turn, without destroying the fastener or the tool’s motor. While you can often use a regular drill for an engineered screw, you will burn out your drill a lot faster.
This is one of those tools that everyone should own, from the general contractor to a DIYer. Sanding anything large is agonizingly slow, tiring and sloppy. An electric sander can do the work in a fraction of the time and the end result will look superior.
Sometimes there’s just no other power tool more suited to trimming out a little detail or cutting an accurate curved line. Their specialty is cutting through thin and lightweight material with inexpensive reciprocating blades that can be used on wood, metal and plastic.
If you’re remodeling, you are guaranteed to encounter issues where none of your other tools can quite solve the problem. That’s the time to reach for the oscillating cutter.
Wondering which brands or models to buy? There are plenty of reviews online that cover the ever-changing world of power tools. But this is the rule of thumb I use: Spend your money where it will get used. If you plan to use something weekly, opt for the best model you can afford. If it will only be used occasionally, choose a name-brand, mid-price option and you’ll likely be happy with the tool.
Reciprocating saw (aka Sawzall): This tool is helpful if you’re doing a large demo or remodel project. It can quickly cut through wood, metal and other material. But there are other tools that can accomplish the task.
/power-tools-woodworkers-should-have-3536541-FINAL1-5bb7c2bc46e0fb002692907b.png)
Hand and power tools are a common part of our everyday lives and are present in nearly every industry. These tools help us to easily perform tasks that otherwise would be difficult or impossible. However, these simple tools can be hazardous and have the potential for causing severe injuries when used or maintained improperly. Special attention toward hand and power tool safety is necessary in order to reduce or eliminate these hazards.
Pneumatic power tools must be secured to the hose in such a way as to prevent accidental disconnection. Safety clips or retainers must be securely installed to prevent attachments from being inadvertently expelled.
Appropriate personal protective equipment, such as safety glasses with side shields, face shields, leather work gloves, or leather work boots must be worn when using hand tools.
Portable power tools are designed for a wide variety of uses. Circular saws, jigsaws, drills, hammer-drills, sanders, grinders, routers and numerous other power tools, save time and effort on the job. The increased use of power tools heightens the need for awareness of the hazards they present if not operated properly. While each type of tool has its own unique hazards which must be taken into account, the following safety rules are common to all power tools.
Employees using hand and power tools may be exposed to falling, flying, abrasive and splashing objects, flying dusts, fumes or mists, vapors or gases, and should be fitted with the appropriate PPE necessary to protect them from hazards.
All hand tool and portable power tools and similar equipment, whether furnished by Caltech or by or the employee, will be maintained regularly and kept in a safe working condition.
Hand tools are non-powered or operate only through physical exertion by hand. The greatest hazards posed by hand tools result from misuse and improper maintenance.
A portable tool is one that requires a power source to operate, such as electric, pneumatic, liquid fuel, hydraulic, explosive-actuated, and powder-actuated device or power supply. Power tools can be hazardous if used improperly.
Power tool general precautions include the following:Read the owner"s manual to understand the tool"s proper applications, limitations, operation, and hazards
Electric power tools will be either three-wire grounded or double-insulated and must be listed by Underwriters" Laboratories or another recognized listing agency.
Disconnect tools and ensure a zero-energy state when not in use, prior to servicing and cleaning, and when changing accessories such as blades, bits, and cutters.
Remove all damaged or defective portable electric tools from use and tag them: "Do Not Use." If not repairable, cut off power cord and discard/recycle.
Always plug cord-connected, hand-held electric tools into ground-fault circuit interrupter (GFCI)-protected receptacles or in compliance with the facility"s assured electrical grounding conductor program.
Hazardous moving parts of a power tool need to be safeguarded. For example, belts, gears, shafts, pulleys, sprockets, spindles, drums, fly wheels, chains, or other reciprocating, rotating, or moving parts of equipment shall be guarded if such parts are exposed to contact by employees.
Power tool guarding precautions include the following:Always consult supervisor when the manufacturer recommendations for guarding a specific power tool are not available or cannot be implemented.
Operate power tools only when all guards are in place and properly attached according to the manufacturer"s recommendations, and are functioning properly.
All hand-held power tools will be fitted with any one of the following safety switch methods as appropriate for the particular tool:A momentary contact "on-off" control.
A pressure switch which requires constant pressure to run and will shut off when the pressure is released, such as required for hand-held gasoline-powered chain saws.
Portable electric tools will be of the approved double-insulated type and used with an approved grounding device such as a GFI (Ground Fault Indicator) to prevent the unlikely event of an electrical shock.
Pneumatic tool precautions include the following:Pneumatic power tools will be secured to the hose or whip by some positive means such as a tool retainer to prevent the tool from becoming accidentally disconnected.
Safety clips or retainers will be securely installed and maintained on pneumatic impact (percussion) tools to prevent attachments from being accidentally expelled.
All pneumatically-driven nailers, staplers, and other similar tools provided with automatic fastener feeds which operate at more than 100 psi pressure to the tool will have a safety device on the muzzle end to prevent the tool from ejecting fasteners unless the muzzle is in contact with the work surface.
The fluid used in hydraulic powered tools will be fire-resistant and must retain its operating characteristics at the most extreme temperatures to which it will be exposed. The manufacturer"s safe operating pressures for hoses, valves, pipes, filters, and other fittings will not be exceeded.
Powder-actuated tools are also known as "explosive-actuated." Such tools are actuated by explosives or any similar means, and propel a stud, pin, fastener, or other object for the purpose of affixing it by penetration to any other object.
Fasteners will not be driven directly into materials such as brick or concrete closer than 3 inches from the unsupported edge or corner or into steel surfaces closer than ½ inches from the unsupported edge or corner, unless a special guard, fixture, or jig is used. (Exception: Low-velocity tools may drive no closer than 2 inches from an edge in concrete or ¼ inches in steel).
If you work with a lot of tools, you know they can quickly get disorganized. This happens to mechanics and carpenters at work, to businesses where people share equipment, to drivers who keep a tool box in their trucks, and to homeowners who have tools for work in the garage or the garden. In some large workplaces, tools can even get stolen. The key to keeping everything where it needs to be is figuring out how to organize tools logically.
In many cases, the best tool box organizer is the one you customize yourself. Toolboxes and tool chests are all a little different, and the ways people use tools and the frequency with which they use them vary. The first step to getting organized is selecting a foam tool kit or other tool foam product. Then you can tailor this foam to fit your needs. You can create a single tool tray organizer or drawer organizer. You can also cut foam for every drawer in your tool chest.
No matter what type of foam liner you"re working with, you"ll likely have to cut it to fit the drawers of your tool chest and to fit your tools. To maximize your foam and achieve the best possible layout, don"t start cutting until you have a plan.
First, lay out every tool you want in a drawer on top of the foam. Stop and consider what the best arrangement will be. Try putting tools you use together near each other. You might want to place tools you use more frequently closer to the front of a drawer were you can access them more quickly. Once you have the layout you want, trace all the tools using a pen, pencil, or marker. Then you can start cutting.
This tip sounds simple, but it"s some of the best advice about cutting tool foam. If you start cutting without a plan, you"re more likely to space tools poorly and end up wasting material.
Toolbox foam comes in several styles, sizes, and colors. Some types of foam are single color - often called foam drawer liners - and some contain two colors. These foam tool organizer kits with two colors have a dark top layer of foam (usually black or blue) and a bright bottom layer. When you cut out the shapes of your tools on the top layer and place it over the second layer, that bright second layer shows through. This arrangement functions like a shadow board (which people tend to associate with hanging on walls; whenever a tool is missing from your drawer, you"ll know immediately it"s not where it belongs.
Tool box shadowing foam takes tool organization to the next level by calling out what you"re missing. This is especially useful if you take your tool box with you to more than one location. At the end of the day, you can pack up and know you have all the tools you came with. If you work in an area where foreign object damage (FOD) is a concern, shadow boards can make a big difference.
When you outline small tools, drawing straight lines probably won"t be a concern. You can easily trace the tool itself. If you need to draw long, straight lines to cut a piece of tool foam to size, though, a straight edge such as a drywall T-square can make the task a lot simpler.
Most foam tool organizers and tool foam sheets are made from cross-link, closed-cell foam that"s resistant to water and chemicals. They"re made from durable materials, but that doesn"t mean cutting the foam will be too difficult. You just need the right tools.
In some situations in makes more sense to cut a strip through all of the tools in a drawer so you can pick any of them up easily. This works if you have a drawer of wrenches, for example, where you have wrenches of many sizes placed close together. The wrenches might be too close together to use the hole punch method, and the horizontal strip method will likely create a cleaner finished product.
Tool box foam sheets work great for organizing smaller tools that would otherwise be thrown together in a drawer. When these tools are neatly arranged using foam, you can find the size you need without digging through a jumble of tools. This method is useful for creating DIY wrench organizers, socket organizers, and screwdriver organizers. You can see an example of a pliers organizer below.
When you lay out your small tools on the foam, you can maximize space by fitting the tools close together. Either place them next to each other in a line facing the same direction or fit them together like puzzle pieces. You may want to try several layouts before settling on the best option.
Another method for organizing drawers with small tools is to alternate the direction of tools to maximize space. This works well for pliers, screwdrivers, and other tools with a narrow end and a wider end with a handle.
It"s often a good idea to maximize space this way, but you don"t have to cram everything into a drawer if that doesn"t make sense for you. Sometimes spacing tools out among multiple drawers will be more logical for your application. Select a layout that gives you the organized tool box you"re looking for.
When you plan tool box foam layouts for power tools, don"t forget to make spaces for cords and batteries. Cutting out spaces for these accessories will prevent them from getting lost and it will prevent damage to cords. Cutouts for cords don"t need to be perfectly shaped, but they do need to be big enough to fit the cord. Make sure to lay the cord out and trace it so you"ll be able to fit it into the space without trouble in the future.
Foam tool kits work well for small to medium-sized tools, but for larger tools such as drills you"ll probably need thicker foam. It also makes sense to use this thick foam in the deeper drawers of your tool chest so tools don"t sit too low in the drawers.
Thick tool control foam is often constructed of thinner layered foam sheets glued together, so you can cut out several of the layers and fit a tool into the foam without cutting all the way through the foam. This means your tools will be protected from damage on the bottom, too.
Another way to save space in your tool chest is to turn both foam and tools on their sides and create an upright tool organizer. This works well for smaller tools such as wrenches, as you can see in the image below. It can even provide the extra space to store both your metric and standard wrenches.
To do this, measure the depth of your tool drawer and your tools (when they"re on their sides). Make sure the tools will fit in the drawer at this angle. Next, measure strips of foam that are the length of your drawer and whose width matches your drawer"s depth. For example, if your drawer is three inches deep and 15 inches wide, cut strips that are 3" x 15". Now you should cut slits into the foam to fit your tools into. Cut the slits deep enough that the tools fit snugly. You will probably want to measure this depth and test it with one of your tools. Before you cut all the slits, count how many tools you have and space the slits evenly.
When you store more than one kind of tool in a drawer, you might want to consider using different colors of tool box foam inserts for the sections where you will store different tools. For example, you could use blue foam for screwdrivers and black foam for pliers. If you use foam tool kits with two layers, the entire top layer could be black and the bottom layer could incorporate several colors of foam such as red and yellow. That way people can see even from a short distance away whether a screwdriver or pliers is missing from the drawer.
Color coordination is especially useful for 5S programs or for workplaces where people share tools. It allows everyone to quickly find what they need and then return it where it belongs when they"re done with it. Less wasted time and wasted motion.
If you have a Dremel rotary tool with a depth accessory, you can turn it into a plunge router to carve out spaces in your tool foam. This will take you beyond having a foam cutting tool to having a foam shaping tool capable of more detailed work. This is useful when you want to carve into thick sheets of foam or when you want to have a very snug fit for you tools. When you use your Dremel as a plunge router, you can cut varying depths into the foam so it molds to your tools, making for a very custom fit.
To do this, install a multipurpose bit in your Dremel and then screw a depth accessory over it (Dremel rotary attachment part number 565 or 566, depending on which model Dremel you have). By adjusting the depth accessory as needed, you can then carve out foam using the bit. To achieve the best fit for your tools, carve slowly to get the shape and depth you want and test out how the tool fits the shape as you go along.
While this method of cutting foam is ideal for thick layers of foam, you can also use it to cut into two-layered foam tool kits. You might want to do this to get a snug fit for taller tools while still having the shadow board effect with a bright background layer.
This might sound bizarre, but if you don"t like tracing, here"s an alternative for outlining tools on foam that involves an oven. Keep in mind, this only works for tools without rubber or plastic parts.
First, mark where you want your tools on your foam (even if you don"t trace them, at least indicate their general position). Then "bake" your tools on a cookie sheet for 30 minutes in a 350-degree oven. Carefully remove the hot tools one by one and place them on the foam sheet. The tools will melt the foam beneath them, creating indentations. (If you don"t have access to an oven, you could also try using a toaster oven or heat gun to heat up the tools.)
The methods we"ve described above for using bright colored foam to highlight missing tools help people identify where tools belong. It can also be helpful in shared tool storage areas to add small labels next to each tool"s cutout naming the tool. This can make finding and returning tools even faster, especially for people who may be less familiar with the current tool arrangement or the tools used.
An organized space tends to be a more productive space where fewer mistakes are made, and organizing your tools is a simple way to make your space an easier place to get work done. All spaces are unique, though, which is what makes a customizable organizational tool like tool box foam a solution that can work for almost anyone.
To get started, find appropriate foam products. We recommend checking out foam tool organizers (which come with two sheets of contrasting colored foam), foam drawer liners (a single sheet of foam), and thick foam tool organizers (for deeper drawers or larger tools). For safely storing items that could be damaged by electro-static discharge, take a look at ESD anti-static thick tool foam organizers. You can also get the appropriate foam cutting accessories (https://www.creativesafetysupply.com/foam-cutting-accessories/), too.
Whether you run an auto mechanic shop, a manufacturing facility or any other business that uses tools, you know that organization is absolutely essential. Having your tools properly organized can help everything to operate more smoothly, reduce the risk of lost or stolen tools and even help ensure tools are not damaged.
While at first glance it may not seem like it, one of the best ways you can improve the organization of your tools is by using a foam organizer. In fact, there are an almost endless number of ways that this item can help you and your facility. Take a moment to read through the following 101 great hacks for getting the most out of your tool foam organizers in your facility.
Missing tools are much easier to see when they have a bold yellow background. As you can see from this picture, every tool has its own predetermined place. The bright yellow backing behind the tool box shadowing foam will help you to immediately identify which tools are in use or missing.
If you have specific tool chests dedicated to specific types of tools, or even individual drawers for each tool type, a tool chest drawer organizer is a great option. Using this type of organizer your tools will always be exactly where they belong. The foam is cut to snugly hold each tool, which helps to ensure only the right tools can fit in each slot for further organizational help. Combine this great item with a label on each drawer to show what type of tool is in it and your employees won"t waste another minute looking for the tools they need.
When it comes to tools, few names are as well-known as Craftsman. They don"t, however, stop at just making your favorite tools. Thy also make a variety of Craftsman tool chest organizers that you can add to almost any of their high quality tool chests. These organizers are made specifically for their tools, but can work on others as well making them an ideal solution for your facility.
Whether you have just a few sockets or you"ve got hundreds, a toolbox socket organizer is a great option for when you are taking your tools with you on the go. Sockets can quickly get all mixed up in a toolbox if you"re not careful, and that"s why this type of organizer is the ideal choice for plumbers, carpenters, general contractors and many others. Your sockets will be in the right spot every time you need them so you don"t waste any time while you"re on the job. This will also help you to quickly confirm that you have them all before you leave a job site so you don"t accidently leave some behind.
Keeping your toolbox organized is essential for working efficiently while out on the job. Having toolbox shadow foam in place will not only keep everything looking nice and clean, but will also help you to see if any tools are missing or out of place with just a glance. This can help you to quickly confirm you have everything you need before you leave the shop so you don"t have to make an unnecessary trip back because you forgot an important tool.
For many tool chests and other storage areas you don"t need to have too thick of a piece of foam to keep your tools in place. A simple foam drawer liner will be sufficient to ensure the tools don"t roll around while people are opening and closing the drawer. Even with its thinner design it will still ensure all tools have their own spot for exceptional organization.
You can have custom tool box foam inserts made for your tool box, or you can even make your own at home. This is a great way to help organize your tool box, obviously, but it can be much more too. You can select whatever color foam you want for a customized look or to further improve organization. No matter what type of tool box you have, or what tools you"re using, it is quick and easy to have your own foam insert made to keep the tools safe.
There are many different ways to learn how to organize tools in a tool chest. One of the most effective options for most people is going to be using foam tool organizers. While there are many pre-made foam options out there, some people will want to do it on their own. This is quick and easy with high quality foam that you can cut on your own.
If you"re like many people, organizing a tool chest consisted of little more than pushing your tools around until the drawers would close. If you want to become more efficient, and keep your tools safer, make sure you learn some important tips on how to organize your tool chest. The first step is to get the quality foam organizers you need. Next, plan out exactly where you want your tools to go. Organizing them by type and by size is going to help ensure you always know where everything should be.
If you"re looking for the best tool chest organization ideas, you"ve come to the right place. You can use foam organizers to split your chest up by color of foam, color of background or just about anything else. Of course, the best tips are going to be to make sure you keep similar types of tools all in the same general area. This will help not only keep everything organized, but also ensure you know exactly where to go for every tool in your chest. Using a piece of foam vertically can provide additional segmentation to keep the tools in their place.
When you"re making a toolbox foam organizer at home, make sure you keep the foam tight enough to hold your tools securely, yet still have enough room to fit your fingers in to remove the tool easily. Sometimes just leaving space around one section of the foam is sufficient. Remember, it is for your tools so come up with a solution that will make it easy to keep your tools safe, yet each to access.
When using foam tool chest organizers, make sure you put the handle end of the tool openings facing the opposite sides of each other. This will ensure you are making the most efficient use of the room you have. In many cases, it will also leave enough room in the middle to put some extra tools. Experiment with putting your tools on angle too for added options.
There are many options when it comes to craftsman tool organizers. Craftsman makes many of them, but you can also create your own. One common idea people have when trying to keep their Craftsman tools safe and organized is placing a protective layer of foam over or under them while not in use. This helps them from getting bumped around and also keeps them cleaner than would otherwise be possible. Look through all the different Craftsman tool organization options available and find the ones that are right for you.
Using a tool tray organizer is very helpful for your actual tools, or the items you use with them. You can have a tray that contains essential tools such as screw drivers and wrenches as well as the items they are used with, including screws, bolts and nuts. Having every item with its own spot in your tool tray will make your jobs go much more quickly and easily every time.
If you"re thinking about how to organize a tool chest there are quite a few points to consider. First, you want to make sure you have enough room so that every tool can have its own place. This may require you to have additional drawers or chests to accommodate. Next, organizing your tools by type is very important. If you"re using foam tool inserts for the chest drawers, make sure you leave room to grow so that you can keep like tools near each other.
Using tool organizer foam is one of the best ways to keep tools in their place and safe. These organizers are commonly put into drawers or toolboxes, but there are other options as well. Since the foam is nice and firm, you can hang these organizers on a wall for easier access. You can even hang them over the edge of a machine or on a gate. Wherever the tools will be used, you can conveniently store them close by.
There are many options to choose from when learning how to organize a tool chest. Some people like to have a different tool chest for each type of tool. Others label drawers based on what is in them. Once you get into the drawers or cabinets, however, you need to make sure the tools are kept in their place. This can be done with hooks, magnets or foam organizers. The foam organizers are often the least expensive, and most effective option available.
Craftsman tool organizers are used by people from all walks of life. In this video you can see how an F-18 aircraft mechanic keeps his toolbox organized. He uses foam organizers to keep every tool he has (there"s a lot of them!). In the video he brings up an important point. Having foam organizers not only keeps your tools from going missing, but also helps ensure you don"t accidently leave any tools inside of the items you"re working on.
Many types of foam organizers use the shadow board to make tools more visible. You can use this effective strategy to improve organization and help keep track of your tool inventory. This is especially effective when you are storing a large number of tools and you want to be able to see what is missing at a glance. Using this type of shadow board foam can help to eliminate wasted time and lost tools in your facility.
Finding the right foam ratchet organizer can be a challenge, which is why so many people turn to custom solutions. This allows you to easily fit in all your tools in a logical way. As you can see below, each of these is organized by type and size to help eliminate the delay caused by searching for each item for your ratchet set.
Whether you have a small personal tool box, or something much larger for a professional situation, you need to keep it organized. With custom tool box organizer foam you can make sure every tool you have is always properly put away. This can not only improve efficiency on the job, but also help make the job safer too since you won"t have to worry about tools falling out and hurting others.
You don"t have to settle for just having traditional tools in your tool box. With tool box liner foam you can make spots to fit anything you"d like. Of course, tools will occupy most of the areas, but you can also make a spot for things like a pencil, a small notebook or even your cell phone to keep it safe. Some people even make a special spot for things like wedding rings that they want removed while they are on the job!
One important trick to having a successful tool box foam liner is to make sure the tools fit snugly into the foam. This will keep them more secure, even if the tool box gets bumped around while you are traveling. As long as you are able to get them in and out without trouble, the tighter the better when it comes to using foam inserts for your tool box organization strategy.
Does your tool chest look like the following image? If you"re like most people and businesses, this is a common problem. Even if you take the time to organize it, the tools seem to get all mixed up again within days (or less). Why not try using a foam tool chest organizer to make sure everything has an assigned slot. Even if you just section off your tool box to ensure each type of tool has its own space you will be able to prevent things from becoming a mess again.
Using a variety of different colors of tool box drawer foam can help you to get more about of your effort. By using a variety of colors you will have additional options for remembering what tools go where. You can often use several different main colors, plus several different background options to give yourself a wide range of different solutions for organizing your tool box. This is especially powerful when you have a tool box that is used by multiple different people at the company.
Craftsman tools are great, but if you can"t find the one you need, they won"t help you. This is why Craftsman has spent so much time and effort developing the organizers as well as the tools themselves. Using Craftsman tool box organizers you can not only make sure the right tools are in the right spots at all times, but also help keep them protected from damage, dirt and other potential problems.
Shadow foam is an effective way to organize tools and many other things. There are many options on the market for this type of thing, and finding the right one is essential. Choose a tool shadow form that is firm enough to securely hold your tools in place at all times. Also, make sure the background color is sufficiently different from the foreground color to ensure you get the contrast that you need to really make your tools pop out when they are missing.
There are many different types of foam drawer liners on the market. Some of them will allow you to put your tools into the foam for added security. Others simply add a non-slip surface to the drawers to help keep the tools in place. Take some time to think about which type of foam you need. Remember, you can even use a non-slip foam as the background of traditional form for improved results.
Making a tool box drawer organizer doesn"t have to be a huge job. You can do it all yourself in your own facility. Some of the options are quite simple, and others can be more complex. Consider what you need when creating your tool box drawer organizer and set everything up. Whether you do it on your own or order a custom organizer, you"ll be very happy with the results when you are able to quickly find all your tools when you need them.
A good toolbox should not only keep your tools in one general place, but also keep each tool in its own specific location. This can only really be done with a good toolbox organizer. On top of holding the tools in position, it will keep them safer and cleaner than any other option on the market. Foam toolbox organizers are one of the most affordable and effective ways to add convenience to the job site and life to the tools.
While most people think of tool drawer foam as a way to securely keep each tool in place. For smaller tools, or items like nails, screws and more, it can be helpful to make small boxes within each drawer to hold everything you"ll need for a job. This partitions off each type of tool in a convenient, yet accessible way.
Coming up with great toolbox organization ideas doesn"t have to be hard. Start by determining how much space you have in your toolbox, and then compare that with how many, and which type, of tools you have that need to be stored. Whether you"re storing small tools or large, you need to make sure they are properly organized to ensure they don"t get damaged, lost or stolen.
When storing power tools, you want to make sure you are using a high quality tooling foam to ensure they are stored safely. Remember also to include a spot for any wires and batteries that are present so that it doesn"t get tangled or damaged while in storage. If there is a charger or other item, that should have its own place as well.
Custom tool chest foam is a great way to store your tools. This foam is strong and durable, yet will still absorb enough shock if you bump the storage chest throughout the day. The foam is also perfect because it really doesn"t take up too much space so you"re left with plenty of room for all your tools. Just cut out the individual spots for each tool, slide it in the drawer and you are all set. Some people like to secure it in place with magnets or glue, but that is not necessary in all cases.
You can get foam tool organizer kits for many of the most popular tools. This can be a great way to quickly get the majority of your tool cabinet organized, leaving you with only the unusual tools to make custom organizers for. Some of the most common options are for wrenches, ratchets, screw drivers or other similar items. Since many shops have many types of each of those items, it is easy to see how this type of kit can really be helpful.
If you have an extra-long drawer, you can organize your tools based on how often you use them. With foam tool organizers it is possible to set up the drawer so that common tools like wrenches are right in front. Those tools like wire cutters and the like, which don"t get used nearly as often in most cases, will be located in the back. This helps to further improve organization and efficiency.
Craftsman has a lot of tools that can be purchased in a boxed set. This is a great way to quickly increase your collection of tools. Whether you"re an individual or a business, when you buy Craftsman tool box sets, you will want to make sure you can organize the tools properly. Sometimes they will come in a reusable box but other times they are just individual tools that come in a set. Make sure you know what you"re buying first so that you can be prepared with how you will store them.
Craftsman tool chests are typically divided up into drawers to help improve organization. You can add different types of tools for each drawer to make it easier than ever to find the tools you need. If your craftsman tool drawer doesn"t come with foam inserts already, consider adding them to keep the tools in place and protected from harm.
While it is quite common for people to use foam organizers in their tool drawers, most people make sure that the cutouts are sufficient to hold the tools in place. If you"re making a tool drawer organizer that won"t be mobile, it is often enough to just make an indentation or slight cutout to keep the tool secure, while still allowing the tools to remain in their place.
There are many types of shadow box foam. Sometimes the dark color is out front, and the bright color behind. Other times it is the opposite. Either way, this is a very effective way to highlight it whenever a tool is missing. In addition to alerting people to tools being in use, it also keeps your tools in place and properly organized. You can use pre-made shadow box organizers, or you can make your own to fit your specific tools.
Whether you are implementing 5S strategies in your facility, or you"re just looking for another way to eliminate waste, 5S foam is a great option. This foam can be used to organize tools, keep them safe and generally improve efficiency. Of course, since the goal of 5S is to eliminate waste wherever possible, this is an excellent option for improving your entire facility.
Keeping your tool chest organized is very important. The more tools you have, the more important it is to keep them organized. It is one thing to have just a couple dozen tools and not keep them properly organized, but when you have hundreds, it can dramatically impact the amount of time it takes to find what you need. There are an endless number of tool chest organization products available including clips, foam, dividers and more. Find which ones you need and get your chest organized today.
Taking foam sheets and putting them in a crate, tool box or other area is a great way to keep your tools just the way you want them. Tool box foam sheets are affordable and easy to cut into the shapes that you need them to fit in the container where they will go. You can also use a hot knife or other foam cutting tools to make outlines of the tools that will be stored so they can be kept nice and safe in your facility. This is one of the fastest and easiest ways to keep your tools organized at all times.
Making your own tool chest is sometimes the only way to make sure you have all the room you need for all your tools. While it will take some time and effort up front, it allows you to keep your tools nice and safe for years to come. One thing to remember when making a custom tool chest is that you want to ensure it will be able to stay perfectly organized at all times. You also need to make sure that your tools will be kept safe inside of it. This requires that you plan everything out ahead of time so that every tool you have has a special spot in your new box.
Using tool organization foam to add protection and convenience to your tool box or tool chest is a great way to improve your overall business. Depending on what type of tools you use in your facility, and how many employees there are, it is possible to waste a significant amount of man hours each week looking for tools when they are needed. By organizing your storage area you will virtually eliminate this type of waste from your company. You can consider this type of Kaizen Event that can improve your facility and get everyone to work more efficiently.
When you use tool box drawer organizers you want to make sure you are coming up with your own custom solution. While there are many recommended ways to do this type of thing that you can find online, they aren"t made specifically for you. Take your time to really think through things like how much room you have, what types of tools you own, which tools get used the most and any other important details. This will give you the information you need to plan out exactly how you want to organize everything in your tool box. You can then use a tool box drawer organizer to get the job done properly.
Tool boxes are one of the most difficult items to keep organized. This is because the tools are used frequently, and often when in a hurry. People don"t want to spend a lot of time making sure every tool is in the right spot while they are on the job site, so toolboxes end up becoming a disaster. If you have tool organizers for tool boxes, however, you can prevent that from occurring. If you use foam organizers, for example, you can make it so each tool only fits in one spot. This helps to eliminate the temptation for people to put tools where they don"t belong.
There are several ways that you can use foam for tool boxes. What is likely the most common is simply to line the inside of the tool box, especially on the bottom part. This gives a little bit of extra cushion for the tools so that they don"t become damaged. It also helps to protect the tool box itself from getting too scratched up. The other way people use this type of foam is to actually make organization improvements in the box. By using foam with cutouts you can protect your tools while also ensuring each tool is kept in its proper spot.
When you"re looking for a way to organize your tool box there is no better option than using either pre-made or custom organizational products. These products include things like foam lining, foam tool organizers, shadow foam, metal or wood tool separators and much more. The main point is to make sure each of your tools has a designated spot, ensure that it will remain in that spot while it is not in use, and to help provide improved protection to your tools. This is especially important for power tools, which can get damaged if they are knocked around too much.
If you want to get your tool box organized quickly, the best option available is tool box inserts. These inserts can slide right into your tool box and make it so you know exactly where the tools go every single time. You can get inserts in a variety of shapes and sizes, and you can even make your own custom inserts to get the job done right for your specific tools. To get your tool box organized quickly with these inserts, make sure you have all your tools laid out and ready to go when you put the inserts in.
You can improve organization by installing strong magnets into the foam in your toolbox. This will allow you to attach longer tools at the top, leaving the main area for smaller options. You can even leave one area open for the "rest of the tools" that you need to bring on a job, but don"t have a set location for. Using these ideas to organize your tool box will help give you the flexibility you need, while still keeping the box as organized as possible.
Many facilities use a large tool crate to hold the majority of their tools when they are not in use. Employees can then come and take what they need and put it in their tool box for use throughout the day. This is important for companies that have hundreds, or even thousands, of tools in the facility. If you don"t keep the crate organized, however, it can cause significant delays and even increase the risk of having your tools lost or stolen. Using a tool organizer box within the crate will make it nice and easy to ensure every tool is in the right place at the end of every day.
If you have a tool box or chest that has drawers you can use them to store just about anything. If you don"t have a well thought out plan, however, every drawer will just become a mess of random tools that get shoved in. This is why you should always add in foam tool cutouts before a single tool is added to the drawer. This will ensure that you always know which tools go in which drawers, and where they go within them. It isn"t too much work to create these types of cutouts so give it a try and see how it goes.
While manually cutting your tool case foam is the most common way to get the results you want, some people prefer having a laser cutting tool available to handle the job. If you have a laser foam cutter available in your facility, this is a great option. If not, you can contact third party vendors who are willing to create foam inserts for you and provide them with an outline of each of the tools, and where you want it to go. This is a great option for those who want to make sure everything is perfect and precise.
With the right tool control foam you can make sure every tool in your create or tool box is held firmly in place. This can help ensure that your tools don"t get bounced around while in your vehicle, and can even help keep them in place if you drop the toolbox or other container. Slipping these foam inserts into drawers or cabinets is a great way to add convenience as well as protection for all your tools.
You can make your own tool organizer for your home or business with some items that you likely have laying around your home or shop. For example, place some foam for padding and to keep tools from slipping. You can then use wiring or other firm metals to create simple slots that will hold common tools in place. In many cases you can have your own DIY tool organizer set up and ready to go in just a few hours.
Keeping your tool box nice and organized can save hours of time every week. There are many ways to do it depending on how many tools you own and what type of work you use them for. Consider holding them in place with plastic brackets, foam tool organizers or other items that will make sure every tool has its own spot. Once you have everything in place, you need to make sure you take steps to ensure everyone who uses the tools puts them back properly.
If your tool box isn"t organized it will take up a lot of extra space, and you won"t be able to keep as many tools in it. While many people dread the idea of organizing their tool box, it is actually something that is well worth the time. Whether it is a small portable tool box, or something much larger, taking the time to keep a well-organized tool box is very helpful for your productivity.
Making a foam board for your tools is quite simple. All you really need to do is trace out the tools you want to store onto the foam, cut out a portion of the foam, and then store your tools. If you want to use a shadow board type background that will give your foam board tools increased visibility, which is nice, and it takes the same amount of work.
Using tool box foam you are able to protect your tools and keep them in their proper spot. Once really nice trick that can make this type of foam even better is leaving one corner of the foam unsecured to the bottom of the tool box. You can then store important items like money or papers in there so you have it when you need it. It is almost like a hidden chamber, but with much easier access for you.
You can learn how to organize a tool box in just a short period of time. The trick is to start out with an empty box, and then assign a place for each tool. Ideally the tools should be held securely using foam or other organizing products. You can either buy things like foam organizers, or you can make them yourself. Once you"ve got them in place, you simply insert each tool into the proper spot and you are all set.
Using a shadow tool box is a great way to improve the visibility of tools. This can be helpful when working in darker areas, or just with general work where you want to be able to see quickly which tools are in use at any time. Whether this is your own personal shadow tool box, or it is shared between many people, it is a great way to eliminate wasted time looking for tools that are already being used or are already out of the tool box.
When it comes to getting a tool organizer, you want to make sure you have plenty of space for every tool in your collection. In addition, you want to make sure that they will keep your tools safe. Sometimes you"ll need a large organizer with lots of little slots for things like screw drivers and ratchets. Other times you will need something much larger to hold all your power tools or other items. For many people getting both is the best way to go.
There are many places you can look to get tool box organization ideas. This page here has dozens of them that you can consider quickly. Before you look other places for ideas, however, you will want to make sure you know exactly which tools you are looking to store. One great tip is to store your tools in their original packaging. This can save time and ensure the tools are always kept protected when not in use. Of course, the packaging will eventually wear out so this is likely only a temporary solution.
If you"re looking to set up your own organizer for your tools, you will need to come up with ideas and see which ones work the best. Try to look at both how you will fit them in the space you have, and how they will be kept safe. Tools can be very expensive so taking the time to come up with the best tool box organizer ideas is well worth it.
Using foam sheets is obviously great for organizing your tools, and even keeping them safe from drops or other shocks. One great benefit of tool foam sheets that many people don"t think about is that they help keep your tools cleaner too. They can remove some dust, dirt and oil as you put the tools in and out every day. When they get too dirty, they can typically be washed several times without a problem.
Finding the best tool box organization tips can be hard because every tool box is unique. What works for someone with a lot of wrenches, for example, might not work well for someone who has a larger collection of hammers or other larger tools. The trick is to look at the tools you have, and then find tips specifically for them. Some tips, of course, can be used on any type of tool. Things like foam organizers can be custom made for tools no matter how big or small.
Keeping an organized tool box will help ensure you don"t lose your tools. This much is obvious, but what you might not realize is that it can also help to prevent theft. When someone sees a well-organized tool box they will know that you are keeping a close eye on what you have, and that you will notice as soon as something goes missing. This makes it more risky for them to take something they shouldn"t, so they will likely avoid doing it.
Toolbox organization is an activity that few people enjoy doing, but almost everyone benefits from. Keeping the tool boxes in your workplace clean and organized will eliminate the frustrations of having to look for a missing tool, or dig through potentially sharp and dangerous tools to find the one you need. An organized toolbox is a safe toolbox so make sure you put in the effort now to keep yours properly organized.
There are a lot of different tool organizers on the market today. Finding the ones that will work best for your particular situation doesn"t have to be difficult. You can start by listing the tools you own, and then measuring how much space you have in your tool box, tool chest or other tool storage areas. This information will help you to select the perfect tool organizers for your home or business.
You can use foam caps to safely hold your tools in place in an otherwise messy tool box. Placing a cap around tools will keep them cleaner and protected from bumps and other issues. Of course, the cap can also help to improve the overall organization of your tool box or chest. Whether you are working at the main facility, or you are out on a job, make sure you bring the foam caps you need.
There are many ways to cut tool foam. Some people just use a knife, and others use specialized tools to get the job done in a cleaner and more professional way. Whatever you choose, you need to make sure you have the right outlines to get the job done right the first time since you can"t really redo the same piece of foam if a mistake is made. Having a clear outline to follow will help ensure you do it right the first time.
Most facilities have a lot of different tools for their drawers. It seems, however, that no matter how many drawers you have, you can always use more. That is almost always because they become unorganized over time. Taking the time to clean out and organize your drawers so that the tools are properly stored will help solve this problem. Even something as simple as using foam organizers will help get this job done quickly and prevent the problem from happening again.
Using an organizer for your tools is a great option for any facility. Sometimes a simple peg board will allow you to quickly store your tools up on the wall, where they are out of the way. Other times, however, you want a little bit more protection. When this is the case, just put up a board with foam outline cutouts up on the wall. The firm foam will hold each item in place safely and securely.
One of the best things about using foam to organize your tools is that it is so affordable. You can choose from a wide range of colors and other foam supply options to help you get the most out of every piece. No matter what it is that you need, you can get the supply of foam that will meet and exceed your needs. This foam is long lasting and looks great, so consider ordering yours today.
When it comes to tool box organization, no individual item is more effective than foam. You can cut the foam to fit in any tool box, and keep it organized. Whether you lay it flat to add protection, cut out sections to securely hold your tools, or even place it vertically to ensure every tool type has its own spot, you will be thrilled with the flexibility of foam for your organizational needs.
You may be thinking that you need some type of super strong, industrial foam for your tool box organization. While that can be necessary in some situations, for the average tool box, simple box foam will help to provide the protection and organization you need. It will add the cushioning to keep tools from breaking and will hold the tools in place too.
If you"re going to use foam to organize your tools, you will likely need to get some tools to help customize your foam. Foam tools can help to trim, scrape and form the foam into the perfect shapes so that it will hold your tools securely and safely at all times. Using the right foam tools will make this job much easier so you can get it completed in no time.
As you can see, tool foam organizers can be used in many different ways for many different things. Finding the items that wi


 8613371530291