
serpentine belt driven hydraulic pump free sample

Check that the pump shaft is rotating. Even though coupling guards and C-face mounts can make this difficult to confirm, it is important to establish if your pump shaft is rotating. If it isn’t, this could be an indication of a more severe issue, and this should be investigated immediately.
Check the oil level. This one tends to be the more obvious check, as it is often one of the only factors inspected before the pump is changed. The oil level should be three inches above the pump suction. Otherwise, a vortex can form in the reservoir, allowing air into the pump.
What does the pump sound like when it is operating normally? Vane pumps generally are quieter than piston and gear pumps. If the pump has a high-pitched whining sound, it most likely is cavitating. If it has a knocking sound, like marbles rattling around, then aeration is the likely cause.
Cavitation is the formation and collapse of air cavities in the liquid. When the pump cannot get the total volume of oil it needs, cavitation occurs. Hydraulic oil contains approximately nine percent dissolved air. When the pump does not receive adequate oil volume at its suction port, high vacuum pressure occurs.
This dissolved air is pulled out of the oil on the suction side and then collapses or implodes on the pressure side. The implosions produce a very steady, high-pitched sound. As the air bubbles collapse, the inside of the pump is damaged.
While cavitation is a devastating development, with proper preventative maintenance practices and a quality monitoring system, early detection and deterrence remain attainable goals. UE System’s UltraTrak 850S CD pump cavitation sensor is a Smart Analog Sensor designed and optimized to detect cavitation on pumps earlier by measuring the ultrasound produced as cavitation starts to develop early-onset bubbles in the pump. By continuously monitoring the impact caused by cavitation, the system provides a simple, single value to trend and alert when cavitation is occurring.
The oil viscosity is too high. Low oil temperature increases the oil viscosity, making it harder for the oil to reach the pump. Most hydraulic systems should not be started with the oil any colder than 40°F and should not be put under load until the oil is at least 70°F.
Many reservoirs do not have heaters, particularly in the South. Even when heaters are available, they are often disconnected. While the damage may not be immediate, if a pump is continually started up when the oil is too cold, the pump will fail prematurely.
The suction filter or strainer is contaminated. A strainer is typically 74 or 149 microns in size and is used to keep “large” particles out of the pump. The strainer may be located inside or outside the reservoir. Strainers located inside the reservoir are out of sight and out of mind. Many times, maintenance personnel are not even aware that there is a strainer in the reservoir.
The suction strainer should be removed from the line or reservoir and cleaned a minimum of once a year. Years ago, a plant sought out help to troubleshoot a system that had already had five pumps changed within a single week. Upon closer inspection, it was discovered that the breather cap was missing, allowing dirty air to flow directly into the reservoir.
A check of the hydraulic schematic showed a strainer in the suction line inside the tank. When the strainer was removed, a shop rag was found wrapped around the screen mesh. Apparently, someone had used the rag to plug the breather cap opening, and it had then fallen into the tank. Contamination can come from a variety of different sources, so it pays to be vigilant and responsible with our practices and reliability measures.
The electric motor is driving the hydraulic pump at a speed that is higher than the pump’s rating. All pumps have a recommended maximum drive speed. If the speed is too high, a higher volume of oil will be needed at the suction port.
Due to the size of the suction port, adequate oil cannot fill the suction cavity in the pump, resulting in cavitation. Although this rarely happens, some pumps are rated at a maximum drive speed of 1,200 revolutions per minute (RPM), while others have a maximum speed of 3,600 RPM. The drive speed should be checked any time a pump is replaced with a different brand or model.
Every one of these devastating causes of cavitation threatens to cause major, irreversible damage to your equipment. Therefore, it’s not only critical to have proper, proactive practices in place, but also a monitoring system that can continuously protect your valuable assets, such as UE System’s UltraTrak 850S CD pump cavitation senor. These sensors regularly monitor the health of your pumps and alert you immediately if cavitation symptoms are present, allowing you to take corrective action before it’s too late.
Aeration is sometimes known as pseudo cavitation because air is entering the pump suction cavity. However, the causes of aeration are entirely different than that of cavitation. While cavitation pulls air out of the oil, aeration is the result of outside air entering the pump’s suction line.
Several factors can cause aeration, including an air leak in the suction line. This could be in the form of a loose connection, a cracked line, or an improper fitting seal. One method of finding the leak is to squirt oil around the suction line fittings. The fluid will be momentarily drawn into the suction line, and the knocking sound inside the pump will stop for a short period of time once the airflow path is found.
A bad shaft seal can also cause aeration if the system is supplied by one or more fixed displacement pumps. Oil that bypasses inside a fixed displacement pump is ported back to the suction port. If the shaft seal is worn or damaged, air can flow through the seal and into the pump’s suction cavity.
As mentioned previously, if the oil level is too low, oil can enter the suction line and flow into the pump. Therefore, always check the oil level with all cylinders in the retracted position.
If a new pump is installed and pressure will not build, the shaft may be rotating in the wrong direction. Some gear pumps can be rotated in either direction, but most have an arrow on the housing indicating the direction of rotation, as depicted in Figure 2.
Pump rotation should always be viewed from the shaft end. If the pump is rotated in the wrong direction, adequate fluid will not fill the suction port due to the pump’s internal design.
A fixed displacement pump delivers a constant volume of oil for a given shaft speed. A relief valve must be included downstream of the pump to limit the maximum pressure in the system.
After the visual and sound checks are made, the next step is to determine whether you have a volume or pressure problem. If the pressure will not build to the desired level, isolate the pump and relief valve from the system. This can be done by closing a valve, plugging the line downstream, or blocking the relief valve. If the pressure builds when this is done, there is a component downstream of the isolation point that is bypassing. If the pressure does not build up, the pump or relief valve is bad.
If the system is operating at a slower speed, a volume problem exists. Pumps wear over time, which results in less oil being delivered. While a flow meter can be installed in the pump’s outlet line, this is not always practical, as the proper fittings and adapters may not be available. To determine if the pump is badly worn and bypassing, first check the current to the electric motor. If possible, this test should be made when the pump is new to establish a reference. Electric motor horsepower is relative to the hydraulic horsepower required by the system.
For example, if a 50-GPM pump is used and the maximum pressure is 1,500 psi, a 50-hp motor will be required. If the pump is delivering less oil than when it was new, the current to drive the pump will drop. A 230-volt, 50-hp motor has an average full load rating of 130 amps. If the amperage is considerably lower, the pump is most likely bypassing and should be changed.
Figure 4.To isolate a fixed displacement pump and relief valve from the system, close a valve or plug the line downstream (left). If pressure builds, a component downstream of the isolation point is bypassing (right).
The most common type of variable displacement pump is the pressure-compensating design. The compensator setting limits the maximum pressure at the pump’s outlet port. The pump should be isolated as described for the fixed displacement pump.
If pressure does not build up, the relief valve or pump compensator may be bad. Prior to checking either component, perform the necessary lockout procedures and verify that the pressure at the outlet port is zero psi. The relief valve and compensator can then be taken apart and checked for contamination, wear, and broken springs.
Install a flow meter in the case drain line and check the flow rate. Most variable displacement pumps bypass one to three percent of the maximum pump volume through the case drain line. If the flow rate reaches 10 percent, the pump should be changed. Permanently installing a flow meter in the case drain line is an excellent reliability and troubleshooting tool.
Ensure the compensator is 200 psi above the maximum load pressure. If set too low, the compensator spool will shift and start reducing the pump volume when the system is calling for maximum volume.
Performing these recommended tests should help you make good decisions about the condition of your pumps or the cause of pump failures. If you change a pump, have a reason for changing it. Don’t just do it because you have a spare one in stock.
Conduct a reliability assessment on each of your hydraulic systems so when an issue occurs, you will have current pressure and temperature readings to consult.
Al Smiley is the president of GPM Hydraulic Consulting Inc., located in Monroe, Georgia. Since 1994, GPM has provided hydraulic training, consulting and reliability assessments to companies in t...

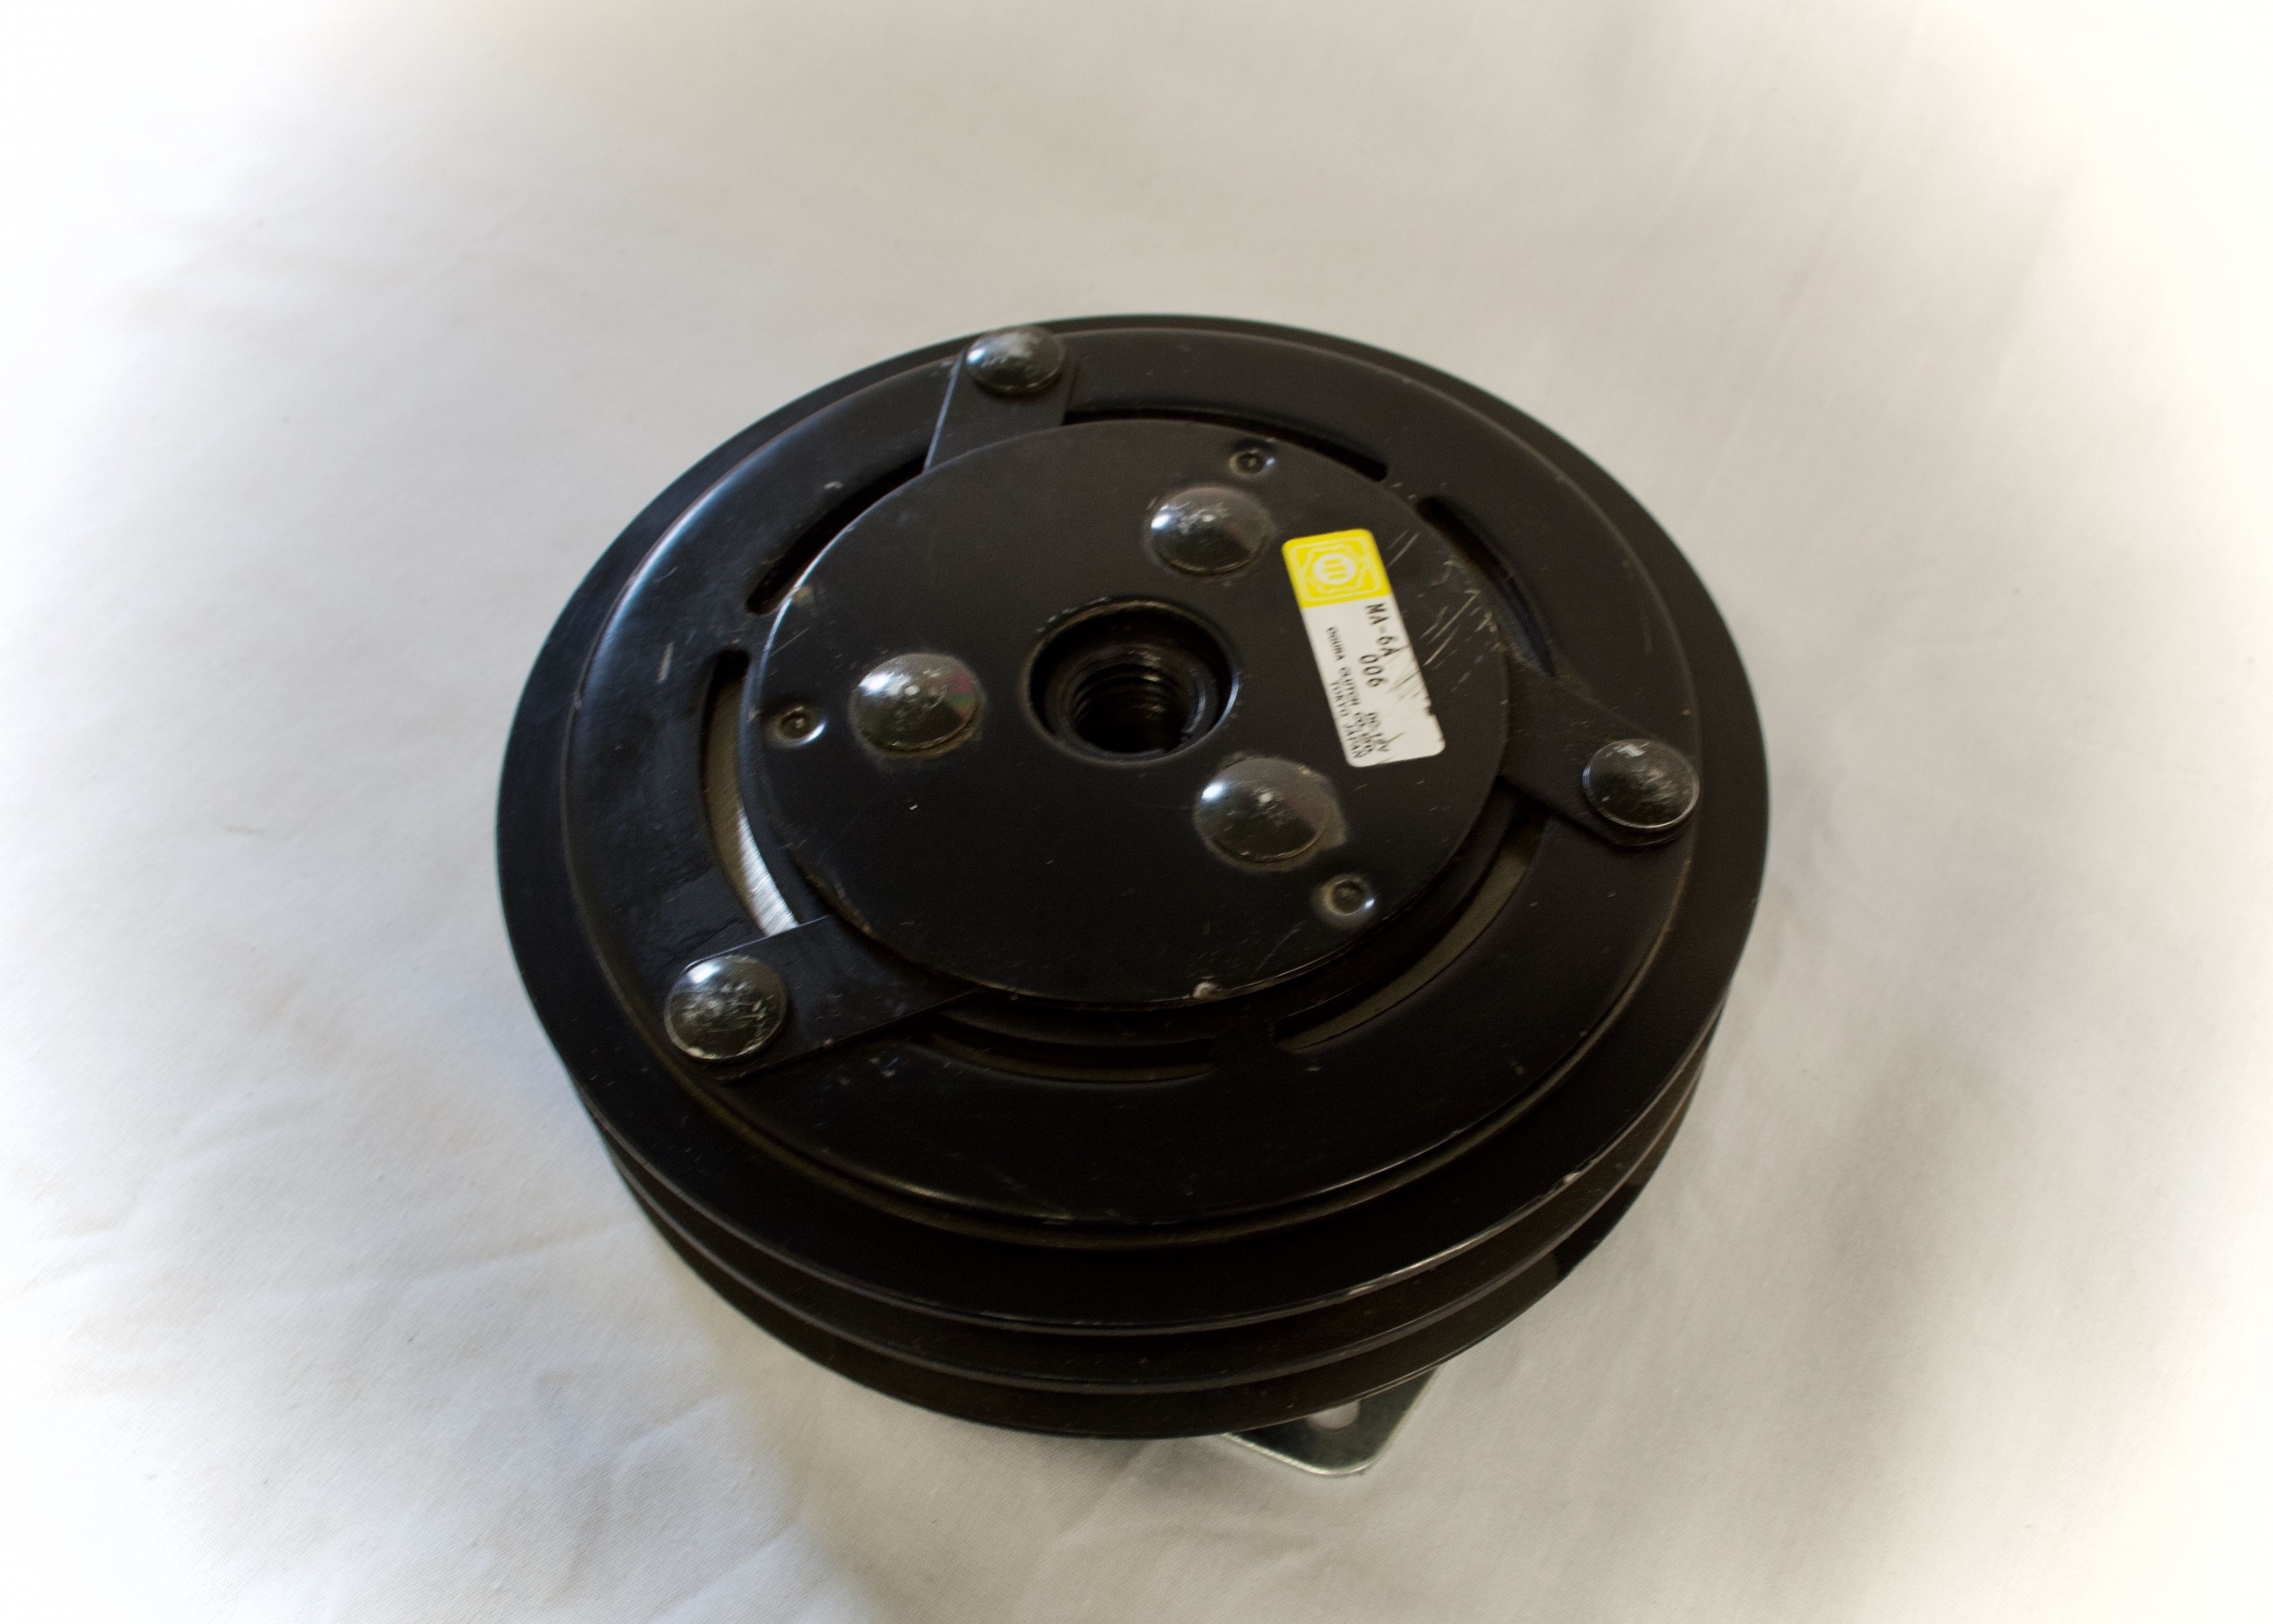
At Coastal Hydraulics, we regularly receive calls from people looking for a new clutch or who are experiencing issues with their current electric clutch. Take the following scenario, for example: you"re out on your fishing boat having a smooth, productive day, when all of a sudden you begin hearing a loud noise coming from your clutch—you may even notice a burning smell.
So, how exactly do you know what size clutch you need as a replacement? If you"re using a Gresen pump, chances are that the answer is pretty straightforward—there are a number of clutches designed specifically for this popular and common pump. Otherwise, how to choose a clutch comes down to a few important details about your hydraulic system components.
The first step in right-sizing a clutch is to determine the approximate hydraulic (fluid power) horsepower, or HP needed to drive your system"s pump. While some of our customers have this information readily available, a formula may be used to determine HP for those who do not. Two important numbers are needed to complete the formula - the PSI (pressure in pounds per square inch) of the hydraulic pump and system, as well as the total flow of hydraulic fluid running through the system each minute, measured as "gallons per minute (GPM)." From there, the following formula can be used:
This should be a breeze considering you"ve already identified the amount of HP needed to drive the pump; all you need to know is the RPM the pump will work at. Once you"ve run the numbers, you"ll be ready to apply a K factor.
Now that you"ve gotten your clutch torque figured out, it"s important not to overlook the threat of slippage, which can result from pressure spikes and/or high RPM engagement. This means adding in a "service factor," also commonly referred to as a "K-factor." At Coastal Hydraulics, we typically multiply torque value by a K-factor of 2, which accounts for variables such as slippage that can occur during performance. If your torque value is 90.8, for example, we would multiply by the K-factor - in this case, 2 - for a final number of 180.6. Thus, we would end up recommending a 200 lb. ft. clutch under these circumstances.
In situations that are less cut and dry, additional information about your pump may be needed to determine the right clutch size for your needs. As an example, our team would ask if your pump is belt-driven or a direct drive off the boat"s motor or engine. Pump mount style matters, too; is it an "A" style with two bolts, or a "C" style with two or four bolts? Identifying the shaft size on the pump can also be helpful, including the number of teeth if the pump has a spline shaft.
So, we"ve explained how to ensure the clutch you end up with is the right size, but why exactly is it so important to not overlook this step? The answer comes down to the performance and longevity of both your clutch and your hydraulic system. If the clutch you purchase doesn"t have quite enough torque, for example, you may end up working it too hard and running into more problems down the road. Clutches are not designed to work harder than they"re supposed to, which may end in premature failure rates. Right-sizing a clutch helps to ensure that slipping never becomes a problem, allowing you to focus on the task at hand without any distractions.
Looking for the right clutch to help you work more efficiently? Are you in need of a quick electric clutch replacement? Coastal Hydraulics has a wide variety of clutches for different work environments. If you would like to talk more or shop clutches, feel free to reach out to us at (603) 474-1914.
A hydraulic pump converts mechanical energy into fluid power. It"s used in hydraulic systems to perform work, such as lifting heavy loads in excavators or jacks to being used in hydraulic splitters. This article focuses on how hydraulic pumps operate, different types of hydraulic pumps, and their applications.
A hydraulic pump operates on positive displacement, where a confined fluid is subjected to pressure using a reciprocating or rotary action. The pump"s driving force is supplied by a prime mover, such as an electric motor, internal combustion engine, human labor (Figure 1), or compressed air (Figure 2), which drives the impeller, gear (Figure 3), or vane to create a flow of fluid within the pump"s housing.
A hydraulic pump’s mechanical action creates a vacuum at the pump’s inlet, which allows atmospheric pressure to force fluid into the pump. The drawn in fluid creates a vacuum at the inlet chamber, which allows the fluid to then be forced towards the outlet at a high pressure.
Vane pump:Vanes are pushed outwards by centrifugal force and pushed back into the rotor as they move past the pump inlet and outlet, generating fluid flow and pressure.
Piston pump:A piston is moved back and forth within a cylinder, creating chambers of varying size that draw in and compress fluid, generating fluid flow and pressure.
A hydraulic pump"s performance is determined by the size and shape of the pump"s internal chambers, the speed at which the pump operates, and the power supplied to the pump. Hydraulic pumps use an incompressible fluid, usually petroleum oil or a food-safe alternative, as the working fluid. The fluid must have lubrication properties and be able to operate at high temperatures. The type of fluid used may depend on safety requirements, such as fire resistance or food preparation.
Air hydraulic pump:These pumps have a compact design and do not require an external power source. However, a reliable source of compressed air is necessary and is limited by the supply pressure of compressed air.
Electric hydraulic pump:They have a reliable and efficient power source and can be easily integrated into existing systems. However, these pumps require a constant power source, may be affected by power outages, and require additional electrical safety measures. Also, they have a higher upfront cost than other pump types.
Gas-powered hydraulic pump:Gas-powered pumps are portable hydraulic pumps which are easy to use in outdoor and remote environments. However, they are limited by fuel supply, have higher emissions compared to other hydraulic pumps, and the fuel systems require regular maintenance.
Manual hydraulic pump:They are easy to transport and do not require a power source. However, they are limited by the operator’s physical ability, have a lower flow rate than other hydraulic pump types, and may require extra time to complete tasks.
Hydraulic hand pump:Hydraulic hand pumps are suitable for small-scale, and low-pressure applications and typically cost less than hydraulic foot pumps.
Hydraulic foot pump:Hydraulic foot pumps are suitable for heavy-duty and high-pressure applications and require less effort than hydraulic hand pumps.
Hydraulic pumps can be single-acting or double-acting. Single-acting pumps have a single port that hydraulic fluid enters to extend the pump’s cylinder. Double-acting pumps have two ports, one for extending the cylinder and one for retracting the cylinder.
Single-acting:With single-acting hydraulic pumps, the cylinder extends when hydraulic fluid enters it. The cylinder will retract with a spring, with gravity, or from the load.
Double-acting:With double-acting hydraulic pumps, the cylinder retracts when hydraulic fluid enters the top port. The cylinder goes back to its starting position.
Single-acting:Single-acting hydraulic pumps are suitable for simple applications that only need linear movement in one direction. For example, such as lifting an object or pressing a load.
Double-acting:Double-acting hydraulic pumps are for applications that need precise linear movement in two directions, such as elevators and forklifts.
Pressure:Hydraulic gear pumps and hydraulic vane pumps are suitable for low-pressure applications, and hydraulic piston pumps are suitable for high-pressure applications.
Cost:Gear pumps are the least expensive to purchase and maintain, whereas piston pumps are the most expensive. Vane pumps land somewhere between the other two in cost.
Efficiency:Gear pumps are the least efficient. They typically have 80% efficiency, meaning 10 mechanical horsepower turns into 8 hydraulic horsepower. Vane pumps are more efficient than gear pumps, and piston pumps are the most efficient with up to 95% efficiency.
Automotive industry:In the automotive industry, hydraulic pumps are combined with jacks and engine hoists for lifting vehicles, platforms, heavy loads, and pulling engines.
Process and manufacturing:Heavy-duty hydraulic pumps are used for driving and tapping applications, turning heavy valves, tightening, and expanding applications.
Despite the different pump mechanism types in hydraulic pumps, they are categorized based on size (pressure output) and driving force (manual, air, electric, and fuel-powered). There are several parameters to consider while selecting the right hydraulic pump for an application. The most important parameters are described below:
Speed of operation: If it is a manual hydraulic pump, should it be a single-speed or double-speed? How much volume of fluid per handle stroke? When using a powered hydraulic pump, how much volume per minute? Air, gas, and electric-powered hydraulic pumps are useful for high-volume flows.
Portability: Manual hand hydraulic pumps are usually portable but with lower output, while fuel power has high-output pressure but stationary for remote operations in places without electricity. Electric hydraulic pumps can be both mobile and stationary, as well as air hydraulic pumps. Air hydraulic pumps require compressed air at the operation site.
Operating temperature: The application operating temperature can affect the size of the oil reservoir needed, the type of fluid, and the materials used for the pump components. The oil is the operating fluid but also serves as a cooling liquid in heavy-duty hydraulic pumps.
Operating noise: Consider if the environment has a noise requirement. A hydraulic pump with a fuel engine will generate a higher noise than an electric hydraulic pump of the same size.
Spark-free: Should the hydraulic pump be spark-free due to a possible explosive environment? Remember, most operating fluids are derivatives of petroleum oil, but there are spark-free options.
A hydraulic pump transforms mechanical energy into fluid energy. A relatively low amount of input power can turn into a large amount of output power for lifting heavy loads.
A hydraulic pump works by using mechanical energy to pressurize fluid in a closed system. This pressurized fluid is then used to drive machinery such as excavators, presses, and lifts.
A hydraulic ram pump leverages the energy of falling water to move water to a higher height without the usage of external power. It is made up of a valve, a pressure chamber, and inlet and exit pipes.
A water pump moves water from one area to another, whereas a hydraulic pump"s purpose is to overcome a pressure that is dependent on a load, like a heavy car.

For any parts that are belt driven, you should tell the examiner: "I am checking the belt to make sure it is not cracked or frayed and there is less than 3/4-inch of free play."
For any parts that are gear driven instead of belt driven, you should simply tell the examiner that the part is gear driven, not damage, leaking, and mounted securely.
EPDM (ethylene propylene diene monomer) rubber offers long lasting service life and durable performance to your vehicle belt drive systems, but unlike older rubber belts, they don’t always show wear with traditional signs of visual damage and loud belt noise.
Think of EPDM belt wear the way you think of tire wear. After many miles of running on the road, a tire’s tread gradually wears down. Over time, belts experience a similar loss in material or rib wear. When this happens, a belt loses its ability to grip or function properly – it can slip – which puts a strain on other components within your engine, causing them to malfunction and potentially fail. Although not always the case with EPDM belts, noise is often your first and most obvious clue that your belt and other system components should be replaced.
As a best practice, we always advise technicians and vehicle owners to Be System Smart by knowing the Car Care Council’s recommended service interval schedule. Start inspecting the serpentine system at 60K miles, and replace worn components by 90K miles or as advised by the manufacturer. An easy way to remember this recommended interval is I-60/R-90.
With traditional Chloroprene (neoprene) serpentine belts, standard diagnostics called for replacement of the belt if it showed three cracks in a three inch section. However, today’s EPDM belts are much more resistant to cracking, since they can run up to 100,000 miles or beyond without visual cracks - despite the belt being worn to near failure. This resilient material quality makes EPDM belts more durable than their chloroprene counterparts, but also significantly harder to conduct a visual belt wear diagnosis.
Serpentine belt drives do not work in an enclosed environment, and are frequently exposed to sand, rocks, salt, water and other engine fluids. These contaminants, along with slight misalignments, result in accelerated wear of the rubber rib surface. Once serpentine belts lose rib material, the belt is susceptible to failure modes defined by changes in the belt rib profile.
Most commonly, material loss alters the belt fit to the pulley. Serpentine belts are designed to allow clearance between the ribs and the pulley sheaves (valleys). When material loss occurs, the clearance is reduced; thus, eliminating a way for water and debris to be passed through the pulley. This can result in belt slip as a result of hydroplaning.
Today"s technicians need to look at the entire accessory drive system to help diagnose belt wear: from the belt/tensioner/pulley performance, to vehicle mileage, to the operation of other system components. For example, belt wear can lead to intermittent alternator performance as indicated by a persistent check engine light, inconsistent power steering performance, and/or poor A/C system performance. All are signs of belt slip caused by wear or loss of tension.
The informed technician needs to consider belt issues every time a serpentine system component is replaced, and every technician’s best practice is to begin checking belts and other system components at 60,000 miles. Ensure that the pulleys can free-wheel and spin, the belt doesn’t have excessive wear, and the tensioner rotates through its full range of motion. You can also instantly and easily check belt wear with Gates belt wear gauge tool .To avoid more costly component failures, replace system components at 90,000 miles, or as recommended by the vehicle manufacturer.
The slightest belt material loss means more for a car"s performance than you might think. As little as 5% rib material loss due to surface wear can negatively affect belt performance, and 10% belt slippage can noticeably affect the vehicle’s drivability. For example, belt slip could reduce alternator output, which is particularly impactful on very cold days when system charging and other factors may compromise performance.
The graph below shows the effect on the system when a new alternator is installed with an old belt and tensioner. The average automatic belt tensioner arm will cycle over one billion times for every 100,000 vehicle miles. By only changing one of the system components, system vibration increases dramatically. This vibration increase may not be felt or heard. Excessive arm vibration results in belt noise, accelerated bearing wear to accessory drive components, and premature system failure. Internal components in the tensioner can fail, causing stress on the belt and other accessory components. Performance of the new component can also be compromised, resulting in additional cost to re-diagnose and repair the problem.
3. When replacing an alternator without replacing the belt and tensioner, arm vibration is increased as the worn belt and tensioner do not dampen the new component effectively
The two primary roles of the automatic belt tensioner are to: 1) apply the correct amount of tension to the serpentine belt as it transfers torque from the crankshaft to the system accessories and 2) smooth out crankshaft vibration associated with the transfer of power.
A common misconception is that automatic belt tensioners last the lifetime of the vehicle, when in actuality, they contain internal components that eventually wear out. A tensioner is a relatively inexpensive part to replace and can help protect other components, such as the water pump, alternator, and A/C compressor, from undue stress and premature failure. Pulley bearing failures due to excessive heat, vibration, or improper belt tension is among the leading causes of alternator warranty returns. As the tensioner wears out, it creates an uneven amount of tension and will wear on the edges of the belt prematurely, resulting in tensioner pulley misalignment. Belt slippage and even small amounts of misalignment can cause diminished system component output or even total component failure.
An essential best practice for a technician considering belt replacement, or any other component within the serpentine system, is a diagnostic check of the tensioner. While the engine is running with the air conditioning on, check the tensioner arm for excessive vibration. If the tensioner arm vibration can be seen with the naked eye, then the vehicle needs a new tensioner. With the engine off, also inspect the pulley surface and spin the pulley to check the bearing. Make sure there’s no resistance, as this will confirm the bearing is operating properly.
Remember, any system is only as good as its weakest link - and the tensioner is a very critical link in the accessory belt drive system. If you replace the tensioner, we recommend replacing the other system components to ensure a complete system repair. Be System Smart by being aware of the Car Care Council’s recommendation. Start inspecting the serpentine system at 60K miles, and replace system components by 90K miles, or as advised by the manufacturer.

If you open the hood in a modern car with a gasoline or diesel engine, you will see at least one serpentine belt. See this photo. There are cars with two or three belts; electric cars have no belts.
A serpentine belt is different from a timing belt. A timing belt runs the engine camshaft(s) and is hidden under protective covers. A serpentine belt is located on the side of the engine and can be inspected from under the hood.
If a serpentine belt breaks, a car won"t be drivable and will have to be towed. If the engine runs without a serpentine belt, it might overheat as the water pump will no longer work. A broken belt can also damage other parts. We have seen broken radiator shrouds and ripped coolant hoses that were damaged by a ripped belt.
Symptoms of a broken serpentine belt include loud slapping, squealing or knocking noises coming from under the hood. The battery-shaped charging system warning light might also come on because the alternator will stop charging the battery. If a car has a hydraulic power steering pump, the steering will become stiff.
1. Regular wear and tear. A new serpentine belt has a soft felt-like surface on the ribbed side. As the belt wears out, the belt rubber hardens and cracks; scroll down to see the photo of a cracked belt. A worn-out belt stretches and loses tension. This causes the belt to start slipping from time to time. You might hear it when the engine is started in the morning or in wet weather as squealing or chirping noises coming from under the hood. The belt may also appear glazed as in this photo.
If there are no other problems and the belt tensioner is in good shape, a new serpentine belt should fix this problem. Replacing a serpentine belt costs from $18-$75 part plus $50-$150 labor.
2. Oil leaks. Sometimes, an engine develops oil leaks around the belt area, which causes the belt to get soaked in oil, see the photo. Oil or coolant can damage the serpentine or timing belt fast.
We have seen a new serpentine belt that lasted less than a week in an engine that leaks oil around the belt area. In this case, there is no point installing a new belt. Oil leaks have to be fixed first.
3. Bad spring-loaded automatic belt tensioner. Proper tension is vital for any belt. Often an old spring-loaded automatic belt tensioner seizes up or wears out and becomes weak. Without proper tension a serpentine belt will start slipping. This will cause the belt to wear faster.
We have seen seized belt tensioners causing a loose serpentine belt to roll off the tensioner. The symptoms of a loose serpentine belt include a loud squealing noise when the engine is started or when the steering is turned all the way to one side. A serpentine belt that keeps slipping off the pulley is another symptom of a bad tensioner.
The solution is to replace a serpentine belt and a belt tensioner. A spring-loaded automatic belt tensioner costs $20-$50 for the part, plus the labor ($75-$170).
4. Problems with hydraulic belt tensioner. Many cars have a hydraulic serpentine belt tensioner, where instead of the spring the tension is maintained by a little "shock absorber" (in the photo). It too can fail.
Symptoms include a leak from the tensioner or a rattling noise from the belt area when the engine is running. This item is common to fail in many cars including Toyota Corolla, Matrix, BMW and Mazda cars.
5. Manual belt tension is out of adjustment. In some cars the belt tension is adjusted manually, see the photo. Here is another example: the belt tension adjustment in Toyota Yaris. Over time, the belt stretches and if the tension is not adjusted in time, the belt will start slipping. You have probably seen it: an older Japanese or Korean car makes a loud screeching noise when started.
The solution is simple: if the belt is still in good shape, the tension needs to be re-adjusted. If the belt is bad, it needs to be replaced and properly tightened.
6. Misaligned belt pulley. A serpentine belt runs on several pulleys. If any of the belt-driven devices or a tensioner pulley for some reason is not lined up with the belt, the belt will squeal. Often this problem is discovered after a newly replaced belt still squeals or wears out fast. One of the symptoms of this problem is increased wear on one side of the belt.
Sometimes, you can visually see when one of the pulleys is not lined up. For example, in this car, in the photo, an alternator and a belt have been replaced while on a trip, a few weeks ago. Now the belt squeaks. Upon closer inspection, we found that the alternator was loose and shifted under angle. This caused the alternator pulley to be misaligned with the belt, so the belt was squealing and wearing out faster. If you look closer in the photo, you can see rubber shavings in the area between the belt and the alternator.
7. Noisy idler pulley or tensioner bearing. To route a serpentine belt, many cars use free-spinning pulleys like the one in the photo. It"s called an idler pulley. It spins on a little bearing. When that bearing goes bad, it can produce a whining/whirring or screeching noise. Because several belt-driven devices can make a similar noise, this one might take some time to diagnose.
Mechanics use a special stethoscope to look for the source of noise. A bad bearing inside the alternator, A/C compressor or power steering pump produces the same type of noise. A mechanic might have to remove a belt and check the devices that are run by a belt one by one.
When you take your car for a regular oil change service, a mechanic will look for cracks (see the photo), splits, damaged edges, missing chunks, glazing and other signs of wear. In most cases, it"s easy to see when the belt is worn out. A worn-out belt must be replaced. A serpentine belt must also be replaced if it is found to be soaked in oil or stretched.
If your car has two belts, we recommend replacing both at the same time, because you are saving on labor. It"s also a good idea to replace an old serpentine belt before a long road trip. Replacing a serpentine belt costs $18-$75 part plus $50-$150 labor.
On the scale from 1 (easy) to 10 (leave it to pros) the serpentine belt replacement can be rated from 3 to 7 depending on the car. To replace a serpentine belt, you will need a belt diagram that shows the routing. For some cars, the routing is shown in the owner"s manual. Another way is to draw a routing diagram before removing the old belt.
In many front-wheel drive cars with a transversely-mounted engine, the space between the engine and the frame is limited and changing a serpentine can be tricky.
In some cars, a special tool is needed to release the belt tensioner. To order a serpentine belt you might need a VIN number, as the belt could be different for different years and engines. It"s a good idea to compare the new belt to the old one before installing to make sure the part is right.
A serpentine belt is a relatively long, flat, multi-ribbed belt that is driven by the engine’s crankshaft pulley. The belt drives many, and often all, of the engine accessories such as the alternator, air conditioning compressor, power steering pump, water pump, and air pump. The serpentine belt is tensioned by a hydraulic or spring-loaded automatic tensioner. Some older cars use a serpentine belt to drive most accessories but will also have a shorter v-style belt to drive, for example, the power steering pump.
Regularly scheduled maintenance. Typically, belt manufacturers recommend belt replacement at 90,000 miles. However, the belt must be inspected for wear or damage at regular intervals prior to this high mileage.
Squealing noise, belt slippage, visible belt damage. Should the belt fail or wear out prematurely, you may hear noise or you may see visible signs of deterioration such as missing chunks of rubber, excessive cracking, or a shredded appearance on the edge of the belt.
Battery Light. A loose belt, perhaps caused by a defective tensioner, may not drive the alternator at adequate speed and thus the battery may discharge, causing the warning light to illuminate.
Engine overheating. Often, the serpentine belt drives the water pump. In those applications, if the belt breaks the engine will overheat in seconds to minutes. If the belt is inadequately tensioned, you may notice higher-than-normal engine operating temperature.
Prior to removing the belt, the mechanic must run the engine to determine if the idler pulley and the belt tensioner are noise-free. Those rotating components have grease filled bearings and are subject to wear. In addition, the mechanic will ensure that all pulleys and accessories are turning in the same plane. These steps help make sure your new belt will operate trouble-free for its full-service life.
The belt’s routing path through the various components is noted. The belt tensioner is released, usually with a wrench or lever, to release the tension from the belt. With the tension off, the belt slides off the pulleys.
If everything checks out, the new belt is slipped over all of the pulleys while holding the tensioner away from the belt. Once the belt is centered on all pulleys, the tensioner is released and the installation is complete. The engine is run to ensure normal operation.
No. Should the belt have visible damage, you risk unexpected and sudden breakage that could potentially leave you stranded. Serpentine belt problems that result in the alternator not charging may cause the battery to discharge, which will result in loss of electrical power to the vehicle. Additionally, if a deteriorated belt breaks and that belt drives the water pump, the engine will overheat in a matter of seconds.
On many cars, the expected service life of a serpentine belt is around 90,000 miles. Should the belt fail well prior to that, a very careful inspection should be performed to check for out-of-alignment pulleys, a possibly out-of-position crankshaft harmonic balancer on which the drive pulley is mounted, binding pulleys, or a defective belt tensioner.
Attention should always be given to serpentine belt routing, since proper routing is critical to proper belt tension, and function of the driven components.
Sometimes it is difficult to distinguish serpentine belt related noise from other engine noises. In these cases, a mechanic will determine the origin of the noise by momentarily running the engine without the serpentine belt attached.

Check if the squeaking noise is persistent when you turn on your car, and it feels like it’s coming from the front of your vehicle (under the hood or from the engine bay). If yes, then the squeal you hear is from your serpentine belt or drive belt.
The squeaky belt noise can become even louder or more aggressive if you accelerate suddenly or try to make a U-Turn. Rain or humidity can also make it worse.
For example, if your engine overheats often and makes a rattling or squeaking noise, your water pump is failing (powered by a serpentine belt). Therefore overheating and a failing water pump could be a sign of a failing belt.
If a lack of power steering accompanies your squealing belt, that’s another confirmation that the squealing noise comes from a serpentine belt. This will make it harder to turn your power steering wheel, and you’ll notice it immediately.
And lastly, your air conditioning won’t operate if there’s a serpentine belt issue. So if you try to crank the cold air, but no cold air comes out, that’s a bad drive belt issue.
If you detect something, get it checked immediately as the serpentine belt directly influences vital engine components like your alternator and power steering.
With time a serpentine drive belt will go bad, like most car parts. The good news is new car models come with durable belts (engine belt, alternator belt, timing belt, etc.) that last longer.
All these reasons result in a weaker serpentine belt that can no longer maintain the required tension needed to grip each tensioner pulley properly, linking the belt together.
This happens over the years due to friction, leading to cracks in the belt. If these cracks increase in number, the belt tension and the tightness in the pulley system will reduce, resulting in slippage or snapping.
As the temperature changes from hot to cold outside, your car will pump the coolant throughout the engine block to provide an even operating temperature.
Even the tiniest bit of coolant fluid can damage a serpentine belt or drive belt. It usually drips from a leak in the coolant hoses or is blown out from the engine fan and causes a belt squeal.
Unfortunately, you can’t wash off the antifreeze once it has sunk in on the belt, and it damages the belt immediately. Even though you come across some belt dressing products that claim to reduce the squealing or squeaking noise, you’ll mostly need a replacement belt to fix the belt noises.
Here’s the good news: If you notice the squealing noise is powerful in the morning when it’s cold, but reduces as the engine warms up and the day gets hotter, then you probably don’t have a bad belt.
However, get it checked out by a mechanic to confirm the cause for the squeaky belt and find out if you’ll need a serpentine belt replacement to eliminate that belt squeal.
Let your mechanic check the belt and determine if there’s a misaligned pulley or belt tensioner. Any element of the belt design that isn’t installed right can disturb the whole system causing the squeal.
This pulley regulates the belts connected to the crankshaft and helps move numerous engine accessories. Some of the accessories include the alternator, power steering pump, and AC compressor.
The idler pulley has to be strong enough to hold the serpentine belt in place with the right tension as it spins. If it doesn’t, the belt may slip, and the annoying squeal will start.
The belt tensioner provides the correct amount of belt tension, allowing the serpentine belt to operate optimally. It’s basically a mechanism where a pulley is connected to an adjustable pivot.
Without it or with seized belt tensioners, a serpentine drive belt will start to slip, damaging it faster. And as a result, it’ll produce the belt noise.
Normally, an old or bad spring-loaded automatic belt tensioner can become weak. Such a belt tensioner can make a loose serpentine belt fall off the tensioner.
If your vehicle utilizes a hydraulic belt tensioner (a belt tensioner where a shock absorber supports the spring of the belt), issues can manifest in other ways.
When the belt slips, the friction between the belt and accessory drive pulleys causes the drive belt to overheat, producing a high-pitched squealing noise.
If you ignore the belt noise, the entire belt could eventually slide off of the pulleys. And all the key engine components will stop functioning. Don’t take this lightly because a squeaky belt can also harm your engine.
Contacting a mobile mechanic and repair service like RepairSmith is a great idea. It’s a convenient auto repair solution that’ll bring you the best quality serpentine replacement belt and install it.
To make things easier, just reach out to a professional like RepairSmith. It’s a mobile mechanic and auto repair shop that comes to your doorstep (or anywhere you are) for your serpentine belt replacement!


 8613371530291